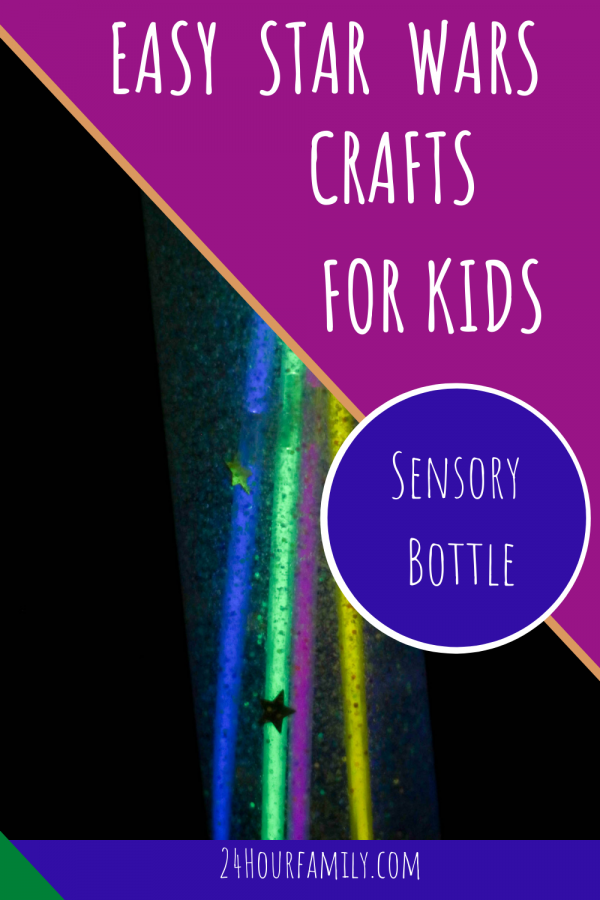
How to Make a Star Wars Sensory Bottle
Do your children love Star Wars more than anything? If so, work with your little ones to create a fun Star Wars sensory bottle to entertain and amaze them.
Star Wars Crafts for Kids offers a galaxy of benefits, making them more than just a fun activity. Did you know sensory toys are naturally good for a child’s development? Different sensory toys and activities can improve fine motor skills, encourage children to problem solve, and get them excited to do other things.
This post may contain affiliate links. As an Amazon Associate and a participant in other affiliate programs, I earn a commission on qualifying purchases. Read our disclosure policy here.


If you were looking for an excellent sensory activity for the children, you could teach them how to make kid lightsabers. These lightsabers are perfect for children who watch Star Wars and enjoy it. They will get excited to learn that they can put something together similar to what the characters use in the movies.
Table of Contents
The Supplies Needed to Make the Star Wars Sensory Bottle
When making the Star Wars kid lightsabers, you will need specific supplies. Make sure you have enough of these items for each child in the household. If you are making sensory bottles for a Star Wars party, it is best to get more supplies because you want to have enough lightsabers for each child.
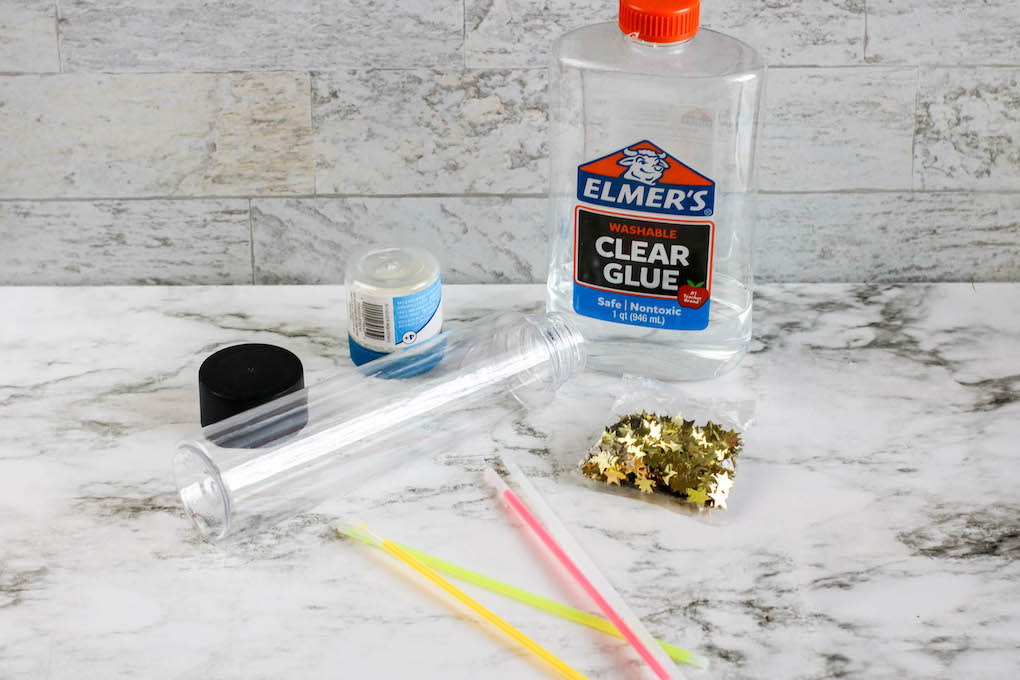
- Plastic Storage/Sensory Bottle. You can find these bottles on Amazon or at Michael’s.
- Elmer’s Glue. You will need several bottles of Elmer’s glue. Make sure it is the clear version!
- Warm Water. Use warm water from your faucet to add to each sensory bottle.
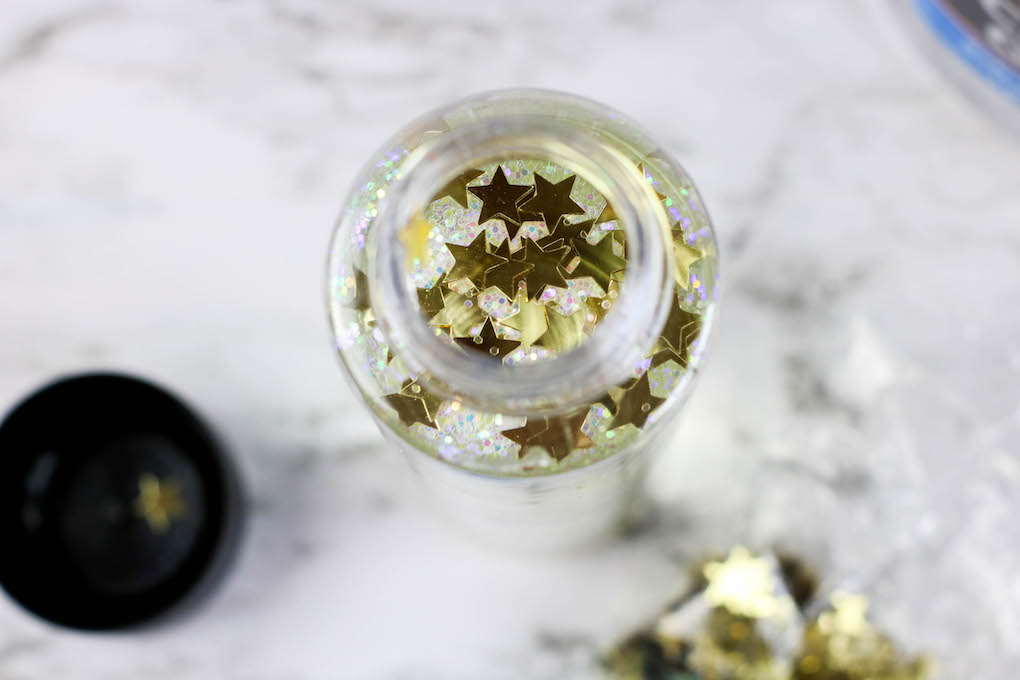
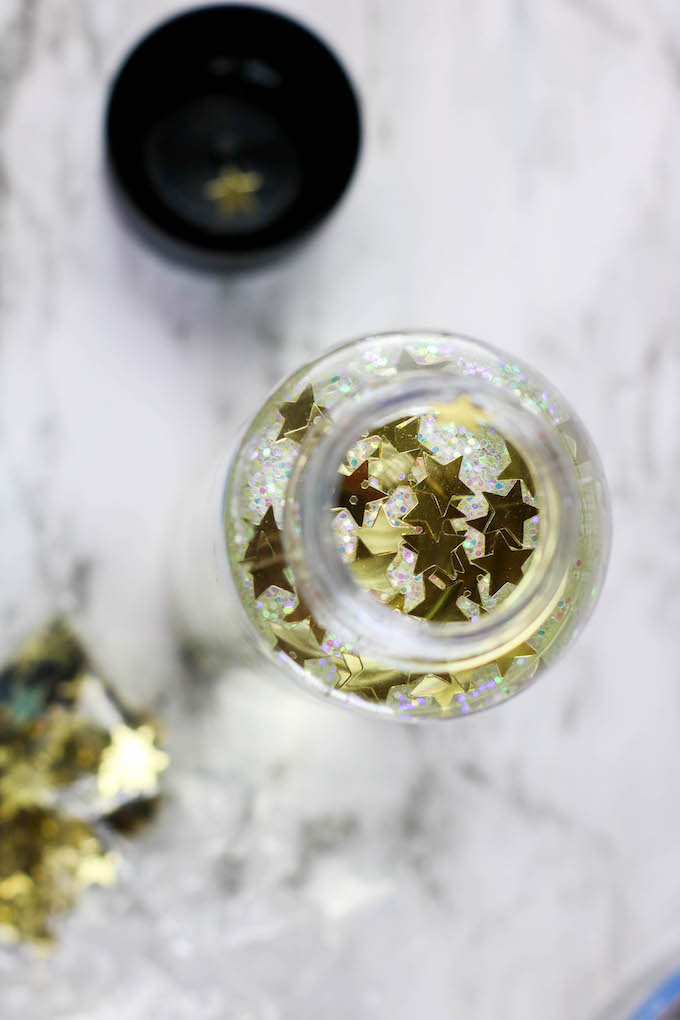
- Glitter or Confetti. Purchase glitter or confetti from any store and add it to your bottles.
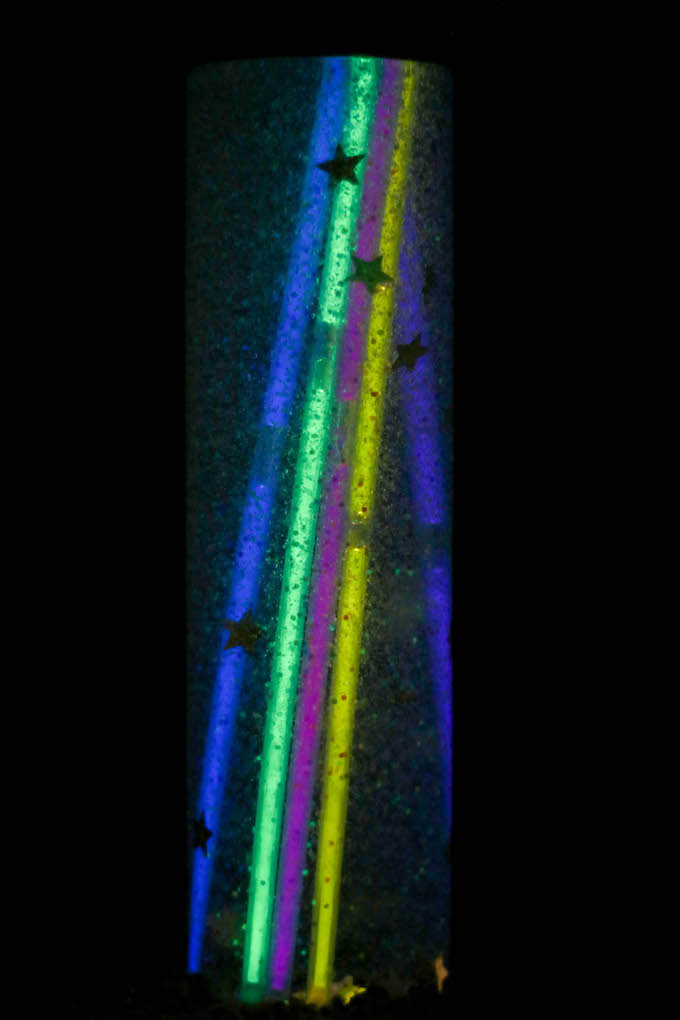
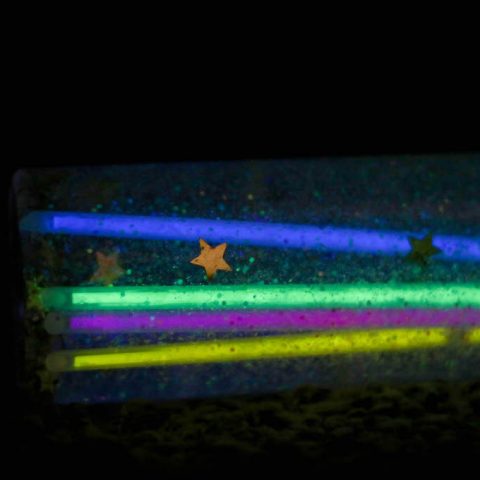
Adding toys is optional. If you want the sensory bottles to look even cooler, you may want to add mini plastic toy figures to the bottle with water, glue, glitter, or confetti. If you can find glow-in-the-dark glitter, consider buying it and using it. Glow-in-the-dark glitter makes these sensory bottles even more fun. Small glow sticks are also a great addition to these bottles.
How to Make Your Star Wars Sensory Bottles
When making sensory bottles, one of many Star Wars crafts you can complete with your kids, it is important to have the right supplies. Once you have the essential items needed to make these bottles, you can follow these steps to get started:
Empty an entire bottle of Elmer’s glue into a single sensory bottle. Complete this process with each bottle you make.
Add warm water to each glue bottle. It would be best to fill it halfway before pouring the water into a sensory bottle. Complete this step until you have filled each bottle with water.
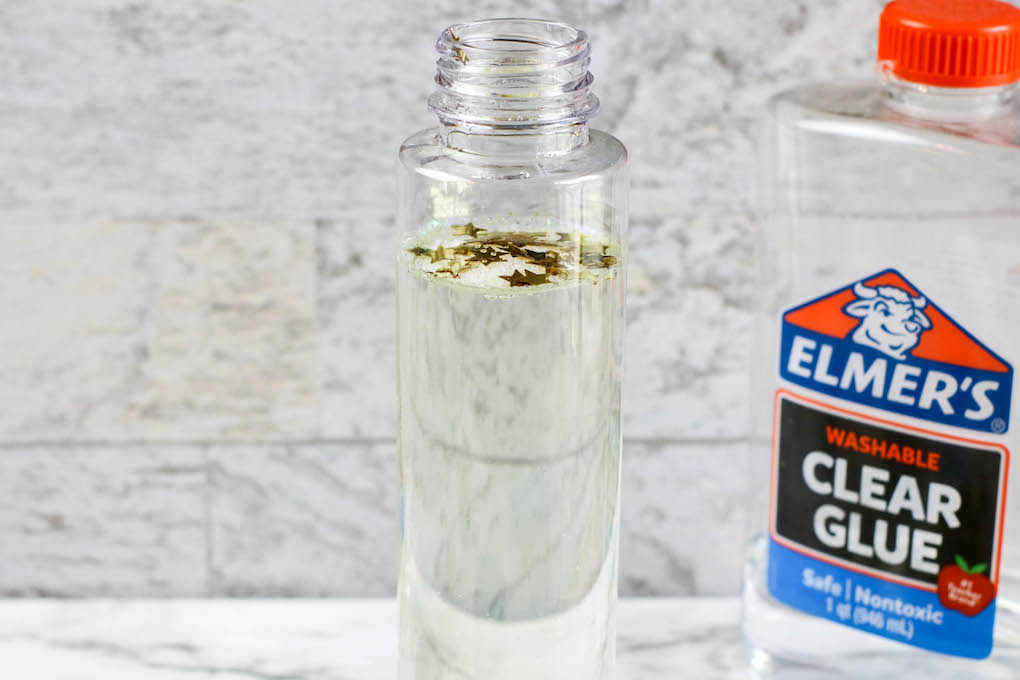
Seal the bottles with lids and shake them vigorously to allow the glue and water to mix.
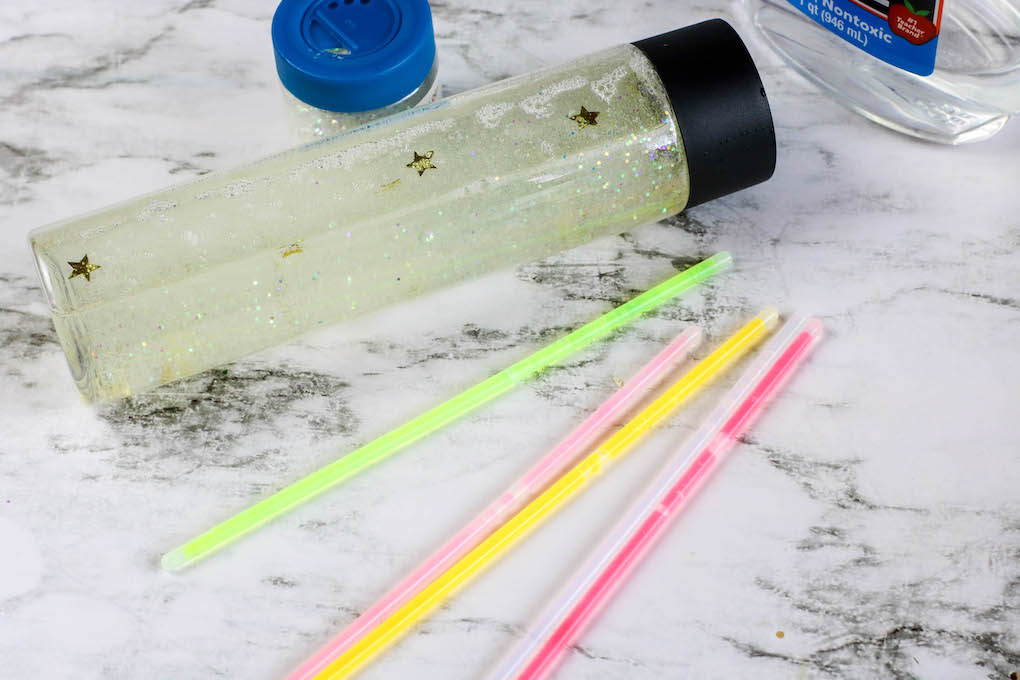
If you plan on using glitter, glow sticks, or toys, you should add them in the beginning when you pour the glue into your bottles.

Continue adding layers of glue, glitter, and toys until you achieve the appearance you like best.
Seal the bottle with glue to ensure that it will not open when the children play with these bottles. You might also want to use some duct tape for extra support.
Once you finish following these steps, you will have the perfect sensory bottles for your children to play with and even hand out at a birthday party.
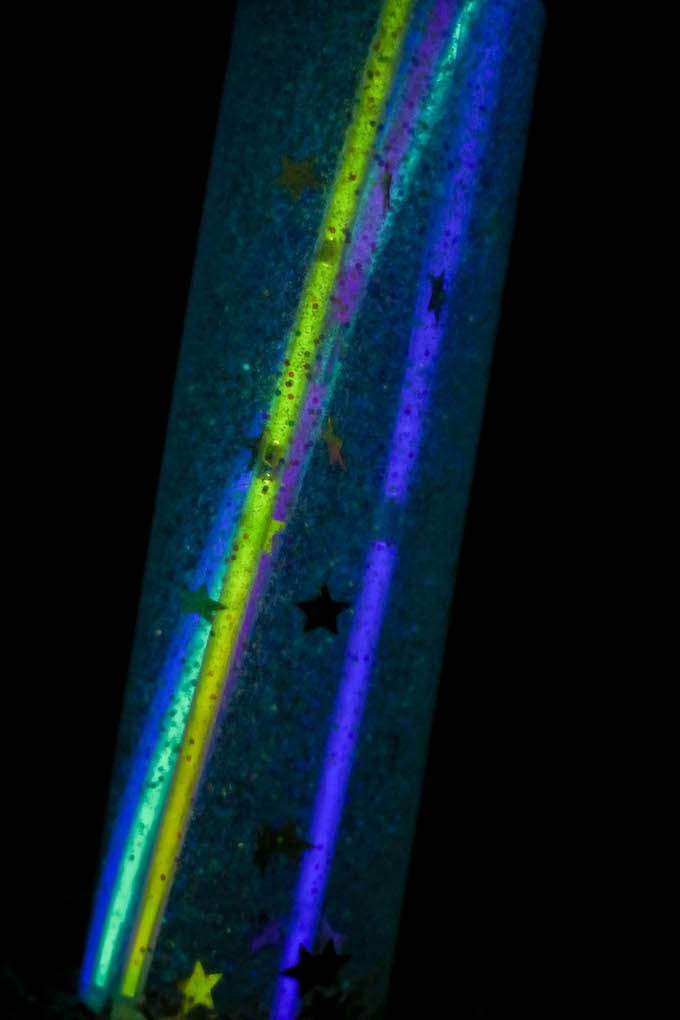
This is a simple but entertaining craft for kids to make that would be fun to make at parties or just a fun daily activity to entertain the kids. Please encourage them to take the bottle outside and see it glow! I hope you enjoy this Star Wars-themed craft!
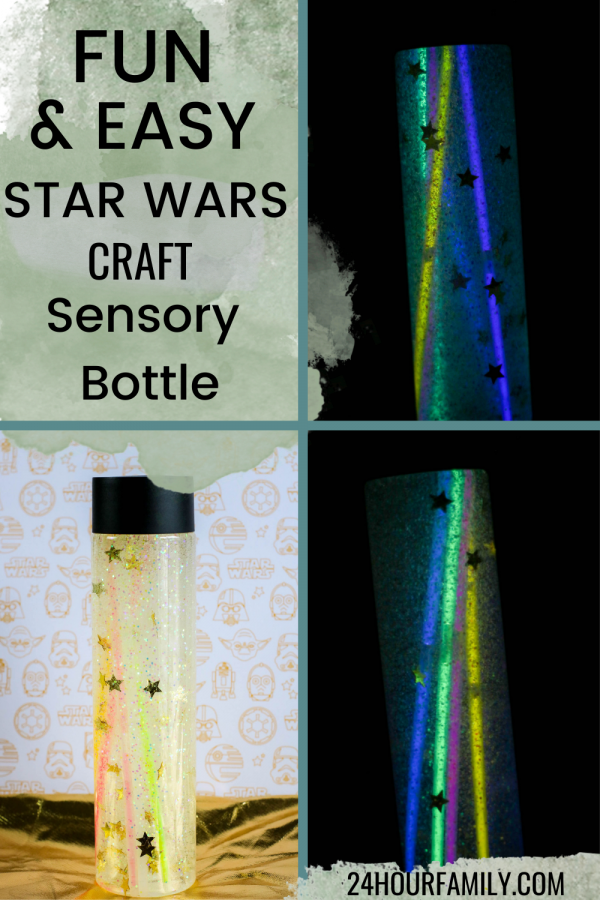
How to Make a Star Wars Sensory Bottle
Team up with your little ones to craft an exciting Star Wars sensory bottle that will captivate and delight them.
Materials
- 16 oz plastic storage or sensory bottle (find these at Michaels or similar stores, though smaller options work too)
- 2 to 3 (6 oz) bottles of clear glue
- Approximately 1 cup of warm water
- Roughly 1 tablespoon of glitter or confetti
- Toys (optional)
Tools
- Glow sticks
- Iridescent glitter
- Star-shaped confetti
- Glow-in-the-dark glitter
Instructions
Pour one bottle of glue into the sensory bottle.
Fill the empty glue bottle halfway with warm water (about 1⁄4 cup), close it tightly, and shake well to mix any leftover glue with the water. Then, add this mixture to the sensory bottle and stir or shake to combine everything thoroughly.
If you plan to include glitter or toys, add some glitter and a few toys to the glue mixture.
Secure the lid on the bottle and shake vigorously. Add a bit more warm water if the glitter or confetti moves too slowly. If it moves too fast, incorporate more glue.
Gradually add more layers of glitter and toys until you are satisfied with the look.
Once the bottle's contents flow the way you like, firmly seal the bottle and adhere the lid with glue to prevent leaks.
Optionally, you can secure the lid with duct tape or embellish it with additional decorations.