
Darth Vader Paper Hat: Easy Star Wars Craft for Kids
Turn black-and-white construction paper into an easy Darth Vader paper hat that children can wear for Star Wars Day, pretend play, a birthday party, or an inexpensive costume.
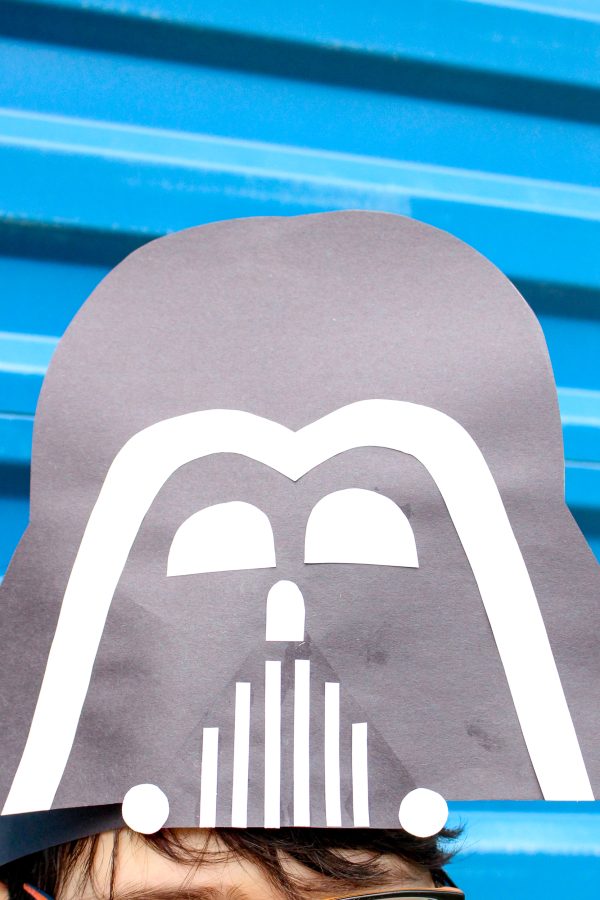
This simple craft uses basic craft supplies and a homemade paper template to create Darth Vader’s iconic look. The finished project sits above the child’s eyes like a wearable headpiece rather than covering the face, making it comfortable for supervised dress-up and imaginative play.
Make your favorite Characters with our Star Wars Crafts for Kids!
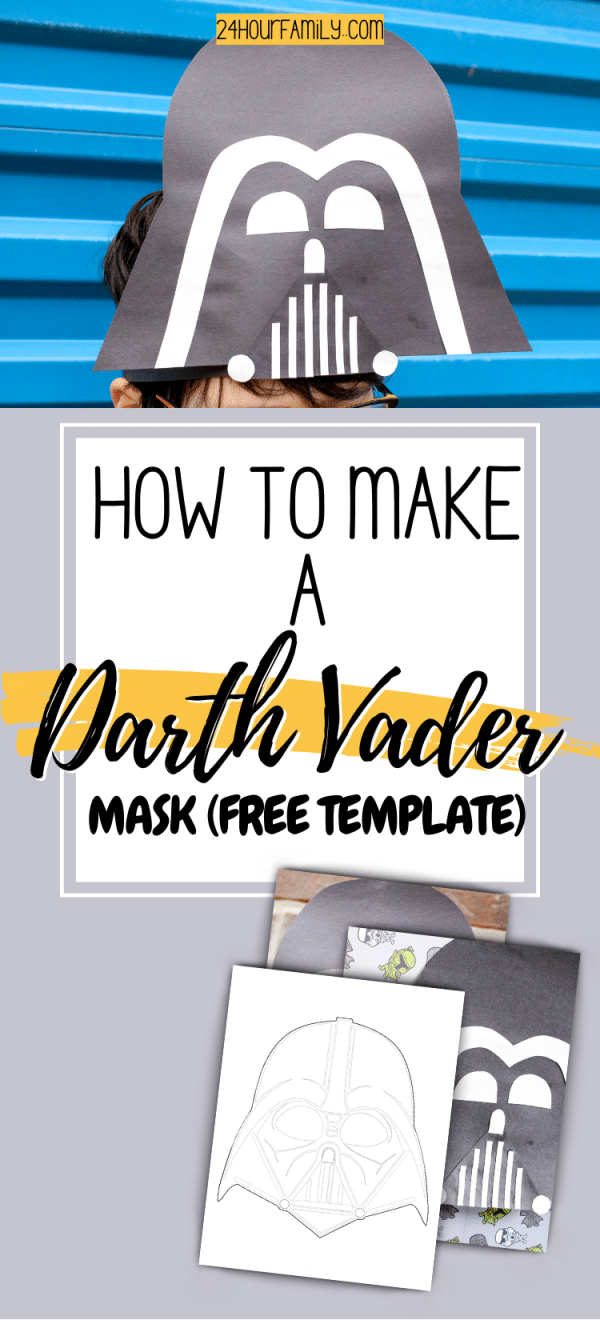
Easy Darth Vader Paper Hat Craft for Kids
Children will practice tracing, cutting, arranging shapes, and following a sequence as they assemble the helmet’s face frame, eyes, nose, mouth bars, mouthpiece, and paper headband.
The finished project is simple enough for elementary-age children with adult assistance and makes a fun activity for classrooms, homeschool lessons, birthday parties, or Star Wars Day celebrations. Once complete, children can wear their paper creation during pretend play or display it as part of their Star Wars-themed decorations.
DIY Darth Vader Construction Paper Craft
This Star Wars craft is made entirely from black and white construction paper. No special cutting machine or expensive craft supplies are required.
The design consists of:
- One large black headpiece
- A white curved face frame
- Two white eye shapes
- A small white nose
- A black triangular mouthpiece
- Narrow white vent strips
- Two white circular details
- A black construction-paper headband
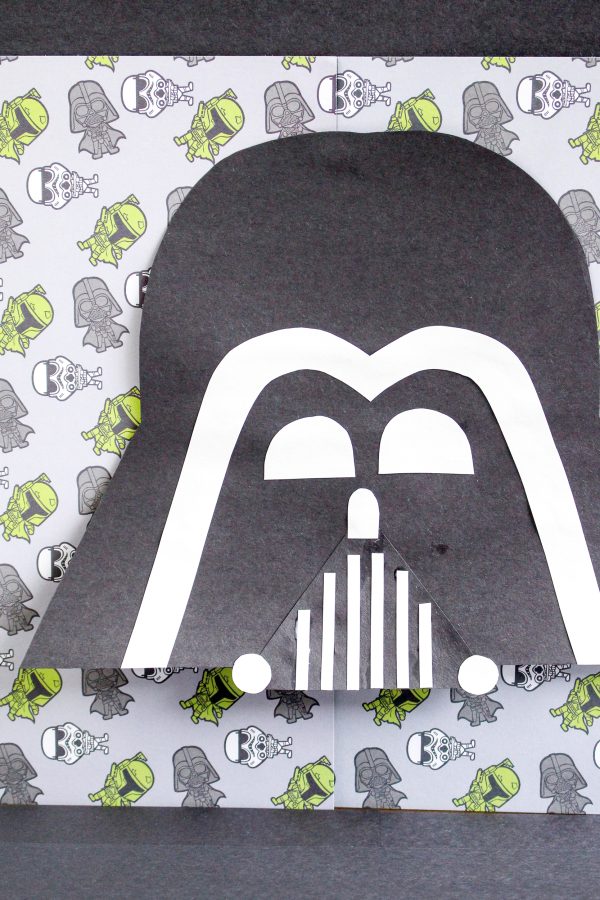
The individual pieces do not need to be perfectly symmetrical. Slight differences give each child’s paper hat its own handmade personality.
Supplies Needed
You will need:
- Two or three sheets of black construction paper
- Two sheets of white construction paper
- Pencil
- Child-safe scissors
- Glue stick or school glue
- Clear tape
- Ruler
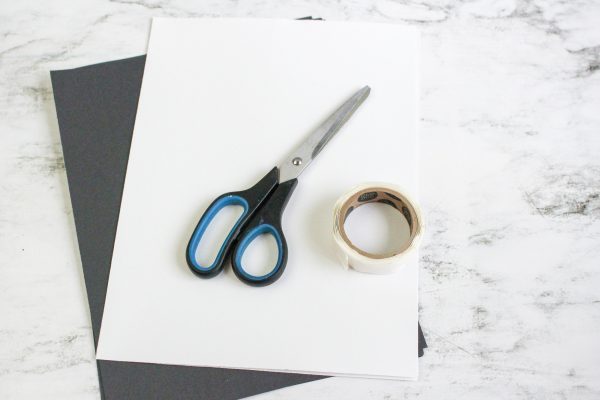
Black cardstock or lightweight cardboard can be used instead of the main piece if you want the finished project to stand upright more easily. Regular construction paper works well for the smaller facial details and headband.
How to Make a Darth Vader Paper Hat
This project takes approximately 45 to 60 minutes, including drying time. Adult assistance may be helpful when younger children draw the main outline or cut the smaller pieces.
Begin with the White Paper
Fold one sheet of white construction paper from top to bottom to form a vertical crease. Press firmly along the fold to create a visible center crease.
Drawing only half of the design along the folded edge makes it easier to create a symmetrical pattern.
Draw the Pattern
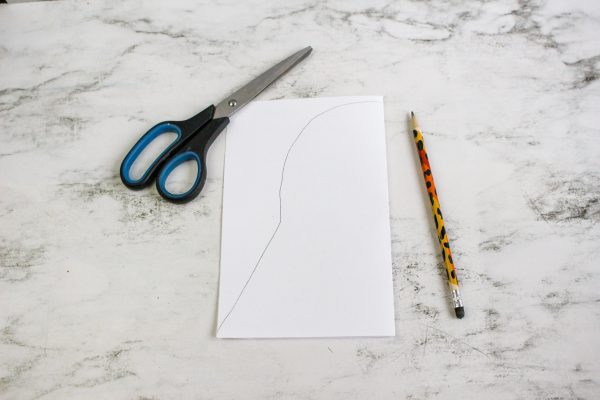
With the folded piece of paper still folded, draw half of Darth Vader’s facepiece.
Start near the top of the folded edge and sketch a smooth, rounded curve across the top. Continue the outline downward, then angle it outward to create the wider lower portion.
The completed outline should look like a rounded dome with gently flared sides near the bottom.
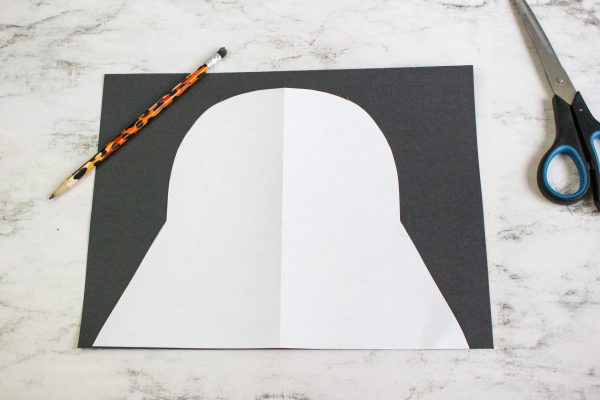
Keeping the paper folded, cut along the pencil outline. Open the paper to reveal your finished pattern.

Create the Main Shape on Black Paper
Position the template over the black construction paper and carefully trace the outside edge with a pencil.
Cut out the traced shape to form the main piece.
Keep the larger leftover pieces for the next steps. You will use some of them to create the mouthpiece and headband.
Create the Darth Vader Face Pieces
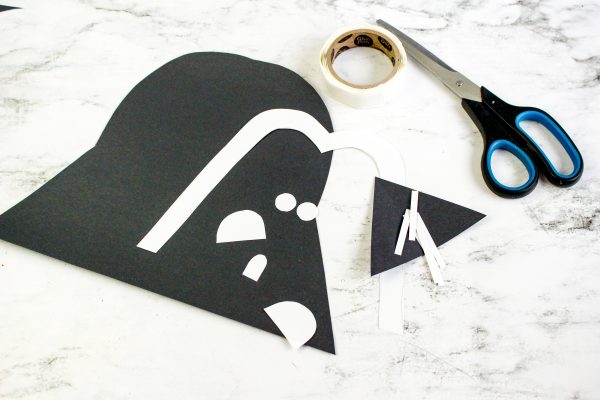
Before attaching the pieces, cut out all the white and black facial details. Arrange them on the black base as you work so you can check their size and placement.
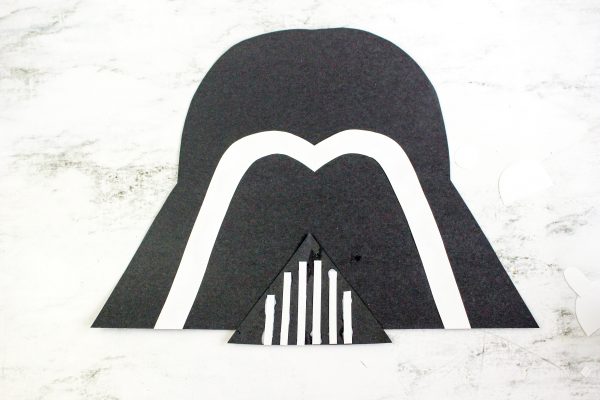
Make the White Face Frame
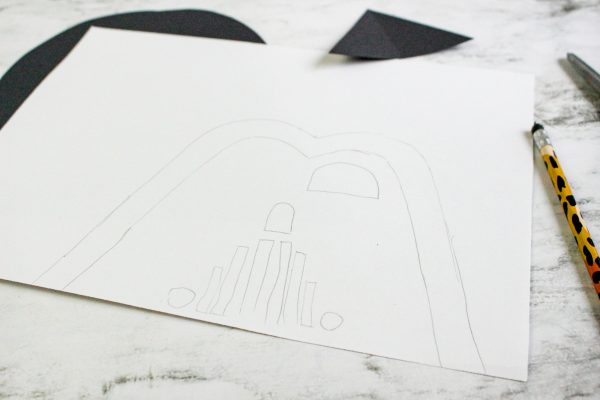
Draw a wide, curved shape on white construction paper. It should resemble a large, rounded uppercase M.
The outside edge should follow the lower sides of the black base. Allow some black paper to remain visible around the white frame to create a clear outline.
Cut out the face frame and place it on the base. Trim the ends or adjust the curves as needed, but do not glue it down yet.
Build the Mouthpiece
From one of the extra black construction paper pieces, cut out a triangle.
Place the triangle at the bottom center of the face with the point facing upward. The base of the triangle should align with the bottom edge of the design.
Adjust the size if it covers too much of the face area.
The mouthpiece helps give the finished design its recognizable appearance.
Cut the White Mouth Bars
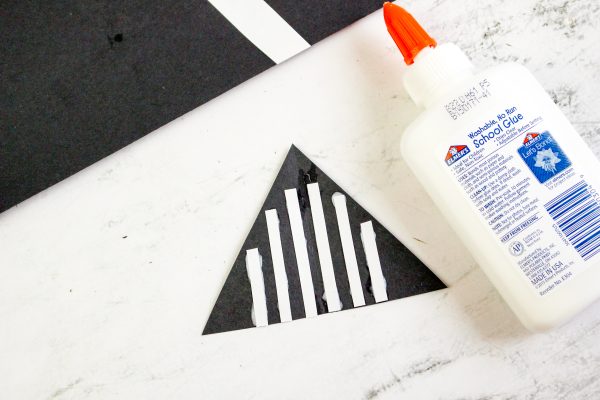
Cut six or seven narrow strips from white construction paper.
Arrange the white strips in vertical rows over the black triangle. Place the longest strips near the center and gradually use shorter strips toward both outer edges.
This arrangement creates Darth Vader’s recognizable vented appearance.
Attach the strips to the triangle. Once everything is secure, trim away any white paper extending beyond the bottom edge.
Attach the Face Frame and Mouthpiece
Center the white curved frame on the black base. Check that the top point is near the center and that both sides extend evenly toward the bottom corners.
Carefully position and secure the white frame.
Position the completed triangular mouthpiece at the bottom center of the base and secure it in place.
Add the Nose
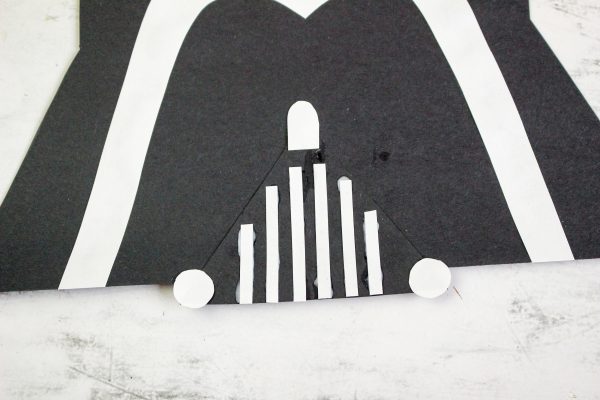
Cut a small rounded rectangle from white construction paper.
Place the nose directly above the pointed end of the mouthpiece. Attach it to the black base after checking that it is centered.
Add the Circular Helmet Details
Cut two small circles from white paper.
Place one circle on each side of the lower mouthpiece. Try to position them at approximately the same height.
Attach both circles in place.

Make the Eyes
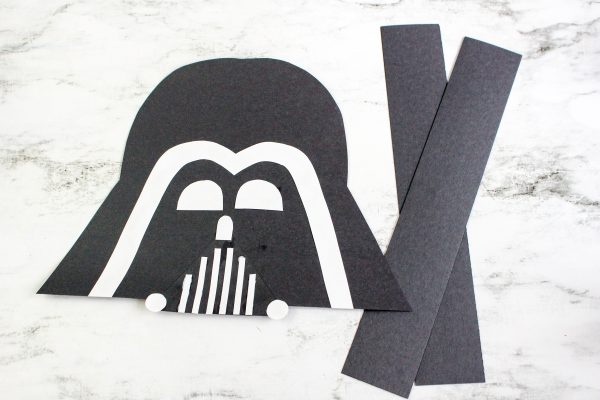
Cut two matching rounded eye shapes from white construction paper.
One easy way to create matching pieces is to fold a small piece of white paper in half, draw one eye, and cut through both layers at once.
The eyepieces should have rounded tops and straighter lower edges.
Position them beneath the white face frame and above the nose. Move them around until the spacing looks balanced, then secure them in place.
The eyes are decorative because this project is worn as a headpiece above the child’s face. Do not cut eye openings into the paper unless you are making a Darth Vader mask instead.
Let the Project Dry
Place the assembled project on a flat surface and let the adhesive dry completely.
If you used liquid school glue, check the smaller white vent strips before moving the project. These narrow pieces can slide out of position while the adhesive is still wet.
Placing a lightweight book near the edges can help flatten curling construction paper, but do not place anything over wet adhesive.
How to Make the Paper Headband
The headband allows children to assemble the project as a hat without covering their eyes, nose, or mouth.
Prepare the Paper Band
With a ruler, mark two strips on the black construction paper before cutting. Each strip should be approximately two inches wide.
Cut the strips along the ruler lines.
For a more durable band, use black cardstock or reinforce the construction paper with clear tape.
Fit the Band Around the Child’s Head
Tape or attach one end of the first strip to one end of the second strip to create one long paper band.
Wrap the band loosely around the child’s head and mark where the ends overlap. Remove the paper before trimming or securing it.
The band should fit comfortably without squeezing the child’s head or sliding down toward the eyes.
Secure the Headband
Tape or attach the overlapping ends together to create a circle.
If using liquid adhesive, hold the connection with a clothespin or paper clip while it dries. Remove the clip before the child wears the finished project.
Avoid using staples because their sharp edges could come in contact with the child’s skin or hair.

Attach the Helmet
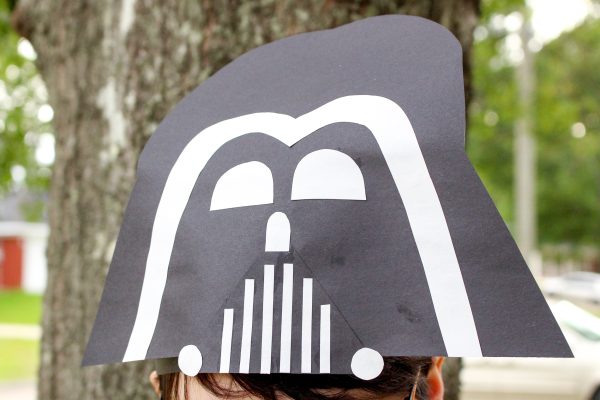
Center the completed paper hat on the front of the paper headband.
Tape or attach the back of the front piece to the band. If needed, strengthen both sides with additional strips of clear tape.
Give the project enough time to dry before wearing it.
Tips for Making the Paper Helmet
Use Heavier Paper for the Main Piece
Construction paper makes for a lightweight project, but it may bend after extended use. Black cardstock or lightweight cardboard will produce a sturdier result.
For extra durability, secure the construction paper piece to cardstock and cut along the outer edge.
Use a Glue Stick for the White Pieces
A glue stick is less likely to wrinkle construction paper and works well for the face frame, eyes, nose, vent strips, and circular details.
Liquid school glue may provide a stronger hold when attaching the finished front piece to the headband.
Arrange Everything Before Gluing
Place all the facial pieces on the black base before securing anything. Begin with the large white face frame and triangular mouthpiece, followed by the eyes, nose, and circles.
This makes it easier to adjust the spacing and keep everything centered.
Prepare Small Pieces in Advance
Younger children may have difficulty cutting the narrow white vent strips. An adult can precut these pieces while children handle the larger shapes and assembly.
For a group activity with preschoolers and older kids, place each child’s pieces in a separate bag or tray. This keeps everything ready to assemble and makes cleanup easier.
Customize the Fit
Children’s head sizes vary, so measure each paper band individually. Do not rely on a single band length when making paper headpieces for a classroom or birthday party.
When to Make This Darth Vader Craft
This wearable paper craft works for several Star Wars activities and celebrations.
Star Wars Day
Make these paper hats on May the Fourth to celebrate the occasion with a simple Star Wars craft. Pair the activity with a Star Wars movie, books, or other character crafts.
Star Wars Birthday Party
Prepare the large black shapes before the party and let children assemble the facial details. Each guest can take the completed project home as a party favor.
Write each child’s name on the inside of the headband so the projects do not get mixed up.
Pretend Play
The finished project can become part of a dress-up bin along with capes, robes, and homemade paper props. Children can create stories featuring Jedi, Sith, the Galactic Empire, the Rebel Alliance, or other iconic characters from the Star Wars saga.
Easy Costume Idea
Combine the paper headpiece with black clothing, a black fabric cape, or even a black hoodie for an inexpensive homemade cosplay accessory.
Because the project is made from paper, it is best for indoor parties, classroom celebrations, photographs, and supervised play.
Movie Night
Make the paper headpieces before a family Star Wars movie night. Children can wear them for photographs and during quiet activities.
Remove them if they become distracting or interfere with watching the screen.
What Children Practice With This Craft
Although this project is primarily a creative activity, it also allows children to practice several useful skills:
- Tracing around a pattern
- Cutting straight and curved lines
- Creating symmetrical shapes
- Arranging pieces spatially
- Following multi-step directions
- Measuring a paper headband
- Matching shapes and sizes
- Strengthening fine motor skills
- Applying adhesive carefully
- Completing a project in sequence
Children can also compare the simple geometric pieces to a picture of Star Wars’ Darth Vader and discuss how recognizable characters can be recreated using basic shapes. This fun and easy activity introduces simple design concepts while encouraging creativity.
Darth Vader Hat Safety
Always supervise children while making and wearing paper costume pieces.
- Have children use safety scissors while cutting.
- Secure the headband without using staples.
- The band should fit comfortably without causing pressure.
- Attach the front section high enough to stay above the child’s eyes.
- Make sure nothing obstructs the child’s sight.
- Remove the paper headpiece during running or active play.
- Do not wear it while riding a bicycle or scooter.
- Keep the paper away from candles and other heat sources.
- Avoid using the craft outdoors in wet or windy conditions.
Because this project sits above the eyes instead of covering the face, it provides the Darth Vader look without obstructing the child’s nose or mouth.
More Star Wars Crafts and Activities
If your kids had fun making this Darth Vader Paper Hat Craft, here are more Star Wars-themed activities to keep the adventure going. These easy printables and crafts are perfect for creative play, parties, or themed learning.
- Build a Darth Vader Printable Craft – Cut, assemble, and build everyone’s favorite Sith Lord with this fun printable activity.
- Baby Yoda Paper Plate Craft – Turn a simple paper plate into an adorable Baby Yoda that’s perfect for young Star Wars fans.
- Han Solo Paper Plate Craft – Bring the legendary smuggler to life with this easy paper plate craft for kids.
- Build a Yoda Craft – Create a wise Jedi Master with this printable cut-and-paste activity that’s fun and easy to assemble.
- Star Wars Connect the Dots – Practice number skills while revealing favorite Star Wars characters one dot at a time.
- Printable Star Wars Activity Mats – Keep kids entertained with a collection of Star Wars-themed puzzles, games, and coloring activities.
- Star Wars Paper Plate Crafts
This Darth Vader paper-hat tutorial turns a few sheets of construction paper into a memorable, wearable DIY project.
Children can build the design one shape at a time, customize the fit, and use their finished creation for a party, Star Wars Day, a costume, or imaginative play.
Whether you’re looking for easy Star Wars activities or crafts for kids and adults, this project is a fun, simple way to make a Darth Vader headpiece inspired by the galaxy far, far away.
May the Force be with every young Jedi—or future Sith Lord—as they wear their finished creation.
Is this a mask or a headpiece?
The photographed project is a paper headpiece. The front piece is attached to a construction-paper band and positioned above the child’s eyes rather than covering the face.
What age is this Darth Vader craft for?
The project is best for elementary-age children. Younger children can participate with help in cutting the curved frame, narrow vent strips, and smaller facial details.
Do I need a printable template?
No. This version uses a simple homemade pattern created by folding a sheet of white paper in half and drawing one side of the design.
A separate [free Darth Vader mask template] is available if you prefer a printable full-face design.
Can I use cardstock instead of construction paper?
Yes. Cardstock will create a sturdier project and headband. It may be more difficult for younger children to cut, so adult assistance may be needed.
How long does it take to make the paper hat?
Allow approximately 45 minutes of active crafting time, plus about 15 minutes for the glue to dry. Preparing the smaller pieces in advance can shorten the activity.
Can this craft be made with a group?
Yes. It works well for classrooms, libraries, homeschool groups, and birthday parties. Prepare the basic black shapes and small vent strips beforehand if time is limited.
How do I keep the front piece from falling forward?
Use cardstock for the main helmet, make sure the paper band fits properly, and attach the front piece securely across a wide section of the headband. Reinforce the connection with clear tape on the back.

How to Make a Darth Vader Mask
Make an easy Darth Vader paper hat using black and white construction paper. This wearable Star Wars craft is perfect for Star Wars Day, parties, costumes, and pretend play.
Materials
- Two or three sheets of black construction paper
- Two sheets of white construction paper
- Glue stick or school glue
- Clear tape
Tools
- Pencil
- Ruler
- Child-safe scissors
Instructions
- Fold a sheet of white construction paper in half vertically.
- Draw half of a rounded helmet along the folded edge.
- Cut along the line and unfold the paper.
- Trace the pattern onto black construction paper and cut it out.
- Cut a wide, curved face frame from white paper.
- Cut a black triangle for the mouthpiece.
- Cut six or seven narrow white strips and glue them vertically to the mouthpiece.
- Glue the face frame and mouthpiece to the helmet.
- Cut and attach two white eyes, a small nose, and two circular details.
- Let the helmet dry on a flat surface.
- Cut two black paper strips approximately two inches wide.
- Join the strips and fit the band comfortably around the child’s head.
- Secure the headband and attach the helmet to its front.
- Let the completed hat dry before wearing it.
Notes
Use cardstock for a sturdier helmet. Position the finished craft above the child’s eyes and never use staples near the child’s head.
