
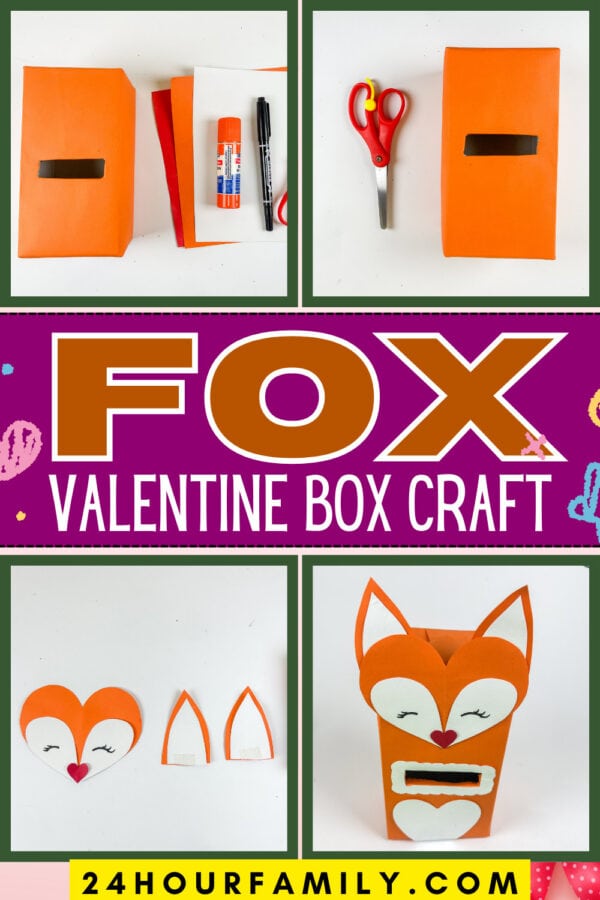
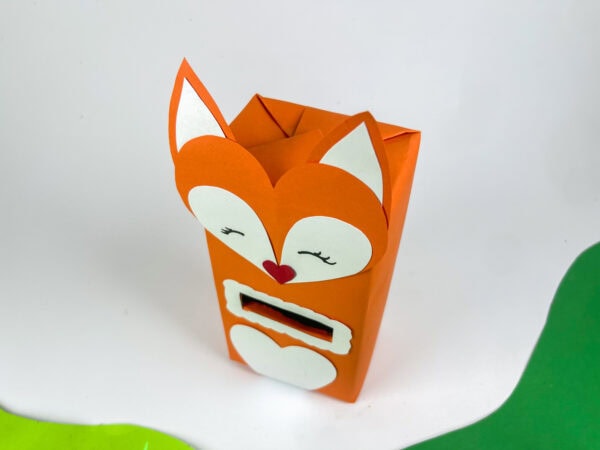
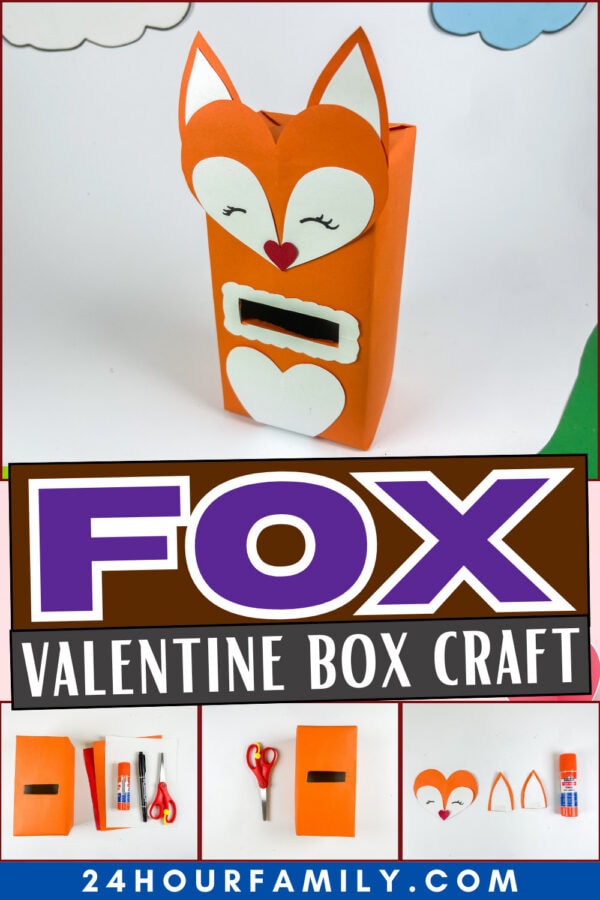
Fox Valentine’s Day Box Craft
This year, I decided to switch things up and make a Fox Valentine’s Day Box Craft, and I can honestly say it turned out to be one of the cutest projects I’ve done in a long time.
There is something extra special about handmade Valentine projects. They feel thoughtful, creative, and just a little bit magical, especially when they involve bright colors, tiny details, and lots of imagination.
Fox Valentine’s Day Box Craft
If you’re looking for fun box ideas that feel creative but not overwhelming, this one is a winner. It’s cheerful, playful, and works beautifully as a valentine card box for exchanging notes, treats, and tiny surprises. It also makes a charming decoration long after the cards are collected.
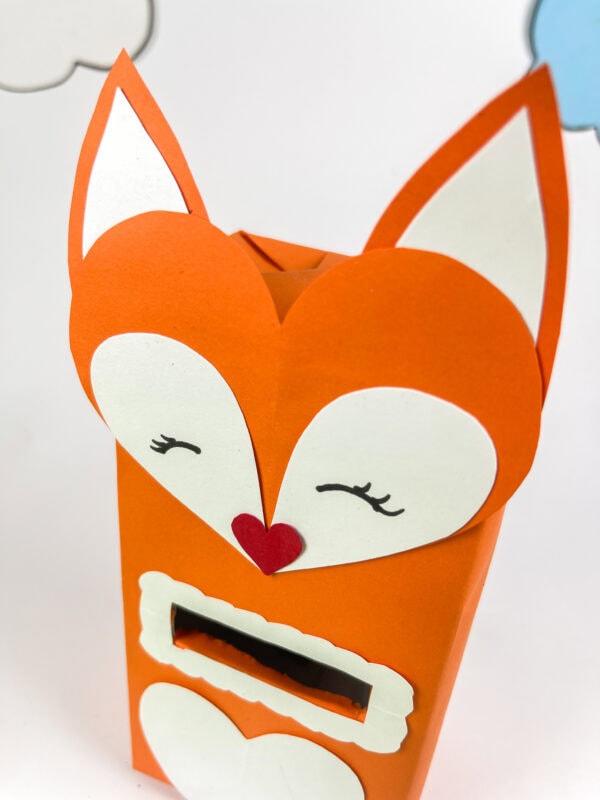
A fox just feels right for Valentine’s season. They’re whimsical, warm, and full of personality. This design is gentle and inviting, with just the right amount of detail, and is easy to customize.
You can keep it simple or dress it up with extra decorations. Either way, it becomes a keepsake rather than something that gets tossed after the holiday.
Check out: 10+ Valentine’s Crafts For Preschoolers
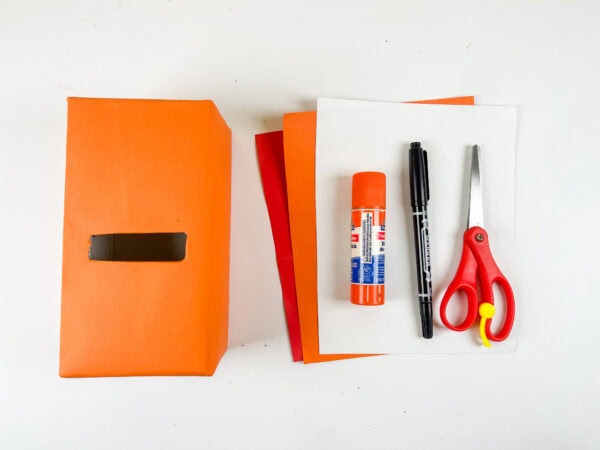
What You’ll Need:
To get started, gather a few basic supplies:
- A small cardboard box
- Colored construction paper
- White cardstock or card stock
- Black paper
- A glue stick or craft glue
- Scissors
- Marker or pen
- Optional: craft foam, googly eyes, or felt
You’ll also want a template (or several pieces) to shape the face, ears, and heart details. Having a printable template makes this project much easier, but you can also sketch your own if you enjoy designing.
This post may contain affiliate links. As an Amazon Associate and a participant in other affiliate programs, I earn a commission on qualifying purchases. Read our disclosure policy here.
Crayola Construction Paper Bulk Pack (480 Sheets) – 10 Assorted Colors, 9×12, Classroom Arts & Crafts Supplies for Kids, Art Paper for School Projects Paper Crafts for Kids: 25 Cut-Out Activities for Kids Ages 4-88 Rolls Colored Masking Tape Rainbow Colors Painters Tape Colorful Craft Art Paper Tape for Kids Labeling Arts Crafts DIY Decorative Coding Decoration Teaching Supplies, 0.6 Inch x 16 Yard, 8 ColorsARTISTRO 24 Acrylic Paint Markers for Rock, Fabric, Wood, Glass, Craft, Decoration – Dual-Tip Paint Pens – Stocking Stuffers, Christmas Gift Idea for Teens, Grandkids, Kids – Art Supplies900 PCS Pom Poms, Multicolor Bulk Pom Poms Arts and Crafts, Soft and Fluffy Craft Pom Poms, Assorted Sizes Pompoms, for Arts and Craft Making DecorationsElmer’s Disappearing Purple School Glue Sticks, Washable, 6 Grams, 12 Count – Poster, Vision Board, Back to School, #1 Teacher Brand


How to Make Your Fox Valentine’s Day Box Craft
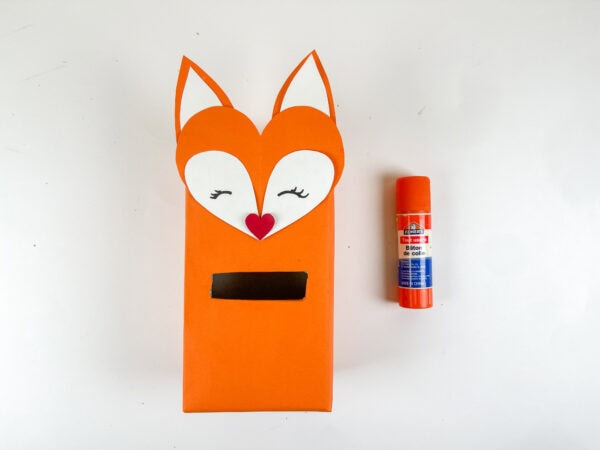
Step 1: Cover the Box and Cut the Card Slot
Start with your cardboard box. Cover it completely with orange paper and secure it using glue.
Next, draw a small rectangle on the front of the card for the card opening. Carefully cut it out so the cards can slide in easily.
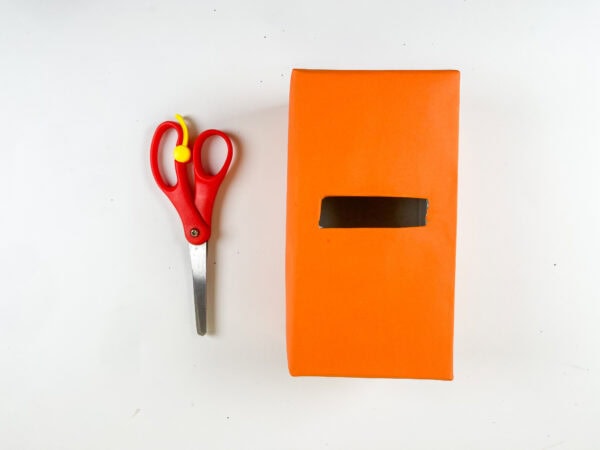
That’s it—your base is ready!
Step 2: Print and Trace the Template
If you’re using a printable, go ahead and print it out.
Place the template pieces onto your colored paper and trace them:
- Orange for the head and ears
- White for the cheeks and body heart
- Black for the slot lining
- Pink or red for the nose heart

Cut out all your shapes neatly and set them aside.
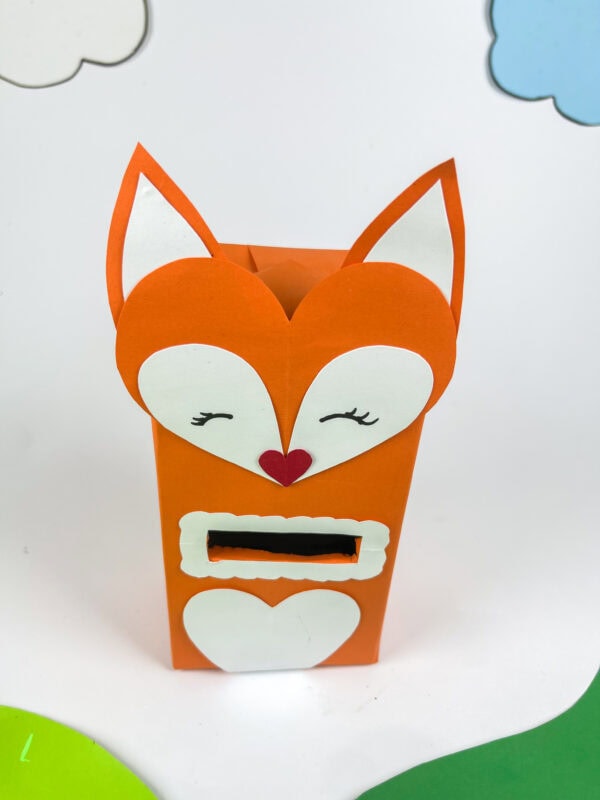
Step 3: Build the Face
Layer the white cheek pieces on top of the orange face shape and glue them together.
Use a marker to draw soft eyelashes for a gentle expression. Then glue a small pink heart in the center as the nose.
This part is where the project really starts to feel alive. That little face adds so much personality.
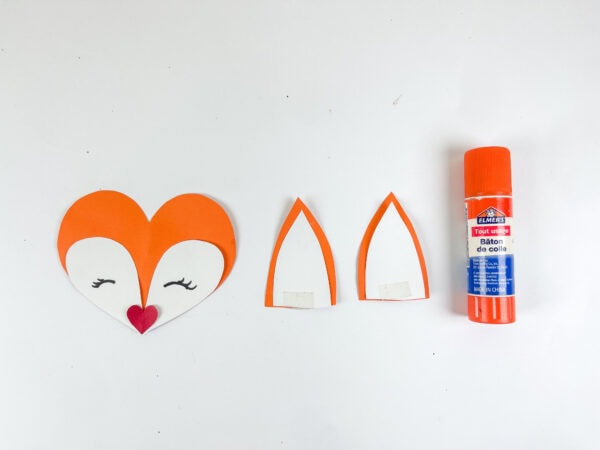
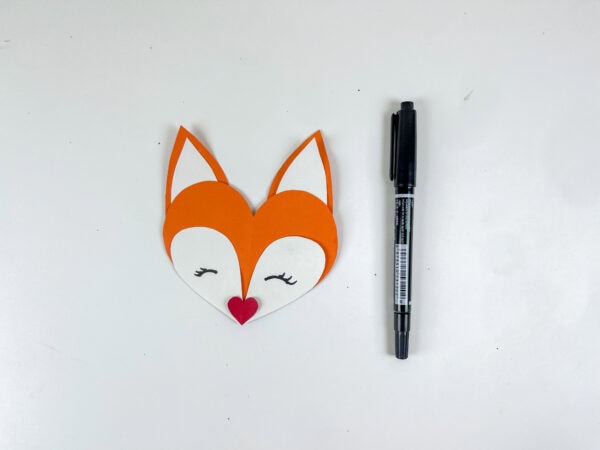
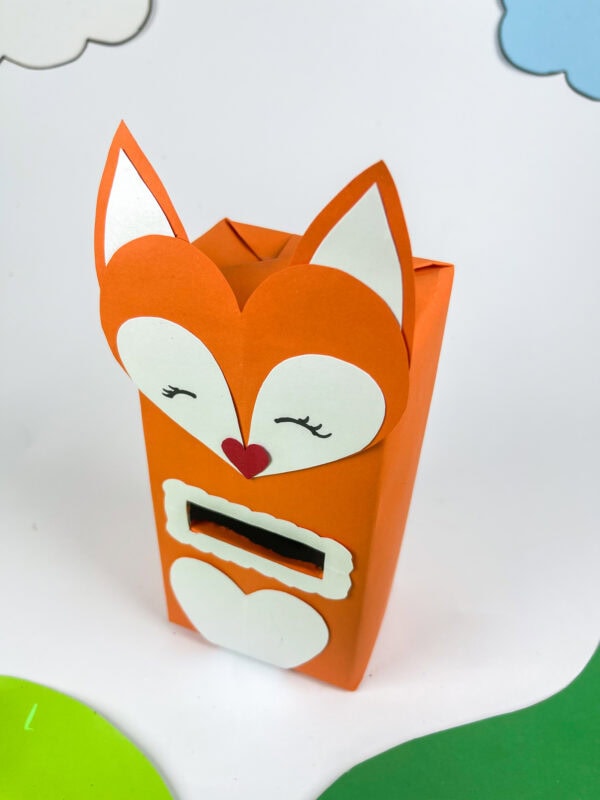
Step 4: Make and Attach the Ears
To make the ears, glue the smaller white shapes inside the orange pieces.
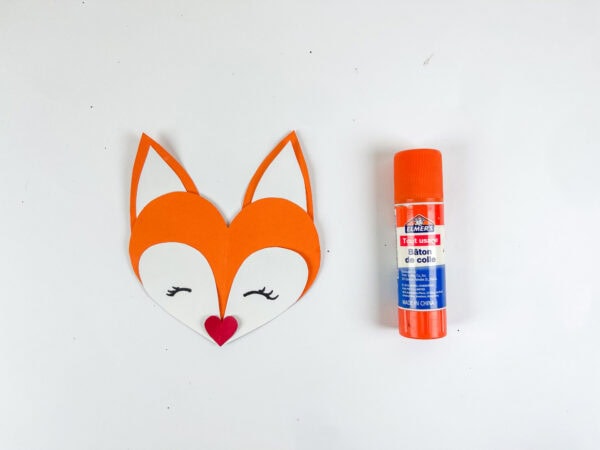
Let them dry briefly, then glue them to the back of the face near the top edge.
Attach the full face to the top front of the box so it slightly overlaps the opening area.
Step 5: Frame the Card Slot
Cut a rectangle from white paper that’s slightly larger than your slot. Cut the center out so it forms a frame.
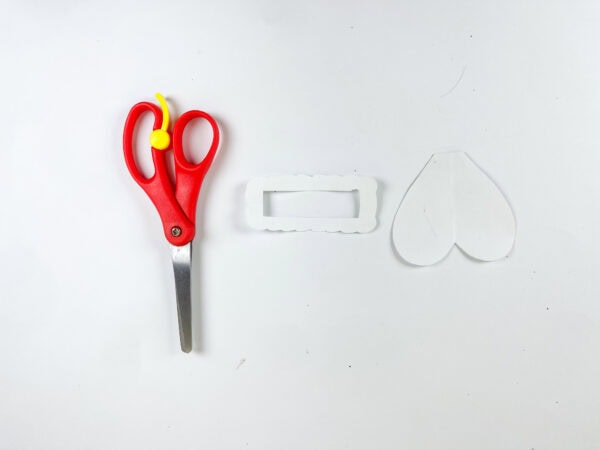
Glue this over the opening. Then, glue a black rectangle behind the slot using black paper to help the opening stand out.
This small detail really improves the box’s appearance.
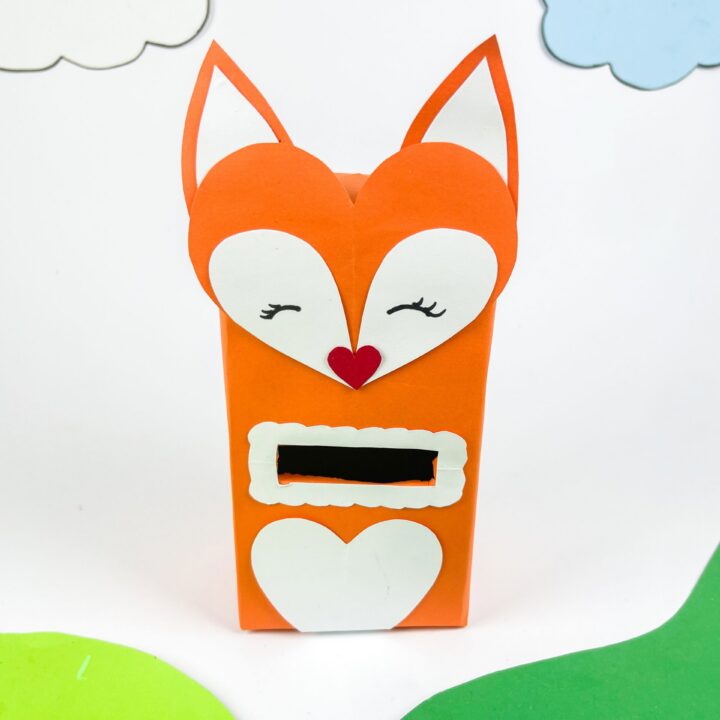
Step 6: Add the Body Heart
Cut a large white heart and glue it near the bottom front of the box.
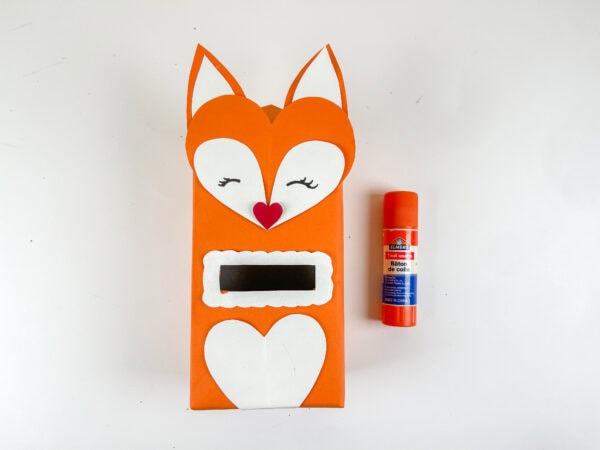
It gives the fox its classic chest marking and beautifully balances the design.
Step 7: Optional Decorations
Now comes the fun part—decorating!
You can:
- Use craft foam for extra texture
- Glue on googly eyes
- Create a simple paper tail for the back
- Include tiny hearts or stickers
- Paint dots or accents using craft paint
For thicker pieces, a tiny bit of hot glue works well (with adult help).
Step 8: Let Everything Dry
Press gently on all edges and let the glue fully dry before adding cards.
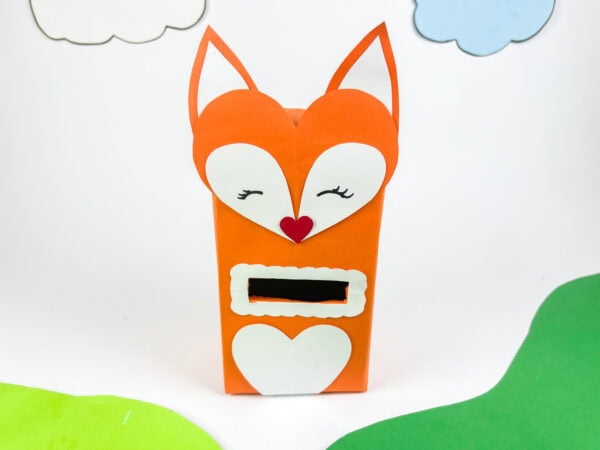
Your Valentine’s Day box for your fox is now complete!
Why This Craft Works So Well
This project is creative but still very manageable. It’s super easy to customize and doesn’t require complicated tools or supplies.
It’s also a wonderful option for classrooms. Many teachers look for sturdy Valentine boxes for school, and this one holds up nicely while still being playful and eye-catching.
It’s simple enough for a kid to enjoy helping with, especially when tracing or decorating.
Helpful Crafting Tips
- Use thin layers of glue to avoid wrinkles
- Let each section dry before moving on
- Cardstock works best for sturdy pieces
- Try both square and round design ideas for variety
- Keep scraps—you may need them later
These small tips make the process smoother and more enjoyable.
Creative Variations
You can change the look in so many ways:
- Swap the main color for pink or red
- Add glitter for sparkle
- Make the cheeks fluffy with cotton
- Use a name label using white card
- Decorate with tiny hearts
Every version becomes its own little work of art.
Pete the Cat: Valentine’s Day Is Cool LEGO Heart Ornament Building Toy Set – Fun Arts and Crafts Idea for Girls and Boys, Ages 9+ – Gift for Kids – Display on The Wall as Home Decoration – 40638Valentines Sticky Hands Bulk 48PCS Valentines Day Gifts for Kids Classroom Prizes Valentines Party Favors for Kids Stretchy Heart Sticky Hand Toy Valentines Day Goodie Bag Stuffers Kid Party SuppliesGrumpy Monkey Valentine Gross-Out: Includes Valentine StickersBiscuit’s Valentine’s Day: A Valentine’s Day Lift-theFlap Book for KidsKESOTE Valentines Day Stamps for Kids, Self Inking Stamps for Valentine Party Favor Goody Bag Fillers


More Valentine’s Day Craft Ideas
If you had fun making this Fox Valentine’s Day Box Craft, here are more creative Valentine projects that work well for classroom exchanges or relaxed crafting time at home.
- Bee Valentine’s Day Box Craft – A sweet and buzzy box craft that adds a playful twist to Valentine’s Day.
- Valentine’s Day Monster Heart Paper Plate Craft – A silly, colorful craft that brings extra fun to Valentine activities.
- Valentine’s Day Horse Paper Craft – A charming animal-themed craft perfect for kids who love horses.
- Valentine’s Day Cow Paper Craft – A cute farm-style craft that’s easy to assemble and fun to decorate.
- 10 Valentine’s Day Crafts for Preschoolers
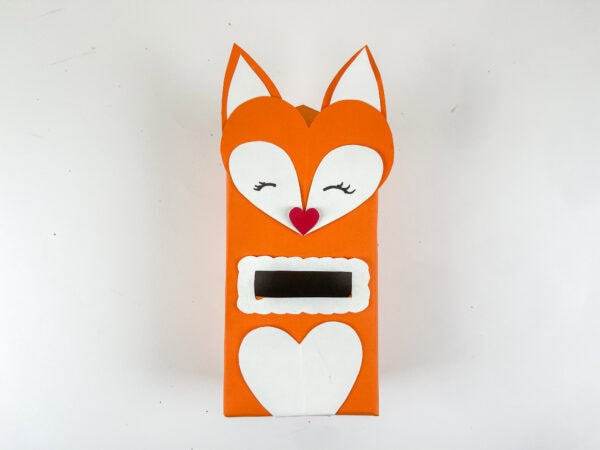
This project turned out to be one of the cutest Valentine crafts I’ve made. It’s cheerful, creative, and full of charm without being complicated. Whether you’re making one for school, a party, or simply for fun, this fox is a perfect way to collect Valentine cards and spread a little handmade joy.
If you’re still deciding what box this year should be, this one is truly perfect. It’s sturdy, sweet, and super sweet in personality.
Fox Valentine's Day Box Craft
This Fox Valentine’s Day Box Craft turns a simple cardboard box into a sweet woodland-themed Valentine holder. The fox face is made with layered paper pieces that give it a soft and friendly look. Kids can enjoy assembling the face, ears, and heart details one piece at a time. The design is playful and works well for classroom exchanges or home crafting. Once finished, the fox box is perfect for holding Valentine cards and small notes.
Materials
- Small cardboard box
- Colored construction paper
- White cardstock
- Glue
- Scissors
- Marke
Instructions
1. Cover the Box and Cut the Card Slot
Cover the entire box with colored paper, pressing it down smoothly so the surface looks neat. On the front of the box, draw a small rectangle and carefully cut it out to create an opening for Valentine cards.
2. Trace and Cut the Face Pieces
Trace the fox face, ears, cheeks, and heart shapes onto the correct colored paper. Cut each piece out neatly and place them nearby so they are ready to assemble.
3. Build the Fox Face
Glue the white cheek pieces onto the orange face shape, lining them up evenly. Draw gentle eyelashes with a marker, then glue a small heart in the center to create the nose.
4. Prepare and Attach the Ears
Glue the smaller white ear pieces inside the larger ear shapes. Once set, attach the ears to the back of the face near the top edge, then glue the completed face onto the front of the box so it slightly overlaps the card opening.
5. Frame the Card Opening
Cut a white rectangle slightly larger than the slot and remove the center to create a frame. Glue this over the opening, then add a black rectangle behind the slot to help the opening stand out.
6. Add the Body Heart
Cut a large heart from white paper and glue it near the bottom front of the box. This creates the fox’s chest detail and balances the overall design.
7. Add Decorative Details
Decorate the fox using simple paper accents like extra hearts, facial details, or a paper tail. Arrange everything before gluing to make sure the design looks balanced.
8. Let the Box Dry
Press down all glued areas and allow the box to dry completely. Once dry, it’s ready to be filled with Valentine cards and treats.