
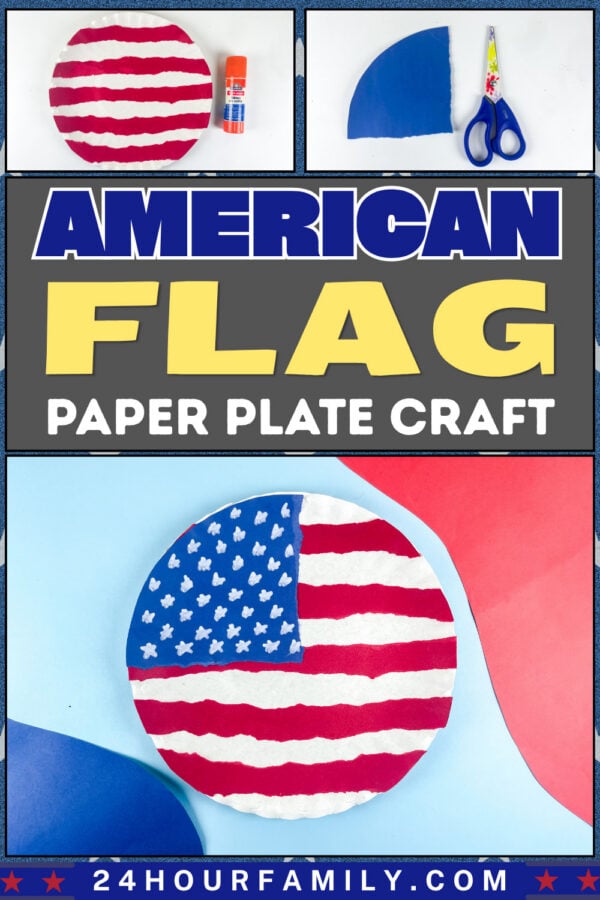
American Flag Paper Plate Craft (Easy 4th of July Idea)
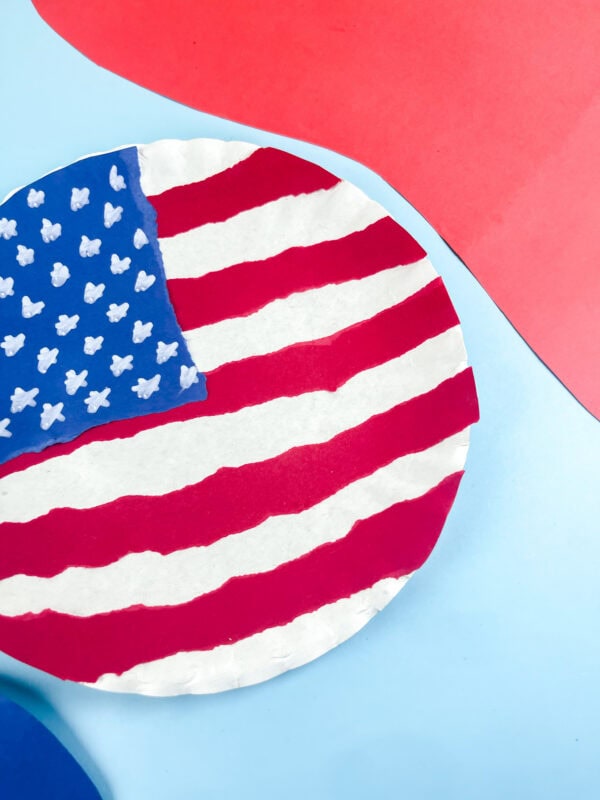
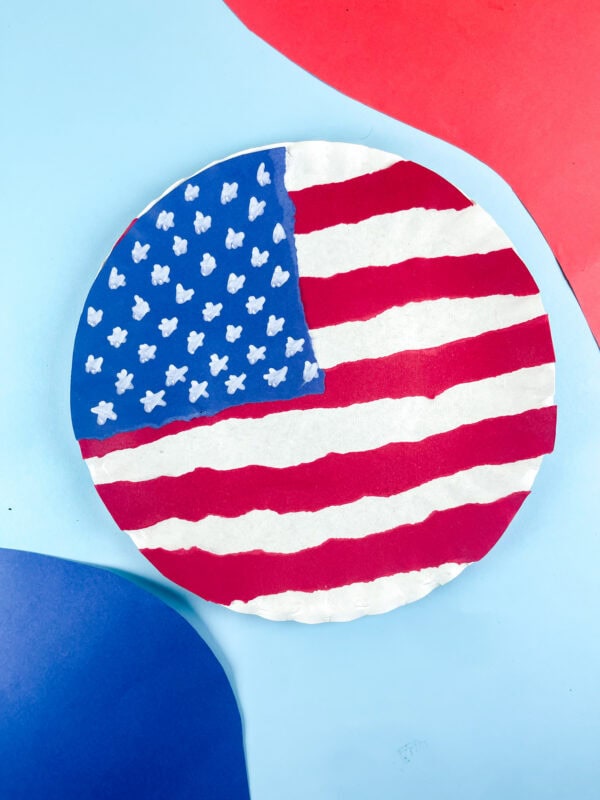
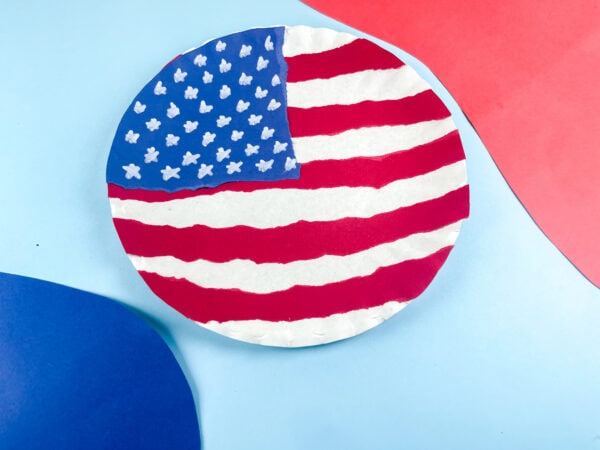
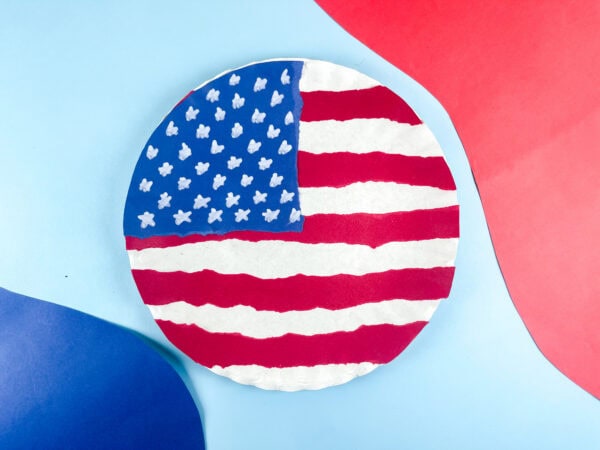
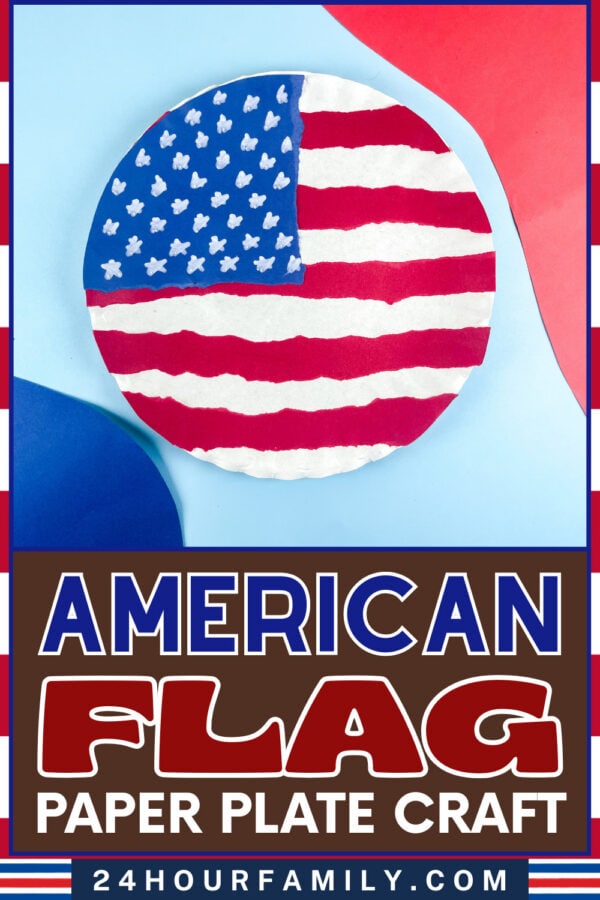
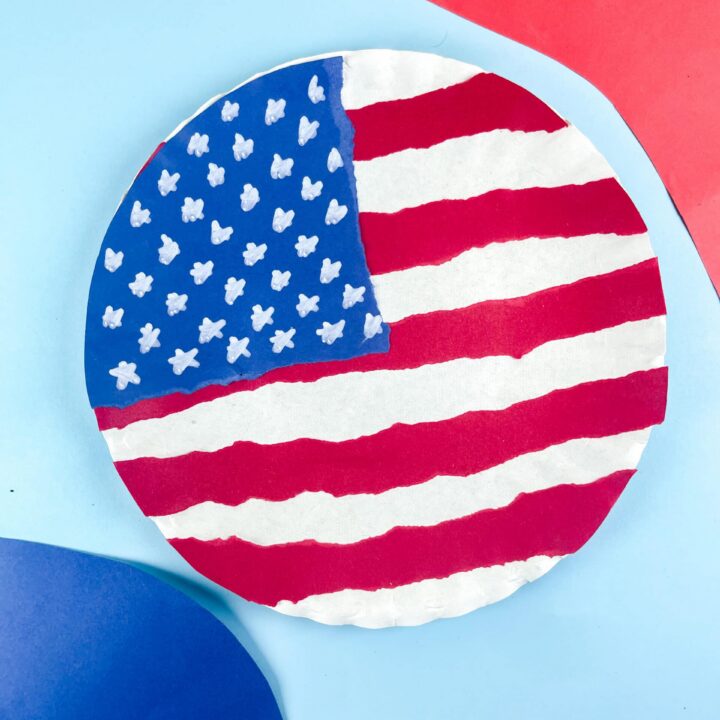
This American flag paper plate craft turns an ordinary paper plate into a bold, festive patriotic display using red and white paper strips, a blue corner section, and hand-drawn stars.
It’s an easy 4th of July craft for kids that comes together with just a few simple supplies, making it perfect for classrooms, homeschool, or a quick afternoon activity at home. The finished flag looks great hanging on a wall, displayed on a shelf, or added to a Memorial Day or Independence Day party decoration setup.
American Flag Paper Plate Craft
This paper plate flag craft is especially fun for summer celebrations, classroom projects, and seasonal crafting afternoons. Whether you are preparing for the 4th of July, creating something special for Memorial Day, or simply searching for easy patriotic ideas for kids, this project is such a fun choice.
The torn paper pieces give the flag a handmade look that adds extra personality, and it’s super easy to make.
This post may contain affiliate links. As an Amazon Associate and a participant in other affiliate programs, I earn a commission on qualifying purchases. Read our disclosure policy here.
Stock Your Home 9-Inch Paper Plates Uncoated, Everyday Disposable Plates 9KTOJOY 100Pcs Jumbo Wooden Craft Sticks Popsicle Stick 6” Long x 3/4”Wide Treat Ice Pop for DIY Crafts,Home Art Projects, Classroom SuppliesMod Podge Gloss Sealer, Glue & Finish: All-in-One Craft Solution- Quick Dry, Easy Clean, for Wood, Paper, Fabric & More. Non-Toxic – Craft with Confidence, Made in USA, 16 oz., Pack of 1Crayola Construction Paper – 480ct (2pck), Bulk Teacher Supplies, Back to School Essentials For Kids, Classroom Must Have, Arts & Crafts Art PaperGoodyKing Arts and Crafts Supplies for Kids – 1170Pcs+ Craft Art Supply Kit for Toddlers Kids Craft Supplies & Materials Age 4 5 6 7 8 9 – All in One D.I.Y. Crafting School Supplies900 PCS Pom Poms, Multicolor Bulk Pom Poms Arts and Crafts, Soft and Fluffy Craft Pom Poms, Assorted Sizes Pompoms, for Arts and Craft Making Decorations


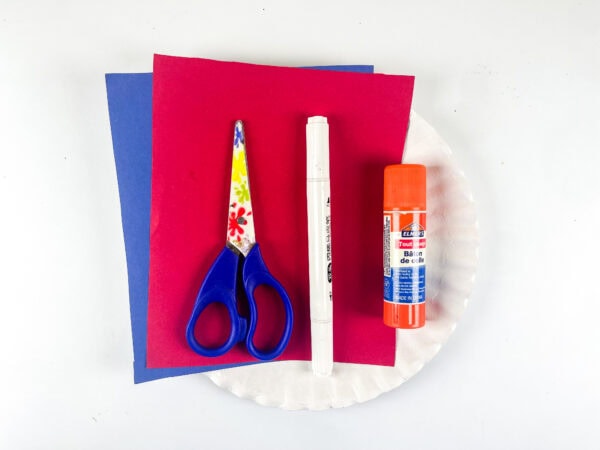
Materials You’ll Need To Make This Patriotic Craft:
These flag materials are wonderfully simple and easy to gather before starting.
- Paper plate
- Red construction paper
- Blue construction paper
- Marker
- Glue stick
- Scissor
- School glue
- White paint or white marker
You can also use red and white crepe paper instead of construction paper if you want softer-textured red and white stripes. Some people even like adding glitter stars or small white star stickers to the blue section for extra decoration.
How to Make an American Flag Paper Plate Craft
Step 1: Gather the Supplies
Start by placing all of your craft supplies onto a clean workspace. Lay out the paper plate, colored paper, marker, scissors, and glue so everything is easy to reach before beginning.
This easy paper plate American flag project uses very simple supplies, which makes it especially nice for easy kids crafting sessions.
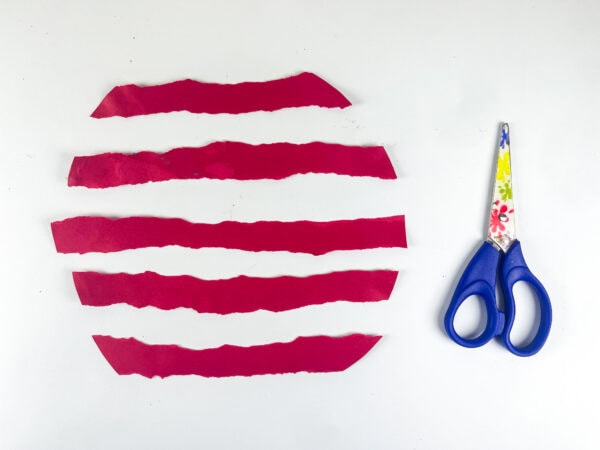
Step 2: Tear the Red Paper Into Strips
Take the red construction paper and carefully tear long strips to create the flag stripes. The uneven edges give the paper plate crafts project a textured handmade appearance that looks super cute once finished.
Try to make several pieces of similar width so the design stays balanced across the plate. You can also cut the strips with scissors instead of tearing if preferred, but the torn look adds extra charm to the craft.
If you want a different texture, red-and-white crepe paper works beautifully here, too. The soft paper creates a fun patriotic look that feels extra festive.
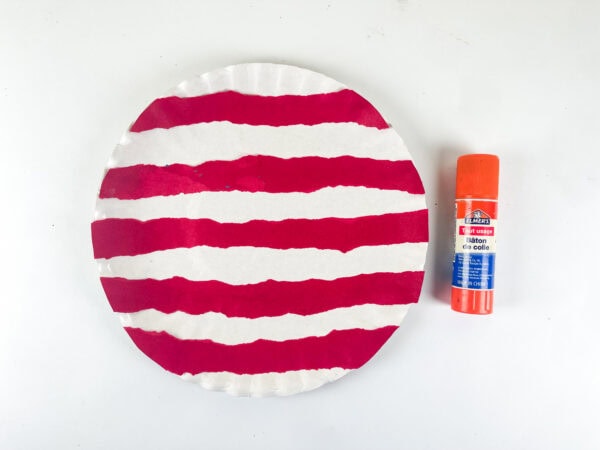
Step 3: Attach the Red Stripes
Use the glue stick or school glue to attach the torn red strips horizontally across the paper plate. Leave white space between each strand so the plate naturally forms the red-and-white flag pattern.
The alternating colors instantly help the flag come together. You can trim any extra paper hanging off the edges once the strips are attached.
The three red stripes with three white spaces in between help give the paper plate a neat and balanced design. Let the glue dry briefly before starting the next step.
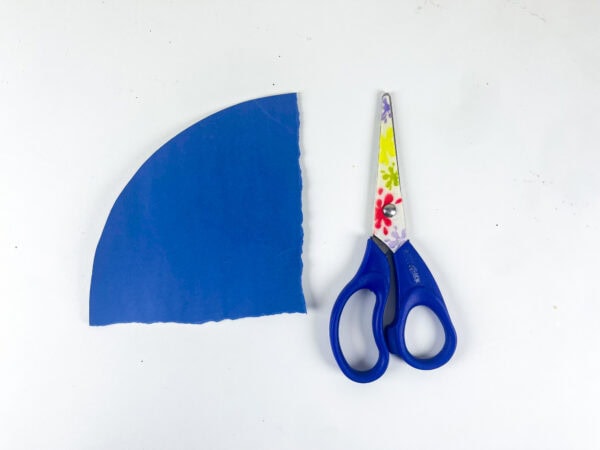
Step 4: Create the Blue Corner Section
Next, cut a curved blue rectangle from the blue paper to fit in the upper-left corner of the plate. This piece becomes the star section of the American flag.
Some people may prefer using a blue paper plate for this step instead, but construction paper keeps the project lightweight and easy to assemble.
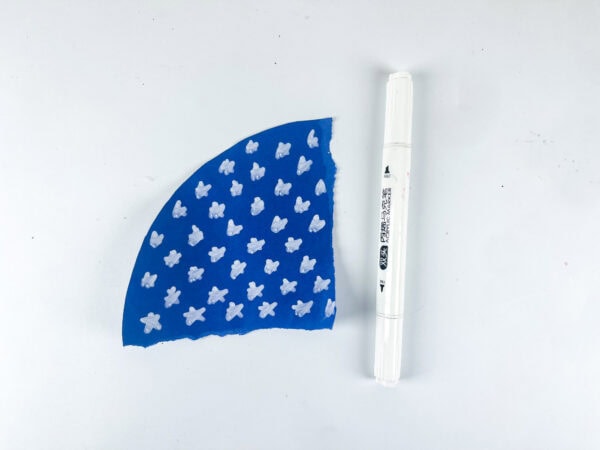
Once the blue piece is ready, use a white marker or white paint to draw stars across the surface. The stars do not need to look perfect. The slightly uneven shapes actually make the handmade project feel more charming.
You can also use white star stickers as a quicker option for younger crafters.
Step 5: Attach the Blue Section
Spread glue on the back of the blue rectangle and place it on the upper-left area of the paper plate. Press it down gently so it sticks securely over the red stripes underneath.
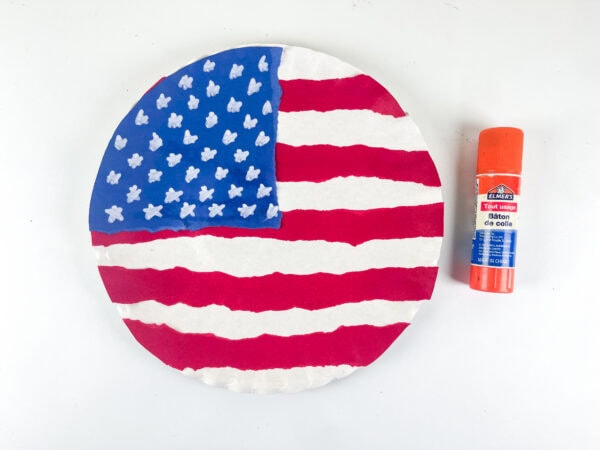
At this stage, the paper-plate American flag craft really starts to look complete. The bright white-and-blue section, paired with the bold red paper, creates such a cheerful display.
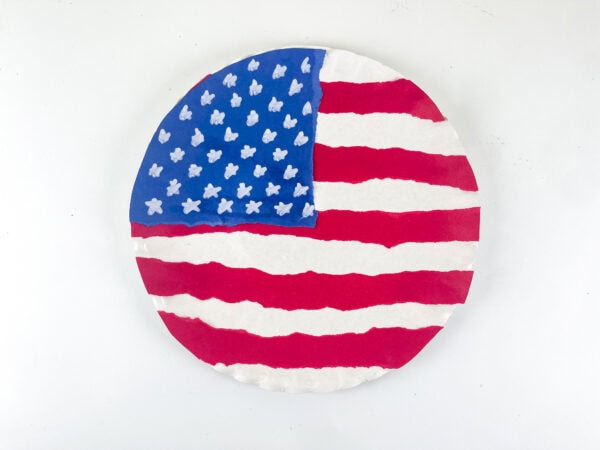
Let the project dry completely before displaying it or hanging it up.
Fun Ways to Customize Your Flag Craft
One of the reasons this flag craft for kids works so well is that it can be easily personalized in many ways. Even though the basic design already looks adorable, there are lots of fun little extras that can make it feel even more unique.
Here are a few ideas for kids who want to decorate their craft even more:
- Add glitter around the stars
- Use glitter stars instead of drawing stars
- Attach a streamer to the bottom edge
- Create mini paper plate flags for a banner
- Add ribbon to turn the project into a hanging decoration
- Use alternate shades of red and blue paper
- Attach several finished flags together as a garland
These little details can make the project feel even more festive for a celebration or holiday display.
Perfect for Patriotic Holidays
This American flag paper plate craft fits beautifully into so many patriotic holidays throughout the year. It works wonderfully as a 4th of July craft, but it is also perfect for Memorial Day activities and other patriotic celebrations.
Because the project is easy and fun, it works especially well during Fourth of July parties or crafting afternoons. The bright colors instantly create a festive atmosphere while still being simple enough for younger children to complete with help.
If you are searching for ideas for kids during July or Memorial Day events, this project is a great addition to the schedule. It combines creativity, cutting, tearing, gluing, and coloring into a single simple American-themed project.
The finished flag can even be displayed around the house as a handmade holiday decoration during summer gatherings.
Tips for Making the Craft Easier
If you are crafting with very young kids, there are a few ways to simplify the project even more.
Pre-tear the paper strips if needed. This makes the process move faster and keeps the focus on gluing and decorating.
Older kids may enjoy lining up the paper pieces evenly on their own, while young kids might prefer simply sticking pieces wherever they fit. Both versions turn out adorable.
You can also replace the drawn stars with sticker stars to make the project easier for smaller hands.
This easy project works well because there is no pressure to be perfect. Every finished flag looks slightly different, which makes each one feel special.
A Fun Craft to Share on Pinterest
This fun American flag paper plate craft photographs beautifully once finished, especially with the bright red & white colors against the bold blue section. The torn paper texture adds extra detail to the finished project that stands out nicely in photos.
Because of the playful design and simple supplies, this craft is also a wonderful project to share on Pinterest for seasonal inspiration. It works especially well for summer crafting boards, patriotic themes, classroom projects, and easy craft collections.
More Paper Plate Crafts to Check Out
If you enjoyed making this American Flag Paper Plate Craft, here are a few more paper plate projects that are packed with fun themes, colorful details, and hands-on crafting time.
- C-3PO Paper Plate Craft – A fun character-themed craft that’s perfect for kids who enjoy space adventures and imaginative activities.
- Cross Paper Plate Craft – A meaningful craft idea that works well for faith-based lessons, holidays, or special occasions.
- Taco Paper Plate Craft – A playful food-themed craft that turns a paper plate into a colorful taco filled with fun details.
- Cupcake Paper Plate Craft – A sweet and cheerful craft that lets kids make their own pretend cupcake using bright colors and simple shapes.
- Uncle Sam Paper Bag Craft
- American Flag Handprint Craft
- Bald Eagle American Craft
This American flag paper plate craft combines creativity, color, and simple supplies into a project that feels cheerful from beginning to end. From the easy red torn paper strips to the painted stars, every step stays approachable while still creating something bright and eye-catching.
Whether you are preparing for the 4th of July or Memorial Day celebrations, searching for a craft for kids, or simply want an easy patriotic activity to try during the summer, this project is a fun option.
What materials do I need for an American flag paper plate craft?
You’ll need a white paper plate, red and white paper (or red and white paint), blue paper for the corner section, white paint or a white paint pen for the stars, scissors, and glue. Torn paper strips, like the ones used here, give the stripes a fun textured look, but cut strips work just as well for a cleaner finish.
Do I need to draw all 50 stars?
No — for younger kids especially, it’s perfectly fine to add a smaller, simplified number of stars rather than all 50. The goal is to capture the look and feel of the flag, not create an exact replica. A simple grid of 15–20 dotted or painted stars works beautifully and is much more manageable for little hands.
What’s the easiest way to make the stripes?
Torn paper strips, like the ones in this version, are among the easiest methods because they don’t require precise cutting — kids can simply tear strips of red and white paper and glue them across the plate. This also gives the flag a textured, hand-torn look that adds charm without needing scissor precision.
How do you make the stars look neat without stamps?
Dot painting works well here — dip the end of a paintbrush, a cotton swab, or even a pencil eraser into white paint and press it onto the blue section in small star-like clusters. For a more defined star shape, a small star-shaped sponge or stamp also works great and saves time for younger crafters.
What age is this craft best for?
This craft works well for preschool through elementary age. Younger children may need help with the blue corner placement and painting the stars, while older kids can manage the torn-paper stripes and star painting fully on their own.
Can I use paint instead of paper for the stripes?
Yes — painting the stripes directly onto the paper plate works just as well as gluing on paper strips. Painting tends to create a smoother, more uniform look, while torn or cut paper strips (as shown here) give a more textured, layered effect.
American Flag Paper Plate Craft
This American Flag Paper Plate Craft is a fun and colorful activity that turns a plain paper plate into a patriotic decoration. Kids can use torn paper, bright colors, and simple shapes to build their own flag design. It’s a great project for holiday activities, classroom crafts, or summer fun. The finished craft looks cheerful and festive while giving kids extra practice with tearing, cutting, and gluing. It also makes a cute display for patriotic celebrations.
Tools
- Paper plate
- Construction paper (red & black)
- Marker
- Glue stick
- Scissors
- White paint or white marker
Instructions
1. Gather the Supplies
Set all of your materials onto a clean work surface before starting. Place the paper plate, colored paper, scissors, glue, and marker nearby so everything is easy to reach.
2. Tear the Red Paper Into Strips
Take the red construction paper and tear it into long strips to form the flag sections. Try to keep the strips close in size so they fit evenly across the paper plate.
3. Attach the Red Strips
Glue the red strips across the paper plate in horizontal rows. Leave spaces between each strip so the plate shows the alternating flag pattern, then trim away any extra paper around the edges.
4. Create the Blue Corner Section
Cut a curved blue shape sized to fit the upper left area of the plate. Use white paint or a white marker to add small stars across the blue section.
5. Attach the Blue Section
Apply glue to the back of the blue piece and place it onto the upper left corner of the paper plate. Let the craft dry completely before hanging it up or adding it to a patriotic display.