Owl Animal Pencil Toppers (with Printable Template)
We love these adorable Animal Pencil Toppers! Do you have a child who is preschool, kindergartener, or young grade school age child about to start another School year? If so, you may be looking for fun and creative ways to help them get excited about learning. One way to do that is to provide them with some fun and unique school supplies. Today, we are going to show you how to make a owl shaped felt animal pencil toppers craft. This is a great project for kids of all ages, and it’s a great way to teach them about animals and nature. Let’s get started!
Does your little one love animals or animal crafts? If so, this felt animal pencil toppers craft is perfect for you! Not only is it fun and easy to make, but your child will love using it to decorate their pencils. We will show you how to make an owl, but you can use our template to create any other types of animals that you want.
Table of Contents
Materials needed to Make these Owl Shaped Felt Pencil Toppers
The first thing you will need to do is gather your supplies. For this project, you will need some different colors of felt, scissors, a pencil, and a glue gun, glue sticks, or some felt or Elmer’s glue. Once you have all of your supplies, you will need to cut the felt into small pieces.
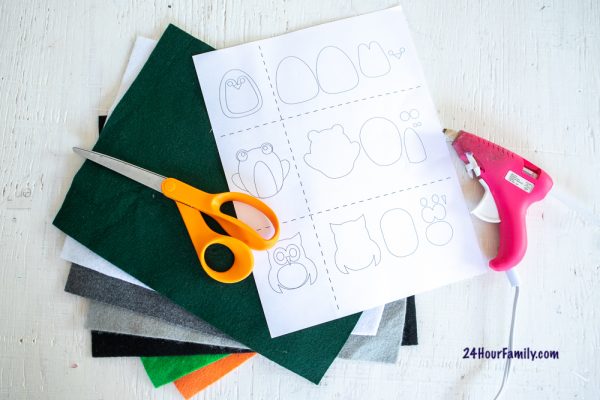
-Felt Sheets colors needed to make the Owl Animal Pencil Toppers – Charcoal, Light Gray, White, Black, Orange
-Fabric scissors
-Hot glue gun and clear glue sticks
-Printable free Owl Template pencil topper template (See Download Below)
-Pencils
How to Make Felt Owl Animal Pencil Toppers
This adorable animal craft felt pencil topper is perfect for all younger preschool and school aged kids from Kindergarten to grade 4 or grade 5. It is simple to complete and the owl template is fun to use with felt to cut out animal crafts and craft projects.
Gather all of the supplies listed above.
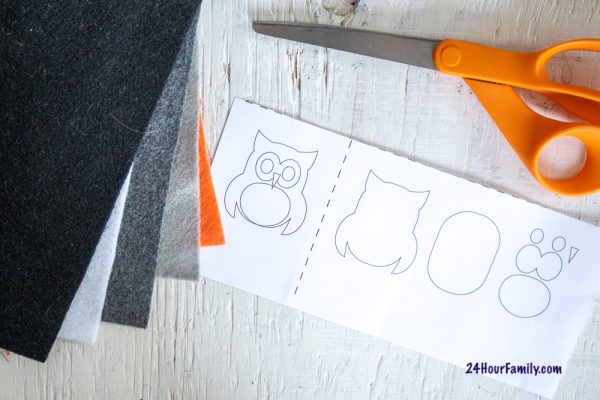
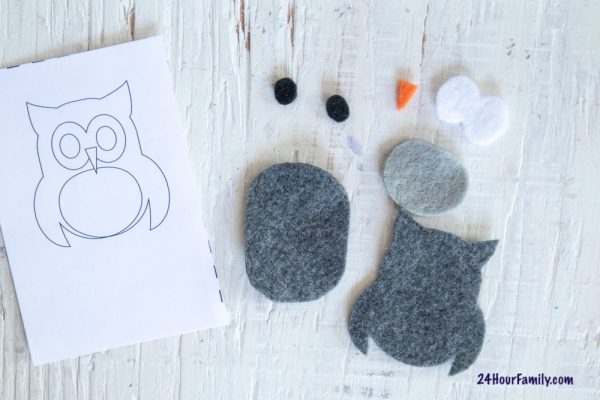
Print off paper template.
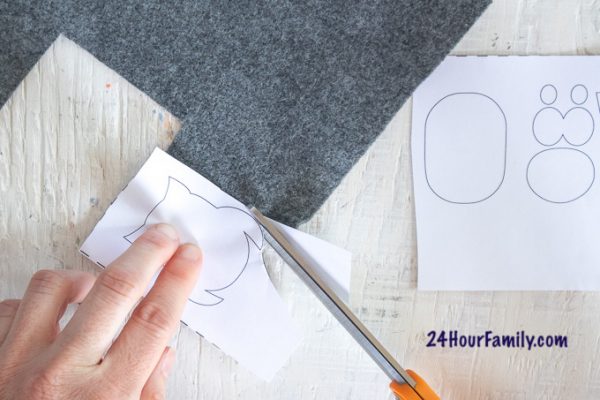
Next, cut out the Owl Pattern by placing the owl pattern pieces over the top of the felt sheets in the color of your choosing. Using your scissors, cut along the solid lines to cut out the pattern pieces.
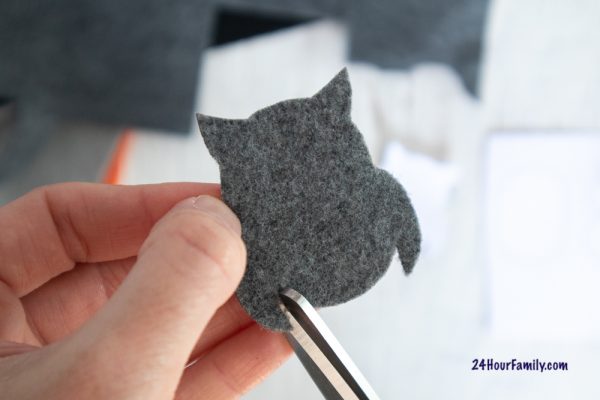
Fabric scissors work better when cutting small felt pieces, but standard sharpened scissors will also work. These scissors should only be used by adults or by kids with adult supervision.
After you have cut the felt into pieces, it’s time to start glueing them together. Preheat the glue gun if you are using one. Standard fabric glue or regular glue can also be used.
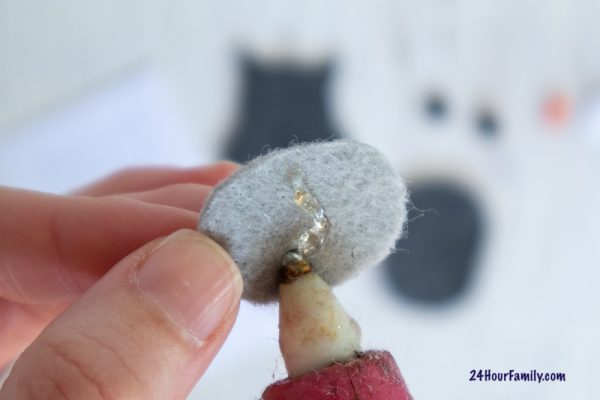
Start by Applying a bead of glue along the outer edges of the smaller body piece (the small light gray cut out) leaving the bottom without glue.
Press the prepared owl front piece to the back piece and press in place until the glue sets.
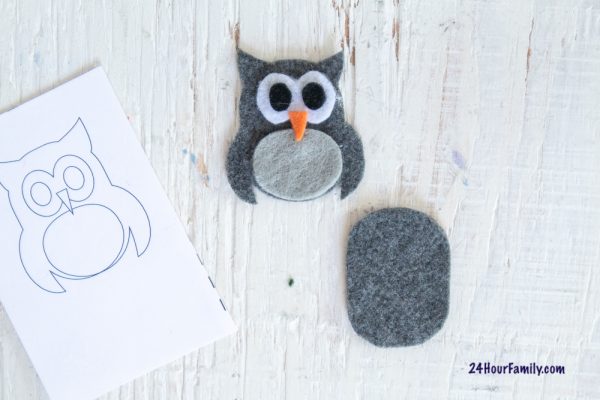
Carefully glue the smaller felt pieces (the owl belly, eyes and beak) to the largest felt owl piece pressing in place.
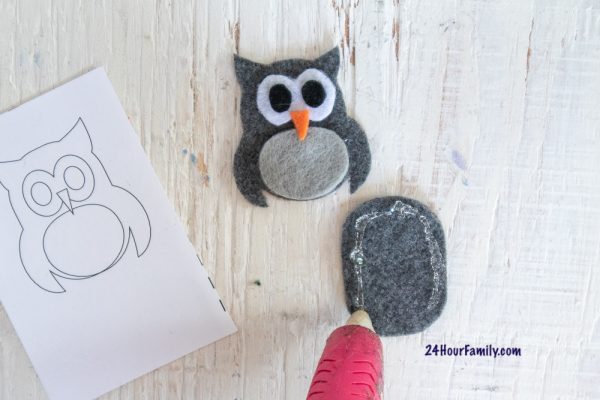
Next, add glue to the larger charcoal colored back piece of the felt owl. Remember to not add glue in the lower middle bottom of the owl where you will insert the pencil.
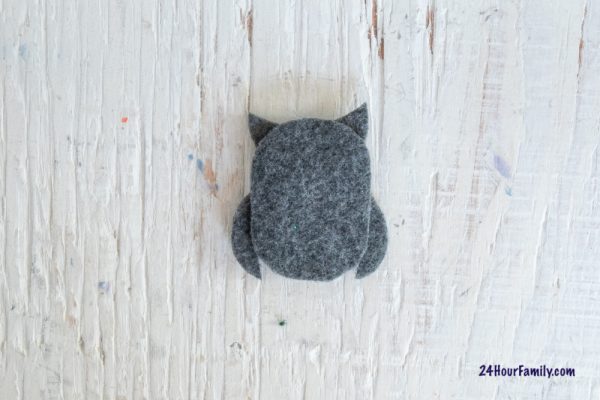
Now, attach the rounded back piece to the back of the owl and allow the pencil topper to dry completely.
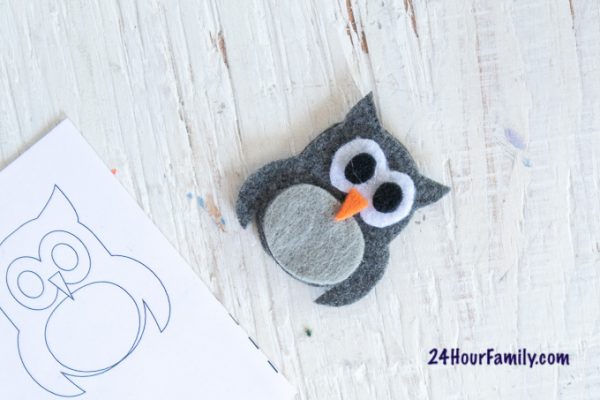
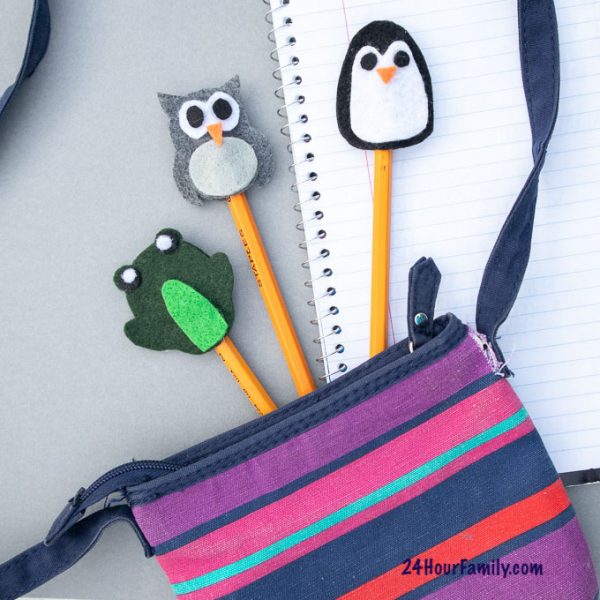
Now you have an adorable finished owl felt pencil topper!
These little felt animals pencil toppers are perfect for adding some personality to your pencils, and they make great party favors or gifts. You can choose from a variety of different animals, but we have provided a free template PDF download of an Owl, a frog, and a penguin pencil topper.
Do you have any tips for making unique and exciting school supplies? We’d love to hear them! Share your ideas in the comments section below. And don’t forget to share photos of your finished projects with us in the comments section below. We can’t wait to see what you create!
We hope you enjoyed this fun and easy craft project. If you’re looking for more school inspiration and your kids love learning, be sure to check out this free Octopus Printable Activity for Kids. Until next time, happy crafting!