
Build Mrs. Potato Head Printable Craft
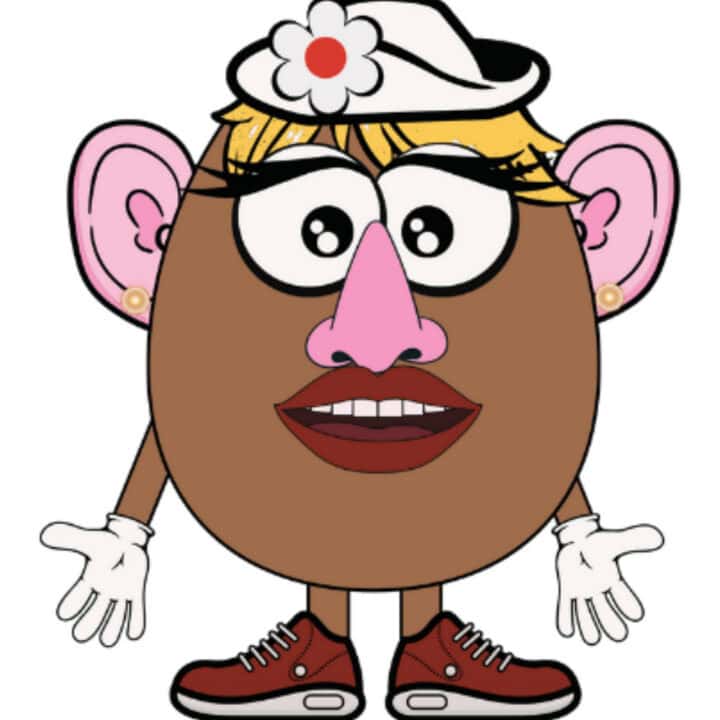
Build a silly character one piece at a time with this Mrs. Potato Head printable craft.
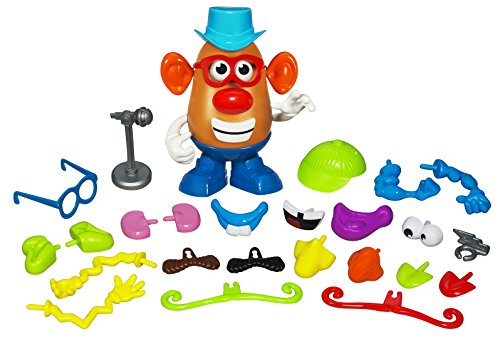
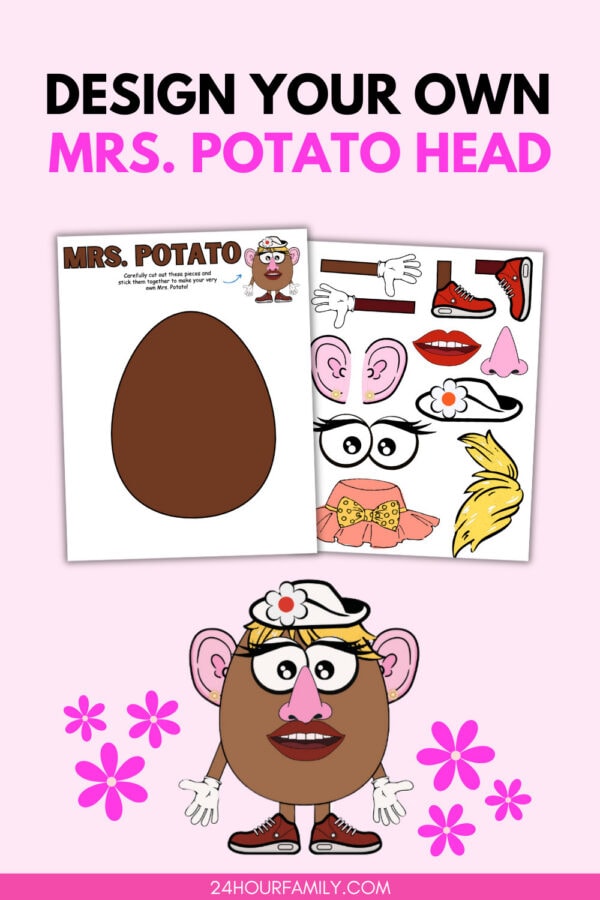
Children can cut out the eyes, ears, nose, lips, arms, shoes, hats, and hair before arranging everything on the large potato-shaped body. Fans of Mr. Potato Head, Mrs. Potato Head, and Toy Story will recognize the familiar look while moving the pieces into unexpected places.

Build Mrs. Potato Head Printable Craft
Everything is already colored, so it works well for a low-prep activity for young learners, kindergarten, a classroom center, a themed party, or a quiet afternoon at home.
Use glue to make a permanent version, or add reusable fasteners so children can rebuild the character again and again.
What Is Included in the Mrs. Potato Head Printable?
The PDF file is ready to download at the bottom of this blog post and includes easy-to-use digital files for quick setup.
Potato Body
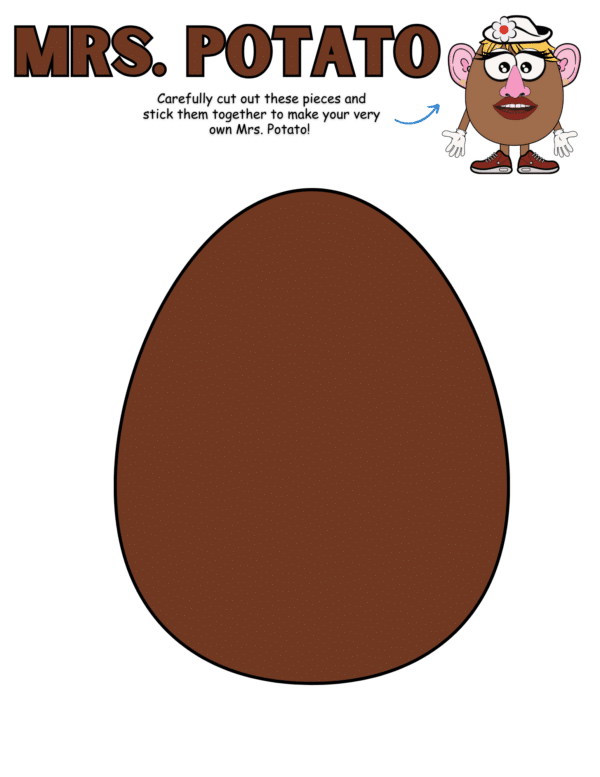
The first page contains:
- One large brown potato-shaped body
- A small completed Potato Head example
- Basic cutting and assembly directions
The blank body gives children plenty of room to decide where each facial feature and item should go.
Character Parts
The second page includes:
- Two long limbs
- Two white-gloved hands
- Two red shoes
- Two large eyes with eyelashes
- Two pink side features with earrings
- One pink facial feature
- One red mouth
- One white flower cap
- One pink cap with a yellow bow
- One yellow hairstyle
Children can use everything provided or leave some items off to create their own version.
Supplies Needed:
Gather these supplies before beginning:
- Printable template
- White cardstock or standard printer stock
- Child-safe scissors
- Adhesive stick
- Crayons or markers, optional
- Construction paper, optional
- Laminator and laminating pouches
- Hook-and-loop dots, reusable adhesive, or magnets, optional (or add magnets for a reusable version)
An adhesive stick is usually easier for young children to control than liquid adhesive and is less likely to wrinkle ordinary printer paper.
For a sturdier project, use white cardstock for the potato body and all of the parts.
How to Make the Mrs. Potato Head Craft
Print the Mrs. Potato Head Template
Download the two free printables in standard 8.5 × 11-inch format.
Make sure “Actual Size” or “100% Scale” is selected in the print settings. Check the preview before printing to make sure the body and parts are not cropped.
Use cardstock when the finished project will be displayed or handled frequently.
Cut Out the Potato Body
Cut around the large brown potato shape on the body template.
You can also leave the body attached to the full template if younger children will have difficulty cutting such a large curved shape. The remaining parts can still be attached directly onto it.
Cut Out the Parts
Carefully cut around each item on the second page.
Younger children may be able to cut the larger caps, side features, and shoes independently but need help with:
- The eyelashes
- Individual fingers on the gloves
- Curves around the facial feature
- The flower on the white cap
- The yellow hairstyle
- Smaller spaces around the shoes
Leaving a narrow white border around difficult items is perfectly fine. It makes them sturdier and reduces frustration.
Arrange Everything Before Attaching
Place the potato body on the table and arrange all the parts without adhesive.
Children can use the completed example as a guide or experiment with a silly arrangement while exploring their creativity.
A traditional arrangement might include:
- Eyes near the upper center of the body
- Side features on the left and right sides
- Facial feature below the eyes
- Mouth beneath the facial feature
- Hair behind or above the eyes
- Cap at the top
- Limbs extending from the sides
- Shoes along the bottom
Do not worry about making every character look identical. Rearranging the parts is part of the fun.
Choose a Cap and Hairstyle
The template includes two different caps and a yellow hairstyle.
Children might:
- Use the flower cap with the yellow hair
- Use the pink bow cap without hair
- Layer a cap over the hairstyle
- Leave both caps off
- Add their own crown or bow
- Use both caps for an intentionally silly character
Have children test the parts in several positions before deciding.
Attach the Face
Once the child likes the arrangement, attach the facial features to the potato body.
A helpful order is:
- Hair
- Eyes
- Side features
- Facial feature
- Mouth
- Cap
Putting the hair on first allows the eyes and cap to overlap it naturally.
Attach the Limbs
Place one limb on each side of the body.
The straight end of each limb should overlap the edge of the potato, while the gloved hand points outward.
Children can position them:
- Straight out
- Angled upward
- Pointing downward
- Waving
- Reaching toward the face
Attach the straight end behind the body when you want the connection to look cleaner. Attach it on top when simpler assembly is more important.
Attach the Shoes
Position one red shoe beneath each side of the body.
Let the brown section at the top of each shoe overlap the potato slightly. This makes the shoes appear connected to the character.
Check that the shoes face in opposite directions before attaching them.
Add Optional Details
Children can personalize the finished project with crayons, markers, stickers, or scraps.
They might add:
- Eyebrows
- Freckles
- A necklace
- A purse
- A bow
- A patterned dress
- Colorful fingernails
- A speech bubble
- A name
- A background scene
Allow the adhesive to dry completely before moving or displaying the project.



Make a Reusable Potato Head Version
Instead of attaching the parts permanently, turn it into a reusable preschool learning tool and interactive resource.
Laminate
Use cardstock for the potato body and parts.
Cut everything out, laminate them, and trim around each item again while leaving a small sealed border.
Add Hook-and-Loop Dots
Place small hook-and-loop dots on:
- The body where features may be attached
- The back of each item
Children can remove and replace the parts to make different faces.
Avoid using very small loose parts with children who still put objects in their mouths.
Use Reusable Adhesive
Poster putty or reusable adhesive dots are another option.
These work well when you want the parts to move but do not want visible hook-and-loop circles on the body.
Make a Magnetic Version
Attach adhesive magnets to the backs of the laminated parts.
Place the potato body on a magnetic whiteboard, cookie sheet, or refrigerator.
This creates a simple travel or quiet-time project, although adult supervision is needed around small magnets.
A reusable version is especially helpful for classroom centers because children can make multiple combinations without preparing another set each time.
Potato Head Five Senses Lesson
The template can help children practice naming basic facial and body parts.
Pair the activity with a five senses or 5 senses lesson by discussing which parts help people see, hear, smell, taste, and touch.
As they assemble the character, ask them to identify:
- Eyes
- Side features
- Facial feature
- Mouth
- Hair
- Limbs
- Hands
- Feet or shoes
Give simple directions such as:
- Put the facial feature below the eyes.
- Place one side feature on each side.
- Can you point to both hands?
- Put the shoes at the bottom.
- Place the cap above the eyes.
- Locate the mouth.
- Show me the left limb.
This introduces position words and basic body vocabulary while children work.
Position Words to Practice
Use the project to review words describing location.
Try directions such as:
- Put the eyes above the facial feature.
- Place the mouth below the facial feature.
- Put the side features beside the eyes.
- Attach the shoes under the body.
- Place the cap on top of the head.
- Put one limb on the left.
- Put the other limb on the right.
- Move the facial feature between the eyes and mouth.
After creating a traditional face, invite children to make a silly one by deliberately changing the positions.
For example:

- Put a side feature above the eyes.
- Place a shoe beside the mouth.
- Put the facial feature at the very top.
- Add both caps at once.
Children can explain what looks unusual and then restore the parts to their expected places.
Fine Motor Skills Practiced
This cut-and-paste project gives children practice with several small hand movements, including:
- Opening and closing scissors
- Following curved cutting lines
- Turning the sheet while cutting
- Picking up small parts
- Applying adhesive to limited areas
- Aligning facial features
- Pressing parts into place
- Coordinating both hands
The current post mentions fine motor development, but the rewrite should connect that benefit directly to what children are actually doing instead of repeating general claims.
Children develop these skills gradually, so the finished project does not need to look perfect.
Ways to Use the Template
Preschool Art Center
Place copies of the body and parts pages at a supervised art station.
Provide scissors, adhesive sticks, and extra cardstock so children can add their own items.
Body Parts Lesson
Use the template during a preschool or kindergarten lesson about facial features and body vocabulary.
Children can point to their own eyes, side features, facial features, and mouth before placing the matching parts on the potato.
Toy Story Party Project
Prepare one set for each child and place the parts in individual bags.
Preparing a complete set for every participant makes a group project easier to manage. One competing party tutorial specifically recommends sorting the cut parts into individual kits before the event.
Set out adhesive sticks and completed examples at the table.
Rainy-Day Project
Keep a few copies with your supplies for an easy indoor project.
Quiet-Time Project
Use a laminated version during quiet time, travel, waiting rooms, or independent play.
Classroom Bulletin Board
Display the finished characters together.
Possible bulletin board titles include:
- Our Spud-Tacular Class
- Meet Our Potato Pals
- Every Spud Is Different
- A Bunch of Silly Spuds
- We Are One of a Kind
- Potato’s Creative Crew
- Mix, Match, and Create
Add each child’s name beneath the corresponding character.
Party Game
Instead of assembling the character at a table, enlarge the parts and use them for a blindfolded placement game.
Children can take turns trying to place the eyes, facial features, mouth, or cap in the correct position.
Use removable tape rather than adhesive.
Turn It Into a Matching Potato Game
Prepare two copies of the parts page.
Cut out the parts and have children match identical items:
- Eye to eye
- Side feature to side feature
- Shoe to shoe
- Limb to limb
- Cap to cap
You can also sort the parts into categories:
- Facial features
- Clothing
- Body parts
- Pairs
- Items worn on the head
- Items worn on the feet
For younger children, place only a few parts on the table at a time.
Turn It Into a Listening Project
Give children one direction at a time.
Examples include:
- Find the pink facial feature.
- Place the eyes near the top.
- Put one side feature on each side.
- Choose one cap.
- Set the red shoes in place.
- Put the mouth below the facial feature.
- Make one limb wave.
This fun activity works well for practicing attention, following directions, and basic positional language.
Increase the challenge for older children by giving two-step directions:
- Put on the eyes, and then add the side features.
- Choose the flower cap and place the yellow hair underneath it.
- Attach both shoes before adding the limbs.
Make an Emotions Lesson
The included eyes and mouth create one expression, but children can draw additional mouths and eyebrows on scrap material.
Create faces that look:
- Happy
- Sad
- Surprised
- Worried
- Excited
- Sleepy
- Angry
- Silly
Ask:
- What makes the face look happy?
- How would the eyebrows change when someone is worried?
- What might make the character feel excited?
- How can we tell how someone feels by looking at a face?
This turns the template into a simple visual social-emotional lesson without changing the original design.
Create a Character Wardrobe
Encourage children to design additional items from construction paper.
They can make:
- Sunglasses
- A crown
- A winter cap
- A chef’s cap
- A party cap
- A scarf
- A handbag
- Boots
- Sandals
- A necklace
- A superhero cape
- A birthday crown
Place the new items in an envelope or storage bag with the original set.
Make a Story About this Craft
After assembling the character, invite children to name it and inspire their imagination with a short story.
Possible prompts include:
- Mrs. Potato is getting ready to…
- Today Mrs. Potato wore her flower cap because…
- Mrs. Potato lost one of her shoes when…
- Mrs. Potato’s favorite place to visit is…
- She packed her suitcase with…
- Mrs. Potato looked surprised because…
- Her funniest item is…
- Mrs. Potato met another potato who…
Preschoolers can dictate their stories while an adult writes. Older children can write several sentences independently.
Mrs. Potato Head for Different Ages
Toddlers
An adult should cut out the parts in advance.
Kiddos can:
- Choose an item
- Point to body parts
- Place large parts
- Match pairs
- Help press parts into place
- Create a reusable arrangement with close supervision
Avoid giving toddlers loose magnets, small reusable fasteners, or tiny items.
Preschool
Preschoolers can cut some of the larger parts and arrange the character independently.
They may need help with the eyelashes, fingers, hair, and detailed caps.
Kindergarten and First Grade
Children can complete most of the cutting and assembly on their own.
Add body-part labels, position words, or a simple writing prompt.
Older Elementary Children
Older children can:
- Design new items
- Create an outfit collection
- Write a story
- Make an emotions set
- Turn the project into a game for younger students
- Use fasteners to make movable limbs
Tips for Cutting the Printables
Cut Large Parts First
Begin with the potato body and caps. Save the detailed parts for later.
Turn the Sheet
Instead of twisting the scissors around every curve, encourage children to turn the sheet with their helper hand.
Leave a White Border
There is no need to cut directly against every black line. A thin white border is easier and often creates a neater result.
Prepare Difficult Areas Ahead of Time
An adult can cut around the fingers, eyelashes, and hair before giving the remaining parts to a younger child.
Use Child-Sized Scissors
Scissors designed for small hands are easier to control than full-sized household scissors.
Tips for Attaching the Parts
Arrange Everything First
Do not begin attaching anything until the child has tried the full arrangement.
Use Small Amounts of Adhesive
A thin layer is enough. Excess adhesive can wrinkle the sheet and seep around the edges.
Attach Background Parts First
Attach the hair before the eyes and a cap after the hair.
Mount the Body on Construction Paper
Attach the potato body to a larger construction paper before adding the remaining parts.
This gives the limbs, shoes, and caps more room and creates a sturdier finished project.
Let Everything Dry Flat
Leave the project on the table until the adhesive is completely dry.


Colored Background Ideas
Mount the completed character on:
- Pink paper
- Yellow paper
- Blue paper
- Patterned scrapbook paper
- A garden scene
- A classroom scene
- A toy-room background
- A party background
- A kitchen scene
- A drawn bedroom
Children can add furniture, toys, flowers, or speech bubbles around the character.
More Printable Activities to Explore
If you enjoyed this Build Mrs. Potato Head Printable Craft, here are a few more fun printables and cut-and-paste activities that encourage creativity, imaginative play, and hands-on learning.
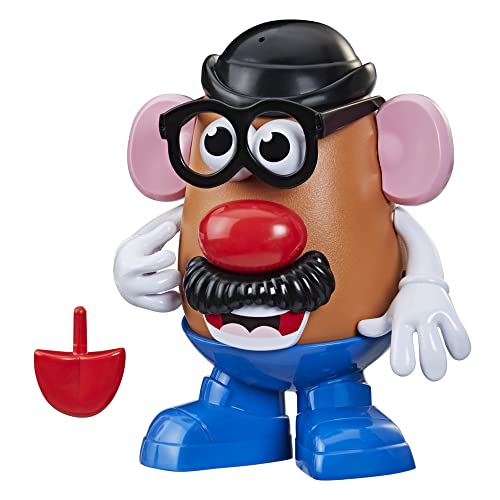
Build Mr. Potato Head Printable Craft – Pair this activity with the matching Mr. Potato Head printable for even more mix-and-match fun.
Blank Face Template – Design different facial expressions while exploring emotions and creativity with these printable face templates.
Rapunzel Paper Doll – Dress up and play with a printable paper doll inspired by the classic fairy tale character.
3D Minecraft Paper Dolls – Fold and assemble Minecraft-inspired paper dolls for a fun hands-on activity.
Body Parts Flashcards Printable – Help kids learn body part vocabulary with colorful and easy-to-use printable flashcards.
Number Insect Crafts 0 to 9 – Practice number recognition while making adorable insect-themed crafts.
Build a Plant Cell Cut and Paste Worksheets – Learn about the parts of a plant cell with an interactive cut-and-paste science activity.
What does the template include?
The template includes a large brown potato body and a separate sheet with eyes, side features, a facial feature, lips, limbs, gloves, shoes, two caps, and yellow hair.
Is it already colored?
Yes. Both the body and all of the parts are provided in color.
What material should I use?
Ordinary white printer paper works for a one-time cut-and-paste project. White cardstock is better for durability.
What ages is this Mrs Potato Head craft best for?
It works especially well for preschool through early elementary children.
Toddlers can participate when an adult cuts out the parts and supervises closely.
Should children use every item?
No. They can choose one cap, use the hairstyle alone, combine different items, or leave some off.
Can children move the parts after assembling the character?
Yes. Laminate the template and attach the parts with hook-and-loop dots, reusable adhesive, or another removable option.
Can I use this potato craft to teach body parts?
Yes. It includes eyes, side features, a facial feature, a mouth, limbs, hands, hair, and shoes. It also pairs well with a worksheet about body parts or the five senses.
Can I prepare several copies for a classroom or party?
Yes, according to the usage terms that accompany your template.
For group use, prepare one body and one complete set of parts for each child. Sorting each set into a bag or envelope before the lesson can save considerable time.
Can children add their own items?
Yes. They can make clothing, jewelry, glasses, crowns, bows, seasonal caps, or another accessory.
Can this be used as a party game?
Yes. Enlarge the body and parts and turn it into a removable placement game instead of attaching everything permanently.
Is this an official Potato Head product?
No. This is an independently created fan-inspired template and is not sponsored, licensed, or endorsed by the applicable trademark owners.
Download the two-sheet template
Children can cut out the colorful parts, arrange them on the large potato body, and attach everything in place. They can copy the completed example or invent a silly character of their own.
Use the finished project for early learning, body-part vocabulary, five senses lessons, position words, classroom displays, party games, storytelling, or reusable mix-and-match play.
Mrs. Potato Head Printable Craft
Cut out colorful facial features, arms, shoes, hats, and hair, then arrange them on the large potato body to build a unique Mrs. Potato character.
Materials
- Mrs. Potato Head printable
- White paper or cardstock
- Glue stick
- Construction paper, optional
- Crayons or markers, optional
Tools
- Child-safe scissors
Instructions
- Download and print both pages of the template.
- Cut around the large brown potato body.
- Cut out the eyes, ears, nose, lips, arms, shoes, hats, and hair.
- Arrange the pieces on the body before using glue.
- Place the hair near the top of the potato.
- Add the eyes, ears, nose, and mouth.
- Choose a hat and position it over the hair.
- Attach one arm to each side of the body.
- Add one shoe beneath each side of the potato.
- Glue all the pieces into place.
- Add optional decorations or a paper background.
- Allow the craft to dry flat before displaying it.
Notes
- Print on cardstock for a sturdier project.
- Younger children may need help cutting the eyelashes, fingers, hair, and flower hat.
- Leave a narrow white border around detailed pieces to make cutting easier.
- Laminate the body and parts and use removable fasteners to make the activity reusable.
- Arrange every piece before gluing.
