Disguise a Turkey as Harry Potter Craft: Free Printable

Sharing is caring!

This little turkey has found a magical way to avoid becoming Thanksgiving dinner: he is heading to wizard school.

The Disguise a Turkey as Harry Potter printable craft includes all the pieces children need to transform an ordinary turkey into a clever young wizard. With round glasses, a striped scarf, a black robe, and dark tail feathers, the finished turkey will look ready for a day of spells and adventures.

Harry Potter Turkey Disguise craft printable with colored and black-and-white turkey templates

Download either the pre-colored template for a quick cut-and-paste activity or the black-and-white version that children can decorate themselves.

This Thanksgiving printable works well for elementary school turkey disguise assignments, classroom art centers, homeschool activities, and creative family projects.

Adult help may be needed when younger children cut around the smaller pieces.

Table of Contents

Understanding the Disguise a Turkey Project?

A disguise-a-turkey project challenges children to hide a turkey by transforming it into another person, animal, object, or character.

The idea is often paired with Thanksgiving reading and writing activities. Children imagine that the turkey does not want to become dinner, so they create a disguise that will help it escape unnoticed.

Popular turkey disguises include:

  • Superheroes
  • Princesses
  • Firefighters
  • Astronauts
  • Pirates
  • Animals
  • Favorite book characters
  • Movie-inspired characters

Turkey disguise activities are commonly used to encourage creativity, imaginative thinking, and fine motor practice. Many printable versions provide a plain turkey and interchangeable outfit pieces that children can decorate, cut, and arrange.

This printable simplifies the planning by giving children a complete wizard-themed outfit while leaving room for their own decorative details.

What Is Included in the Harry Potter Turkey Printable?

The printable is available in two versions.

Pre-Colored Turkey Disguise Template

The colored template includes:

  • A large black feather fan
  • A completed turkey body
  • A black wizard-style robe
  • A red-and-gold striped scarf
  • Round black glasses
  • Black shoes
  • Additional black outfit pieces
  • A small picture showing the completed project

This version is ideal when you need a simple activity that can be assembled quickly.

Black-and-White Turkey Disguise Template

The black-and-white page contains the same pieces in outline form.

Children can color the:

  • Feathers
  • Turkey body
  • Scarf
  • Robe
  • Shoes
  • Glasses
  • Additional outfit pieces

The black-and-white printable gives each child more freedom to personalize the turkey. They can use traditional wizard-inspired shades or invent a completely different combination.

Supplies Needed:

Gather the following materials before beginning:

  • Harry Potter turkey disguise printable
  • White printer paper or cardstock
  • Crayons, colored pencils, or markers
  • Child-safe scissors
  • Glue stick or school glue
  • Black marker, optional
  • Pencil, optional
  • Glitter glue, sequins, or stickers, optional

Cardstock makes the finished turkey sturdier, particularly when it will be displayed on a classroom wall or bulletin board. Regular printer paper also works and is easier for young children to cut.

Colored Harry Potter turkey disguise template with glasses, scarf, and black feathers

How to Make the Harry Potter Turkey Disguise

Print the Template

Download the printable and choose between the colored and black-and-white pages.

Print the selected page at full size on standard 8.5-by-11-inch paper. Check the print preview before printing to make sure none of the pieces are cropped.

Children who want to create their own design should use the black-and-white page.

Decorate the Pieces

Skip this step when using the pre-colored printable.

Decorate all the pieces before cutting them apart. It is usually easier for children to work on the pieces while they are still attached to the full sheet.

The scarf can be finished with alternating stripes. Children can use red and gold for a familiar wizard-school look or choose shades representing an imaginary house of their own.

They can also decorate the feathers in one solid shade or give each feather a different pattern.

Cut Out the Printable Pieces

Cut around each piece using the dashed cutting lines as a guide.

The printable includes several large pieces and a few smaller parts. Young children may be able to cut out the feather fan and turkey body independently but need help with:

  • The glasses
  • The shoes
  • Narrow costume pieces
  • Curved areas around the turkey’s feet
  • Small spaces around the scarf

Place each piece in a small pile after cutting so none of the accessories are misplaced.

Place the Feather Fan First

Lay the large feather fan flat on the work surface.

This piece forms the back layer of the craft. Position it with the widest part of the feathers facing upward.

Do not glue anything yet. Arrange all the pieces first so you can confirm their placement.

Add the Turkey Body

Place the completed turkey body over the lower center of the feather fan.

The body should cover the open center at the bottom of the tail while leaving most of the black feathers visible behind it.

Once the placement looks correct, glue the body to the feather fan.

Attach the Glasses

Position the round glasses over the turkey’s eyes.

The bridge of the glasses should sit between the eyes, with one circle surrounding each eye. Apply glue carefully so the glasses do not shift or cover the pupils.

For additional character detail, children can use a black marker to draw a small lightning-shaped mark above one eyebrow.

Attach the Shoes

Glue one black shoe over each foot.

The orange toes may remain slightly visible depending on how the shoes are positioned. Children can adjust them before gluing to create the look they prefer.

Add the Remaining Costume Pieces

Attach the extra black pieces around the turkey as shown in the small completed example printed on the page.

These pieces help complete the wizard disguise and cover portions of the original turkey outline. Arrange them before applying glue so the pieces do not overlap the face, scarf, or feet incorrectly.

Allow the Craft to Dry

Place the completed turkey on a flat surface and allow the glue to dry fully.

When using liquid school glue, avoid picking up the project too soon. The weight of the large tail can cause pieces to slide before the glue sets.

Black-and-white Harry Potter turkey disguise template with scarf, glasses, and feathers

Ways Children Can Personalize the Turkey

The supplied pieces create the basic costume, but children can add their own imaginative details.

They might:

  • Draw a lightning-shaped mark above the eyebrow
  • Make a paper wand
  • Add stars and sparkles to the feathers
  • Draw a magical school crest on the robe
  • Add a paper book of spells
  • Make a tiny broom from paper or a craft stick
  • Decorate the scarf with different shades
  • Write a wizard name beneath the turkey
  • Glue the turkey onto construction paper
  • Create a nighttime castle background

For a dimensional project, use small pieces of yarn for the scarf fringe or add a craft-stick wand beside the turkey.

Make a Paper Wand for the Turkey

A simple wand makes the wizard disguise even more recognizable.

Cut a narrow strip of brown or black construction paper. Roll it tightly or leave it flat, then glue it near one of the turkey’s wings.

Children can decorate the end with:

  • A paper star
  • Glitter glue
  • Metallic marker
  • A small piece of aluminum foil
  • A drawn magical spark

Keep the wand lightweight so it does not pull the paper turkey forward when the craft is displayed.

Turn the Project Into a Writing Activity

After completing the turkey, invite children to explain how the disguise will keep it safe.

Possible writing prompts include:

  • My turkey became a wizard because…
  • The spell my turkey used was…
  • My turkey escaped Thanksgiving dinner by…
  • When the farmer saw my turkey, he thought…
  • My turkey’s magical name is…
  • The turkey’s first day at wizard school was…
  • The best part of my turkey’s disguise is…
  • My turkey hid inside the castle because…

Younger children can dictate their answers while an adult writes. Older elementary students can turn one prompt into a complete story with a beginning, middle, and ending.

Create a Turkey Disguise Story

Children can use the finished turkey as the main character in an original Thanksgiving story.

Encourage them to include:

  1. A problem: The turkey realizes Thanksgiving is approaching.
  2. A plan: The turkey decides to dress as a wizard.
  3. An obstacle: Someone begins to recognize the turkey.
  4. A magical solution: The turkey uses a silly spell or clever trick.
  5. A conclusion: The turkey safely escapes and celebrates Thanksgiving elsewhere.

This adds literacy practice to the activity while allowing children to explain the reasoning behind their disguise.

Colored Harry Potter turkey disguise template with glasses, scarf, and black feathers

Classroom Ideas for This Printable

Thanksgiving Art Center

Place printed templates, crayons, scissors, and glue at an independent art station.

The pre-colored page works well for younger students or limited class time. The black-and-white version gives students a more open-ended art activity.

Turkey Disguise Bulletin Board

Display the completed projects together on a classroom bulletin board.

Possible bulletin board titles include:

  • These Turkeys Are Under a Spell
  • A Magical Thanksgiving
  • Can You Find the Turkeys?
  • Our Turkeys Have Disappeared
  • Wizard Turkeys in Training
  • No Turkeys Here!
  • The Great Turkey Escape

Add each child’s writing response beneath the corresponding turkey.

Compare Different Disguises

Invite children to compare the wizard turkey with other turkey disguises.

Ask:

  • Which disguise would be most difficult to recognize?
  • What details make each costume convincing?
  • Which disguise would work best on a farm?
  • What could be added to improve each one?
  • Which turkey has the most creative escape plan?

This encourages children to explain their ideas rather than simply identifying their favorite design.

Classroom Turkey Gallery

Hang the completed turkeys around the room and allow students to take a “gallery walk.”

Each student can leave a positive comment about another child’s project. This creates a simple opportunity to practice thoughtful feedback and descriptive language.

Black-and-white Harry Potter turkey disguise template with scarf, glasses, and feathers

Fine Motor Skills Practiced With This Activity

Cutting and assembling the turkey allows children to practice several fine motor movements.

These include:

  • Holding and controlling scissors
  • Cutting along curved lines
  • Rotating paper while cutting
  • Applying glue to small areas
  • Aligning the glasses with the eyes
  • Positioning accessories
  • Decorating within defined spaces
  • Pressing pieces firmly into place

Turkey in disguise projects are popular partly because they combine imaginative play with hands-on cutting, decorating, and arranging.

The smaller glasses and shoe pieces may be challenging for preschoolers, so the activity is especially appropriate for kindergarten and elementary-aged children with adult assistance as needed.

Tips for Making the Craft Easier

Decorate Before Cutting

Working on the full sheet is easier than trying to hold each small cutout while decorating it.

Use a Glue Stick

A glue stick creates less moisture than liquid glue and helps prevent standard printer paper from wrinkling.

Cut the Large Pieces First

Start with the feather fan and body. Save the glasses and other small accessories until last.

Arrange Before Gluing

Place every piece on the turkey before attaching anything. This prevents an early piece from blocking the correct position of another.

Use Cardstock for Display

Cardstock helps the large feather fan remain flat when the craft is hung vertically.

Reinforce Regular Paper

When printing on ordinary paper, glue the finished turkey to construction paper or lightweight cardstock for added support.

Keep a Completed Example Visible

The small finished image on the printable shows how the pieces fit together. Leave it visible while assembling the craft rather than cutting it away immediately.

Should You Use the Pre-Colored or Black-and-White Version?

Choose the pre-colored version when:

  • You need a quick classroom activity
  • Children have limited decorating time
  • You are working with a large group
  • You want consistent results for a display
  • The child prefers cutting and gluing

Choose the black-and-white version when:

  • Children want to choose their own shades
  • You want a longer art activity
  • Creativity and personalization are priorities
  • Students are inventing their own wizard houses
  • You want to incorporate pattern and shade lessons

Both pages create the same basic craft, so children can also combine pieces from the two versions.

How to Use the Printable for a School Assignment

Some teachers send home a plain turkey and ask families to create a disguise using materials they already have.

This printable can serve as inspiration or provide ready-made pieces for that assignment.

Before beginning, check the teacher’s directions to determine:

  • Whether printed outfit pieces are allowed
  • Whether the child must use the original turkey page
  • Whether the project should remain flat
  • Whether three-dimensional materials may be added
  • Whether a written explanation is required
  • When the project is due

When the teacher provides a separate turkey template, cut out the outfit elements from this printable and arrange them over the assigned turkey. Resize the page in the printer settings when necessary.

More Materials to Add to the Project

Children can combine the printable with craft supplies from around the house.

Try adding:

  • Construction paper
  • Yarn
  • Felt scraps
  • Craft foam
  • Googly eyes
  • Sequins
  • Aluminum foil
  • Washi tape
  • Glitter glue
  • Star stickers
  • Tissue paper
  • Metallic markers
  • Scrapbook paper
  • Craft sticks

Use lightweight materials so the finished project remains easy to hang and display.

Printable sheet showing both colored and black-and-white Harry Potter turkey disguise templates

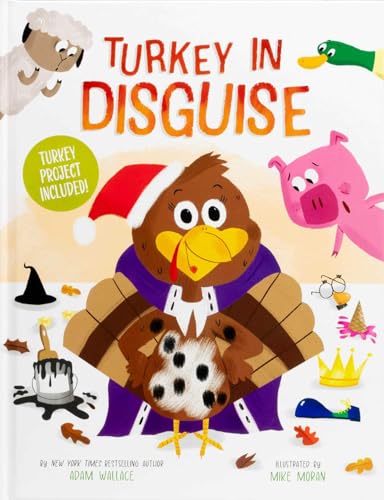
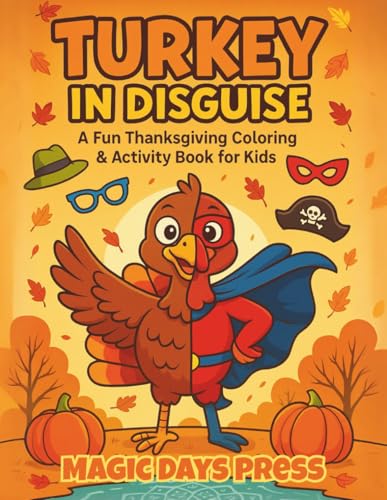
More Turkey Disguise Ideas to Make

If you had fun disguising your turkey as Harry Potter, here are more creative turkey disguise printables that are perfect for Thanksgiving fun at home or in the classroom.

Download the printable and choose the colored or black-and-white design.

Children can decorate the pieces, cut along the dashed lines, and layer the wizard outfit over the large feather fan. Once the glasses, robe, shoes, and wizard details are in place, the turkey will be ready to blend in with a classroom full of young spell-casters.

Is the Harry Potter turkey disguise printable free?

Yes. The printable can be downloaded and printed for personal, classroom, or homeschool use according to the usage terms provided with the download.

What ages is this turkey craft best for?

The activity is best suited to kindergarten and elementary-aged children. Preschoolers can participate with help cutting the smaller accessories.

Does the printable come in a pre-colored version?

Yes. The download includes a pre-colored version and a black-and-white version children can decorate themselves.

What paper should I use?

Standard printer paper works for a basic cut-and-paste activity. White cardstock is more durable and is the better choice for classroom displays.

Can children change the shades?

Absolutely. The black-and-white template allows children to choose any combination they like.

Where does the turkey body go?

The large feather fan forms the back layer. The completed turkey body is centered over the lower portion of the feathers.

Where should the glasses be attached?

Position the round glasses directly over the eyes, with the bridge centered between them.

Can the printable be used with a teacher-provided turkey?

Yes. Print and cut out the outfit pieces, then arrange them over the school’s turkey template. You may need to reduce or enlarge the printable in your printer settings.

Can children add their own details?

Yes. A paper wand, magical book, broom, castle background, or original school crest can make each project unique.

Can this be used as a coloring page?

The black-and-white version can be decorated before it is cut apart. Children can also leave the sheet intact and decorate it as a full activity page.

How can I stop the feathers from bending?

Print on cardstock or glue the completed craft to a larger sheet of construction paper.

Is this an official Harry Potter product?

No. This is an independently created fan-inspired educational craft and is not affiliated with or endorsed by the owners of the Harry Potter trademarks.

Whether this is used for a school assignment, Thanksgiving art center, homeschool lesson, or family craft afternoon, the printable turns the traditional turkey disguise project into an imaginative cut-and-paste activity children can make their own.

Harry Potter Turkey Disguise Craft

Harry Potter Turkey Disguise Craft

Yield: 1 Turkey
Prep Time: 5 minutes
Active Time: 20 minutes
Total Time: 25 minutes
Difficulty: Easy
Estimated Cost: $1.00

Transform a Thanksgiving turkey into a clever young wizard with this printable cut-and-paste craft. Choose the pre-colored version or let children decorate the black-and-white template.

No Ratings

Materials

  • Harry Potter turkey disguise printable
  • White paper or cardstock
  • Crayons, markers, or colored pencils
  • Child-safe scissors
  • Glue stick
  • Black marker, optional
  • Decorative craft supplies, optional

Instructions

  1. Download and print the colored or black-and-white turkey disguise template.
  2. Color the black-and-white pieces before cutting.
  3. Cut around each piece along the dashed outlines.
  4. Place the large feather fan flat to form the turkey's back.
  5. Center and glue the turkey body over the lower part of the feathers.
  6. Position the round glasses over the turkey’s eyes and glue them in place.
  7. Attach one black shoe over each foot.
  8. Arrange and glue the remaining costume pieces using the completed picture as a guide.
  9. Add optional details such as a lightning-shaped mark, paper wand, stars, or magical background.
  10. Allow the glue to dry completely before displaying the craft.

Notes

  • Cardstock creates a sturdier project for bulletin-board displays.
  • Younger children may need help cutting out the glasses and smaller accessories.
  • Arrange all the pieces before gluing.
  • Children can add a writing response explaining how the magical disguise helped the turkey escape.

Sharing is caring!

Leave a Reply

Your email address will not be published. Required fields are marked *