
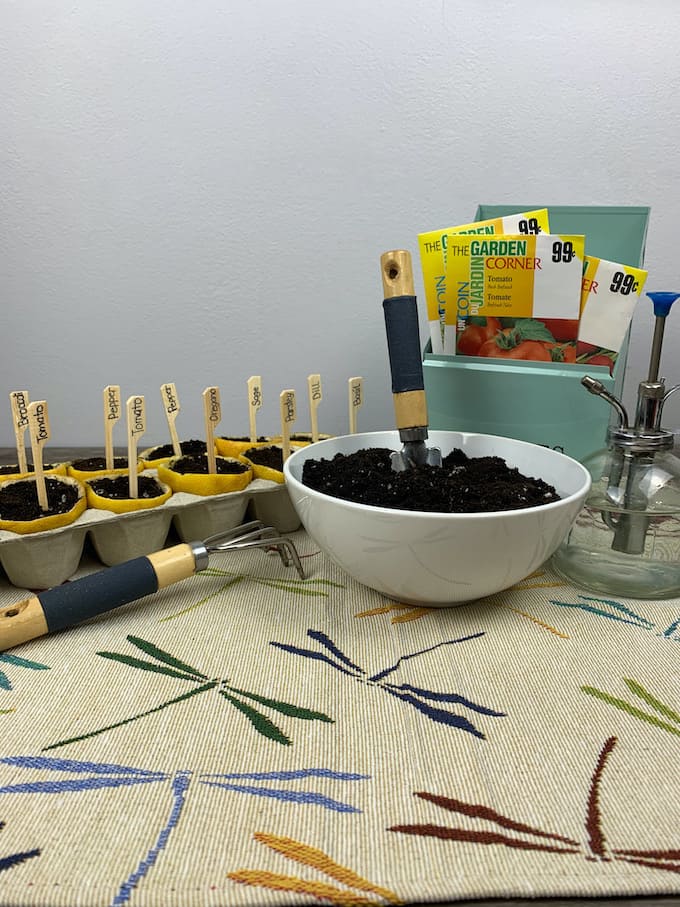
Make a Simple Garden Kit this Spring with your Kids
Looking for a hands-on way to get kids off screens and into nature—without even leaving the kitchen? Say hello to the DIY garden kit for kids that’s fun, eco-friendly, and smells like lemons (literally!). This isn’t your average craft kit for kids—it’s part diy, part science, part art and crafts, and 100% a good time.
This example of a Do-it-yourself gardening pack is easy to do at home. This Do-it-yourself gardening collection starts the plant in used lemon peels. Check out more fun summer craft ideas here.
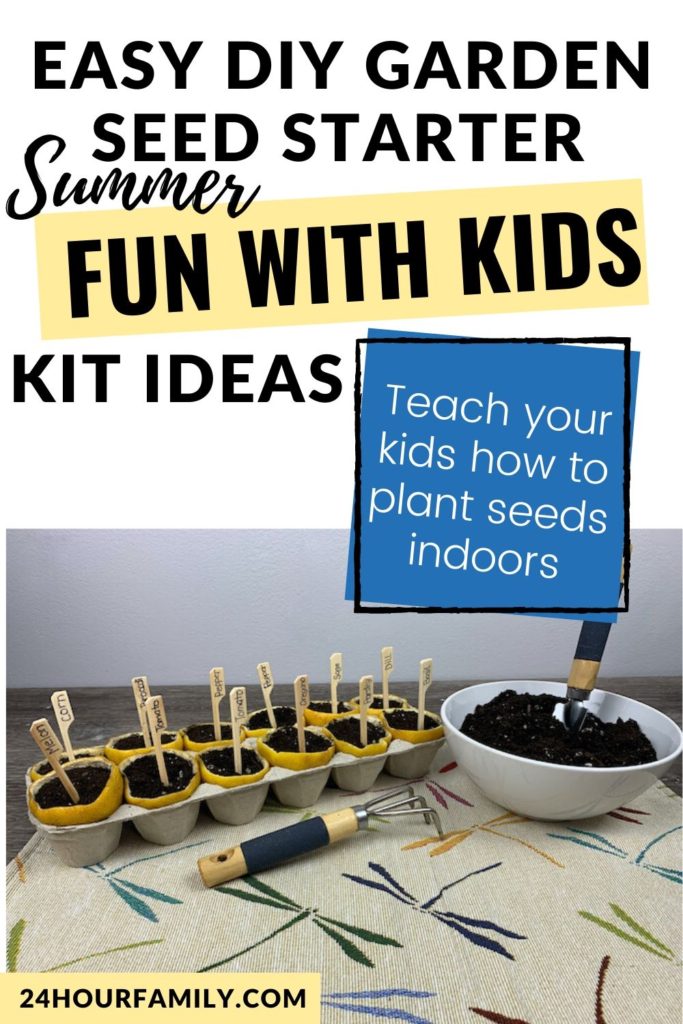
Teaching kids the easy skill of starting vegetable or herb plants indoors will bring out their excitement as they nurture the plants and watch them grow.
This DIY Gardening kit for kids is an easy way to get a head start on growing plants this summer.
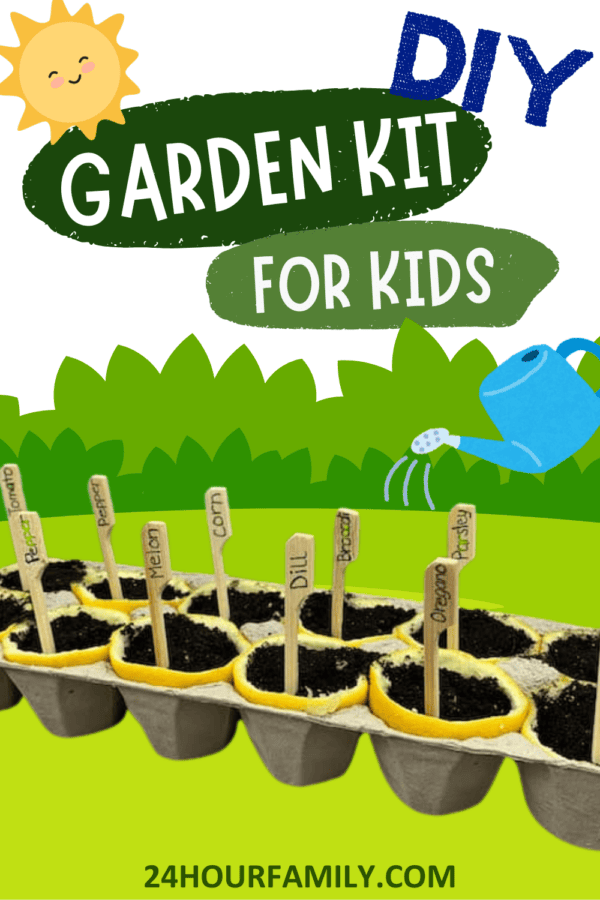
DIY Gardening Kit For Kids
If you’ve got curious kids and a few spare lemons, you’ve already got the start of a citrus-powered garden. Whether you’re looking for gifts for kids, a fun activity for a rainy day, or an eco-friendly weekend project, this one will grow on you.
This post may contain affiliate links. As an Amazon Associate and a participant in other affiliate programs, I earn a commission on qualifying purchases. Read our disclosure policy here.
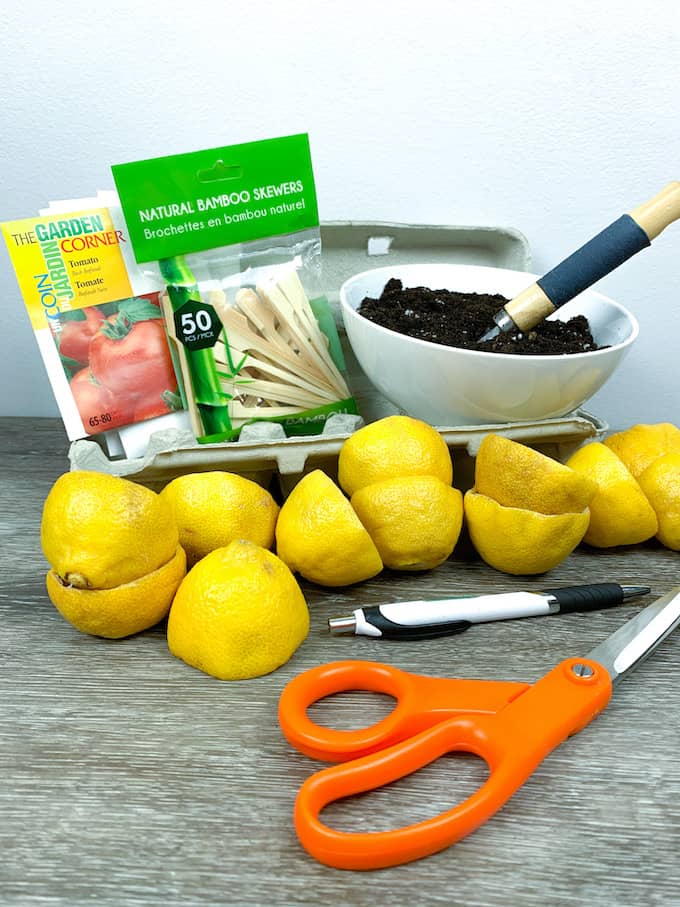
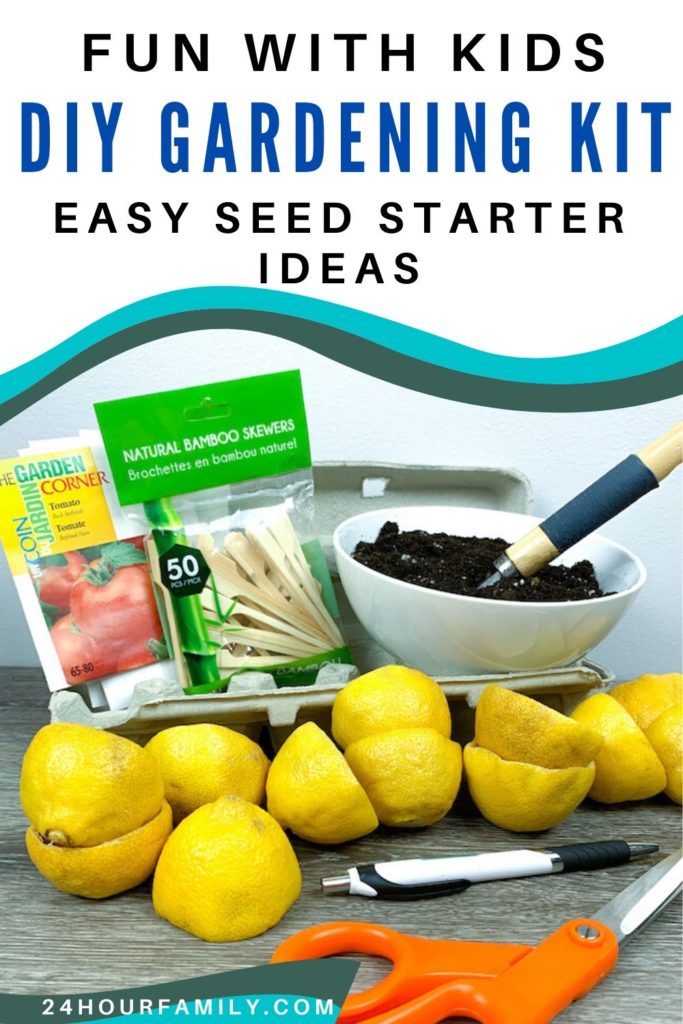
Materials:
- 1 Large Egg carton
- Potting Soil
- 12 half lemon rinds
- Mini bamboo Sticks
- Tomato Seeds or herbs like Oregano
- Marker
Tools:
- Mini Shovel/Spoon
- Scissors
Starting seeds indoors in lemon peels allows transplanting the seeds to the ground in a compostable lemon peel rind. This is a fun way to get the kids involved in spring gardening.
This DIY kit is perfect for boys and girls, and is easy enough for kids aged 4-8 to join in, with a bit of help. It mixes arts and crafts for kids, plant care, and a touch of magic.
DIY Lemon Seed Starter: Step-by-Step Instructions
This isn’t just a garden kit—it’s a full-blown fun project for your little gardener to make a flower-growing kit using lemon peels. Here’s how to bring it all to life:


DIY starter garden tools can be a great way to introduce kids to the joys of gardening. They provide an educational activity that the whole family can enjoy. Whether you have a green thumb or are a beginner, these tools make it easy to start and create a thriving garden.
Easy DIY Gardening Lemon Seed Starter Kit
Step 1: Collect Your Rinds
Throughout the week, save lemon halves from cooking or juicing. Keep them submerged in water in the fridge to keep them fresh and prevent them from drying out. Lime and orange rinds also work—great for variety and color!
It’s the start of your garden, and the kids will love being in charge of collecting the rinds. It’s a small way to involve them in something big.
Step 2: Prep Your Egg Carton
Use scissors to cut the top and closing flaps off the egg carton. You’ll be left with only the bottom part—the section that holds the eggs. Your compostable tray will hold each plant-growing kit in place.
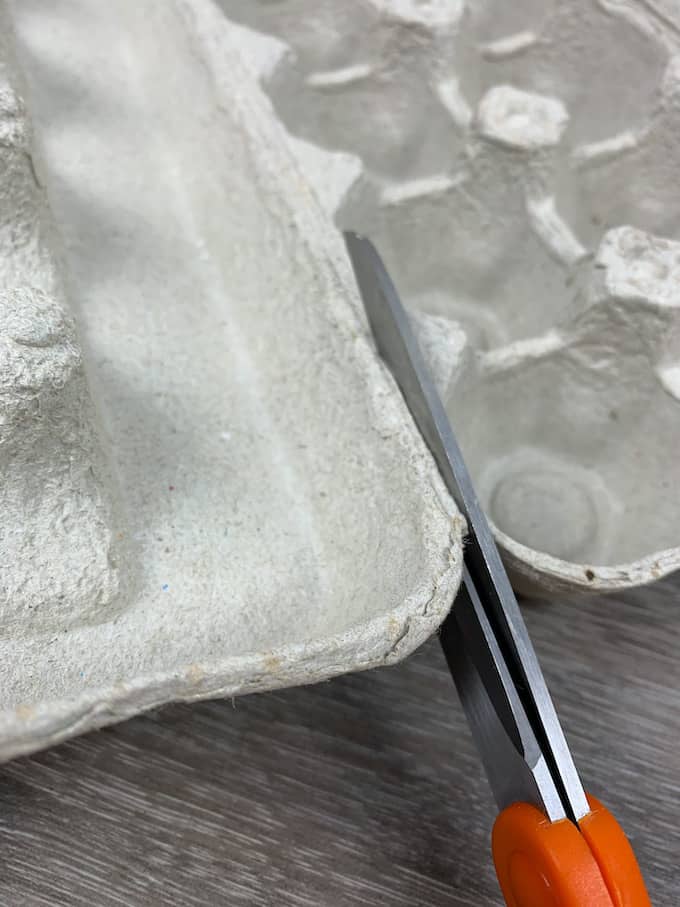
This egg carton method is eco-friendly, neat, and fits right on the windowsill—perfect for indoor seed starting!
Step 3: Insert the Lemon Rinds
Place one half-rind into each egg cell. They should sit snugly, almost like they were made for it. The rind acts as a biodegradable pot that you can plant directly into your garden beds when your seedlings are ready.

This part feels like an arts and crafts kit magic—it’s nature’s own grow pot!
Step 4: Add Soil
Use a mini shovel or spoon to scoop potting soil into each rind. Kids love this part—it’s messy in the best way. Fill each rind to about three-quarters full.
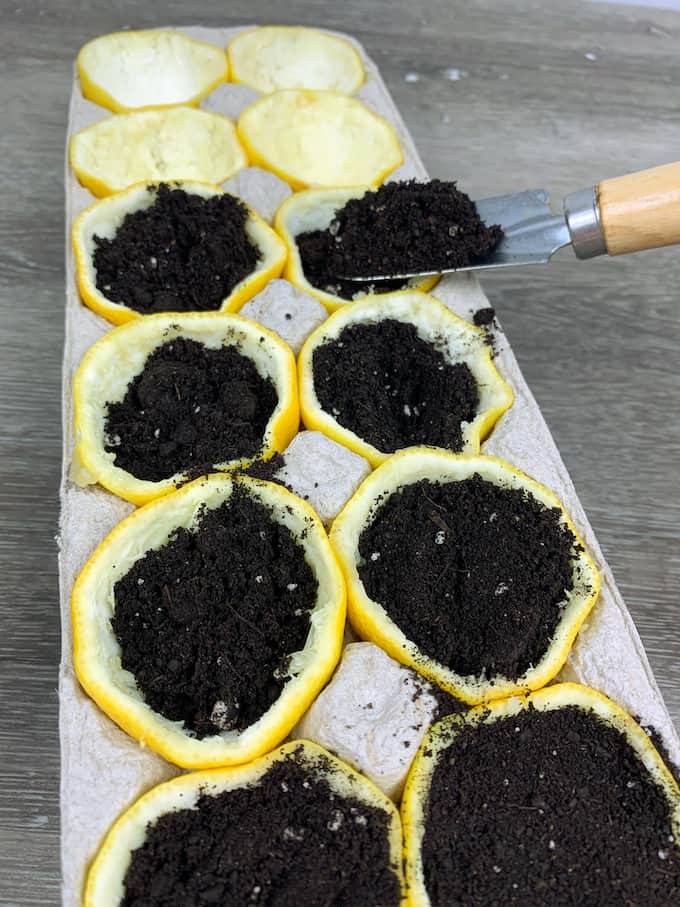
Want to level up your gardener vocabulary moment? Talk about how peat helps retain moisture and support healthy roots!
Step 5: Make Your Plant Markers
Use mini bamboo sticks as plant markers. Name each plant you’re growing with a marker or pen. For a personal touch, you can even turn this into a DIY art moment by decorating the sticks with doodles, stickers, or glitter.
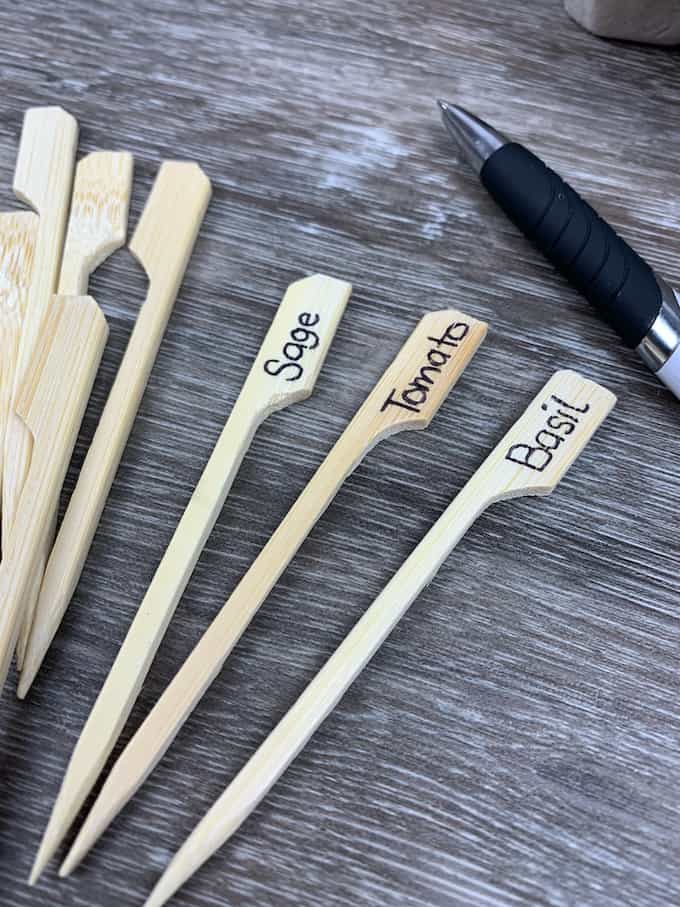
Markers organize things and turn your little ones into official garden scientists (lab coats optional).
Step 6: Plant the Seeds
Now it’s time to plant! Sprinkle in your seeds—think herbs like basil, dill, or mint, or go bold with red cherry tomatoes or zinnia flowers. Cover the seeds with a little more soil and water gently.
This part feels like a science kit moment mixed with a flower-growing kit. It’s hands-on, educational, and rewarding!
Step 7: Insert the Markers
Once your seeds are planted, stick your labeled bamboo markers into the soil. This keeps everything neat and lets the kids see what’s growing. Spoiler: This step also makes everything look adorable and practical like a mini farm display.
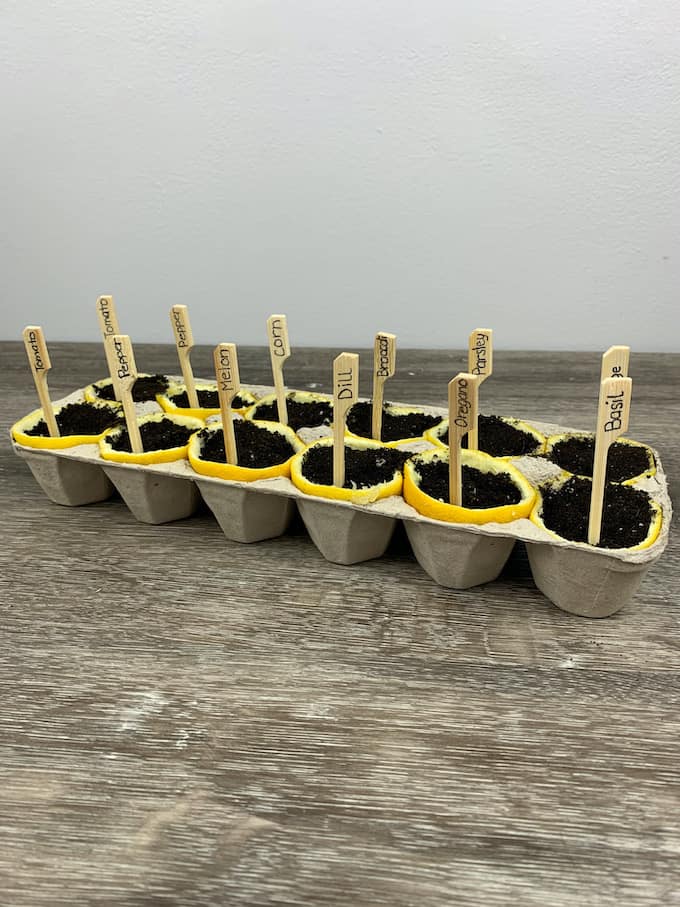
You’ve officially created your diy garden kit—no store-bought terrarium kit required!
Step 8: Place Near Light
Set your seedling tray near a bright window so the plants can soak up natural light. If you’re working with older kids (8, 9, 10, 11, 12), you can even discuss setting up a simple indoor grow station.
Your kids are now real-deal gardeners.
Teaching kids the easy skill of starting vegetable or herb seeds indoors will bring out their excitement as they nurture the seeds and watch the plants grow from them. This Gardening kit for kids is an easy way to get a head start on growing plants this summer.
When the Time Comes: Move It Outdoors!
Once your seedlings are vigorous and the weather’s warm enough, it’s time to transplant. Here’s the best part: no need to remove the lemon rind. Just plant the entire thing into your vegetable garden or outdoor planter. The rind will naturally break down and enrich the soil—win-win!
Talk about an eco-friendly plant kit moment. Compostable? Check. Simple? Double check.

Why This Project Rocks:
This isn’t just a garden kit for kids—it’s a game-changer. You’re not just planting seeds—you’re planting curiosity, responsibility, and confidence.
Here’s what kids get out of it:
- A sense of ownership (“I grew that!”).
- A tactile lesson in nature and growth.
- Daily excitement watching something guaranteed to grow.
- Experience with real gardening tools.
- A love for growing plants and flowers.
- A connection to where food comes from.
And for parents? It’s an awesome screen-free fun activity, an excellent gift for boys or girls, and a perfect idea for a birthday present.
Use It For…
This project makes a great:
- Gift for kids ages four and up
- Mother’s Day project with grandma
- Classroom or scout troop arts and crafts kit
- Unique terrarium kit for kids alternative
- Entry-level flower growing kit
- Homemade building kit for beginner gardeners
You can even prep a few as craft gifts for kids or add them to a party favor table at your next kid’s birthday celebration. A bonus is including extra seed packets or a tiny suncatcher to decorate the garden space.
This garden kit proves that gardening doesn’t have to be complicated, expensive, or messy (okay, a little dirty is fun). With some lemons, a carton, and a handful of soil, your kids can explore plant flower life, practice patience, and grow something magical.
- Easy Bug Slime Recipe – This is an excellent activity for kids of all ages, especially during springtime or at a Halloween party.
- Free Spring Coloring Pages—This is an enjoyable pastime for all ages. We offer a collection of free and printable options that allow us to embrace the spirit of the season.
Whether you’re encouraging kids’ creativity, looking for craft supplies that make sense, or just need a reason to cut up a few lemons, this DIY garden is everything an excellent making kit should be.
Grab your scissors. Scoop the soil. And let the growing begin!
Fun with Kids Gardening kit: Easy DIY Lemon Seed Starter Kit
By teaching kids an easy skill of starting vegetable or herb seeds indoors, you will get to watch the excitment on the child's face as they nuture the seeds and then watch the plants grow from them. This is an easy way to get a headstart on growing plants this summer. Starting seeds indoors in lemon peels provides a way to transplant the seeds to the ground in a compostable lemon peel rind. This is a fun and enjoyable way to get the kids involved in spring gardening.
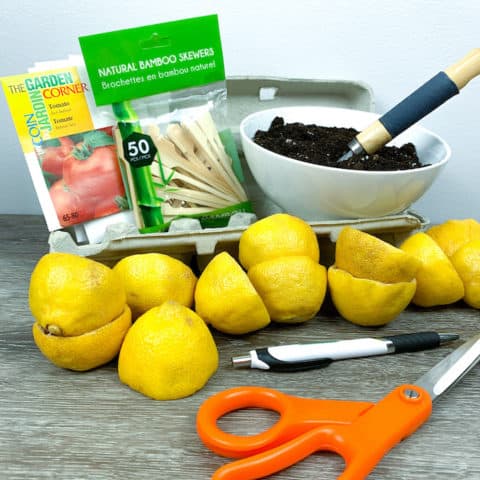
Materials
- 1 LARGE Egg carton
- Potting Soil
- 12 half lemon rinds
- Mini bamboo Sticks
- Pen Seeds
- Marker
Tools
- Mini Shovel/Spoon
- Scissors