
Hedgehog Handprint Craft for Kids (Free Template)
Turn a small handprint into a set of adorable paper spines with this easy handprint hedgehog craft. Children draw around their hand, cut, glue, and add details to create a cute forest animal from simple construction-paper shapes.
The free hedgehog template includes a hand-shaped back, tan face and body, four little feet, and a round nose. You can use the provided shape for a consistent classroom project or outline an actual hand to make it more personal.
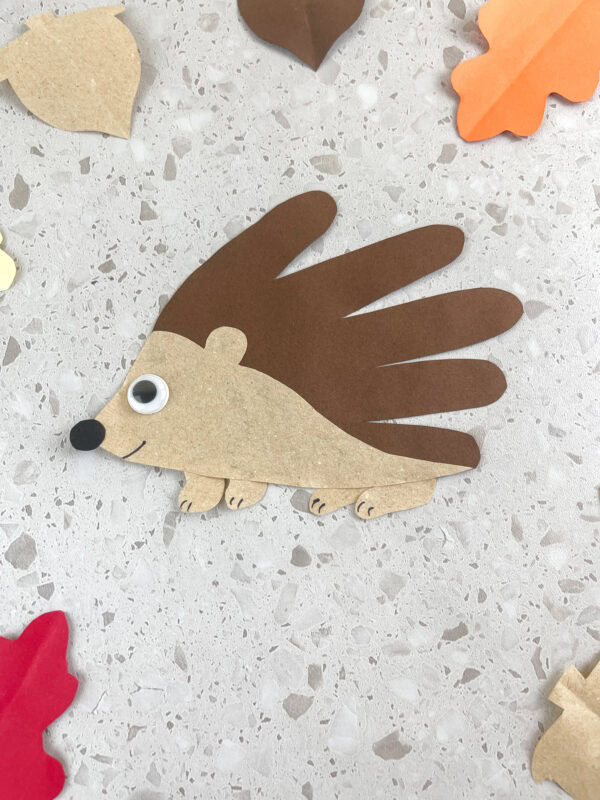
Easy Hedgehog Handprint Craft for Kids
This handprint hedgehog craft for kids is a low-prep activity that works especially well for autumn, an animal lesson, preschool cutting practice, or a hibernation unit. The finished animal is flat and lightweight, so it is easy to display on a bulletin board or add to a larger fall scene.
If your children enjoy making animals from their hands, explore our complete collection of handprint crafts for preschoolers. You can also make this fall hedgehog leaves craft using real or paper foliage.
How Does a Handprint Hedgehog Craft Work?
A handprint hedgehog craft is a paper animal that turns the pointed shapes of a hand outline into the hedgehog’s spines.
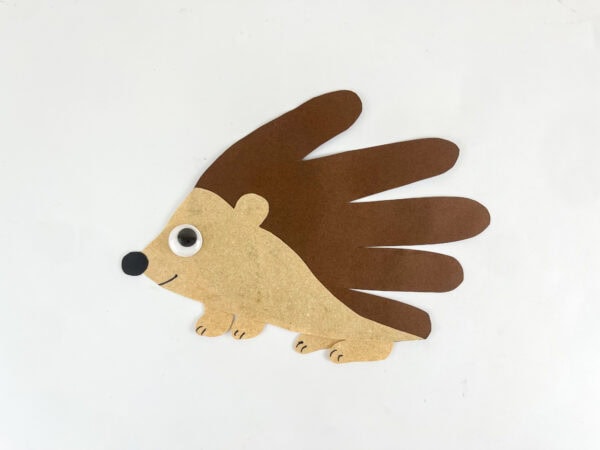
In this version, one dark-brown shape forms the rounded back. A separate tan body overlaps the palm, while small paper feet, a black nose, a googly eye, and marker details complete the animal.
The finger shapes point toward the back rather than straight upward. This creates a simple silhouette that resembles the prickly covering along a real hedgehog’s back.
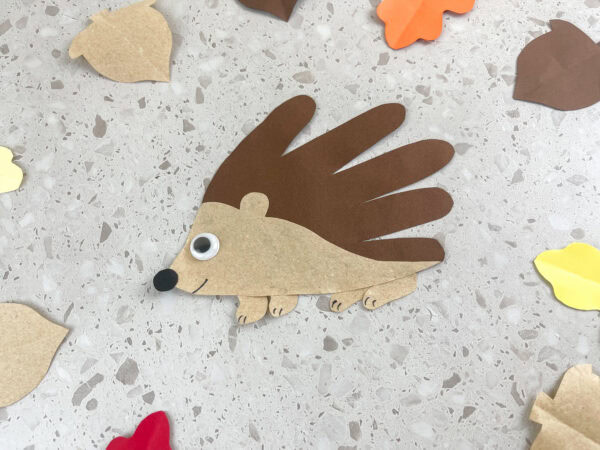
What Comes With the Free Hedgehog Template?
The one-page printable contains:
- One hand-shaped piece for the dark-brown back and pointed details
- One long face-and-body piece for tan construction paper
- Four small foot pieces for tan construction paper
- One round shape for black construction paper
A separate one-page instruction sheet provides a short supply list and assembly overview. The file is formatted on A4 paper. If you are using US Letter paper, select Fit, Fit to Printable Area, or your printer’s equivalent setting so no outlines are clipped.
Download-box placement: Insert the free printable sign-up or download box near the bottom of the post, immediately before the final paragraph.
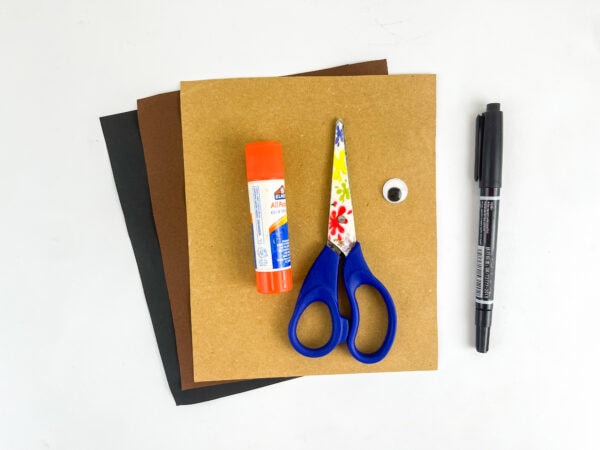
Craft Supplies for the Handprint Hedgehog
- Free hedgehog printable
- Construction paper in shades of brown, tan, and black
- Googly eye
- Pencil
- Child-safe scissors
- Glue stick or school glue
- Black marker/Sharpie
You can substitute cardstock for construction paper if you want a sturdier finished project. Construction paper is generally easier for little hands to cut, while cardstock holds its shape better on a bulletin-board display.
If you don’t have a googly eye, draw one with a black marker or make one from small circles of black and white paper.
How to Make an Easy Hedgehog Handprint Craft
Before beginning, download and print the pattern. An adult may need to cut out the pieces for toddlers and preschoolers. Older children can practice cutting the large shapes themselves.
1. Get the Paper Shapes Ready
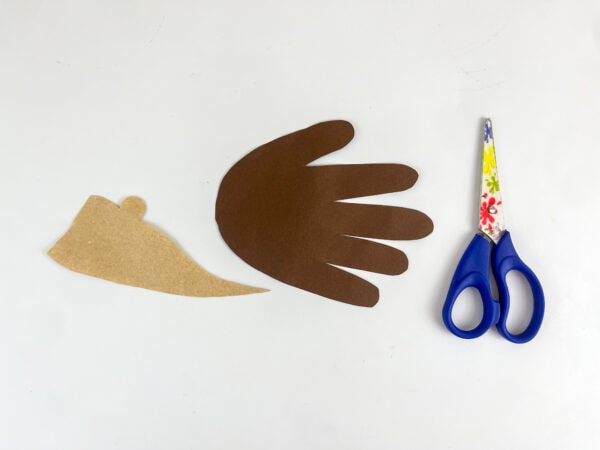
Cut the pieces from the printed pattern. Trace the hand-shaped back onto dark-brown construction paper.
Draw around the face-and-body piece and all four feet onto tan or light-brown paper. Copy the small circle onto black paper. Carefully cut along the outline of every piece.
You should now have one dark-brown hand shape, one tan body, four tan feet, and one black circle.
2. Arrange the Hedgehog’s Body
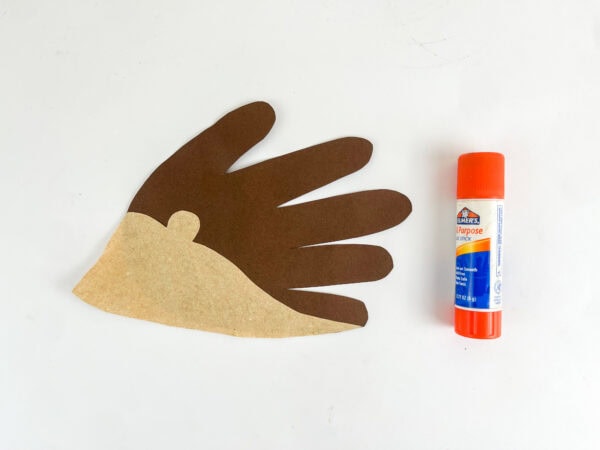
Place the dark-brown hand shape horizontally, with the pointed sections facing right. These create the animal’s spike-like back.
Lay the tan body over the lower-left portion of the palm. The pointed end should extend beyond the brown paper to form the hedgehog face and snout. Adjust the pieces until the rounded tan back fits neatly over the base of the hand shape.
3. Secure the Body to the Handprint
Apply glue to the back of the tan body and press it onto the brown paper. Smooth it gently so the edges lie flat.
For classroom preparation, place one completed example where children can see how the face overlaps the palm. Let their exact placement vary; handmade animals do not need to look identical.
4. Add the Feet and Nose
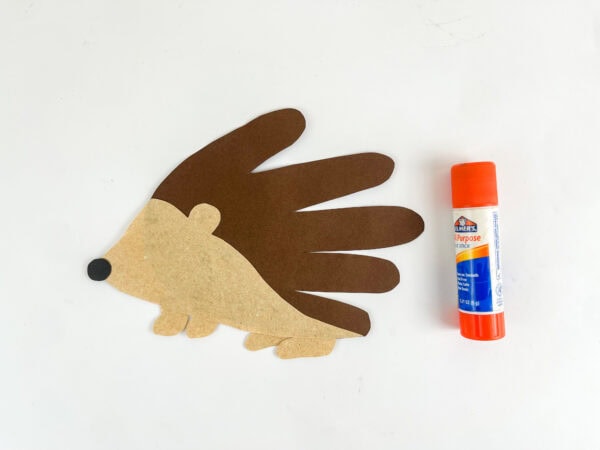
Attach the four small tan feet along the bottom edge of the body. Space them from front to back, allowing the little legs to extend below the animal.
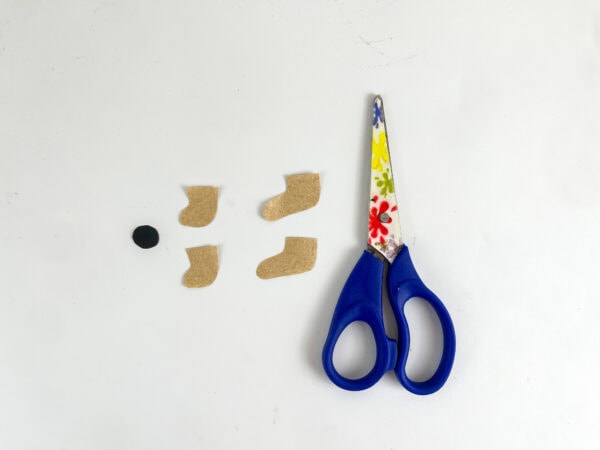
Add the black circle to the pointed end of the snout. In the finished example, it overlaps the tip slightly instead of sitting entirely inside the tan shape.
5. Finish the Eye and Face Details
Place the eye just above and behind the snout, then draw a gentle curved smile with a black marker.
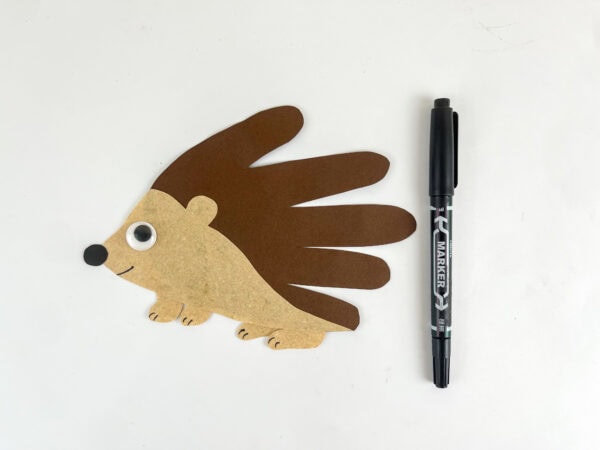
Add two or three short lines to the end of each foot to suggest tiny toes. Let everything dry before displaying or moving your adorable little forest friend.
Use Your Child’s Real Handprint
The provided hand shape makes this craft idea easy to prepare for a group, but using the child’s own hand creates a personalized keepsake.
Rest the hand on dark-brown paper with the fingers slightly apart. Outline it in pencil, then carefully cut along the line. Rotate it so the pointed sections face the animal’s back, then assemble the remaining pieces the same way.
Add the child’s name and the date to the reverse side. Because this hedgehog handprint preserves the hand’s original size and shape, it makes a sweet addition to a preschool portfolio or family memory box.
Tips for Making This Craft With Toddlers and Preschoolers
- Cut out the smallest feet and face pieces ahead of time if they are difficult for young children.
- Lightly outline each pattern in pencil so the cutting lines remain clear.
- Place the craft supplies in separate piles or small trays before starting a group activity.
- Use glue sticks to reduce drying time and excess adhesive.
- Demonstrate the hand shape before children begin assembling.
- Allow children to choose different shades of brown, tan, gray, or an imaginative color.
- Add names to the back before starting so completed projects do not get mixed up.
Adult assistance will vary. A toddler may mainly help press the pieces into place and add marker details. Young children can copy large shapes and practice cutting. Kindergarteners and older children may be able to complete nearly the entire easy hedgehog project independently.
Skills Kids Practice With This Craft
This craft for kids combines several manageable fine-motor tasks in one project:
- Following the outline of a shape
- Cutting straight and curved lines
- Positioning overlapping pieces
- Using an appropriate amount of adhesive
- Drawing small facial details
- Following a visual sequence
- Identifying body parts and colors
To add language practice, ask the child to describe the shapes, textures, and colors used. Older kids can dictate or write one sentence about where their forest animal is going.
For more hedgehog crafts, try this hands-on hopping hedgehog craft or make a textured hedgehog loop paper craft. These projects offer more ideas and inspiration when kids love learning about small forest animals.
Autumn, Woodland, and Hibernation Craft Ideas
The brown paper and forest theme make this a fun fall activity for pre-K, kindergarten, homeschool, or a library storytime. It can also fit an autumn and winter animal unit.
Create a Cute Woodland Bulletin Board
Attach each completed animal to a large sheet of paper. Add trees, mushrooms, grass, acorns, and colorful fall foliage. Children can get creative by drawing nearby food or a hiding place.
Pair the display with our woodland animal coloring pages or let children pretend to be forest animals with these woodland animal masks.
Discuss Hedgehog Spines
Talk about how the pointed paper sections represent a spine rather than long fur. Ask children to count the five points, compare hand sizes, or describe how the sharp-looking shapes differ from the smooth body.
Introduce Hedgehog Hibernation Carefully
European hedgehogs hibernate, making this fall craft a useful starting point for an age-appropriate discussion about how some animals conserve energy during cold months. These patterns vary by species and climate, so phrase the lesson as “some hedgehogs hibernate” rather than applying the statement to every species everywhere.
Children can draw a nest of leaves beneath their paper animal or create a cozy winter shelter from a paper bag. The Wildlife Trusts’ European hedgehog guide explains that European hedgehogs typically spend the winter in a sheltered nest of leaves.
More Hedgehog Crafts for Kids
Continue the theme with these related projects:
- Rocking hedgehog paper plate craft
- Hedgehog popsicle stick craft
- Fall hedgehog leaves craft
- Hedgehog loop paper craft
- Hopping hedgehog craft
- Valentine’s hedgehog craft
For a snack that coordinates with an animal or woodland lesson, make these chocolate-dipped strawberry hedgehogs. Adults should handle hot or sharp kitchen tools and check all ingredients for allergies.
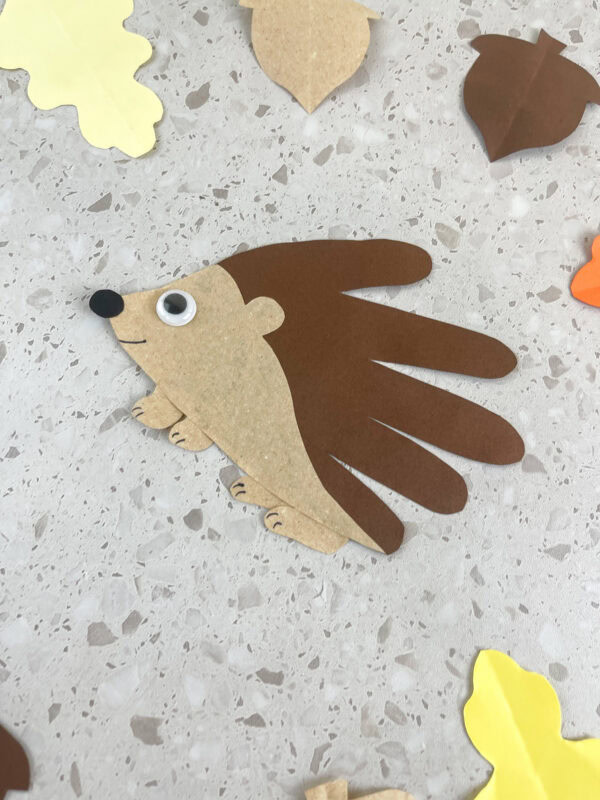
This super cute paper animal turns one familiar hand shape into a memorable, easy craft. Download the pattern, gather a few pieces of construction paper, and let each child give it a unique expression and personality.
What ages can make this hedgehog craft?
This project is best suited to young children in kindergarten and early elementary school. Younger kids can help assemble pre-cut pieces with close adult supervision. Their scissor experience matters more than a specific age, making it adaptable for kids of all ages with the right level of help.
Do I need paint for this fall craft?
No. Use dark-brown, tan, and black construction paper instead, which makes this option cleaner than one that involves brown paint.
Can I use a real hand outline instead of the template?
Yes. Outline a hand on dark-brown paper and use the cutout for the back. Its pointed sections create the prickly effect while adding a personal touch.
What can I use instead of a googly eye?
Use a marker to add the eye, or create one from tiny circles of white and black paper. Keep small loose pieces away from children who may place them in their mouths.
Which type of paper works best for the hedgehog template?
Regular white printer paper works well when you cut out the pieces and copy them onto colored paper. Use cardstock if children will color and assemble the printed pieces directly.
Is this activity suitable for preschoolers?
Yes. Young children can do many of the steps with adult assistance. Preparing the tiny pieces ahead of time simplifies assembly, while confident scissor users can cut the larger parts on their own.
Hedgehog Handprint Craft
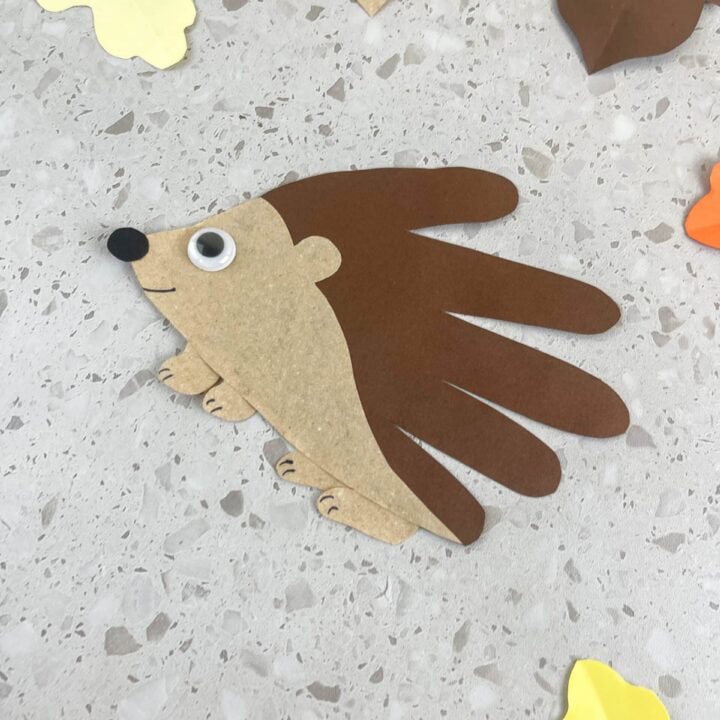
Make an easy paper hedgehog with a handprint-shaped back, construction-paper pieces, a googly eye, and a free printable template.
Materials
- Free hedgehog craft template
- Dark-brown construction paper
- Tan or light-brown construction paper
- Black construction paper
- One googly eye
- Pencil
- Child-safe scissors
- Glue stick or school glue
- Black marker
Instructions
- Print and cut out the hedgehog template pieces.
- Trace the handprint-shaped back onto dark-brown paper.
- Trace the body and four feet onto tan paper, then trace the round nose onto black paper.
- Cut out all the traced pieces.
- Position the brown handprint horizontally with the fingers pointing toward the hedgehog’s back.
- Glue the tan body over the lower portion of the handprint, allowing the pointed snout to extend beyond it.
- Glue four tan feet along the bottom of the body.
- Attach the black nose to the tip of the snout and glue the googly eye above it.
- Draw a smile and short toe lines with a black marker.
- Allow the glue to dry before displaying the craft.
Notes
- Trace the child’s actual hand instead of using the printable handprint for a personalized keepsake.
- Regular construction paper is easier for young children to cut; cardstock creates a sturdier craft.
- Adults should cut small pieces for children who are not ready to use scissors independently.
- Googly eyes and other small pieces can be choking hazards and require close supervision.
