
Rocking Hedgehog Paper Plate Craft For Kids (Free Hedgehog Template)
Turn an ordinary paper plate into an adorable hedgehog that actually rocks from side to side.
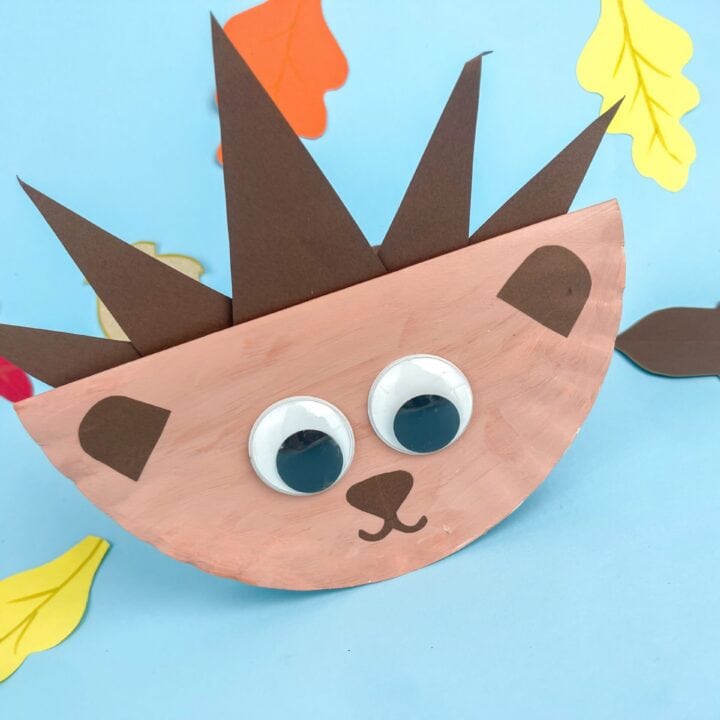
This rocking hedgehog paper plate craft uses a folded plate for the rounded body, construction cardstock for the spines, and oversized googly eyes for an expressive face. Once the adhesive dries, place it on its curved edge and give it a gentle push to make it rock.
Check out our ever-growing list of paper plate crafts for kids.
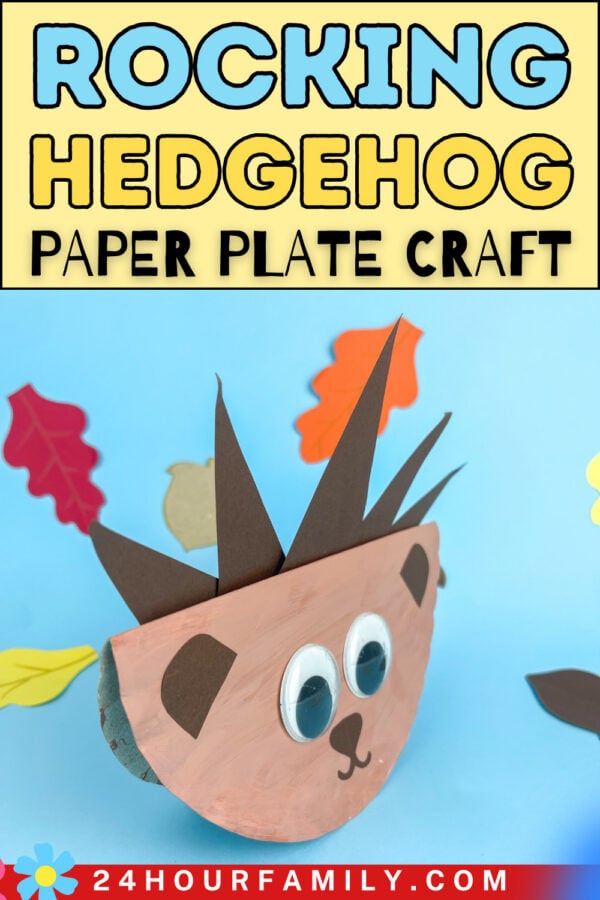
Rocking Hedgehog Paper Plate Craft With Free Template
The project is easy enough for preschool and elementary-age children, and the free guide makes the spines, ears, and nose simple to prepare. This super cute little hedgehog can become a playful keepsake or classroom decoration once the crafting is finished.
Download the template near the bottom of this post.
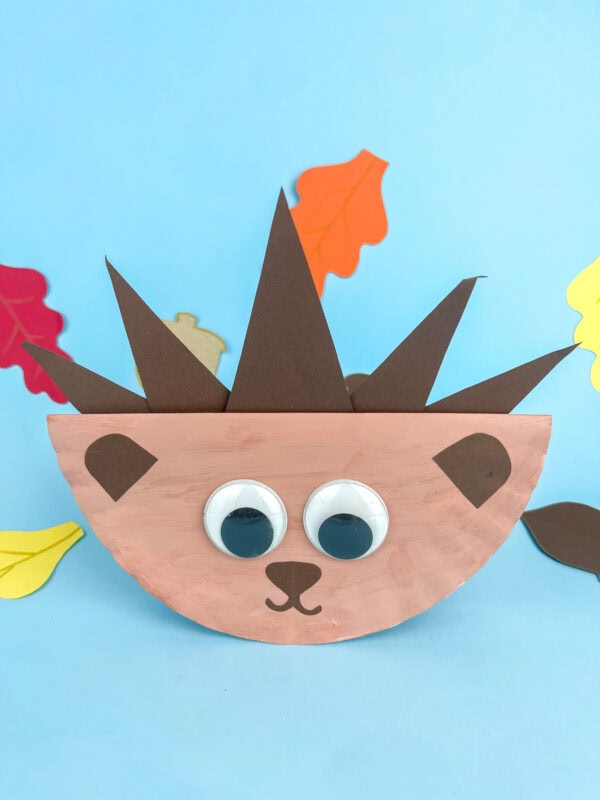
Rocking Hedgehog Paper Plate Craft
Most paper plate craft projects featuring forest creatures lie flat or hang on a wall. This one is different because the plate is folded in half and balanced on its curved edge.
The rounded base lets the finished hedgehog move gently from side to side. Children can decorate it, play with it after crafting, and experiment with the rocking motion.
This project works well for:
- Fun fall craft time
- Forest-themed units
- Letter H activities
- Nature lessons
- Indoor recess
- Homeschool art
- Library story time
- Fine motor skills
- A simple balance or motion demonstration
The finished piece can also be displayed on a shelf, table, or classroom windowsill alongside other hedgehog crafts.
This post may contain affiliate links. As an Amazon Associate and a participant in other affiliate programs, I earn a commission on qualifying purchases. Read our disclosure policy here.
Stock Your Home 9-Inch Paper Plates Uncoated, Everyday Disposable Plates 9KTOJOY 100Pcs Jumbo Wooden Craft Sticks Popsicle Stick 6” Long x 3/4”Wide Treat Ice Pop for DIY Crafts,Home Art Projects, Classroom SuppliesMod Podge Gloss Sealer, Glue & Finish: All-in-One Craft Solution- Quick Dry, Easy Clean, for Wood, Paper, Fabric & More. Non-Toxic – Craft with Confidence, Made in USA, 16 oz., Pack of 1Crayola Construction Paper – 480ct (2pck), Bulk Teacher Supplies, Back to School Essentials For Kids, Classroom Must Have, Arts & Crafts Art PaperGoodyKing Arts and Crafts Supplies for Kids – 1170Pcs+ Craft Art Supply Kit for Toddlers Kids Craft Supplies & Materials Age 4 5 6 7 8 9 – All in One D.I.Y. Crafting School Supplies900 PCS Pom Poms, Multicolor Bulk Pom Poms Arts and Crafts, Soft and Fluffy Craft Pom Poms, Assorted Sizes Pompoms, for Arts and Craft Making Decorations


Supplies For This Paper Plate Hedgehog Craft:
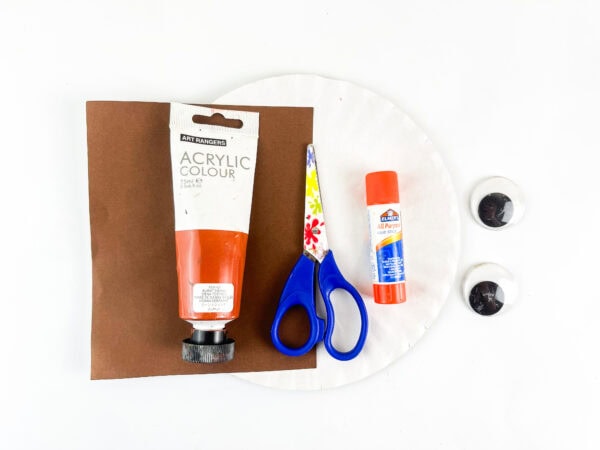
You will need these basic craft supplies:
- Paper plate
- Washable paint and brush
- Brown construction paper
- Googly eyes
- Glue stick or craft glue
- Child-safe scissors
- Pencil
- Free hedgehog template
- Optional black or brown pen
- Optional fall-themed cardstock for decorating the background
The photos show burnt-sienna acrylic, but washable tempera or brown paint is a better choice when working with younger children. You can find similar materials at craft stores, Baker Ross, or Amazon.
What Is Included in the Template?
The one-page sheet contains:
- Five triangular hedgehog spines in different sizes
- Two rounded ears
- One facial piece
Print the page, cut out the pieces, and trace them onto construction cardstock.
The mouth is not included separately. You can use a pen to draw it directly on the plate or cut two small curved pieces from leftover material.
How to Make a Rocking Hedgehog Paper Plate Craft
Follow this easy tutorial to create your own rocking fall hedgehog.
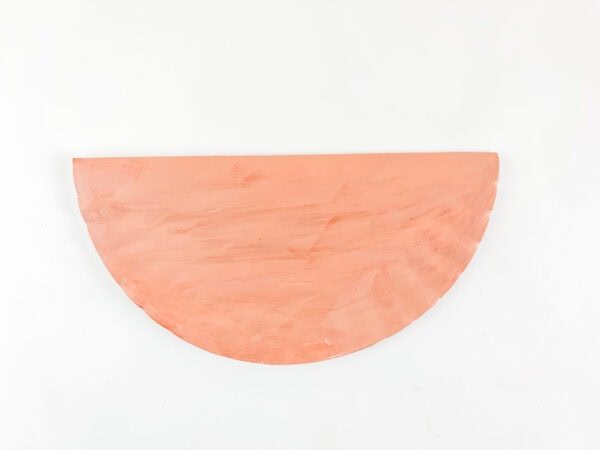
Paint Half of the Plate
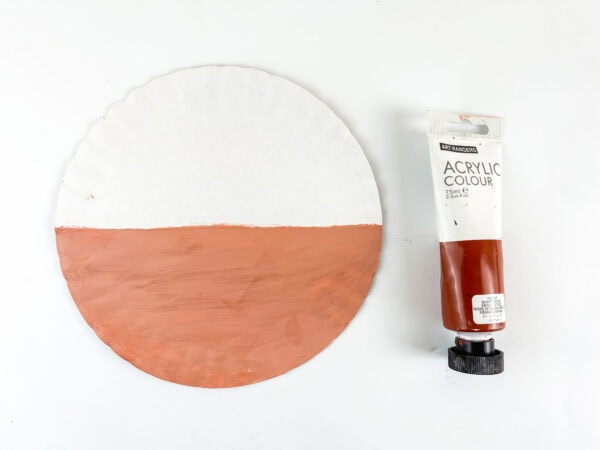
Place the plate with its front side facing up.
Paint one half with tan, peach, or burnt sienna. The painted half will form the face and body once you bring the two sides together.
Only one side needs to be covered. A single coat of brown paint is enough to cover this section without getting the interior messy.
Brush on a light, smooth coat, then wait until the surface is fully dry. Add a second coat if the white surface still shows through.
Fold the Plate in Half
Once the surface has dried, fold the plate in half along its center.
Keep the painted side facing outward. Press along the straight edge to create a firm crease.
The curved edge should remain at the bottom of the plate. This rounded shape is what allows the completed project to rock.
Set it on the table and test it. It should balance upright and move from side to side when gently touched.
Prepare the Pieces
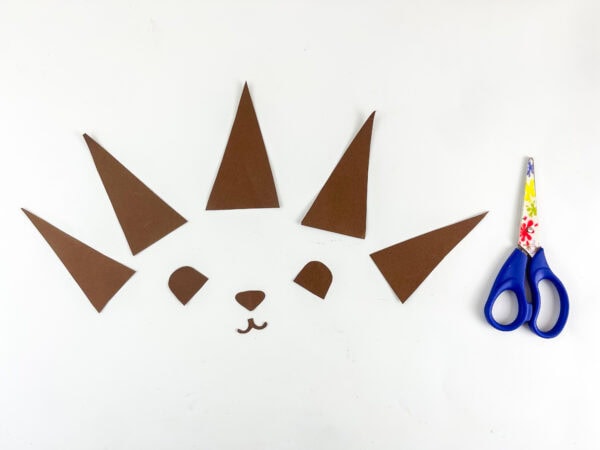
Cut out the five triangular spines, two ears, and remaining facial piece. Place them on construction cardstock, trace around them with a pencil, and cut out the traced pieces.
For little ones, an adult can prepare these in advance. Older kids can trace and cut them independently, making this a great way to build scissor control and other fine motor skills.
Arrange the five spines from smallest to largest before gluing. This makes it easier to create an evenly spaced row across the top.
Attach the Spines
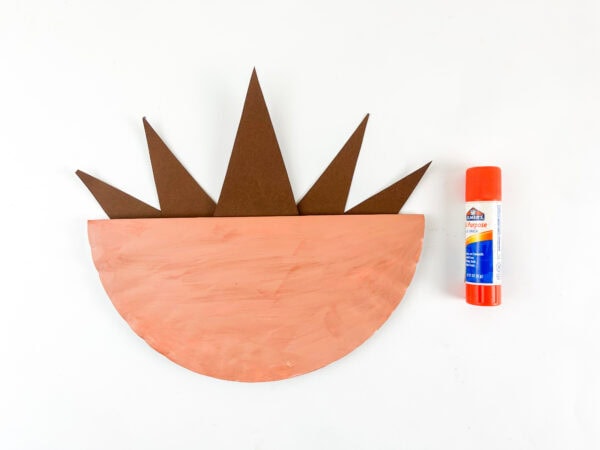
Open the plate slightly.
Arrange the five triangles along the inside of the straight edge so each spike extends above it.
Place the largest spine in the center. Arrange the medium ones on each side and the smallest near the outer edges.
Apply glue to the bottom of each triangle. Close the two halves carefully and press them together so the spines remain secure.
Make sure the points face upward and remain visible above the straight top edge.
Add the Ears
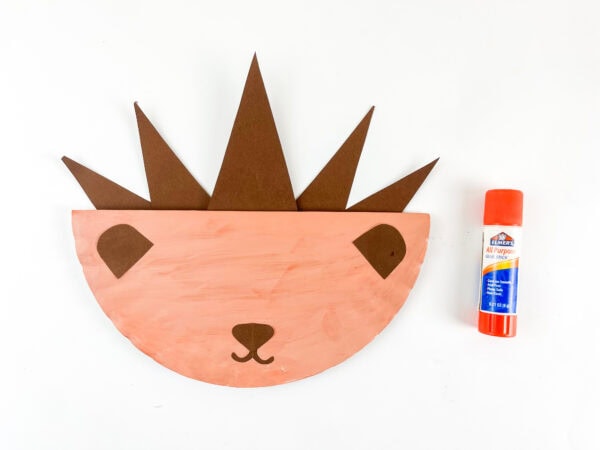
Attach one ear near each upper corner of the painted area.
Position the pointed portion of each ear toward the center of the face. Leave enough room between them for the eyes.
The ears can be placed at slightly different angles to give each creation its own personality and make every finished project unique.
Add the Googly Eyes
Attach two large eyes near the center of the painted area.
Place them below and slightly inside the ears, around the head area. Keep them far enough above the curved bottom to leave room for the remaining facial features.
Craft adhesive may hold heavier eyes more securely than a glue stick. Allow it to set before moving the finished piece.
Finish the Face
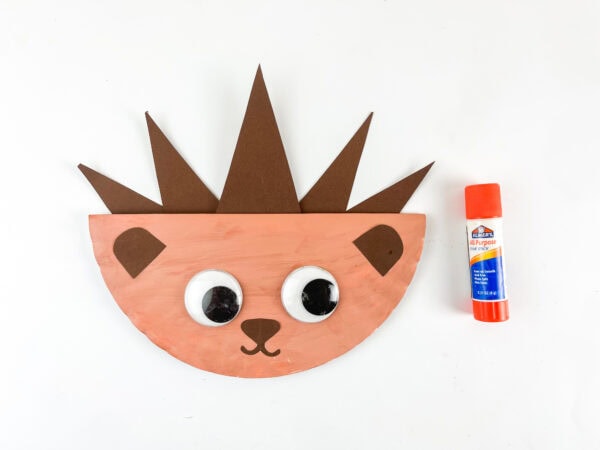
Attach the remaining facial piece below the eyes.
Use a black or brown marker to draw two curved lines extending from the bottom. The lines can curve upward to create a friendly smile.
Alternatively, cut two tiny curved pieces from leftover cardstock and attach them underneath, as shown in the finished example.
Allow everything to dry before playing with the craft.
Make It Rock
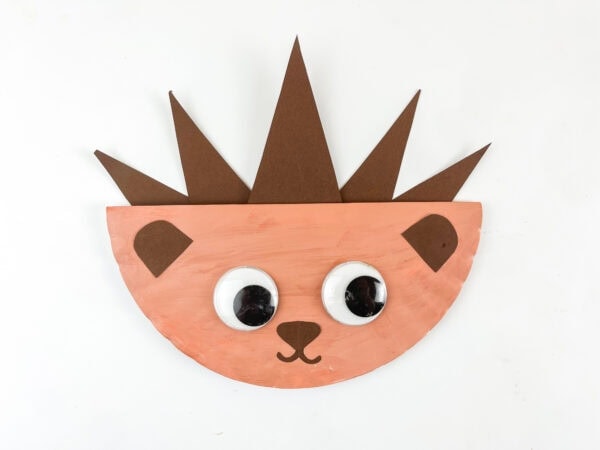
Stand the finished hedgehog paper plate on its curved edge.
Give one side a gentle tap and watch it move back and forth. If it leans to one side, check that the spines and facial pieces are arranged evenly.
Avoid placing heavy decorations on one side, as they can make the project unbalanced.
Why Does the Paper Plate Hedgehog Rock?
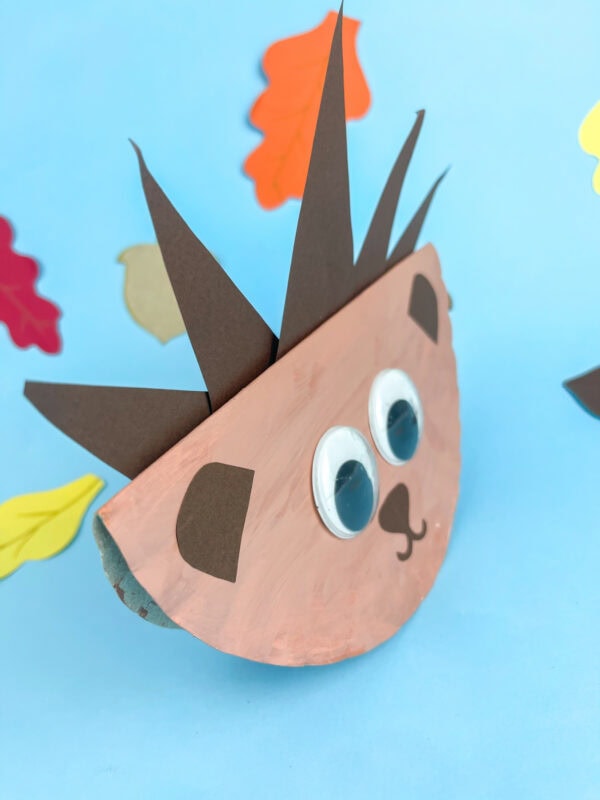
The curved base allows the weight to shift when one side is pushed.
Gravity pulls the project back toward its lowest balanced position, but its movement carries it slightly past the center. It then travels toward the other side. Friction eventually slows the motion and brings it to a stop.
Ask children to experiment by giving it:
- A very gentle tap
- A slightly stronger push
- A push near the top
- A push near the bottom
Kids can observe how the location and force of the push affect the movement.
This turns the project into a simple STEAM activity about balance, force, motion, and gravity while adding an educational element to easy crafts for kids.
Tips for Making It Rock Properly
Create a Strong Crease
Press firmly along the center. A clear crease helps the two halves remain aligned.
Use Lightweight Cardstock
Construction cardstock works best for the spines. Heavy cardboard may make the top too heavy.
Center the Largest Spine
Place the largest triangle in the center and distribute the remaining spines evenly on both sides.
Avoid Too Much Glue
Using excess adhesive may make one area heavier than another. Spread a small amount across the area and give it enough time to set.
Keep the Bottom Edge Clear
Do not attach decorations that extend below the curved edge. The entire curve needs to touch the table as the hedgehog rocks.
Use a Firm Plate
Thin paper plates may collapse or flatten after bending. A sturdy uncoated plate will usually hold its form better.
Craft Variations
Children can personalize their rocking hedgehogs in several crafty ways.
Bright Spines
Replace the standard spines with red, orange, yellow, pink, and gold triangles for a cheerful autumn look.
Patterned Spines
Decorate the triangles with dots, stripes, zigzags, or fingerprints before attaching them. Each pattern gives the finished piece a different appearance.
Leaf Spines
Trace the spine pieces onto fall-themed sheets or use clean, dry leaves collected outside. This is a fun option for lessons about woodland creatures.
No-Paint Version
Use crayons or markers on the plate instead of paint. This eliminates drying time and makes the project easier for a classroom station.
Smaller Version
Use a dessert-size plate to make a baby hedgehog.
Make a Family
Create several hedgehogs in different sizes and shades. Kids can give each one a name and use them for storytelling.
Add Feet
Cut four small oval feet from cardstock and attach them near the bottom. Keep the feet above the curved edge so they do not interfere with the rocking motion.
Making This Craft With Preschoolers
This easy kids project gives little ones several jobs they can complete with minimal help. They can:
- Paint the plate
- Apply adhesive with a glue stick
- Choose the spine order
- Position the ears and eyes
- Test the rocking movement
- Name their finished hedgehog
An adult should cut the pieces or closely supervise kids when they use scissors.
To prepare this as a classroom craft for kids, complete these steps in advance:
- Print enough copies.
- Cut or trace the pieces.
- Get the plates ready for assembly.
- Protect the table before getting started.
- Divide the supply materials among small groups.
- Label a drying area with each kid’s name.
If time is limited, decorate the plates in one session and assemble everything after they have dried. This approach helps keep little hands busy without making the session feel rushed.
Hedgehog Learning Ideas
The finished project can be incorporated into a larger woodland or fall lesson.
Letter H Practice
Practice saying and writing the word “hedgehog.” Ask children to name other words beginning with H.
Count the Spines
Count the five spines. Arrange them from shortest to tallest or create a repeating pattern.
Compare Shapes
Identify the circle used for the plate, the semicircle created after bending it, and the triangles used for the spines.
Test Balance
Add one lightweight decoration at a time and observe whether the finished piece still rocks evenly.
Storytelling
Ask kids to make up a story about where their little hedgehog lives, what it eats, and what adventure it has during the fall. It is a fun way to encourage creativity after completing the DIY project.
Rocking Hedgehog Writing Prompts
Pair the project with one of these simple writing prompts:
- My hedgehog’s name is…
- My little friend lives…
- One day, it found…
- It likes to eat…
- If I had a hedgehog friend…
- It rocked because…
- I made it by…
Young kids can dictate a sentence to an adult. Older children can write a short story and display it alongside their creation, combining creative writing with hands-on art.
How to Display the Finished Craft
Because the finished hedgehog stands independently, it can be displayed on:
- A classroom shelf
- A windowsill
- A fall nature table
- A library display
- A kid’s dresser
- A party table
For a classroom display, place several finished pieces together with leaves and acorns. You could even add a strip of autumn-themed cardstock behind them to create a simple seasonal scene.
Use a heading such as:
We’re Rocking Into Fall!
or:
Our Class Is Looking Sharp!
More Woodland Craft Ideas
After making your rocking creation, try other projects inspired by forest themes. A fox craft, paper bag project, woodland coloring pages, or other simple paper plate projects can extend the theme and give kids more opportunities for creativity.
You can also look to sites such as Easy Peasy and Fun, or to video tutorials on YouTube, for inspiration when planning more seasonal projects. Using paper, basic forms, and materials you already have makes it easy to create a full collection of forest-themed designs.
More Paper Plate and Fall Crafts
Continue crafting with these related projects:
- Paper Plate Crafts for Kids
- Hedgehog Popsicle Stick Craft
- Handprint Owl Craft
- Fox Valentine’s Day Box Craft
- Leaf Hedgehog Craft
- Hopping Hedgehog Craft
Download the Free Hedgehog Craft Template
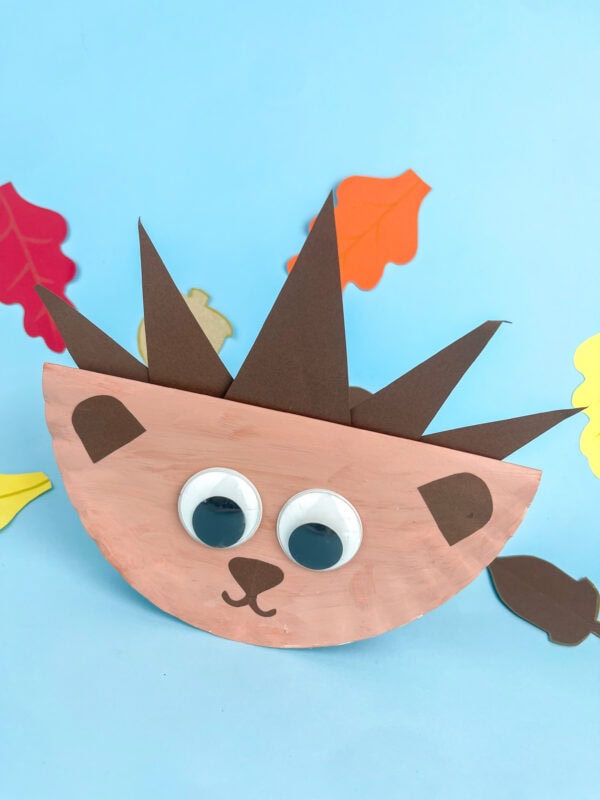
The one-page printable contains the five spines, two ears, and facial piece needed to complete the rocking design.
Print it on regular paper, cut out the pieces, and trace them onto construction cardstock. Then follow the instructions above to assemble the project.
It is intended for personal and classroom use.
Why won’t my paper plate hedgehog stand?
Make sure the plate is creased evenly and placed on its curved edge. Heavy or uneven decorations can pull it to one side. Also check that nothing is attached to the back of the paper plate in a way that affects its balance.
Can I use crayons instead of paint?
Yes. Crayons, markers, or colored pencils eliminate drying time and work well for a less-messy version.
What kind of paint should children use?
Washable tempera is an easy option for young kids. Apply a thin coat so the plate does not become soggy.
Can I make it without googly eyes?
Yes. Cut eyes from white and black cardstock or draw them directly on the plate.
Is the download free?
Yes. The free file includes five spines, two ears, and a facial piece. It is available near the bottom of this post.
What age is this craft for?
The project is appropriate for kindergarten and early-elementary children, as well as younger crafters with adult help. It is a simple way for kids to make a moving fall decoration while developing cutting, gluing, and creative skills.
Rocking Hedgehog Paper Plate Craft
Turn a folded paper plate into an adorable hedgehog that rocks from side to side. Use the free printable template to create the spines, ears and nose.
Materials
- 1 white paper plate
- Brown, tan or peach washable paint
- Brown construction paper or lightweight cardstock
- 2 large googly eyes
- Glue stick or craft glue
- Free printable hedgehog template
- Optional black or brown marker
Tools
- Paintbrush
- Child-safe scissors
- Pencil
Instructions
- Paint one half of the paper plate and allow it to dry completely.
- Fold the plate in half with the painted side facing outward and the curved edge at the bottom.
- Print and cut out the hedgehog template pieces.
- Trace five spines, two ears and one nose onto brown construction paper. Cut out the traced pieces.
- Arrange the spines along the inside of the plate’s straight folded edge, placing the largest spine in the center. Glue them in place.
- Glue one ear near each upper corner of the painted plate.
- Attach two large googly eyes near the center of the face.
- Glue the nose below the eyes.
- Draw two curved mouth lines with a marker or cut the mouth from brown paper and glue it below the nose.
- Let the glue dry. Stand the hedgehog on its curved edge and gently tap one side to make it rock.
Notes
- Washable tempera paint is easier to use with children than acrylic paint.
- Keep all decorations above the curved bottom edge.
- Lightweight construction paper helps the craft remain balanced.
- Crayons or markers can replace paint for a quicker, no-drying version.
