
How to Make a Simple Pinwheel for Kids
Pinwheels are like mini windmills that you can hold in your hand and watch spin around. They’re not just toys, though – they’ve been used for centuries to measure wind and help sailors navigate the seas. But more importantly, making pinwheels is a fun and interactive way to teach kids the wonders of science, engineering, and creativity.
They’ll be blown away by their newfound knowledge of wind power and the impact of various materials on pinwheel spin. Plus, it’s a great way to get them away from screens and into some hands-on creativity. So, grab some paper, a straw, or whatever materials you have on hand, and let’s get started on making some pinwheels! And check out more fun Summer Crafts for kids here.
This post may contain affiliate links meaning I get commissions for purchases made through links in this post at no cost to you. Read my disclosure policy here.
How do you make a pinwheel out of paper for kids?
Paper Pinwheels Supplies needed:
Single hole punch
Buttons
Straw
Scissors
Begin with a square of colored paper.
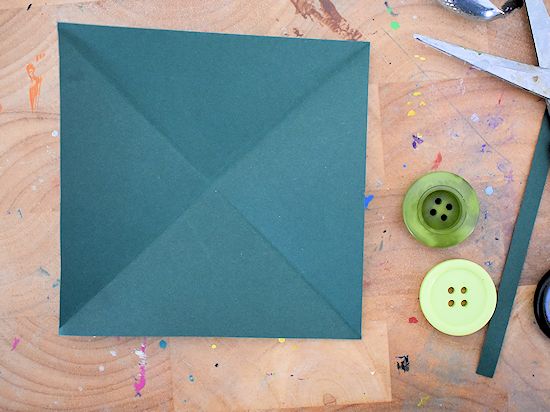
Fold the square horizontally into triangles. Unfold.
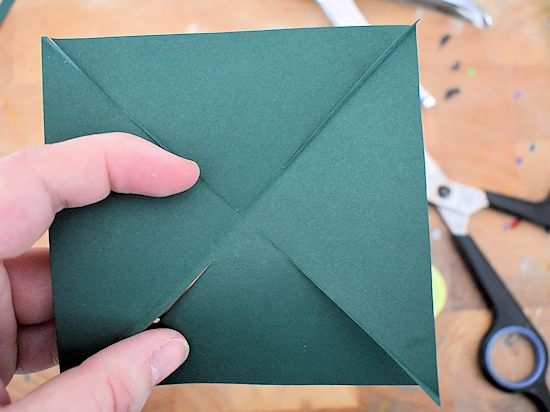
Now make snips into the folds, leaving about an inch or so uncut in the center.
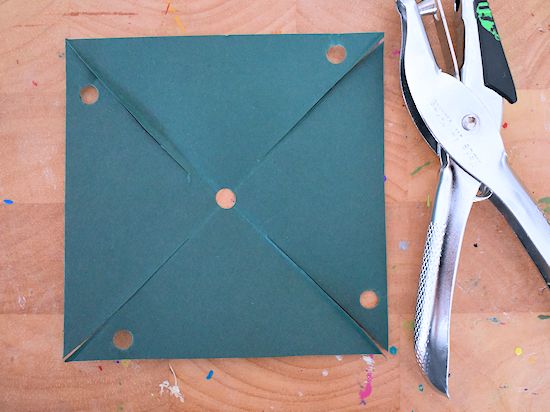
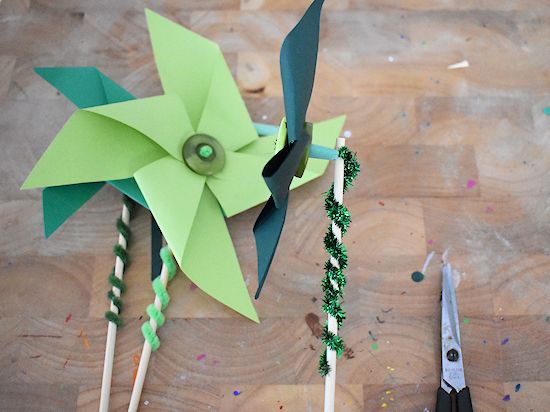
Punch a hole near every cut, as shown in the image. Also punch a hole in the center of the paper.
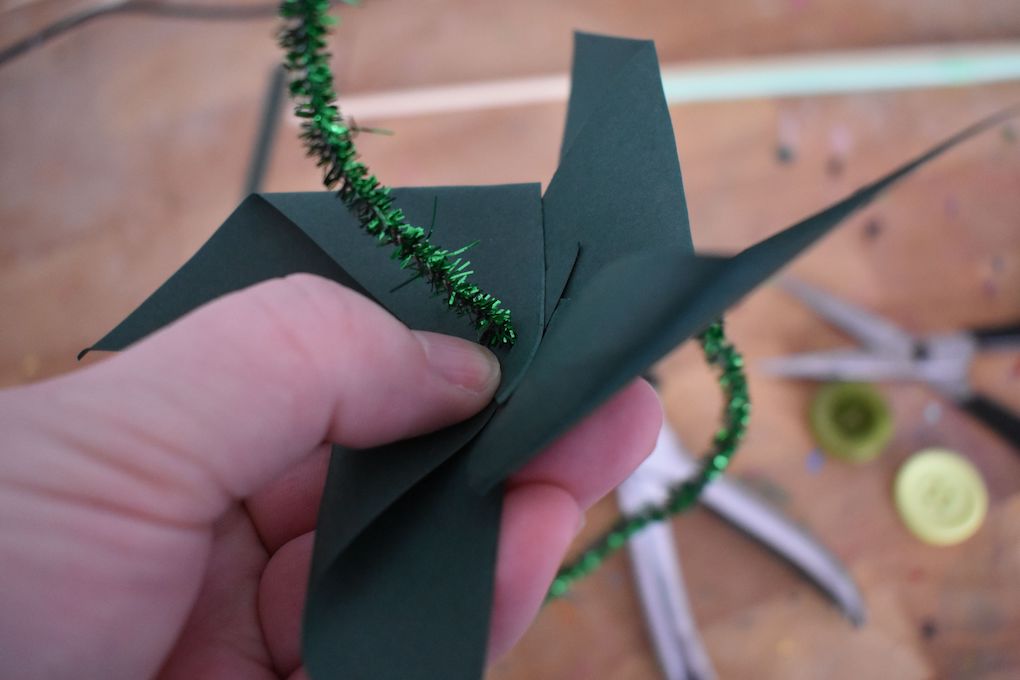
Bring each corner with a hole punched toward the center hole. Guide a pipe cleaner through the holes.
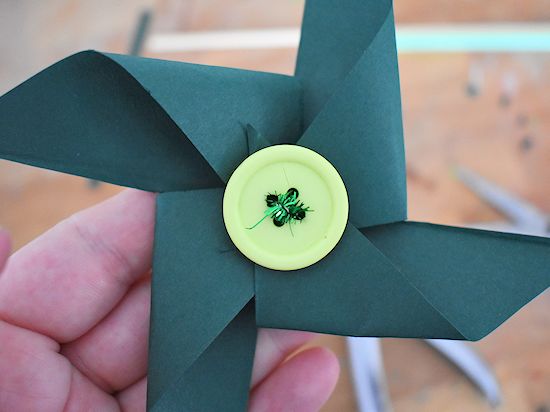
Thread the end of the pipe cleaner through a button and bring back through the holes.
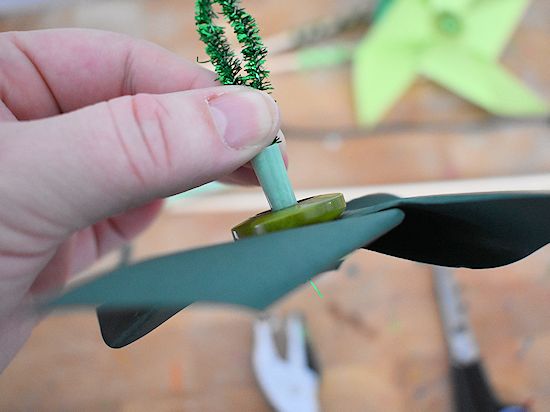
Snip a small piece of the straw. Thread through another button then through the straw. And wrap the pipe cleaner around a skewer to secure it.
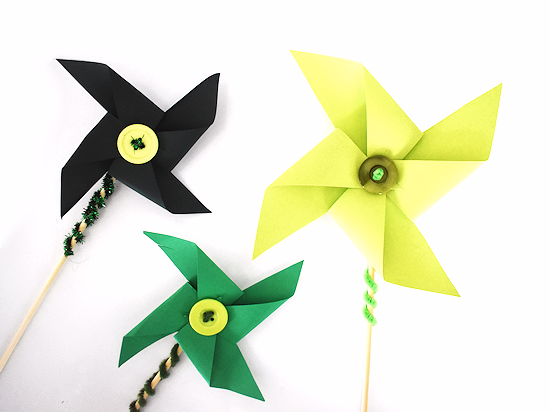
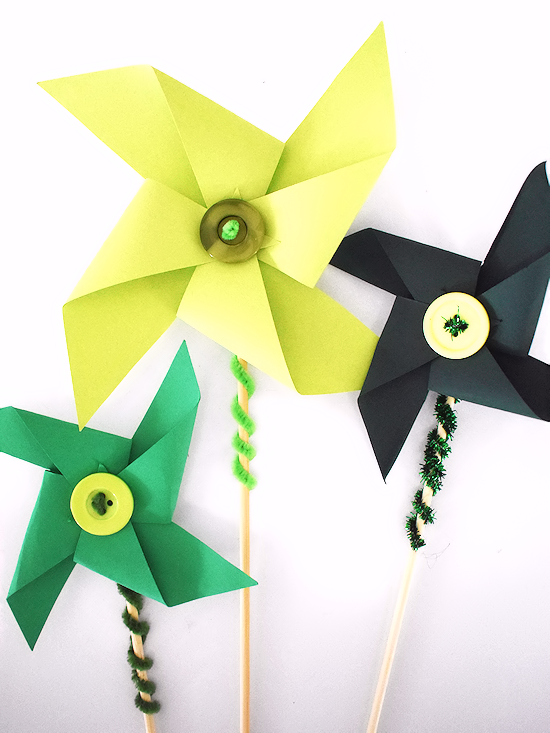
Voila! You’ve got yourself a pinwheel!
But wait, there’s more! You can decorate your pinwheel however you like. Draw some fun designs on the paper before you fold it, or glue on some stickers or glitter when you’re done. You can also experiment with different sizes and shapes of paper to see how it affects the spin of the pinwheel. And don’t forget to take it outside and see how it spins in the wind – it’s a great way to explore your environment and have some fun with your creation.
How do you get a paper pinwheel to stay together without pins?
- The corners of the paper can be held together with tape or glue. Like a regular pinwheel, just fold the paper’s corners in toward the middle and secure them with a bit of tape or glue. Then, just tape the paper to a straw or a stick, and you’re good to go.
- The flaps can also be held together with a paper fastener. You can secure this metal piece to the back with a paper hole punch because it’s so small. Though it takes more effort, using glue or tape can help your pinwheel look more polished.
- If you don’t have anything else handy, a paper clip will do the trick for holding the corners together. Form a U with the paper clip and insert it into each of the four slots. Once in place, simply bend the ends of the paper clip to secure it.
So, there you have it! Who needs pins when you can spin a wheel with just your creativity and some household items? It’s a fun and easy activity that’s perfect for kids (and adults, too!).
Safe Pinwheel for Kids
While pinwheels are a fun and educational toy for kids, it’s important to teach them how to use them safely. Here are a few tips to keep in mind:
- Choose an appropriate location: Make sure your child is using their pinwheel in a safe and open area, away from any obstacles or hazards. Avoid using it near busy streets or in crowded spaces.
- Supervise your child: Always supervise your child while they’re using their pinwheel. Make sure they’re holding it correctly and not putting it too close to their face or eyes.
- Use soft materials: If you’re making your own pinwheel, use soft materials like paper or fabric instead of sharp or hard materials like metal or wood. This will reduce the risk of injury if the pinwheel accidentally hits someone.
- Teach them about wind direction: Explain to your child how wind direction affects the spin of the pinwheel. Encourage them to hold the pinwheel up to the wind and not to blow on it themselves.
- Set boundaries: Teach your child to respect the personal space of others while using their pinwheel. Make sure they’re not swinging it around recklessly or poking others with it.
By following these simple tips, you can ensure that your child has a safe and enjoyable experience while using their pinwheel.
Making a simple pinwheel for kids is an easy and enjoyable activity that can spark their creativity and teach them a thing or two about science. With just a few basic materials like paper, scissors, and a straw, you can create a fun and interactive toy that will keep your child entertained for hours. And with our tips on how to use pinwheels safely, rest assured that your child will have a safe and enjoyable experience while spinning their pinwheel in the wind.
More Fun Summer Crafts for Kids:
Beach Themed Worksheets for Kids
Ice Cream Color by Number Printables
Make this fun Origami Shark Papercraft