
Turtle Handprint Craft
Transforming a simple outline into a cheerful little turtle using just a few basic supplies makes this project especially enjoyable to create. This turtle handprint craft is relaxing to prepare while still leading to a memorable finished piece that stands out once complete.
It brings together cutting, assembling, and decorating in a creative way that fits nicely into both classroom themes and quiet craft time at home.

Turtle Handprint Craft for Kids
If you enjoy simple handprint projects, this one is a wonderful addition to your activity list. The finished handprint turtle makes a sweet display piece, a creative card, or even a lovely keepsake to tuck into a memory box.
It’s also a great option if you’re planning themed kids’ crafts focused on ocean animals or friendly nature topics.

This project is approachable for a wide range of ages, including preschoolers, and it’s easy to adapt depending on the materials needed that you already have nearby.
This post may contain affiliate links. As an Amazon Associate and a participant in other affiliate programs, I earn a commission on qualifying purchases. Read our disclosure policy here.
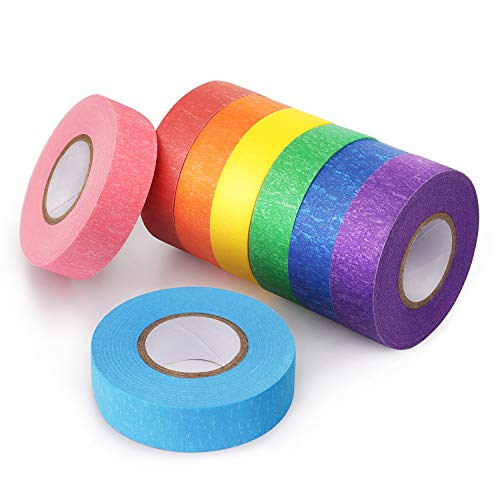
Crayola Construction Paper Bulk Pack (480 Sheets) – 10 Assorted Colors, 9×12, Classroom Arts & Crafts Supplies for Kids, Art Paper for School Projects Paper Crafts for Kids: 25 Cut-Out Activities for Kids Ages 4-88 Rolls Colored Masking Tape Rainbow Colors Painters Tape Colorful Craft Art Paper Tape for Kids Labeling Arts Crafts DIY Decorative Coding Decoration Teaching Supplies, 0.6 Inch x 16 Yard, 8 ColorsARTISTRO 24 Acrylic Paint Markers for Rock, Fabric, Wood, Glass, Craft, Decoration – Dual-Tip Paint Pens – Stocking Stuffers, Christmas Gift Idea for Teens, Grandkids, Kids – Art Supplies900 PCS Pom Poms, Multicolor Bulk Pom Poms Arts and Crafts, Soft and Fluffy Craft Pom Poms, Assorted Sizes Pompoms, for Arts and Craft Making DecorationsElmer’s Disappearing Purple School Glue Sticks, Washable, 6 Grams, 12 Count – Poster, Vision Board, Back to School, #1 Teacher Brand




Materials Needed:
Before starting your diy project, gather your supply items so everything is ready to go.
Materials needed:
- Green construction paper
- Brown paper
- White cardstock
- Black cardstock
- Child-safe scissor
- Glue
- Marker
- Optional googly eyes
- Optional printable template pieces

Using colorful cardstock helps the finished design stay sturdy, especially if you plan to turn it into a turtle card or display piece later.
How to Make Your Turtle Handprint Craft
Follow these easy & simple steps to make your turtle handprint craft.
Step 1: Make the Handprint Base
Start by placing your hand flat on green construction paper and gently trace around it. This outline becomes the body of your handprint turtle.

Once traced, carefully cut along the outline to create the main base shape. The fingers will later become the legs of the animal, giving your project its playful look.
Step 2: Prepare the Template Pieces
Next, use the template shapes to trace the head, shell layers, and eye circles onto the correct colored paper. Then carefully cut each piece out before moving on.

This is a great opportunity for learners to practice cutting while following simple outlines that are easy to handle.
Step 3: Assemble the Turtle Head
Attach the white eye circles onto the head piece using a small amount of glue, then layer the black eye shapes on top. If you prefer, you can substitute googly eyes instead for a slightly more playful look.

Once the eyes are attached, the head begins to take on that friendly personality that makes this project feel extra cute.
Step 4: Attach the Shell Layers
Now place the darker patterned pieces onto the larger background piece. Arrange them evenly before securing them in place with glue.

Layering the shapes helps create depth and gives your turtle a finished appearance that stands out nicely against the green base.
Step 5: Attach the Head and Shell to the Handprint
Position the completed head at the thumb side of the handprint shape. Then attach the layered section across the palm area.

Once everything is in place, your project will clearly begin to look like an adorable turtle ready for display.

Step 6: Decorate the Turtle
Use a marker to add small details across the fingers and head area.

Adding tiny curved lines or dots gives the surface extra texture and personality.

This final step is where learners can really decorate their creation and explore their own creativity through simple drawing touches.

Why This Turtle Handprint Craft Is So Popular
A playful project like this turtle handprint craft works beautifully because it mixes creativity with simple steps that feel manageable from start to finish. It’s the kind of craft for kids that encourages imagination while also giving them a chance to practice small tasks like tracing and assembling shapes.

Creating a turtle handprint card also turns the activity into something meaningful. Whether used as a greeting card, a classroom display piece, or a seasonal project, the finished result always feels special. Many people even share their finished versions on Pinterest or recreate them after spotting a similar tiktok video online.
Turning Your Craft Into a Card
One of the nicest parts of this project is how easily it transforms into a meaningful turtle handprint card. Simply fold a sheet of sturdy cardstock in half and attach your finished design to the front.
A handmade card like this works beautifully for classroom exchanges, thank-you messages, or seasonal displays. It’s also one of those handprint cards that people enjoy saving long after the activity is finished.

Because the outline is based on a real finger shape, the finished result becomes a sweet memory piece that many people keep as a keepsake.
Why Kids Love Making This Turtle Craft
There’s something especially satisfying about watching a simple outline turn into a friendly animal character. This idea feels approachable from the very beginning, and the steps are easy enough for younger learners to follow with support.
Projects like this also help build confidence through simple progress. As each shape is added, learners can clearly see their design coming together. That makes it a rewarding experience whether used during preschool lessons or as a quiet table activity.

Teachers often enjoy using projects like this because they double as an educational opportunity. The activity introduces shape recognition, color matching, and sequencing skills while keeping learners engaged.
Creative Ways to Customize Your Craft
Once you make a turtle, there are lots of fun ways to personalize the finished design.
You might try:
- Using different shades of green for variety
- Adding patterned details to the shell area
- Creating a background scene on the card
- Adding painted textures using a small amount of paint
- Printing extra template pieces to layer with a print

These small changes help each finished project feel unique while still following the same simple steps.
Download the Printable Template for Easy Crafting
Using a printable template makes this activity especially simple to prepare. Just download the shapes, transfer them onto your colored sheets, and begin assembling.
Templates help keep preparation time short and make it easier for a teacher to guide groups through the steps at the same pace.

They also ensure each finished design keeps the recognizable proportions that give this craft its friendly appearance.
More Ocean Handprint Crafts for Kids
If you enjoyed making this Turtle Handprint Craft, here are a few more ocean-themed handprint projects that are fun to explore during creative craft time.
- Narwhal Handprint Craft – A playful ocean animal craft where kids can turn their hand outline into a charming narwhal.
- Handprint Jellyfish Craft – A colorful underwater project that lets kids create a bright jellyfish using simple materials.
- Octopus Handprint Paper Craft – A cheerful sea-themed craft that transforms a hand outline into a friendly octopus.
- Stingray Handprint Paper Craft – A fun ocean craft that helps kids create a smooth and simple stingray design using their hand outline.

One of the nicest things about this activity is how the finished project becomes a lovely keepsake that captures a moment in time through a simple outline. Because the base uses an actual handprint, it always feels a little more meaningful than a typical paper project.
Whether displayed on a bulletin board, added to a seasonal folder, or saved as part of a memory collection, this cheerful design turns everyday crafting time into something special.

Turtle Handprint Craft
This Turtle Handprint Craft is a fun way to turn a simple hand outline into a friendly turtle. Kids can practice tracing, cutting, and gluing while building the turtle’s head and layered shell. The fingers naturally become the turtle’s legs, which makes the design easy to recognize. It works well for ocean themes, nature lessons, or classroom displays. The finished turtle also makes a cute keepsake to save.
Materials
- Construction paper (green, brown, white & black)
- Scissors
- Glue
- Marker
Instructions
1. Trace and Cut the Handprint Base
Place a hand flat on green construction paper and trace carefully around the fingers using a pencil. Cut out the traced shape neatly, since this piece will become the turtle’s body and legs.
2. Cut the Turtle Pieces
Cut shapes from colored paper to create the head, shell layers, and eye circles. Keep each piece sized to match the handprint so they fit together smoothly during assembly.
3. Assemble the Turtle Head
Glue the white eye circles onto the head piece, then attach the black eye shapes on top. Position them evenly so the turtle’s face looks friendly and balanced.
4. Attach the Shell Layers
Glue the patterned shell pieces onto the larger shell base and arrange them across the palm area of the handprint. Press gently so the layered shapes stay in place.
5. Attach the Head and Shell to the Handprint
Glue the completed head near the thumb side of the handprint shape. Then secure the layered shell across the center of the palm area.
6. Add Final Details
Use a marker to draw small lines or dots on the fingers and head area for extra detail. Allow everything to dry before displaying the finished turtle as part of an ocean-themed craft collection or wall display.
