
DIY Angel Charm Bracelet Craft for Christmas
Make a meaningful piece of jewelry with this easy DIY angel charm bracelet.
This angel charm bracelet craft is a pretty Christmas jewelry project that kids and adults can make with beads, elastic bracelet string, and silver angel charms.
The finished bracelet has a simple silver-and-clear color palette with alternating beads and angel charms. It works well as a Christmas craft, handmade gift, Sunday school activity, or keepsake project.
Because the bracelet is made with elastic string, you do not need special jewelry tools or a clasp. Once you arrange the beads and charms, simply tie the ends together and trim the extra string.
This is also a fun jewelry-making activity for older kids, teens, homeschool groups, church groups, or a quiet craft afternoon at home.
If you enjoy making handmade gifts, you can also browse my Christmas crafts and printables as well as my Bible crafts and printables.
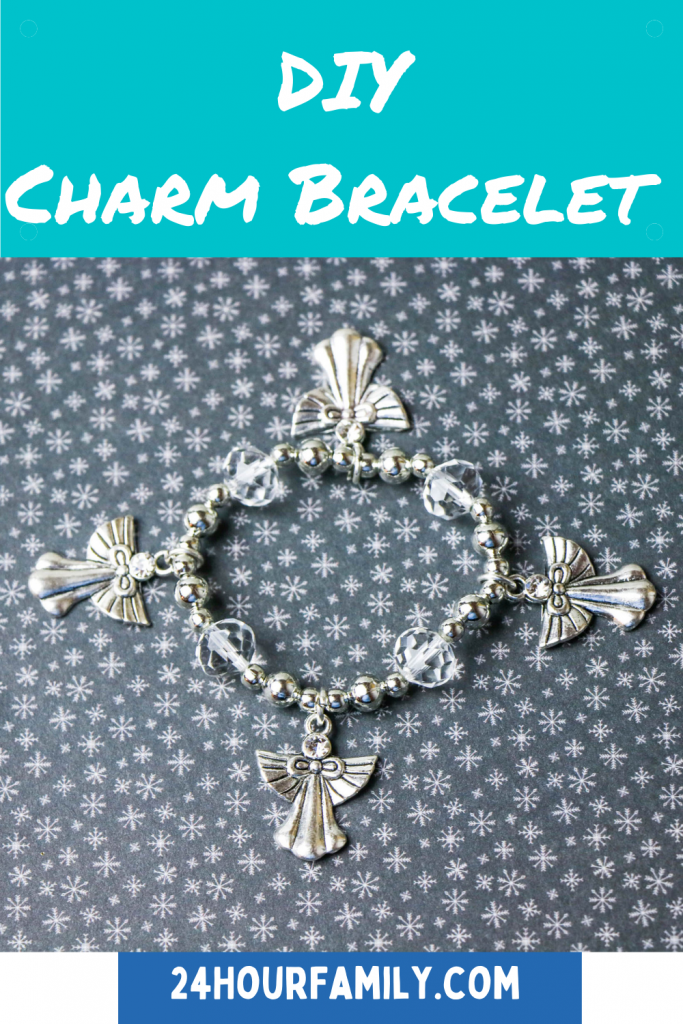
Angel Bracelet Craft for Christmas
This bracelet is easy to customize depending on the beads and charms you have available.
The version shown here uses:
- Silver beads
- Clear faceted beads
- Silver angel charms
- Clear elastic bracelet string
You can keep the bracelet simple and elegant with silver and clear beads or use Christmas colors such as red, green, gold, or white.
The original project uses glass faceted beads, angel charms, silver beads, and elastic bracelet string.
This post may contain affiliate links. As an Amazon Associate and a participant in other affiliate programs, I earn a commission on qualifying purchases. Read our disclosure policy here.
Supplies Needed:
You will need:
- Elastic bracelet string
- Silver beads
- Clear faceted beads
- Angel charms
- Scissors
- Ribbon, optional
You can also use different beads if you want to change the bracelet’s look.
Small glass or acrylic beads both work well.
Safety note: Beads and charms are small parts and can be a choking hazard. This craft is best for older children with adult supervision and should be kept away from babies and toddlers.
How to Make an Angel Charm Bracelet
Step 1: Measure the Bracelet String
Wrap the elastic string loosely around the wrist.
Cut the string to the desired bracelet length, then add about 3 to 4 extra inches.
The extra string gives you enough room to tie the bracelet securely once the beads are in place.
The original instructions recommend cutting the bracelet string to the wrist measurement plus an additional 3 to 4 inches.
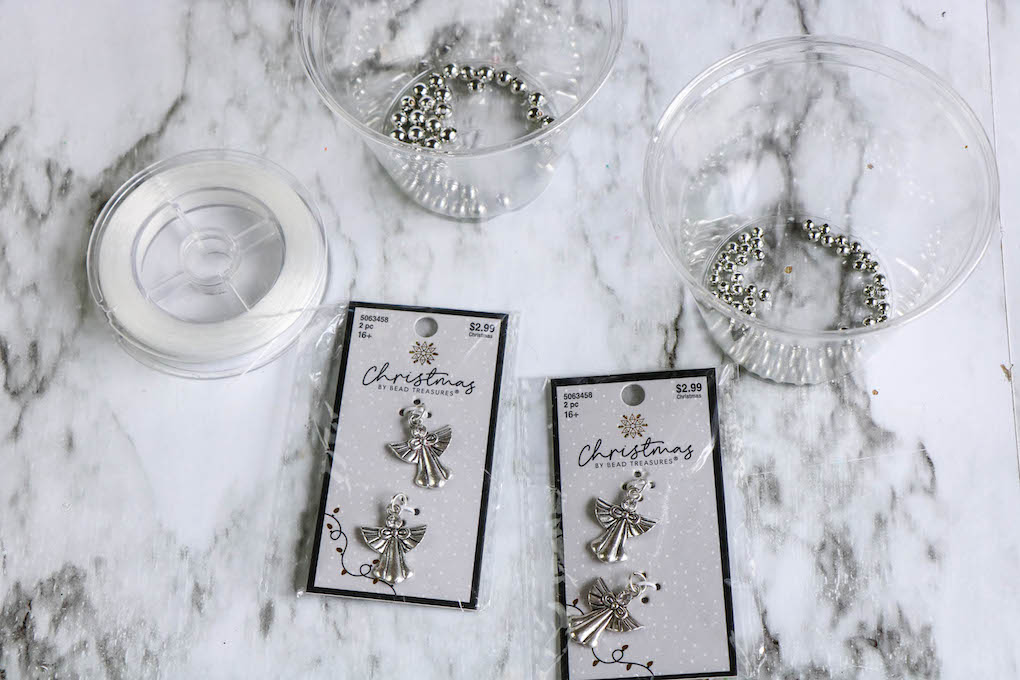
Step 2: Secure the First Bead
Loosely tie one bead to the end of the bracelet string.
This temporary bead acts as a stopper and helps keep the other beads from sliding off while you work.
Don’t tie the knot too tightly, because you will remove or adjust it when finishing the bracelet.
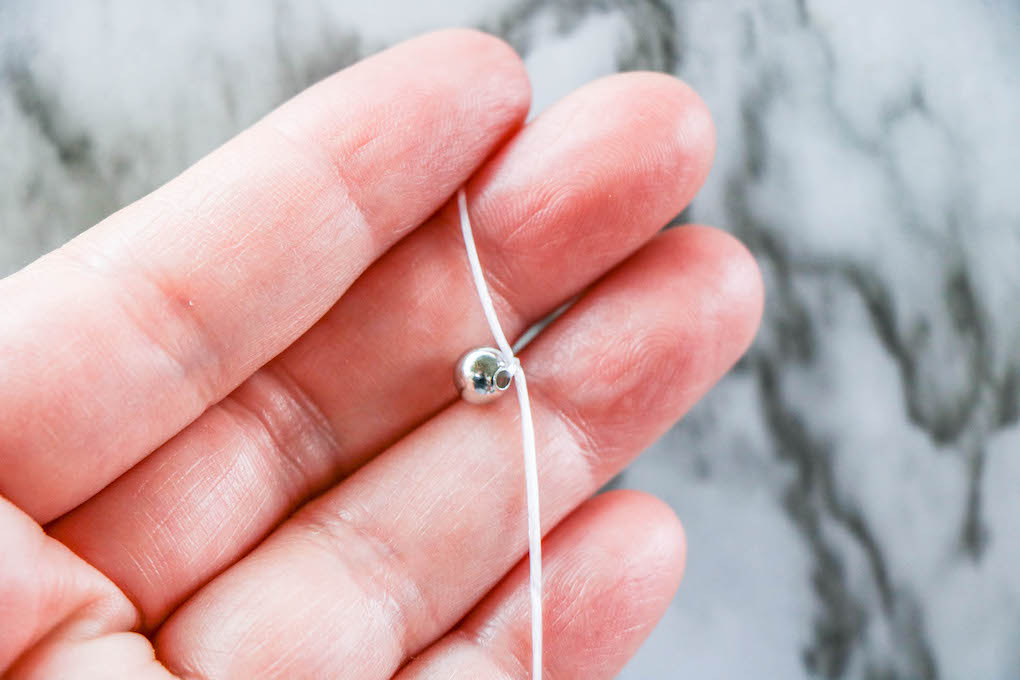
Step 3: Begin Adding the Beads
Start threading beads onto the elastic string.
For the bracelet shown here, alternate between smaller silver beads and larger clear faceted beads.
You can use a pattern such as:
Silver bead
Silver bead
Clear bead
Silver bead
Silver bead
Angel charm
Then continue repeating the pattern around the bracelet.
There is no single correct arrangement.
The goal is to create a balanced pattern that looks good when the bracelet wraps around the wrist.
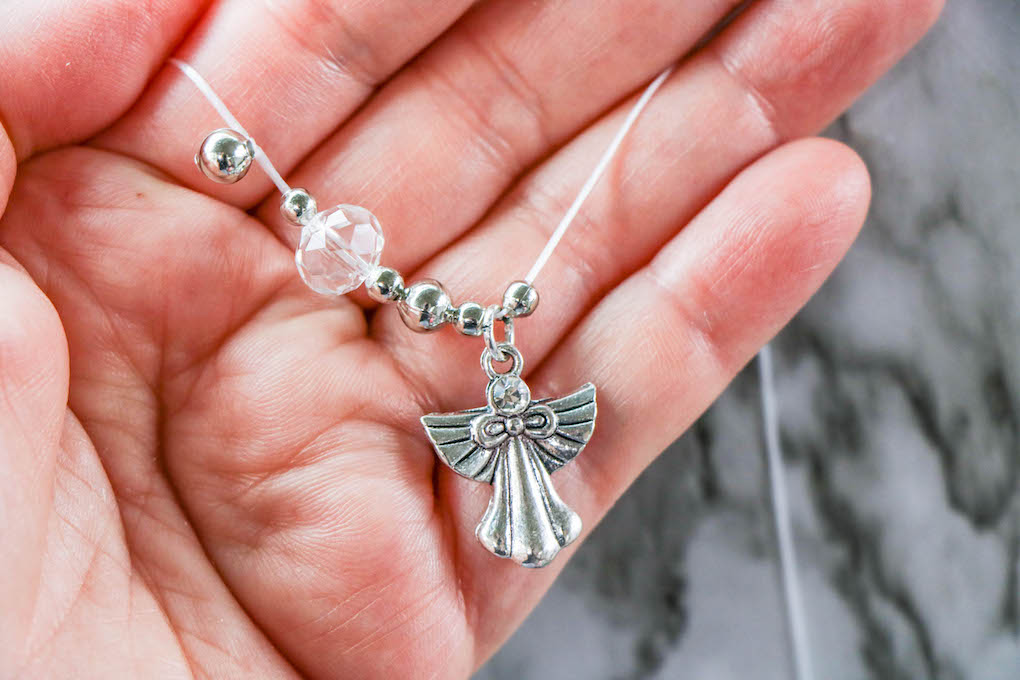
Step 4: Add the Angel Charms
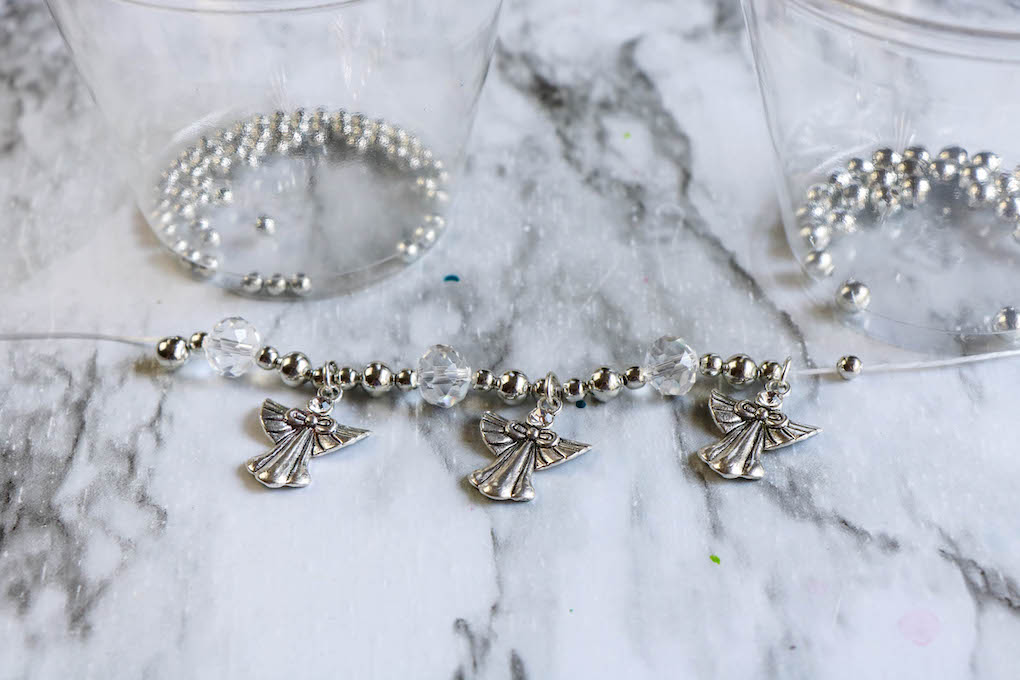
Slide the angel charms onto the bracelet string between groups of beads.
For an evenly spaced bracelet, place the charms at regular intervals.
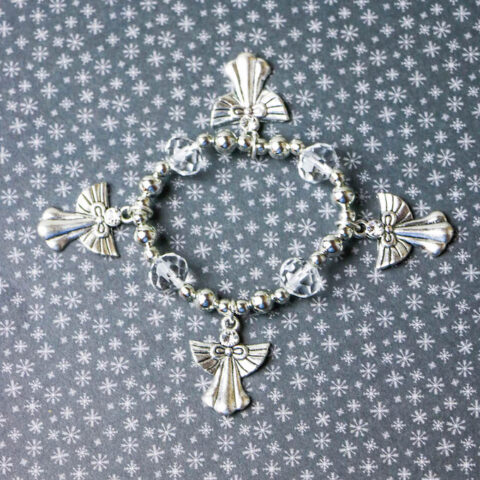
The finished bracelet shown in the photos uses several angel charms spaced around the bracelet rather than one single center charm.
This gives the bracelet a full charm-bracelet look.
The original directions suggest stringing the beads and charms in an alternating pattern until the bracelet reaches the desired length.
Step 5: Check the Fit
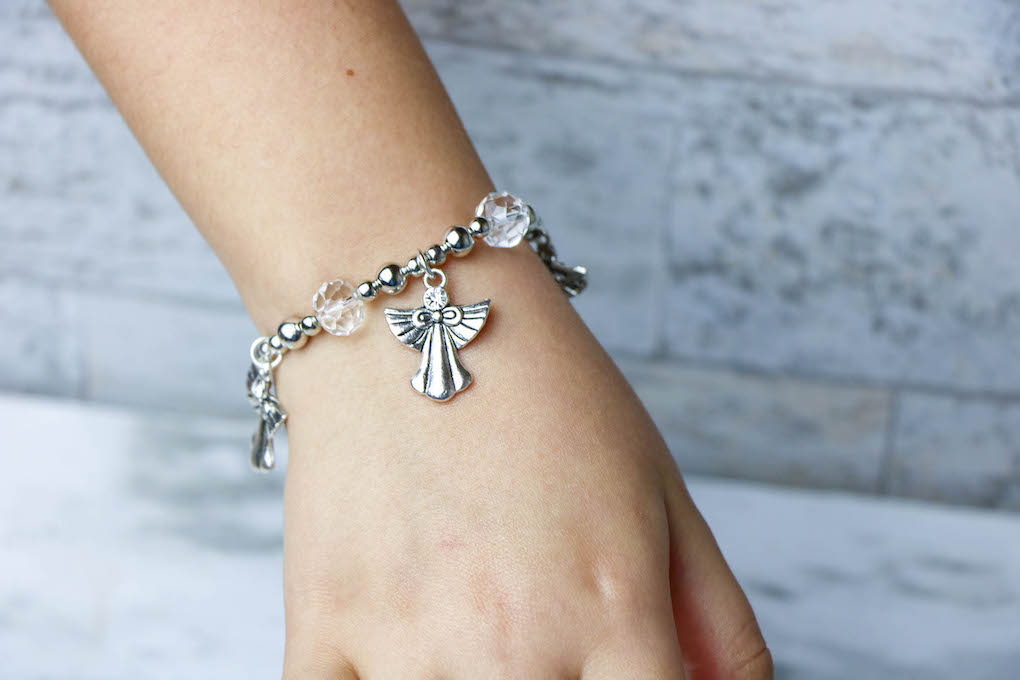
Before tying the bracelet, wrap it around the wrist.
Make sure it is comfortable but not too loose.
Elastic bracelets should have enough room to stretch over the hand without sliding off the wrist.
If the bracelet is too small, add a few more beads.
If it is too large, remove a few.
Step 6: Tie the Bracelet
Once you are happy with the length, bring the two ends of the elastic string together.
Tie them securely.
A tight double knot works well for this type of bracelet.
Gently pull on the bracelet to make sure the knot holds before trimming the string.
Step 7: Trim the Extra String
Use scissors to carefully trim away the excess elastic.
Leave a small amount of string near the knot rather than cutting directly against it.
The original project finishes the bracelet by tying it off and trimming away the extra string.
Optional Ribbon Detail
You can add ribbon if you want the bracelet to feel more like a gift or ornament-style keepsake.
Cut several pieces of ribbon to your preferred length.
Place them together and thread them through the inside of the bracelet.
Let the bracelet hang in the center of the ribbon, then tie the ribbon into a double knot between two beads.
The original instructions include this optional ribbon finishing idea.
Ways to Customize the Bracelet
One of the best things about this angel bracelet craft is how easily you can change the design.
Use Christmas Colors
Replace some of the clear beads with:
- Red beads
- Green beads
- Gold beads
- White pearl beads
Make a Faith-Based Bracelet
Pair the angel charms with:
- Cross charms
- Star charms
- Heart charms
- Nativity charms
This makes the bracelet especially fitting for Sunday school, church Christmas activities, or faith-based gift-giving.
Make Matching Bracelets
Create matching bracelets for:
- Sisters
- Friends
- Cousins
- Mother and daughter
- Sunday school classmates
Changing one or two bead colors can help each child create a bracelet that feels unique.
Why This Makes a Nice Handmade Christmas Gift
Handmade bracelets are small enough for kids to make in one sitting, but still feel special as a gift.
This angel bracelet would work well as a handmade present for:
- Mom
- Grandma
- A teacher
- A Sunday school teacher
- A friend
- A sibling
Place it in a small jewelry box, organza bag, or gift envelope for an easy Christmas gift.
Tips for Working With Elastic Bracelet String
A few simple steps can make assembly easier.
Use a stopper bead.
Loosely tying one bead to the end helps prevent beads from sliding off.
Do not stretch the elastic while stringing.
Let the elastic stay relaxed until the bracelet is finished.
Check the fit before tying.
It is much easier to add or remove beads before the final knot.
Tie securely.
A double knot helps keep the bracelet from coming apart.
Do not cut too close to the knot.
Leave a small amount of elastic so the knot has room to hold.
Angel Bracelet Craft for Sunday School
This craft could also work as a Christmas Sunday school activity for older children.
You can talk about the angels in the Christmas story while children make their bracelets.
For example, read part of the Nativity story and discuss how angels announced Jesus’ birth.
Then let each child create an angel bracelet to take home.
Because this activity uses small beads and charms, I would reserve it for older elementary children, tweens, or teens rather than preschoolers.
More Angel and Christmas Crafts
If you are planning a Christmas craft day or Sunday school activity, you can pair this bracelet with other angel and Christmas projects from 24 Hour Family.
Browse our Christmas Crafts and Printables for Kids for more holiday activities.
What age is this angel bracelet craft best for?
This bracelet is best for older elementary-age kids, tweens, teens, and adults. Small beads and charms can be a choking hazard, so younger children should not make this craft without close adult supervision.
What kind of string should I use for a bead bracelet?
Clear elastic bracelet string works well because it stretches over the hand and does not require a clasp.
Can I use plastic beads instead of glass beads?
Yes. Acrylic or plastic beads are lighter and may be easier for children to work with.
How many angel charms do I need?
The number depends on the bracelet size and the look you want. The bracelet shown uses several charms spaced around the bracelet.
Can this be made as a Sunday school craft?
Yes. It works especially well for older children as they learn about the angels in the Christmas story. An adult must supervise children.
Make Your Own Angel Charm Bracelet
This angel charm bracelet craft is an easy jewelry project that can become a handmade Christmas gift, keepsake, or Sunday school activity.
The combination of silver beads, clear faceted beads, and angel charms gives the finished bracelet a festive look without requiring complicated jewelry-making tools.
Choose your favorite beads, create a pattern, add the angel charms, and make a bracelet you can wear throughout the Christmas season.
Angel Charm Bracelet
Make a pretty angel charm bracelet using silver beads, clear faceted beads, angel charms, and elastic bracelet string. This simple Christmas jewelry craft makes a lovely handmade gift or keepsake.
Materials
- Clear elastic bracelet string
- Silver beads
- Clear faceted beads
- Angel charms
- Ribbon, optional
Tools
- Scissors
Instructions
- Measure the elastic bracelet string around the wrist.
- Cut the string to the desired bracelet size plus an extra 3 to 4 inches for tying.
- Loosely tie one bead to one end of the string to keep the remaining beads from sliding off.
- Begin threading silver beads and clear faceted beads onto the elastic.
- Add angel charms between groups of beads, spacing them evenly around the bracelet.
- Continue adding beads and charms until the bracelet reaches the desired length.
- Wrap the bracelet around the wrist to check the fit.
- Add or remove beads if necessary.
- Bring the two ends of the elastic together and tie them securely with a double knot.
- Gently pull on the bracelet to make sure the knot holds.
- Trim away the excess elastic with scissors.
- If desired, thread ribbon through the inside of the bracelet and tie it between two beads for a decorative finishing touch.
Notes
- Small beads and charms can be a choking hazard. Adult supervision is recommended.
- Plastic or acrylic beads can be used instead of glass beads.
- Do not stretch the elastic while stringing the bracelet.
- Check the fit before tying the final knot.
- Leave a small amount of elastic near the knot rather than trimming it completely flush.
- Use red, green, gold, or pearl beads for a different Christmas color scheme.
