
Armor of God Breastplate of Righteousness Craft (Free PDF Template)
Some crafts are just fun, but this Armor of God Breastplate of Righteousness craft for kids is so much more. It weaves together creativity, a simple Bible lesson, and a hands-on reminder of God’s truth that little ones will carry with them long after the glue dries.
Whether you’re planning a Sunday school activity, putting together VBS materials, or searching for an easy Armor of God craft to add to your week, this one is simple, fun, and easy to make.
Armor of God Breastplate of Righteousness Craft
The breastplate of righteousness is an important piece of the full armor of God described in the Ephesians armor of God passage.
Roman soldiers wore a breastplate over their chest for protection, and the Bible uses that picture to explain spiritual protection too.
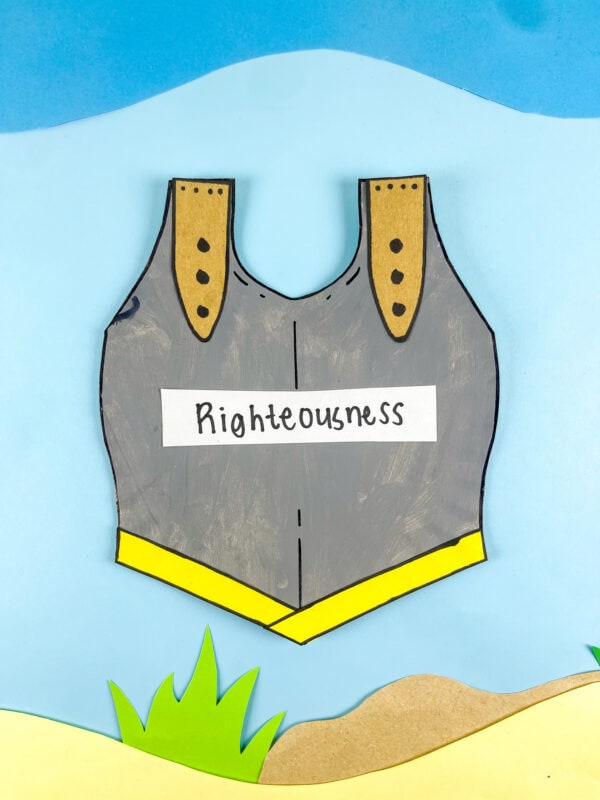
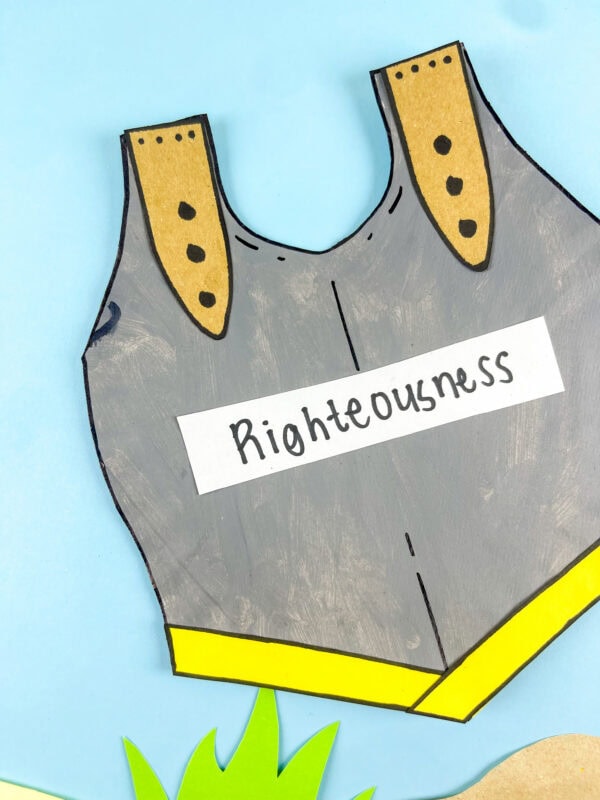
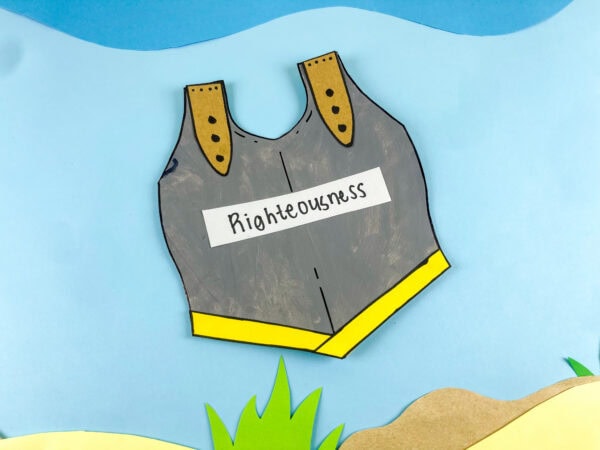
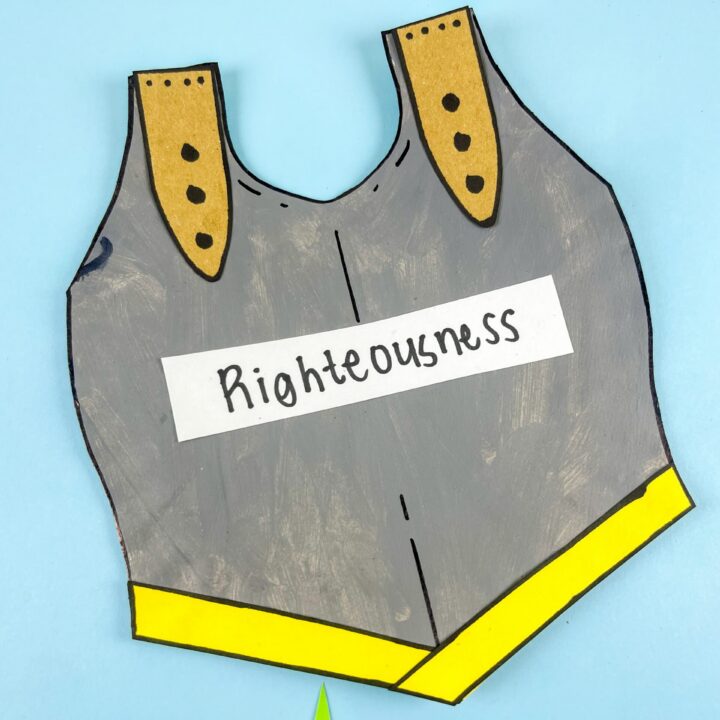
This easy DIY project turns a simple paper plate into an armor-of-God breastplate, complete with straps, trim, and a “Righteousness” label.
Because it uses simple supplies and beginner-friendly cutting, this craft for kids works well for church, homeschool, classroom use, or a themed Armor of god family activity night.
This post may contain affiliate links. As an Amazon Associate and a participant in other affiliate programs, I earn a commission on qualifying purchases. Read our disclosure policy here.
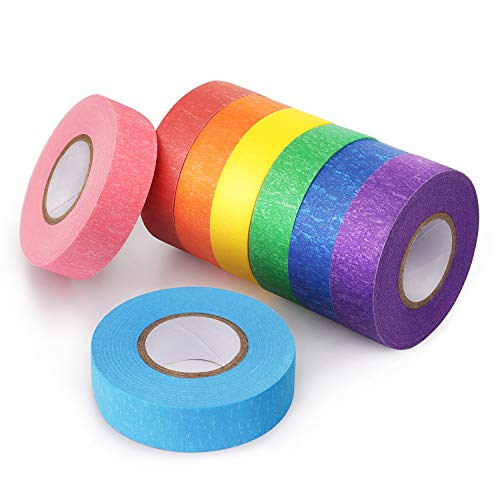
Crayola Construction Paper Bulk Pack (480 Sheets) – 10 Assorted Colors, 9×12, Classroom Arts & Crafts Supplies for Kids, Art Paper for School Projects Paper Crafts for Kids: 25 Cut-Out Activities for Kids Ages 4-88 Rolls Colored Masking Tape Rainbow Colors Painters Tape Colorful Craft Art Paper Tape for Kids Labeling Arts Crafts DIY Decorative Coding Decoration Teaching Supplies, 0.6 Inch x 16 Yard, 8 ColorsARTISTRO 24 Acrylic Paint Markers for Rock, Fabric, Wood, Glass, Craft, Decoration – Dual-Tip Paint Pens – Stocking Stuffers, Christmas Gift Idea for Teens, Grandkids, Kids – Art Supplies900 PCS Pom Poms, Multicolor Bulk Pom Poms Arts and Crafts, Soft and Fluffy Craft Pom Poms, Assorted Sizes Pompoms, for Arts and Craft Making DecorationsElmer’s Disappearing Purple School Glue Sticks, Washable, 6 Grams, 12 Count – Poster, Vision Board, Back to School, #1 Teacher Brand


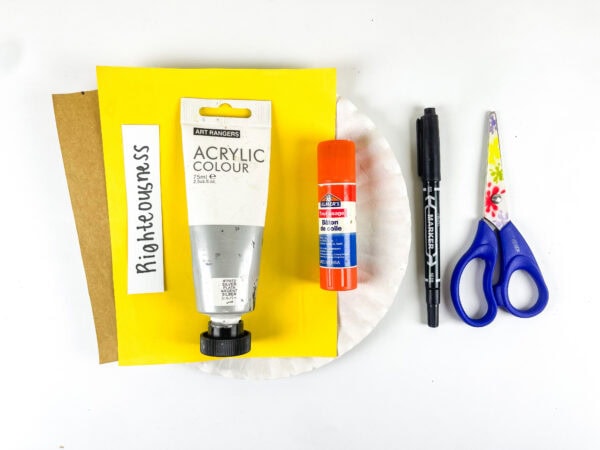
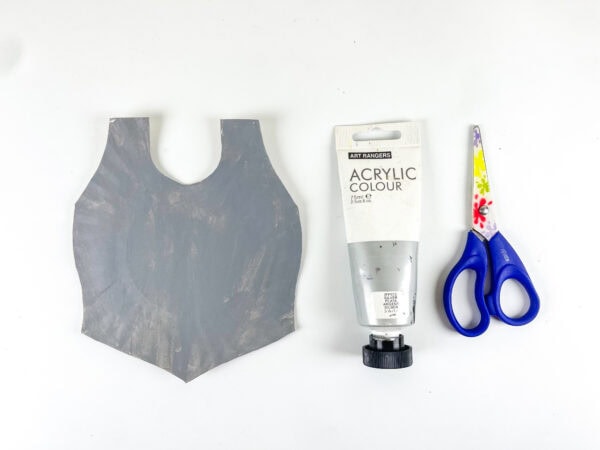
Materials Needed To Make This Bible Craft:
Before starting your breastplate of righteousness craft, gather these supplies:
- Paper plate
- Gray paint
- Construction paper
- Glue
- Scissor
- Marker
- Template or printable breastplate pattern
- “Righteousness” label sheet
If you are using a digital download, simply download, print, and cut your template pieces before starting.
This resource is easy to prep, and most of the supplies are probably already sitting in your craft bag or supply cabinet.
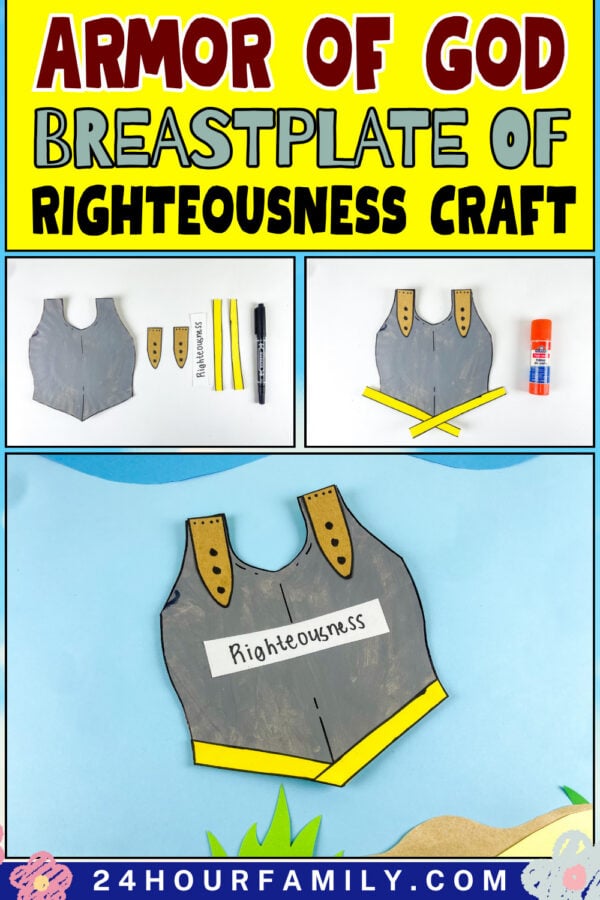
How To Make This Armor of God Breastplate of Righteousness Craft
This hands-on activity comes together in just a few simple steps.
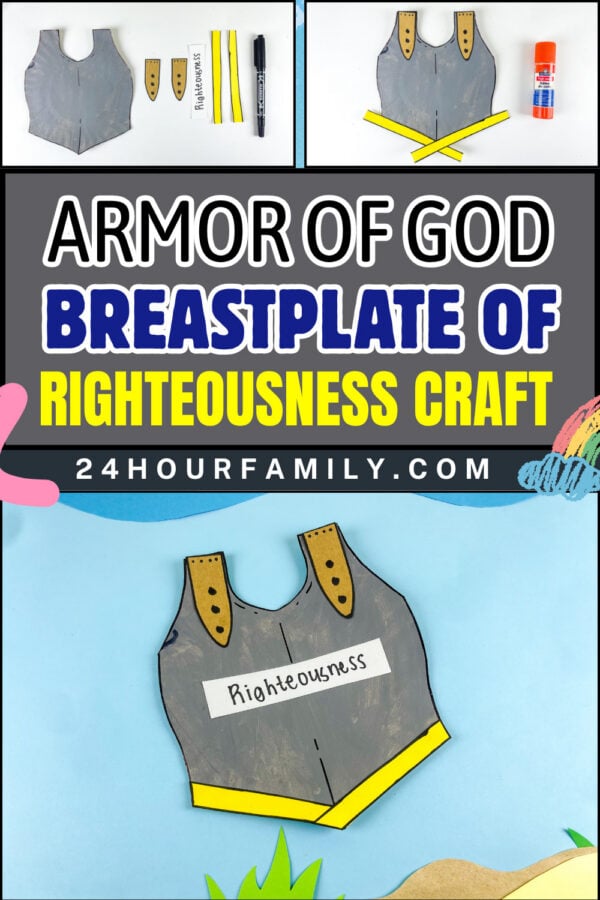
Step 1: Prepare the Breastplate Base
Start by tracing your template onto a paper plate. Carefully cut out the breastplate shape.
Use gray paint to color the front of the plate after the shape is prepared. Let it dry completely before continuing with the craft.
The gray color gives your armor a classic metallic look, almost like a mini Roman soldier costume piece.
Step 2: Trace and Cut the Paper Pieces
Next, use the remaining pattern pieces to trace onto construction paper.
Cut out the shoulder straps and yellow trim sections. This is a great cutting practice step for younger learners, while an older child can work more independently.
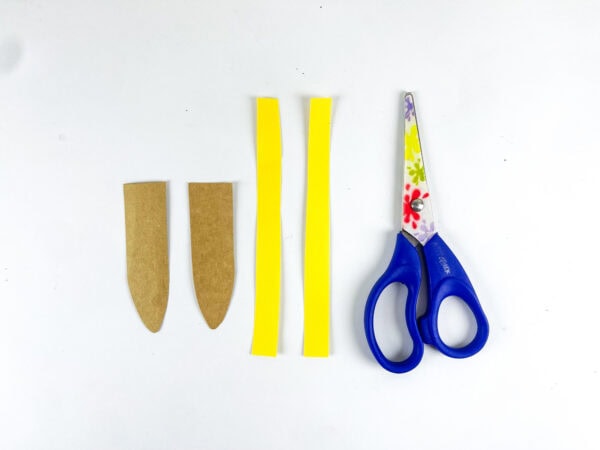
If desired, kids can even draw extra details onto their paper shapes before assembly.
Step 3: Outline the Details
Use a black marker to outline each section.
Adding outlines helps the artwork stand out and adds extra detail to the Armor of God project without requiring complicated supplies.
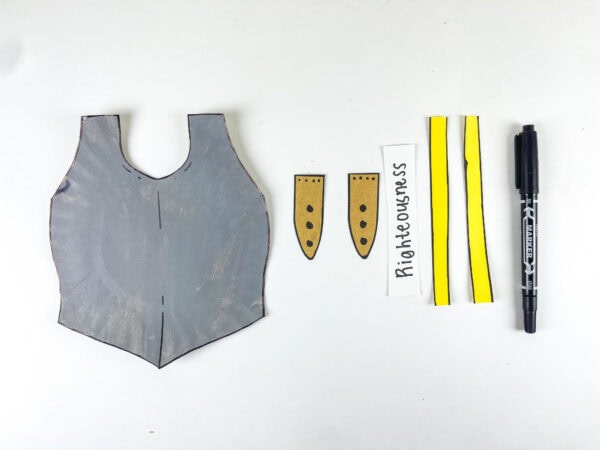
You can also add dots, lines, or small decorations to help the straps match the rest of the design.
Step 4: Attach the Straps
Use your marker to add details to the shoulder tabs.
Then make a small hole near the strap area and attach the shoulder pieces to the top of the breastplate.
This step really helps the wearable design start coming together.
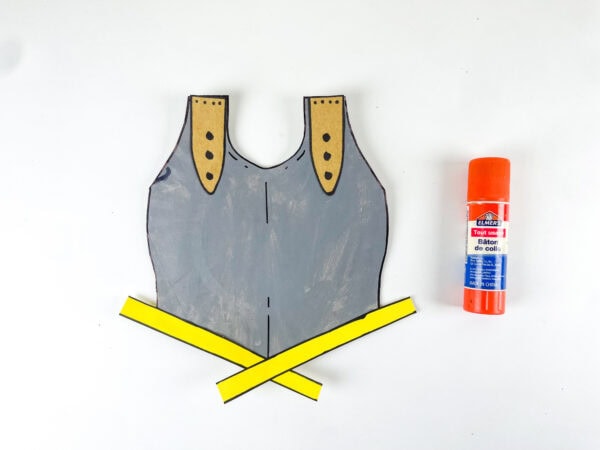
Step 5: Add the Bottom Trim
Take the yellow strips and attach them across the bottom edge of the breastplate using glue.
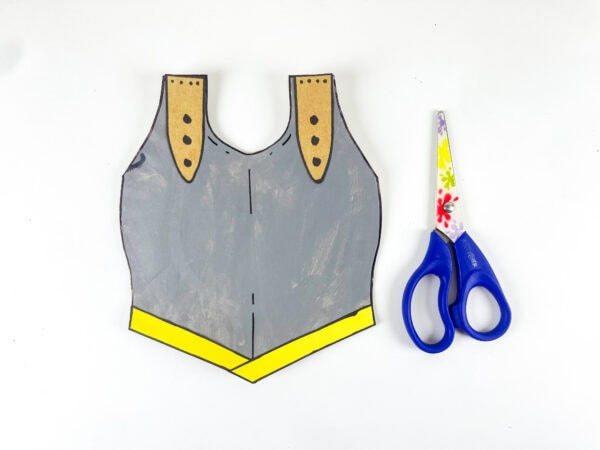
Trim away any extra paper for a neat finish.
The bright yellow trim adds a fun pop of color and helps frame the design.
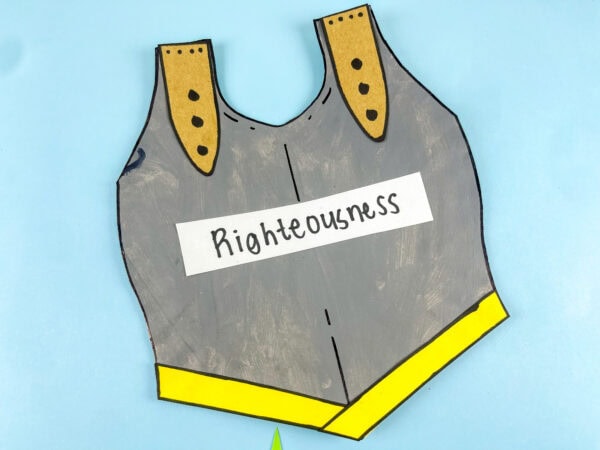
Step 6: Add the Righteousness Label
Finally, attach the “Righteousness” label to the center.
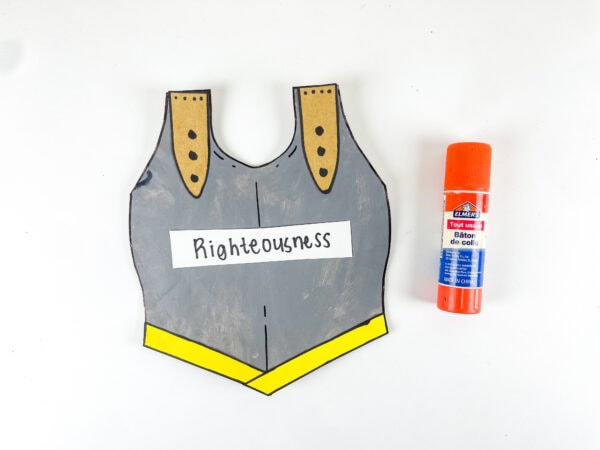
That simple word becomes an important reminder of what the breastplate of righteousness represents in Scripture.
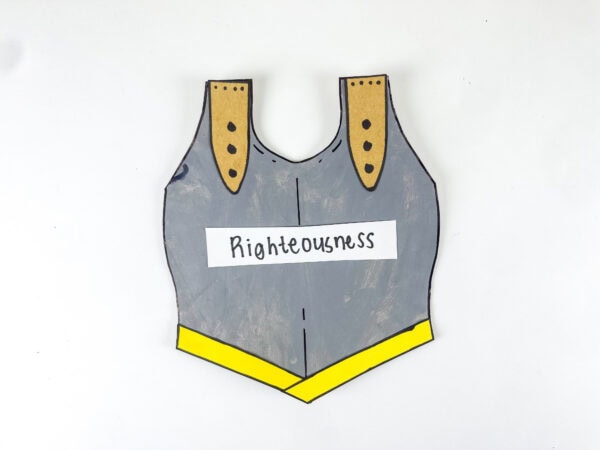
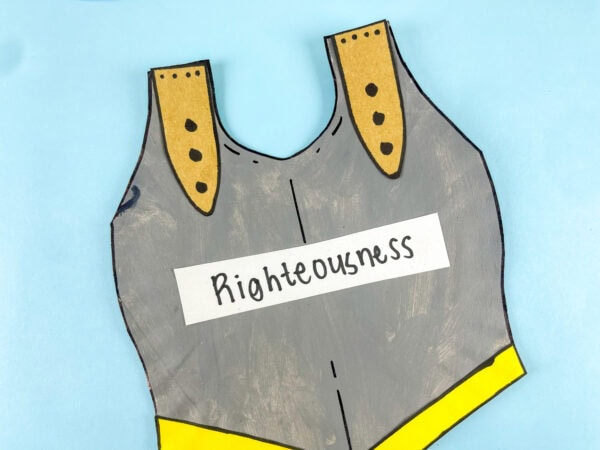
Your finished breastplate of righteousness craft is ready to display, use during a lesson, or pair with the complete armor of god set.
Understanding the Breastplate of Righteousness
The breastplate of righteousness in Bible teaching comes from Ephesians 6, where believers are encouraged to “put on” God’s spiritual armor.
The breastplate of righteousness protected a soldier’s vital areas, especially the heart and chest. In the Bible, righteousness points us toward living in a way that honors Jesus.
That doesn’t mean being perfect.
Instead, it reminds us that through faith, we can follow God, make wise choices, and stay rooted in god’s word.
This makes the breastplate-of-righteousness craft more than just a fun activity. It becomes a visual learning tool that kids can connect to their studies, church crafts, or weekly Bible lessons.
Different Variations to Try For This Craft:
Want to personalize your armor of god craft? Here are a few fun options.
- Add metallic silver paper for extra shine.
- Use stickers or a decorative sticker pack to customize the design.
- Create an oversized version for imaginative play or themed costumes.
- Create a bulletin board display for school.
- Use different printables for younger or older age groups.
You could even create the complete armor of god and build a full classroom set.
For an extra creative theme, pair this project with soldier snacks, scripture memory verse cards, and themed coloring pages.
Shop My Homeschool Room:
Learning Resources MathLink Cubes – Set of 100 Cubes, Ages 5+ Kindergarten, STEM Activities, Math Manipulatives, Homeschool Supplies, Teacher SuppliesElmer’s Disappearing Purple School Glue Sticks, Washable, 6 Grams, 12 Count – Back to School, Teacher Supplies, #1 Teacher BrandThe Mega Deals Kids Painting Set, Washable Paint for Kids with Paint Cups and Toddler Paintbrushes, Non Toxic Washable Finger Paints 2 oz Each, Gifting Bundle Toddler Painting SuppliesEXPO Low Odor Dry Erase Markers Ultra-Fine Tip Assorted Colors 8 CountMy First Book of Patterns: Pencil ControlMarbrasse 6 Tier Paper Organizer Letter Tray – Mesh Desk File Organizer with Handle, Paper Sorter Organizer for Letter/A4 Office File Folder Holder – Black


Helpful Tips For Success:
Here’s one quick tip to make your armor of god breastplate of righteousness craft easier:
Pre-cut some of the smaller sections for younger children.
This helps keep the craft for kids enjoyable without making the cutting steps overwhelming.
If you’re using a PDF or an instant digital download, organize the templates into a supply pack in advance. Having everything ready makes prep much faster for large groups, homeschool settings, or VBS use.
You can even save your printable files for later use.
More Creative Paper Plate Activities
If you enjoyed making the Armor of God Breastplate of Righteousness Craft, here are a few more paper plate projects that are fun, creative, and perfect for keeping kids engaged.
- Angel Paper Plate Craft – Create a simple angel with basic craft supplies for a meaningful, creative activity.
- Moving Nativity Paper Plate Craft – A fun interactive craft that brings the nativity story to life with moving pieces.
- Mayflower Ship Paper Plate Craft – A hands-on history-themed project that lets kids build their own Mayflower ship.
- Crab Paper Plate Craft – A bright ocean-inspired craft that turns a paper plate into a cheerful crab.
- Jonah and the Whale Paper Plate Craft
This Armor of God Breastplate of Righteousness Craft is such a meaningful way to combine creativity with Scripture learning.
With simple supplies, easy steps, and a strong connection to the Bible, it’s an engaging, hands-on activity for kids.
Whether you’re planning an Armor of God family night, building a Sunday school resource, putting together VBS materials, or looking for fresh Pinterest inspiration, this breastplate of righteousness craft offers a simple way to explore God’s truth through making.
Can I use this for a Sunday school or church lesson?
Absolutely. This craft fits beautifully into a church lesson, a homeschool study, or a Bible craft unit focused on the armor of God.
Is this craft good for different age groups?
Of course. Younger children may need help with cutting, while an older child can complete most of the steps independently.
Can I make this into a wearable craft?
Yes! Because of its shape and design, this project has a fun wearable feel. You can even adjust the size and add ribbon straps to make it more costume-friendly.
Where can I find the template?
You can download the free template by entering your email at the bottom of this blog post. The template will be sent directly to your inbox.
Armor of God Breastplate of Righteousness Craft
This Armor of God Breastplate of Righteousness Craft is a fun way for kids to learn about an important piece of the Armor of God. Using a paper plate and a few simple supplies, children can create a breastplate with straps, trim, and a righteousness label. The activity helps strengthen cutting, painting, and gluing skills while reinforcing a meaningful Bible lesson. It works well for church classes, homeschool activities, or VBS programs. The finished craft can be displayed or used alongside other Armor of God projects.
Tools
- Paper plate
- Gray paint
- Construction paper
- Glue
- Scissors
- Marker
- Breastplate template
- "Righteousness" label
Instructions
1. Prepare the Breastplate Base
Trace the breastplate template onto a paper plate and carefully cut out the shape. Paint the front gray to create an armor-like appearance. Set it aside and allow the paint to dry completely before continuing.
2. Cut Out the Paper Pieces
Use construction paper to trace and cut out the shoulder straps and yellow trim pieces. Keep the edges neat so the pieces fit together easily during assembly.
3. Add the Outline Details
Use a black marker to outline the breastplate and the paper pieces. Draw a few simple lines or decorative details to give the armor extra texture and definition.
4. Attach the Shoulder Straps
Add marker details to the shoulder strap pieces before attaching them. Then glue the straps to the top portion of the breastplate so they extend above the main armor section.
5. Add the Bottom Trim
Glue the yellow trim pieces along the lower edge of the breastplate. Trim away any excess paper to create a clean and finished look.
6. Attach the Righteousness Label
Glue the "Righteousness" label to the center of the breastplate. Position it where it can be easily seen and becomes the focal point of the craft.
7. Let It Dry and Display
Allow all pieces to dry completely before handling. Once finished, display the breastplate on a bulletin board, use it during a lesson, or add it to a complete Armor of God craft set.