
Ezekiel Bible Craft for Kids
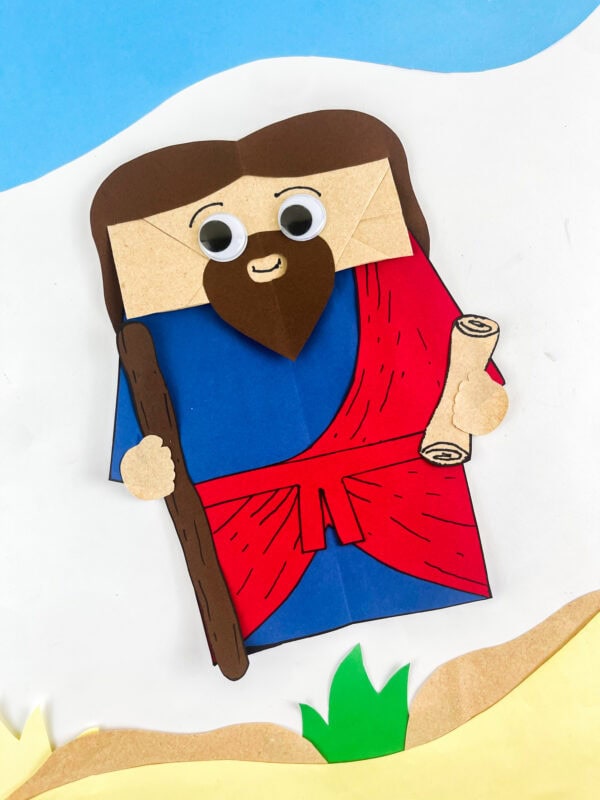
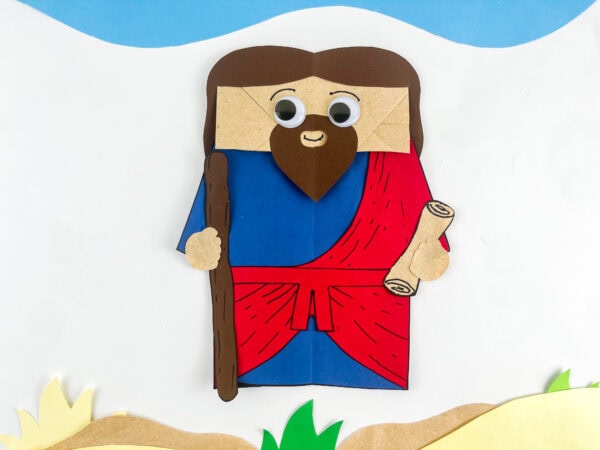
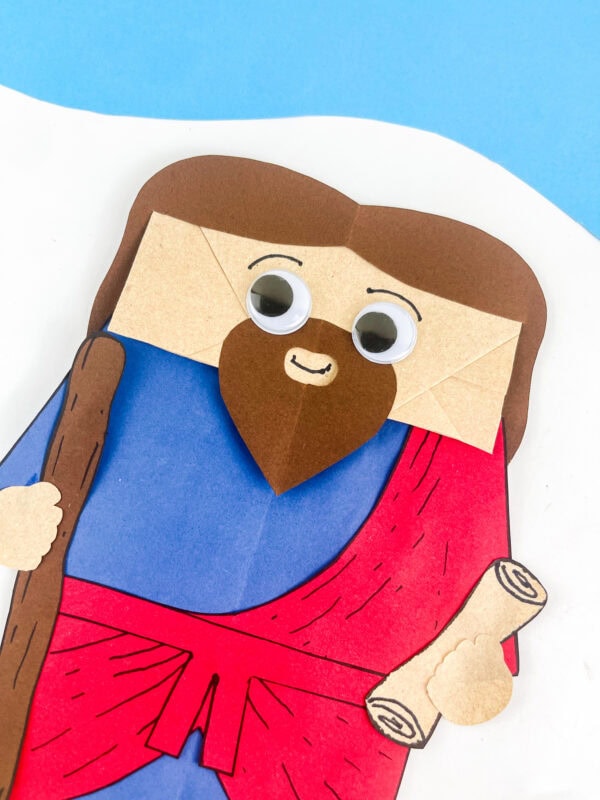
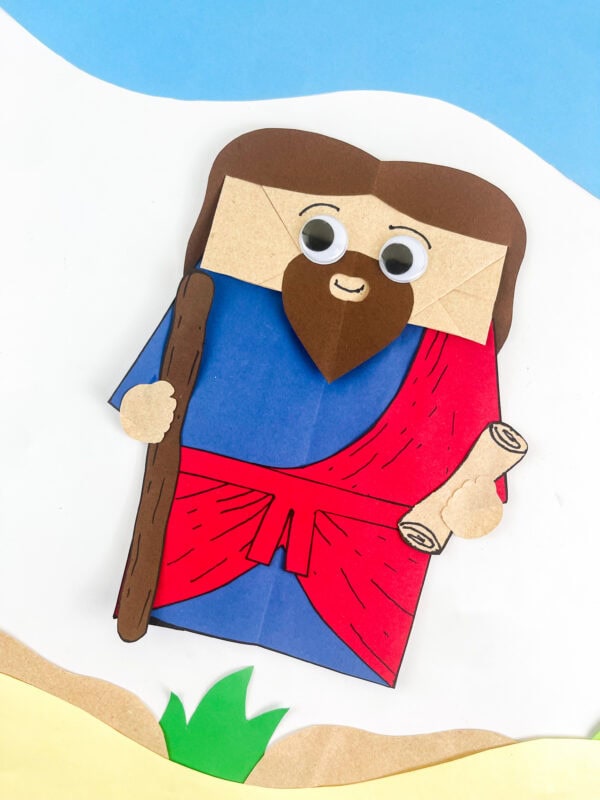
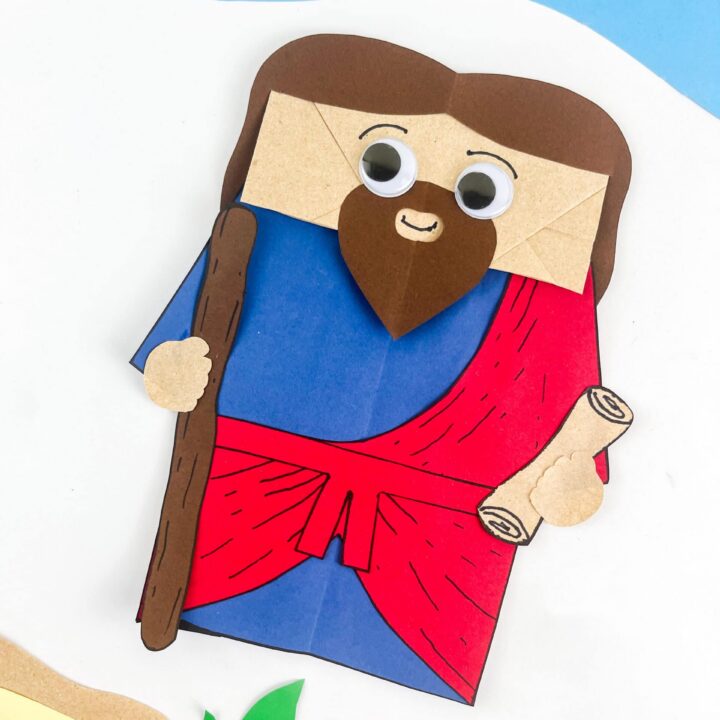
This Ezekiel Bible craft for kids turns one of the Old Testament’s most dramatic prophets into an adorable paper bag puppet — complete with a wooden walking staff, a rolled parchment scroll, a flowing blue robe with a bold red sash, and warm brown hair and beard.
The free printable template in this post includes every piece you need to trace and cut. All you need beyond the template is a standard paper lunch bag, construction paper in blue, red, and brown, googly eyes, white school glue, child-safe scissors, and a black marker.
This easy puppet also makes a fun Sunday school lesson that helps children remember God’s promise to bring hope and new life.
Ezekiel Bible Craft for Kids (Paper Bag Puppet with Free Template)
The staff and scroll are meaningful details that help tell the story. The scroll represents God’s message, while the staff reminds children of faithful leadership and obedience.
Together, they introduce one of the Bible’s most memorable lessons about God’s power to bring hope and new life.
The Story of Ezekiel — A Prophet to Exiles
Before making the craft, here is a brief overview of Ezekiel and why his story matters — particularly the famous vision that makes him most memorable to children.
He served God’s people during their time in Babylon after many Israelites had been taken from their homeland. While living there, God revealed incredible visions filled with heavenly creatures, wheels, fire, and brilliant light, showing His greatness and glory.
God entrusted Ezekiel with the task of delivering His words to the Israelites during their exile. Although many would ignore the message, he would continue to follow God’s calling. “Whether they listen or fail to listen—for they are a rebellious house—they will know that a prophet has been among them” (Ezekiel 2:5).
Ezekiel communicated God’s messages not only through words but through dramatic prophetic actions — lying on his side for 390 days, shaving his head with a sword, packing a bag as if going into exile, and acting out scenes that God told him to perform as living object lessons for the people.
He was, in many ways, the most theatrical of all the biblical prophets.
One of the best-known stories appears in chapter 37, where God showed him a field filled with dry bones that resembled a giant skeleton scattered across the ground. God asked whether life could return to the bones.
As he obeyed God’s instructions, the bones came together, were covered with flesh, and received the breath of life. This powerful event revealed that God can bring hope even in the darkest circumstances.
These verses help bring the lesson to life:
“As I obeyed God’s command and spoke, I heard a rattling sound. Then the bones began to join together, each one connecting to the next.” (Ezekiel 37:7)
“Then God explained, “These bones represent the people of Israel. They believe all hope is lost and that they have been cut off. But tell them this: I will open their graves, bring them out, and restore them.” (Ezekiel 37:11-12)
What You Need for This Ezekiel Craft
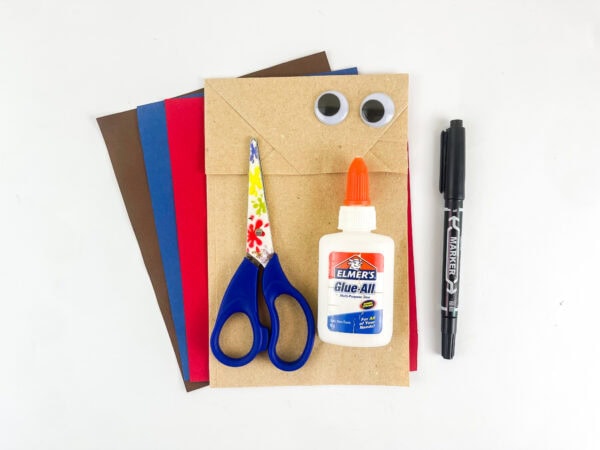
Gather these supplies before you start:
- Construction paper in these colors: blue (for the robe), red (for the sash and sash detail), brown (for the hair, beard, and walking staff)
- 1 standard lunch-size paper bag (brown kraft paper)
- Googly eyes (2 large)
- White school glue or a glue stick
- Child-safe scissors
- Black marker
- Kraft paper scraps from the bag itself (for the scroll and fist pieces)
- Free printable template (download below)
This post may contain affiliate links. As an Amazon Associate and a participant in other affiliate programs, I earn a commission on qualifying purchases. Read our disclosure policy here.
AJM Brown Paper Lunch Bags 40 Count Crafty DAB GLUES DAB N STIC SchoolElmer’s Disappearing Purple School Glue Sticks Washable 22 Grams 3 CountHuhuhero Kids Scissors, 5” Safety Toddler Scissor Blunt Tip with Cover, Small Craft Cutting Paper Scissors for Child Kid Age 4-7 8 9, Assorted Colors, 4 PackCrayola Construction Paper, 120 SheetsCrayola 587722 Non-Washable Markers, Broad Point, Classic Colors, 10/Set




Free Printable Template – What’s Included
The free downloadable PDF includes every traceable piece needed for the puppet.
Body and clothing pieces:
- Blue robe (the large T-shaped piece that covers the main body of the bag)
- Red sash/drape (the curved crescent-shaped piece that drapes across one shoulder and cascades down diagonally)
- Red belt strip and tab detail (the horizontal strip at the waist with a small rectangular tab)
Head and face pieces:
- Hair frame (the rounded piece that frames the face, cut from brown paper)
- Beard (the heart-shaped piece, cut from brown paper)
- Two small fist/hand pieces (cut from kraft paper scraps)
Props:
- Walking staff (a long narrow tapering piece — color brown with a black marker to add wood grain texture)
- Scroll (a small hourglass-shaped piece cut from kraft paper, with spiral circles drawn at each end using a black marker)
How to Make the Ezekiel Bible Craft for Kids
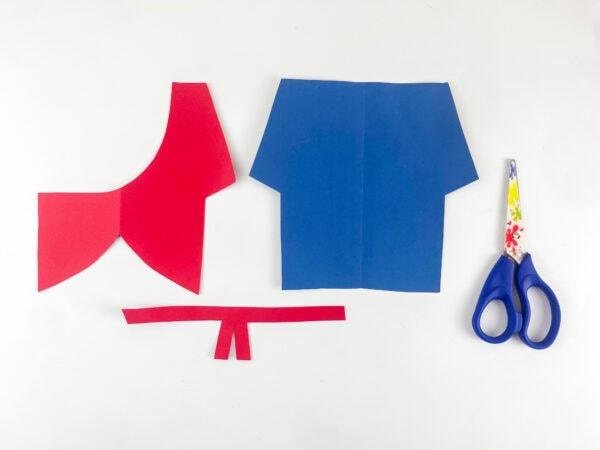
Step 1: Download and print the template. Trace and cut all pieces.
Download the free template PDF below and print it on standard white paper. Trace each template shape onto the correct color of construction paper using a pencil, then cut along the traced lines.
Color guide:
- Blue robe: blue craft paper
- Red sash and belt: red craft paper
- Hair and beard: brown craft paper
- Hand pieces: kraft paper scraps or light brown paper
- Walking staff: brown craft paper
- Scroll: kraft paper scraps
Step 2: Add detail lines to the robe pieces.
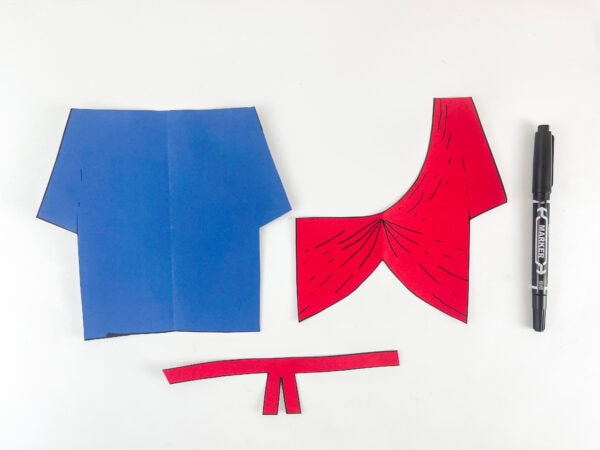
Before assembling, pick up the red sash piece and the black marker. Draw fold and drape lines across the sash — short, slightly curved lines running in the same direction as the sash falls, suggesting the way fabric hangs and gathers.
The sash has a lot of visual movement in the finished puppet, and the marker lines give it the texture and depth that make it look like real draped cloth rather than a flat paper shape.
Draw a clean outline around the edge of the sash as well.
Also draw a clean outline around the blue robe piece and add a few subtle fold lines on the lower body section of the robe.
Step 3: Assemble the body on the paper bag.
Take your paper lunch bag and lay it flat with the flap facing up. The flap at the top of the bag is where Ezekiel’s face will sit.
Glue the blue robe to the front of the bag, centering it so it covers the main body section. The top of the robe meets the bottom of the flap area where the face will go.
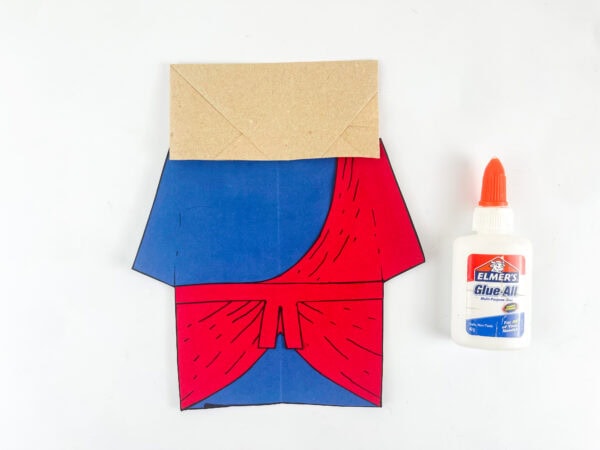
Attach the red sash so it runs diagonally from one shoulder across the robe. Then glue the belt across the waist and add the small tab in the center.
Finish by attaching the two hand pieces near the ends of the sleeves.
Step 4: Make the walking staff and scroll.
Take the long brown staff piece and use the black marker to draw wood-grain details along its length — short, angled dashes and lines that give the staff the texture of a real carved wooden walking stick. Draw slightly curved horizontal lines at intervals and a few knothole marks for extra detail.
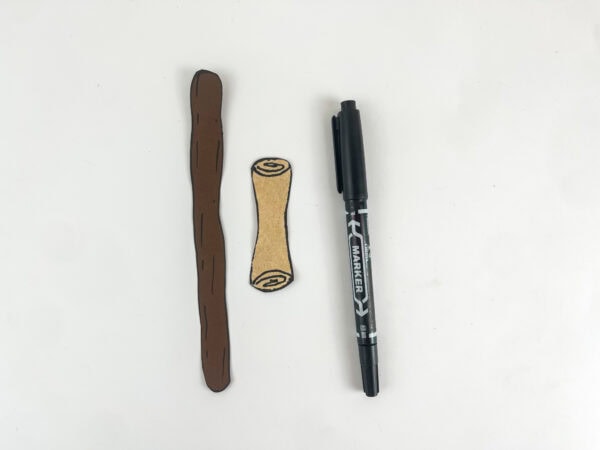
Take the kraft paper scroll piece. The scroll shape is an hourglass — wider at both ends, narrowed in the middle. Use the black marker to draw a tight spiral circle at each end of the scroll, representing the rolled ends of the parchment.
Add a few horizontal lines in the center section to suggest text written on the scroll. This small detail transforms a simple paper shape into an immediately recognizable biblical prop.
Step 5: Cut out and prepare the hair and beard.
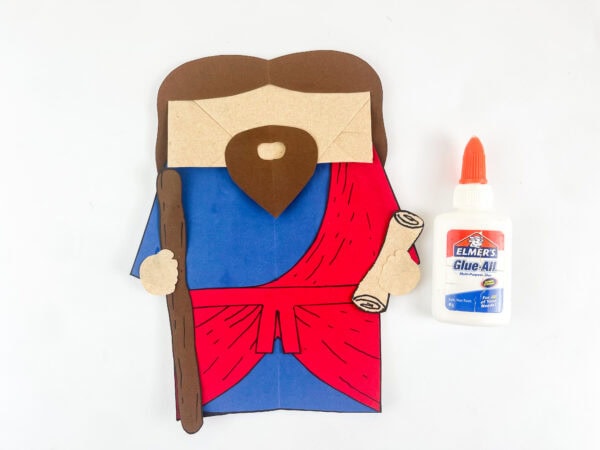
Place the hair piece around the back and sides of the bag flap so it frames the face. Glue it in place, leaving the center of the flap open for the face.
The beard is a rounded heart shape that sits on the lower portion of the flap, between the hair sides.
Step 6: Attach the staff and scroll to the hands.
Glue the walking staff to one hand so it rests diagonally along the puppet’s side. This gives it a natural look while allowing the staff to extend slightly above the head.
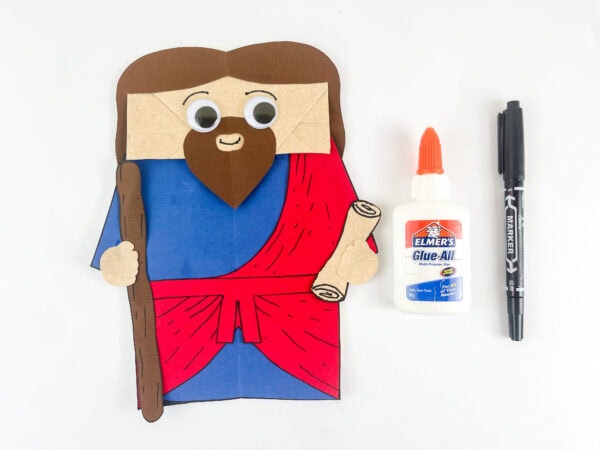
Attach the scroll to the other hand at a slight upward angle, so it appears to be being carried or presented.
Step 7: Add the googly eyes and face details.
Press two large googly eyes onto the flap in the face area — above the beard and below the hairline. Position them symmetrically with a small gap between them.
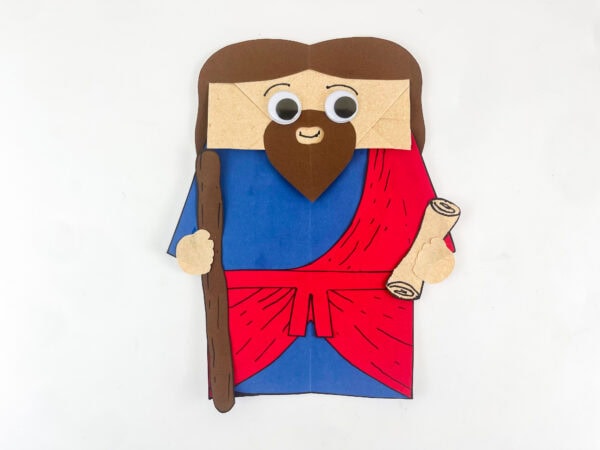
Using the black marker, draw two gently arched eyebrow lines above the googly eyes. Draw a small, curved smile in the beard notch at the bottom of the face.
Your Bible puppet is now complete!
Teaching the Valley of Dry Bones with This Craft
One of the reasons children remember this Bible story so well is its exciting picture of dry bones coming back to life. It reminds us that God can bring hope even when a situation seems impossible.
Here is a simple way to turn this craft into an engaging Sunday school lesson or Bible lesson for children.
Set the scene.
Before telling the story, ask children: “Have you ever felt like something was completely hopeless? Like there was no way it could ever be fixed?” Let them share briefly. Then say: “God showed Ezekiel something that seemed completely hopeless — and then showed him what He could do with it.”
Bring the story to life.
Read chapter 37 or tell the story in your own words. When the bones begin to move, encourage children to make quiet rattling sounds as they imagine everything coming together.
Use the finished puppet.
Invite children to hold up their puppets and ask, “Can they live again?”
Answer together:
“Lord, You alone know.”
This reminds children that God can do what seems impossible.
Connect the story to Jesus.
For older children, draw the connection explicitly: the Valley of Dry Bones is a picture of what Jesus does for every person. We are spiritually dead without Him. He breathes new life into us. Ezekiel’s vision was not just about Israel’s national restoration — it was a picture of resurrection and new life that points forward to Jesus.
Send the puppet home with a question.
Write this question on a small card to take home:
“Where do you need God’s hope today?”
Encourage children to keep their puppet as a reminder that God can bring hope, even when things seem impossible.
Ezekiel’s Vision of Dry Bones — A Simplified Version for Young Children
For preschool and early elementary children who may need the story simplified, here is a version you can read aloud or paraphrase:
God showed His servant a large field filled with dry bones.
Next, God asked, “Is it possible for these bones to live again?”
He answered, “Lord, only You know.”
God told him to speak, and something amazing happened. The bones gradually came together. Muscles and skin covered them. Then God breathed life into them, and they became living people.
God wanted His people to know they were never forgotten. Even when everything seemed hopeless, He had the power to restore them and give them hope again.
The lesson for us: No matter how impossible something may seem, God can bring hope and new life.
What Age Is This Craft For?
Ages 4–5 (preschool and pre-k): An adult pre-cuts all pieces and handles the marker detail work. The child glues pieces together with guidance, adds the googly eyes, and draws the smile. Focus on the simplified “dry bones” story above.
Ages 5–7 (kindergarten and first grade): The primary target age. Children can trace and cut most pieces with light supervision. The marker detail work on the staff and scroll is an engaging step that children this age enjoy. Use the simplified story version and the discussion questions above in their simplest form.
Ages 7–10 (second through fourth grade): Older children can complete the craft independently. Read chapter 37 together and talk about how God gives hope even when situations seem impossible. Before attaching the scroll, invite children to write one short prayer or Bible verse on it.
Sunday school and VBS: Pre-cut the robe, sash, and hair pieces before class to reduce craft time. Leave the marker detail steps for children to complete in class — the staff wood grain and scroll spiral ends are quick and satisfying and add significant visual impact to the finished puppet.
More Bible Character Puppets in This Series
This Ezekiel craft is part of a growing series of Bible character paper bag puppets — each with a free template and a complete blog post covering the character’s story, key Scripture, and discussion questions for children.
More Bible Crafts and Printables:
Gideon Bible Craft for Kids — Gideon holding his torch and ram’s horn, representing God’s call to an unlikely warrior. Judges 6–8.
King Solomon Bible Craft for Kids — King Solomon in his royal crown and red-and-gold robe, representing the gift of wisdom. 1 Kings 3.
Armor of God Coloring Pages — Free Printable
Bible Crafts and Printables for Kids – Full List
Jesus Loves the Little Children Craft
Ezekiel stood in a valley of bones and spoke the words of God — not because it made sense, but because God told him to. And they became a living army.
This puppet gives children something to hold while they hear that story — a visual reminder that God’s word has power, that He is the God who brings life out of death, and that He calls ordinary people to speak His truth in impossible situations.
Download the free template below, gather your paper and glue, and bring Ezekiel to life in your classroom or homeschool room.
What Bible story is this craft based on?
This craft is inspired by the life and ministry of Ezekiel, with a special focus on the vision in chapter 37 where God showed dry bones coming to life. The scroll represents God’s message, while the staff reminds children of faithful obedience and leadership.
What supplies do I need for this Ezekiel craft?
You’ll need a standard paper lunch bag, blue, red, and brown craft paper, googly eyes, white school glue or a glue stick, child-safe scissors, a black marker, kraft paper scraps for the scroll and hands, and the free printable template.
How long does this craft take?
About 30–45 minutes for individual children working through all the steps, including the marker detail work. For a Sunday school or VBS setting with pre-cut pieces, assembly and marker work takes approximately 20–25 minutes.
What is the Valley of Dry Bones?
The Valley of Dry Bones is a vision recorded in Ezekiel 37, in which God brought the prophet Ezekiel to a valley filled with dry bones and instructed him to prophesy to them. As Ezekiel spoke, the bones came together, flesh and skin covered them, and God’s breath entered them and they became a living army. The vision was God’s message that He would restore Israel from exile — spiritually and nationally — and breathe new life into His people.
Is this craft appropriate for Sunday school or VBS?
Yes — this craft is specifically designed for Sunday school, VBS, homeschool Bible lessons, and children’s church. It works especially well for a unit on the prophets, a study of Ezekiel 37, or a lesson on the theme of hope and resurrection.
What age is this craft for?
This craft works best for ages 5–10. Younger children (ages 4–5) can participate with adult help on the cutting and detail steps. Children ages 7–10 can complete the full craft independently.
Is the template free?
Yes — the full Ezekiel puppet template is free to download. Use the download link below to access the PDF with all template pieces on a single page.
Can I use this craft alongside other Bible character puppets?
Yes — Ezekiel pairs naturally with Gideon and Solomon in a series on different kinds of biblical calling: Gideon (unlikely courage), Solomon (humble wisdom), and Ezekiel (faithful obedience). All three puppets use the same paper bag puppet format and free template download, making them easy to use together in a multi-week unit.
Ezekiel Bible Craft for Kids
This Ezekiel Bible Craft lets kids create a paper bag puppet of the prophet using colorful paper and simple supplies. Children will dress the puppet with a robe, sash, beard, and other fun details before adding a scroll and walking staff. It's a great hands-on activity for Sunday school, Bible lessons, or homeschool. Along the way, kids can practice cutting, gluing, and following directions. The finished puppet is perfect for storytelling and imaginative play.
Materials
- 1 brown paper lunch bag: Use a plain, lunch-size kraft paper bag without handles. The folded bottom flap will become the character’s face, while the longer part of the bag will form the body.
- Blue construction paper: Used for the character’s clothing. Choose a medium or dark blue so the pieces stand out clearly against the brown paper bag.
- Red construction paper: Used for accent pieces such as a belt, sash
- Brown construction paper: Needed for features such as the hair, beard
- Googly eyes: Use two medium or large googly eyes to give the character a playful, child-friendly expression.
- Craft glue or a glue stick: Needed to attach the construction-paper pieces and googly eyes to the paper bag. Liquid glue may hold heavier pieces more securely, while a glue stick is less messy for younger children.
- Child-safe scissors: Used to cut out the construction-paper shapes and any printable template pieces. Younger children may need adult assistance with smaller or more detailed pieces.
Tools
Instructions
1. Trace and Cut the Pieces
Trace each template piece onto the correct color of construction paper and carefully cut them out. Separate the robe, sash, belt, hair, beard, hands, staff, and scroll so they're ready to assemble.
2. Decorate the Clothing
Use a black marker to outline the blue robe and red sash. Add a few simple fold lines to each piece to give the clothing a more realistic look before attaching them.
3. Assemble the Body
Lay the paper bag flat with the flap facing upward. Glue the blue robe to the front of the bag, then attach the red sash across one shoulder. Add the belt across the waist and glue the hand pieces near the ends of the sleeves.
4. Make the Staff and Scroll
Draw short wood grain lines along the brown staff using the black marker. Add spiral ends and a few horizontal lines to the scroll so it resembles a rolled parchment.
5. Attach the Hair and Beard
Glue the brown hair around the top and sides of the paper bag flap, leaving space in the center for the face. Attach the beard below the face area so it lines up neatly with the hair.
6. Add the Staff and Scroll
Glue the walking staff onto one hand so it rests alongside the puppet. Attach the scroll to the other hand at a slight angle to make it look like Ezekiel is carrying it.
7. Finish the Face
Glue the googly eyes onto the face area above the beard. Use the black marker to draw eyebrows and a small smile to complete the puppet.
8. Let It Dry and Display
Allow the glue to dry completely before using the puppet. Once finished, it's ready for Bible lessons, storytelling, or classroom displays.
