
King Solomon Bible Craft for Kids
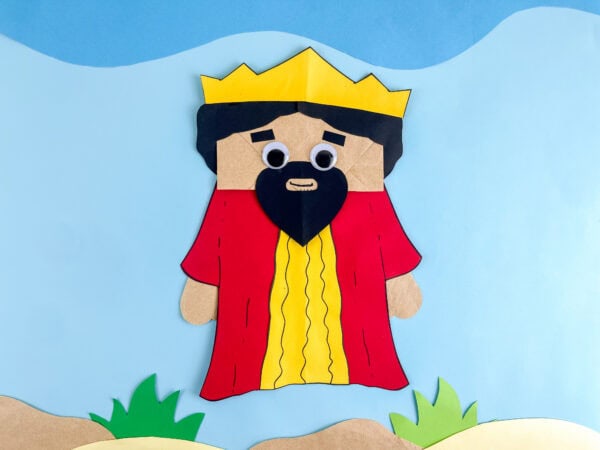
This King Solomon Bible craft for kids turns the story of Israel’s wisest king into an adorable bag puppet, complete with a golden crown, a bold red-and-yellow royal robe, a dark beard, and two small fist hands.
The printable template provides everything you need to trace and prepare each piece. Beyond the template, all you need is a standard lunch bag, construction sheets in red, yellow, and black, googly eyes, white school glue, child-safe scissors, and a black marker.
The whole craft takes about 30 to 45 minutes and works beautifully for VBS, homeschool Bible lessons, kids church, and any children’s ministry study on prayer or the kings of Israel.
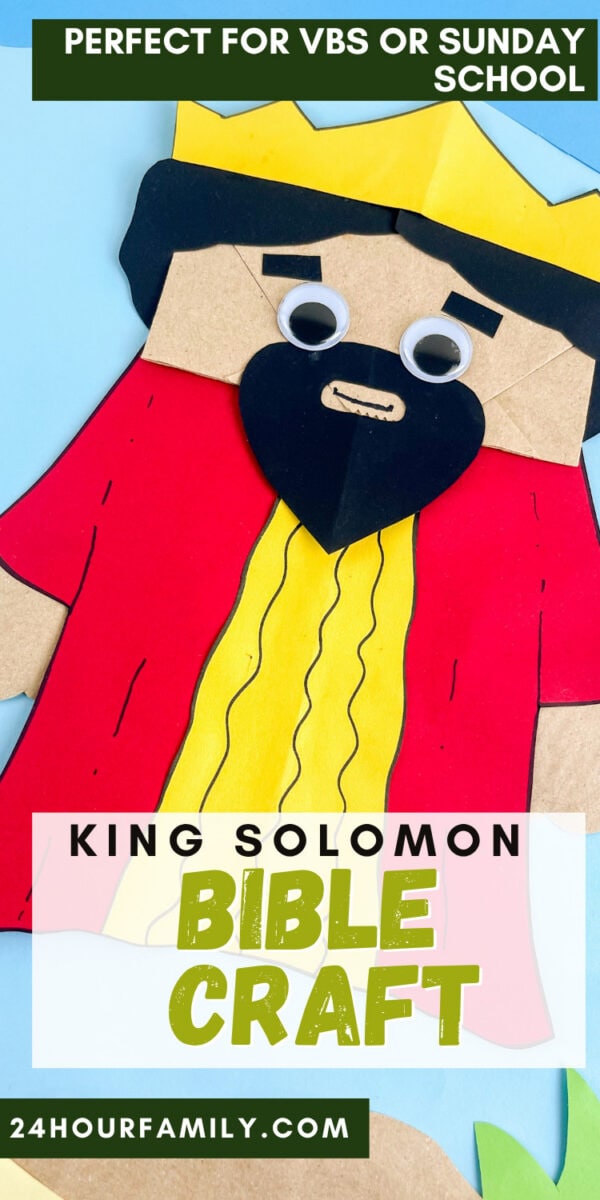
King Solomon Bible Craft for Kids
The finished Solomon puppet makes a wonderful discussion starter about choosing understanding over wealth or power, one of the most compelling and child-friendly accounts in Scripture.
The Story of King Solomon — 1 Kings 3
Before making the craft, here is a brief overview of Solomon’s story — particularly the moment that defines his character and makes him one of the most memorable figures in the Old Testament.
Solomon was the son of King David and Bathsheba, chosen to succeed his father as king of Israel. He became king at a young age and immediately faced the enormous task of leading the people of Israel and building the Temple in Jerusalem, the permanent dwelling place for the Ark of the Covenant that his father David had longed to build but was not permitted to.
One of Solomon’s first acts as king was traveling to Gibeon to offer sacrifices. That night, God appeared to him in a dream with this invitation: “Ask for whatever you want me to give you” (1 Kings 3:5). He was given the chance to request anything he wished.
Rather than asking for a long life, riches, or the defeat of his enemies, Solomon asked for wisdom to govern the people wisely and make sound judgments. God rewarded his request by giving him wisdom, together with wealth and honor.
Solomon’s insight became well known throughout the surrounding nations. Kings and queens traveled great distances to hear him speak, and he composed 3,000 proverbs and 1,005 songs. He built the Temple in Jerusalem, one of the most magnificent structures the ancient world had ever seen.
And he wrote much of what we now read in the books of Proverbs, Ecclesiastes, and Song of Solomon.
The crown on this craft is more than a decoration. The crown symbolizes Solomon’s role as king, and the rich red and gold robe represents the wealth and honor that followed. Together, they show that his humble request brought blessings beyond what he had asked for.
Verses That Connect to This Lesson:
“Please give me an understanding heart so I can lead your people well and know the difference between right and wrong.” — 1 Kings 3:9
“Because you asked for understanding to lead with fairness instead of asking for a long life, riches, or victory over your enemies, I will grant your request.” — 1 Kings 3:11-12
What You Need for This King Solomon Craft
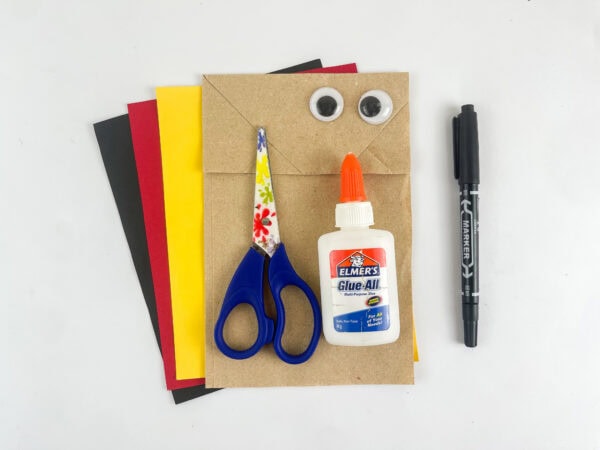
Gather these supplies before starting:
- 1 standard lunch-size brown kraft bag
- Red, yellow, and black cardstock or construction paper (for the robe, crown, hair, and beard)
- Googly eyes (2 large)
- White school glue or a glue stick
- Child-safe scissors
- Black marker
- Printable Solomon template (download below)
This post may contain affiliate links. As an Amazon Associate and a participant in other affiliate programs, I earn a commission on qualifying purchases. Read our disclosure policy here.
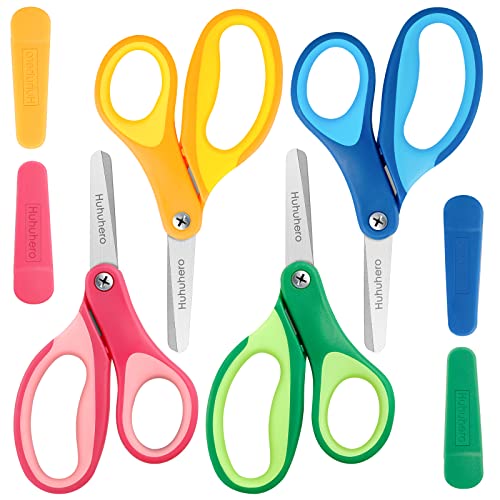
AJM Brown Paper Lunch Bags 40 Count Crafty DAB GLUES DAB N STIC SchoolElmer’s Disappearing Purple School Glue Sticks Washable 22 Grams 3 CountHuhuhero Kids Scissors, 5” Safety Toddler Scissor Blunt Tip with Cover, Small Craft Cutting Paper Scissors for Child Kid Age 4-7 8 9, Assorted Colors, 4 PackCrayola Construction Paper, 120 SheetsCrayola 587722 Non-Washable Markers, Broad Point, Classic Colors, 10/Set




King Solomon Template
The downloadable PDF template includes traceable outlines for every part of the Solomon puppet.
Page 1 – Head and Face Pieces
- Crown (the wide zigzag crown shape, prepared from yellow cardstock)
- Hair and face frame (the large black piece that wraps around the bag flap, creating Solomon’s full hair framing his face)
- Beard (the rounded heart-shaped piece, made from black cardstock)
- Two small eyebrow rectangles (made from black cardstock)
Page 2 – Body and Clothing Pieces
- Royal robe (the large T-shaped piece with a slightly flared hem, made from red cardstock)
- Yellow detail panel (the tapering vertical strip with a wavy top edge, made from yellow cardstock)
- Two hand/fist pieces (made from kraft bag scraps or the back of the bag)
How to Make The King Solomon Bible Craft for Kids
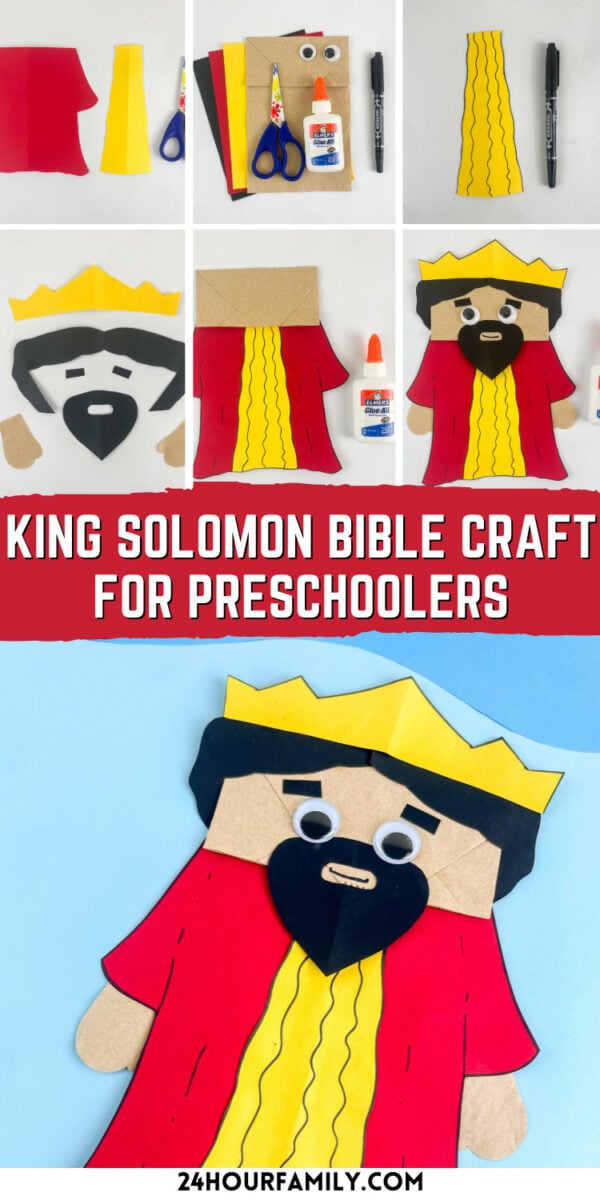
1: Download and print the template. Trace and cut all pieces.
Download the free template PDF below and print it on standard white paper. Trace each template
Color guide for each piece:
- Royal robe: red cardstock
- Yellow detail panel: yellow cardstock
- Crown: yellow cardstock
- Hair frame and beard: black cardstock
- Small eyebrow rectangles: black cardstock (prepare two small thin rectangles)
- Hand/fist pieces: kraft bag scraps or light brown cardstock
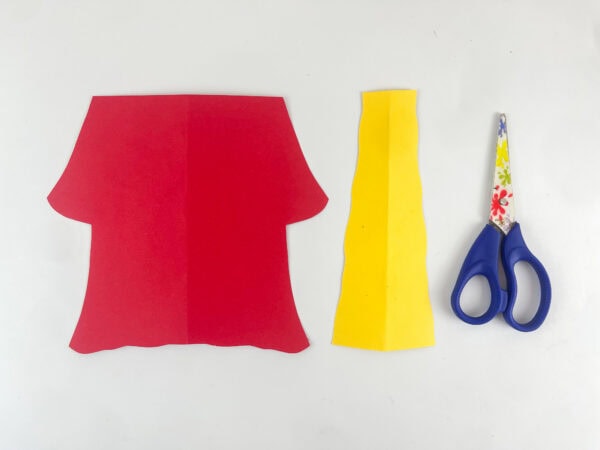
2: Add detail lines to the yellow panel.
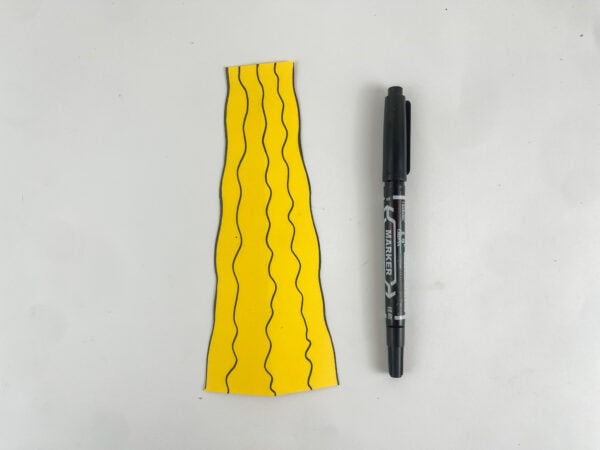
Before assembling anything, pick up the yellow detail panel piece and the black marker. Draw four to five wavy vertical lines down the length of the yellow panel, running from top to bottom.
These wavy lines represent the decorative fabric trim on Solomon’s royal robe — the kind of ornate detail you would expect on a king’s clothing.
The lines don’t need to be perfectly even; the slight variation in hand-drawn wavy lines actually looks more natural and gives the finished puppet more character.
3: Build the Body and Attach the Robe
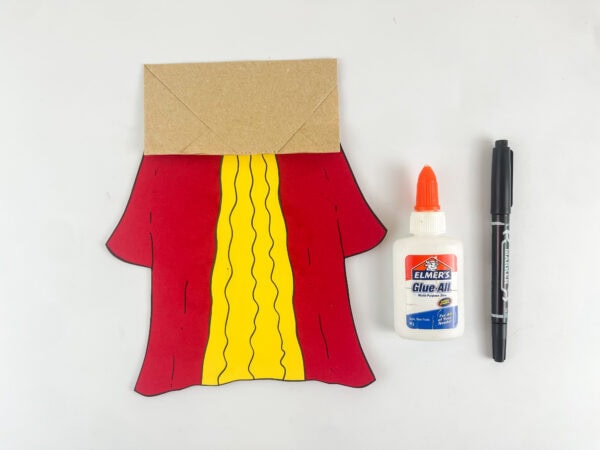
Using the black marker, draw a clean outline around the entire edge of the red robe piece. This outline adds definition and helps the robe stand out against the kraft bag.
Also draw a few gentle, curved fold lines on the robe, two or three subtle curved lines on each side panel, to suggest the fabric’s drape.
These small details are what give the finished puppet that extra level of quality that makes parents and teachers want to display it on a bulletin board.
Glue the yellow detail panel vertically down the center of the red robe, starting at the neckline and extending to the hem. Let it sit for a moment before moving on.
4: Prepare the head, hair, and beard pieces.
The largest black piece is the hair frame — a wide rounded shape with a notch cut into the top center where the crown will sit.
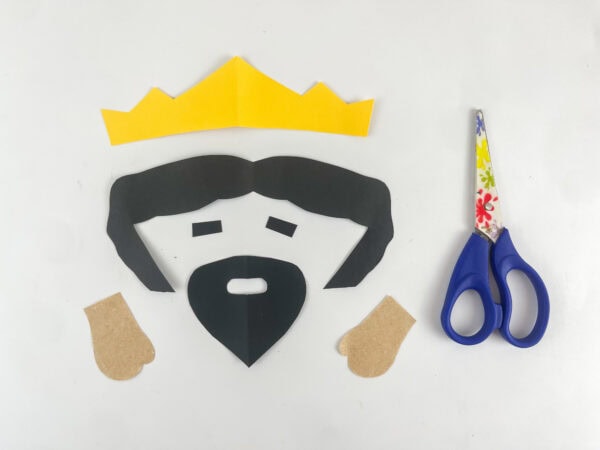
The hair frame wraps around the sides and bottom of the bag’s flap, creating the appearance of Solomon’s full dark hair framing his face.
The beard is a separate rounded heart-shaped piece that sits at the bottom of the face.
The crown is the yellow zigzag piece that sits atop the head, resting partially behind the hair frame.
The two small rectangular eyebrow pieces will be placed above the googly eyes.
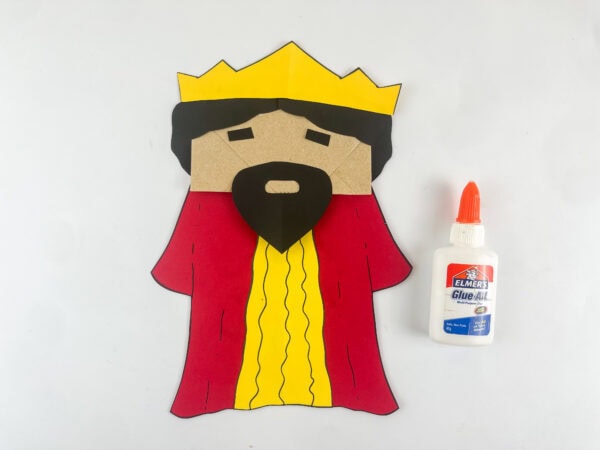
5: Assemble Solomon’s face and head.
Place the bag in front of you with the flap facing up. The flap becomes Solomon’s face.
First, position the black hair frame around the flap so the hair flows around the sides of the face, and the notch at the top aligns with the top of the bag. Glue it in place.
Next, slide the yellow crown behind the top of the hair frame so the crown points rise above the hair. Glue the crown in place, tucking its base behind the hair frame.
Glue the beard to the lower portion of the flap, centered, so it sits below where the eyes and eyebrows will go.
Glue the two small black eyebrow rectangles above the eye area, one on each side, spaced symmetrically.
6: Attach the googly eyes and draw the face details.
Press two large googly eyes onto the flap between the eyebrow rectangles and the beard. Center them with a small gap between them.
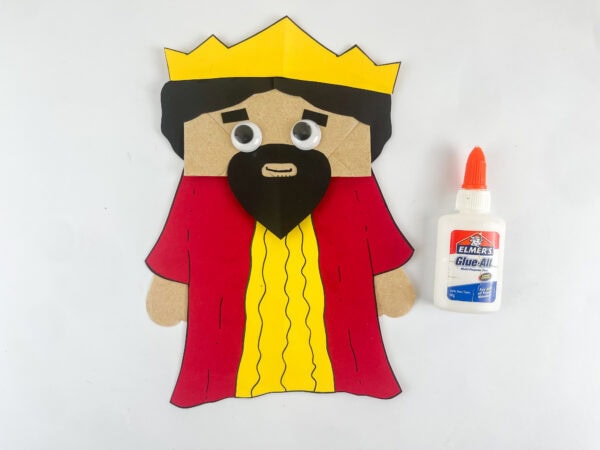
Using the black marker, draw a small curved smile inside the beard notch near the bottom of the face. The smile appears on the kraft bag, visible through the beard’s center opening, adding a simple finishing touch that brings Solomon to life.
7: Add the hands and final touches.
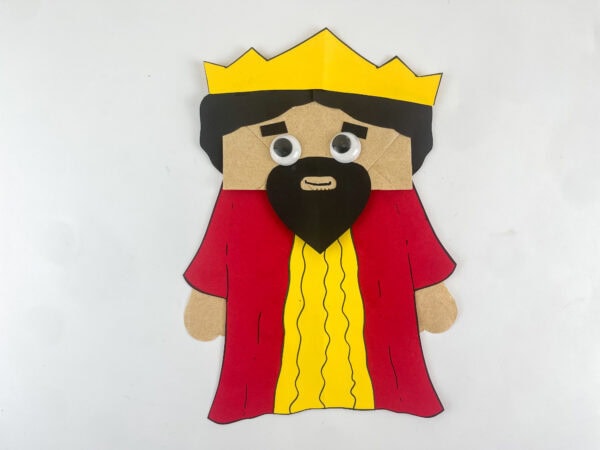
Glue the two small fist pieces at the end of each robe sleeve, tucking them slightly under the fabric edges so they look like Solomon’s hands emerging from his royal robe.
Use the black marker to draw small finger lines on each fist to add definition.
Your King Solomon craft is complete.
The Story of Solomon’s Wisdom: A Discussion Guide for Children
This craft gives children something to hold while you discuss one of the most important questions in all of Scripture: what would you ask God for if He said you could have anything?
Here is a simple discussion framework you can use during or after the craft:
Ask the question first. Begin with this question: “If God appeared to you tonight in a dream and invited you to ask for anything, what would you ask for?” Let them answer freely. Write down their responses on a whiteboard or a large sheet.
Talk about the account. Read through 1 Kings 3, focusing on God’s offer in the dream, Solomon’s humble request, and the answer he received.
For younger children, simplify it: “Solomon didn’t ask for toys or money or even to win every game. He asked for guidance so he could lead the people well. God was so pleased with that answer that Solomon also received wealth and honor beyond what he had requested.”
Reflect on the answers together. Return to the list of answers children gave at the beginning. Ask: “After hearing what Solomon asked for, would anyone change their answer? Why?”
Bring the Lesson to Life. Ask: “What is something you need wisdom for right now? A hard decision? A friendship problem? Something at school?” Lead children in a simple prayer asking God for wisdom in that specific situation.
Hold up the puppet. “This is Solomon, one of the Bible’s most respected kings. Every time you see a crown, remember that the greatest thing a leader can have isn’t power or money. It’s a heart that seeks understanding.”
This discussion sequence can be completed in 15 minutes for a Sunday school class or extended into a full 45-minute lesson for a homeschool Bible unit.
What Age Is This Craft For?
Ages 4–5 (preschool and pre-k): An adult prepares all the pieces and handles the marker details. The child attaches the pieces with guidance, adds the googly eyes, and draws the smile with help. Help children remember this key point: “Solomon asked for understanding.” We can ask Him for help too.”
Ages 5–7 (kindergarten and first grade): The primary target age. Children at this level can trace the template and trim most shapes with light supervision. Assembly is very manageable at this age. Use the discussion questions above in a simplified form.
Ages 7–10 (second through fourth grade): Children can complete the entire project independently, including tracing, preparing all the pieces, and adding the marker details. The discussion questions also work well at full depth with this age group. Add a journaling activity by having children write one prayer asking for guidance in a specific area of their life.
Sunday school and VBS: Pre-cut pieces before class and organize them in individual trays or bags. This reduces the craft time to 20–25 minutes for a group setting, leaving time for the discussion and application.
Connecting This Craft to the Book of Proverbs
Solomon wrote or collected most of the book of Proverbs — 31 chapters of practical wisdom on topics including money, friendship, anger, honesty, work, marriage, parenting, and how to treat others. Proverbs is packed with everyday lessons that encourage thoughtful decisions, kindness, and integrity.
To extend the activity for ages 8 to 12, include a brief reading from Proverbs. The passages help children reflect on humility, trust, character, and thoughtful decision-making.
“The fear of the Lord is the beginning of wisdom.” — Proverbs 9:10
“Trust in the Lord with all your heart and lean not on your own understanding; in all your ways submit to him, and he will make your paths straight.” — Proverbs 3:5–6
“Pride goes before destruction, a haughty spirit before a fall.” — Proverbs 16:18
“A friend loves at all times, and a brother is born for a time of adversity.” — Proverbs 17:17
Each of these proverbs opens a natural discussion question for children. Write one on the board at the start of class, make the Solomon puppet during the lesson, and come back to the proverb at the end. The puppet in their hands becomes a physical anchor for the memory of that lesson.
More Bible Crafts for Kids
This King Solomon craft is part of our growing collection of Bible-character paper-bag puppets and faith-based crafts. Each is designed to bring a specific biblical figure to life through hands-on activity that reinforces the lesson.
- Free Armor of God SVGs — All 6 Pieces
- Armor of God Coloring Pages — Free Printable
- Free Easter Tomb SVGs — Faith-Based Easter Craft
- Christian Thanksgiving Coloring Pages
- He Is Risen Free Printable Scripture Cards
A golden crown and a royal red robe are striking, but the most important thing about King Solomon wasn’t his wealth, palace, or even his temple. It was the understanding he asked for when he could have asked for anything.
This activity gives children something to hold while they wrestle with the same question asked of Solomon: if you could ask for anything, what would you choose? The discussion that follows is where the real learning happens.
Download the free template below, gather your supplies, and introduce your children to one of the Bible’s most memorable kings.
What Bible story is this activity about?
This craft is based on the account of King Solomon in 1 Kings 3, specifically when the Lord appeared to Solomon in a dream and offered to give him anything he asked for. Solomon asked for understanding to lead the people well, and He was so pleased with his request that He also gave Solomon wealth and honor beyond what he had asked.
What supplies do I need for this King Solomon project?
You need a standard lunch bag, construction sheets in red, yellow, and black, googly eyes, white school glue or a glue stick, child-safe scissors, and a black marker. The free printable template is available for download below.
How long does this activity take?
About 30–45 minutes for individual children working through all the steps including the marker detail work on the yellow panel. For a Sunday school or VBS setting where pieces are pre-cut, assembly and marker work takes approximately 20–25 minutes.
Is this activity appropriate for VBS or other group settings?
Yes. This craft is designed for VBS, homeschool Bible lessons, kids church, classrooms, and other group settings. It works well as a standalone activity or as part of a broader study on Solomon, the kings of Israel, or the book of Proverbs.
What age is this project for?
Ages 5–10 work best. Younger children (ages 4–5) can participate with adult help on the cutting steps. Older children (ages 7–10) complete the full project independently and can engage with the deeper discussion questions.
Is the template free?
Yes — the King Solomon puppet template is free to download below. The PDF includes all template pages needed to complete the activity.
Can I make both the Solomon and Gideon puppets together?
Yes. Solomon and Gideon make a wonderful pair to study, featuring two different types of biblical leaders. Solomon represents understanding and royalty, while Gideon represents courage and an unexpected calling. See our Gideon paper bag puppet craft for the companion post and free template.
King Solomon Bible Craft for Kids
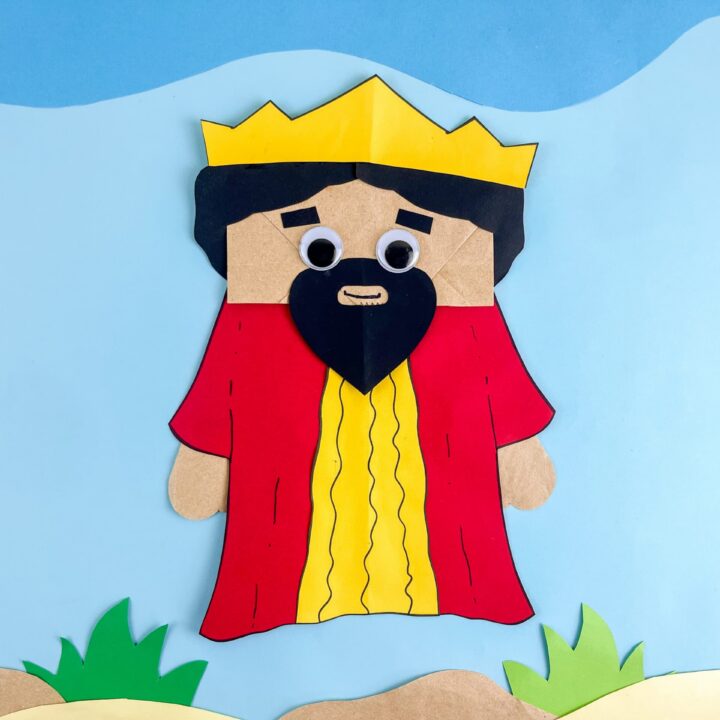
This King Solomon Bible Craft lets kids create a colorful paper bag puppet of one of Israel's most well-known kings. Children will decorate the puppet with a royal robe, crown, beard, and other simple details. It's a fun activity for Sunday school, homeschool, or Bible lessons. Kids can practice tracing, cutting, and gluing while creating their puppet. Once complete, it's great for storytelling, role-playing, or classroom displays.
Materials
- Brown paper lunch bag
- Red construction paper
- Yellow construction paper
- Black construction paper
- Googly eyes
- Black marker
- Printable Template
Tools
- Scissors
- Glue or Glue Sticks
Instructions
1. Trace and Cut the Pieces
Trace each template piece onto the correct color of construction paper and carefully cut them out. Organize the robe, crown, hair, beard, eyebrows, and hand pieces so they're ready for assembly.
2. Decorate the Robe
Use a black marker to outline the red robe and draw a few curved fold lines for added detail. Decorate the yellow center panel with several wavy vertical lines, then glue it down the middle of the robe.
3. Assemble the Body
Lay the paper bag flat with the flap facing upward. Glue the completed robe onto the front of the bag, making sure the top of the robe lines up just below the flap where the face will be.
4. Build the Head
Glue the black hair piece around the paper bag flap to frame the face. Slide the yellow crown behind the top of the hair so the points extend above the head, then attach the beard below the face area. Finish by gluing the eyebrow pieces above where the eyes will go.
5. Add the Face Details
Glue the googly eyes onto the face between the eyebrows and beard. Use the black marker to draw a small smile beneath the eyes to complete Solomon's expression.
6. Attach the Hands
Glue the hand pieces to the ends of each robe sleeve. Add a few short lines with the black marker to create simple finger details.
7. Let It Dry and Display
Allow the glue to dry completely before using the puppet. Once finished, it's ready for Bible lessons, storytelling, or classroom displays.
