
Handprint Arctic Hare Craft (Free PDF Template)
Turn a simple paper handprint into an adorable Arctic hare with this easy winter craft for kids. The long ears, white coat, and black-tipped details make this handprint hare easy to recognize, while the child’s traced hand creates a sweet keepsake parents can save.
This Arctic hare handprint craft is a fun addition to winter lessons, Arctic animal units, preschool activities, or classroom projects about animal adaptations. Children can practice tracing, cutting, gluing, and drawing while learning how Arctic hares survive in cold, snowy environments.
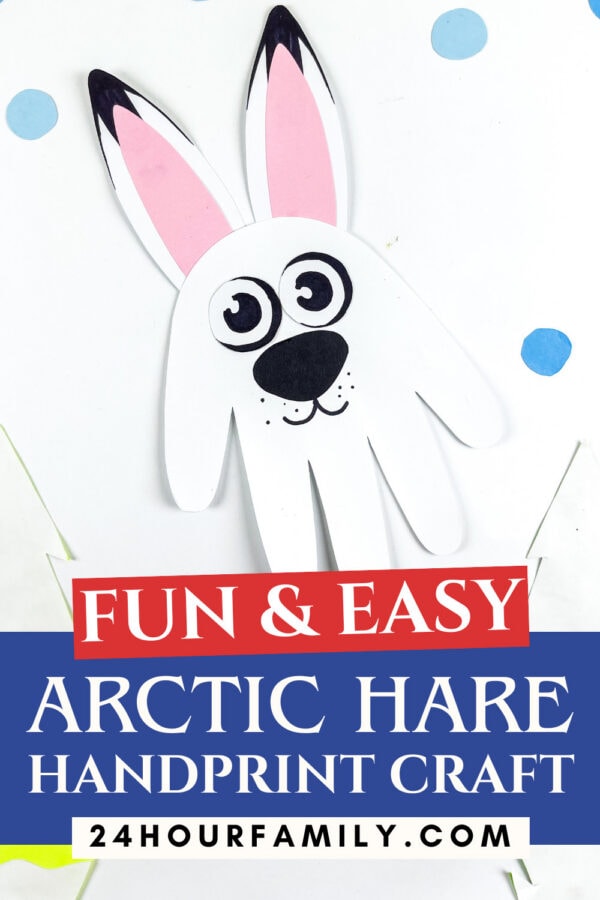
Easy Handprint Arctic Hare Craft
Arctic hares are built for life in extremely cold environments. Their thick fur helps keep them warm, while their white winter coloring allows them to blend into the snow. Their distinctive black ear tips inspired the details on this paper handprint craft.
This project uses inexpensive materials and takes approximately 20 minutes to complete. Younger children may need help tracing their hands and cutting the smaller pieces, while older children can complete most of the project independently.
Craft at a Glance:
- Age range: Preschool through early elementary
- Craft time: Approximately 20 minutes
- Difficulty: Easy
- Skills practiced: Tracing, cutting, gluing, drawing, and following directions
- Theme: Arctic animals, winter, animal adaptations, and handprint crafts
This post may contain affiliate links. As an Amazon Associate and a participant in other affiliate programs, I earn a commission on qualifying purchases. Read our disclosure policy here.
Nabance 2.54 fl oz Blue Baby Hand and Footprint Friendly Ink Paint, Dog Cat Paw Print Safe Ink, Non-Toxic Acid-Free, Safe Gentle for Home School Christmas New Year DIY Keepsake StampCra-Z-art Washable Classic Paint Bulk Pack 8ct, Assorted Colors 4oz each bottle, 32ozWashable Finger Paint for Toddlers 1-3 – 12 Colors Washable Paint for Kids, Non Toxic Toddler Paints, 2 fl oz Tubes, Tempera Paints for Kids, Crafts & Finger Painting – Ages 1-8Crayola Washable Kids Paint (6ct), Assorted Bulk Paint Set for Kids, Must Have Preschool Arts & Crafts Supplies, Nontoxic, Learning Activities for Toddlers7” Large Washable Ink Pad for Kids Handprint & Footprint – Safe & Non-Toxic Ink Pads for Stamps, Finger Paint Pads Preschool Classroom Must Haves, Toddlers Crafts, Christmas Birthday Gifts, 8 Colors


Supplies for the Arctic Hare Handprint Craft
You will need:
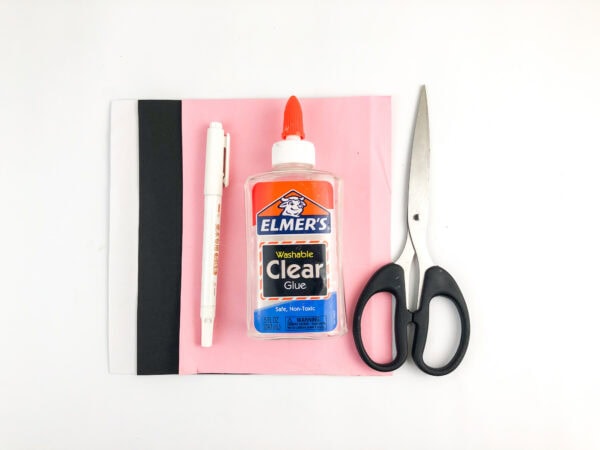
- Arctic hare craft template
- White cardstock or construction paper
- Pink construction paper
- Black construction paper
- Pencil
- Black marker
- Scissors
- School glue or a glue stick
Cardstock will make the finished Arctic hare sturdier, but regular construction paper also works well. A glue stick may be easier and less messy for preschoolers.
If you want to save time, simply print the free printable Arctic animal template and let your kids trace and cut.
How to Make an Arctic Hare Handprint Craft
Before beginning, print the Arctic hare template and gather all your supplies. An adult should supervise children while they use scissors.
Step 1: Trace and Cut Out the Handprint
Place your child’s hand on a piece of white cardstock with the fingers spread slightly apart. Trace around the entire hand with a pencil.
Carefully cut along the traced line. Turn the handprint so the fingers point downward. The palm will form the hare’s face and body, while the fingers will resemble its legs and fluffy lower fur.
If you are completing this craft with a group, trace and cut the handprints before the activity to save time.
Step 2: Cut Out the Arctic Hare Pieces
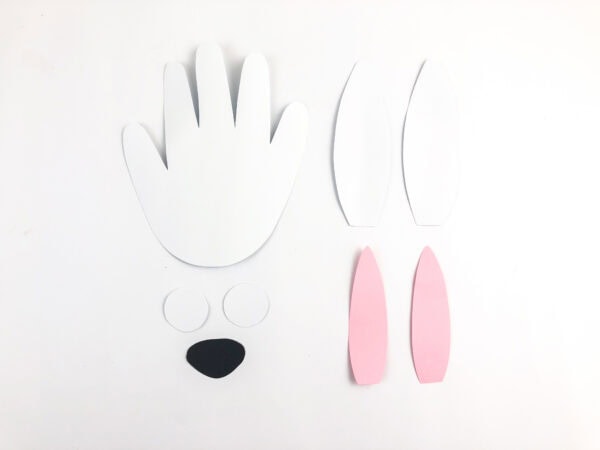
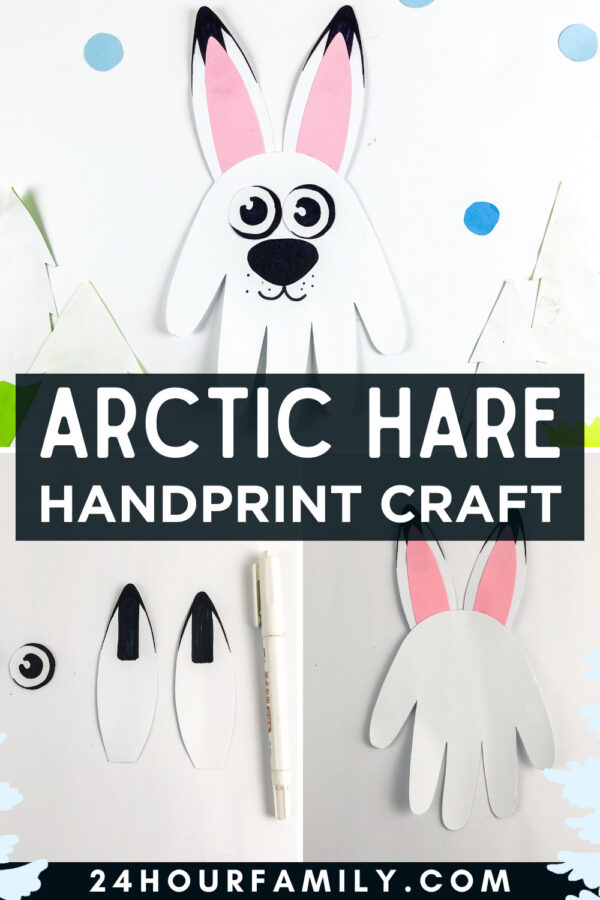
Use the printable template to trace and cut:
- Two long outer ears from white paper
- Two smaller inner ears from pink paper
- Two eye circles from white paper
- One large rounded nose from black paper
The pink inner-ear pieces should be slightly smaller than the white ears so a white border remains visible after they are glued together.
Step 3: Add the Eyes and Black Ear Tips
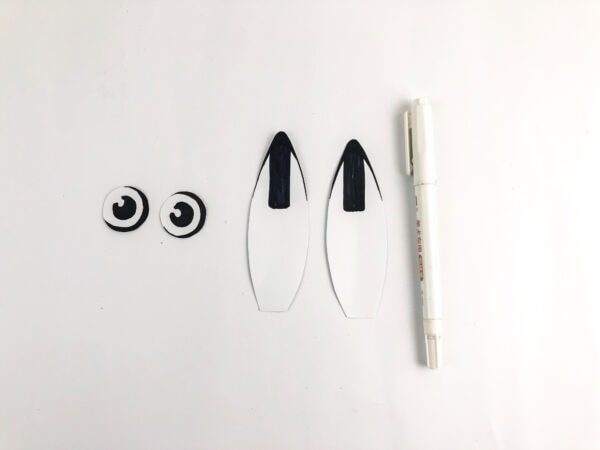
Use a black marker to draw a pupil and outline on each white eye circle. You can make the eyes look in the same direction or give the hare a playful expression.
Color the tips of both white ears black. Arctic hares are known for the dark markings at the ends of their ears, so this small detail makes the craft easier to identify.
Step 4: Assemble the Ears
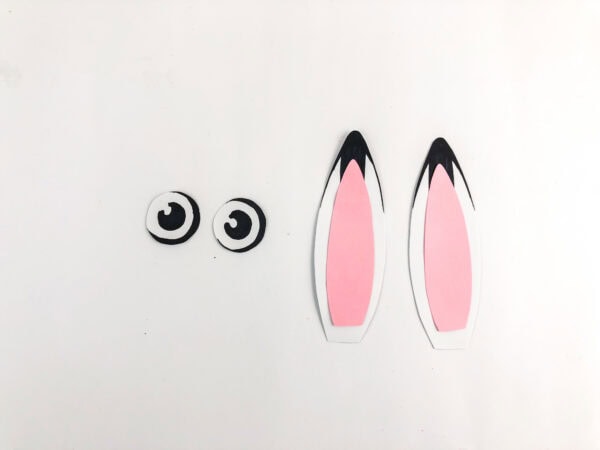
Glue one pink inner-ear piece onto the center of each white outer ear. Leave a narrow white border visible along the sides.
Allow the glue to set for a minute before attaching the ears to the handprint.
Step 5: Attach the Ears to the Handprint
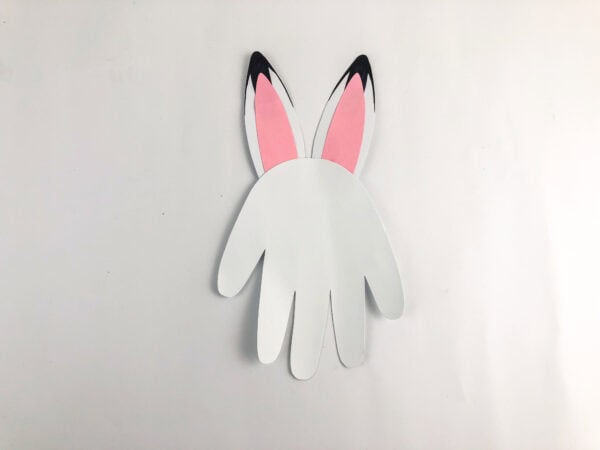
Position the handprint with the fingers pointing down. Glue the ears behind the top of the palm so they extend upward.
You can place the ears straight up or tilt one slightly to the side to give your Arctic hare more personality.
Step 6: Add the Face
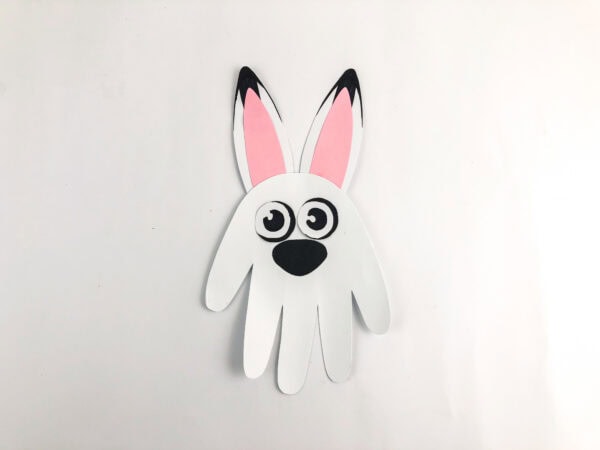
Glue the two eyes near the upper center of the handprint. Place the black nose directly underneath the eyes.
Let children experiment with the placement before adding glue. Moving the eyes closer together, farther apart, or slightly to one side can completely change the hare’s expression.
Step 7: Draw the Mouth and Whisker Dots
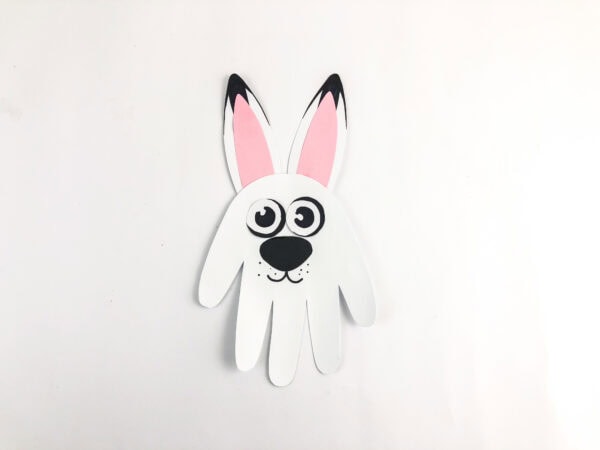
Use the black marker to draw two curved lines extending downward from the nose to form the mouth. Add several small dots on each side of the mouth to represent the hare’s whisker spots.
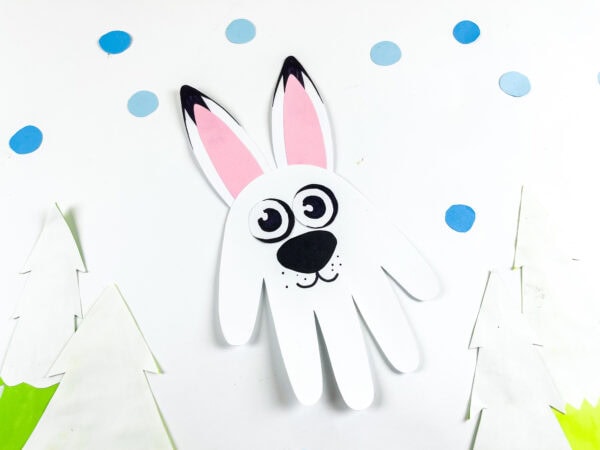
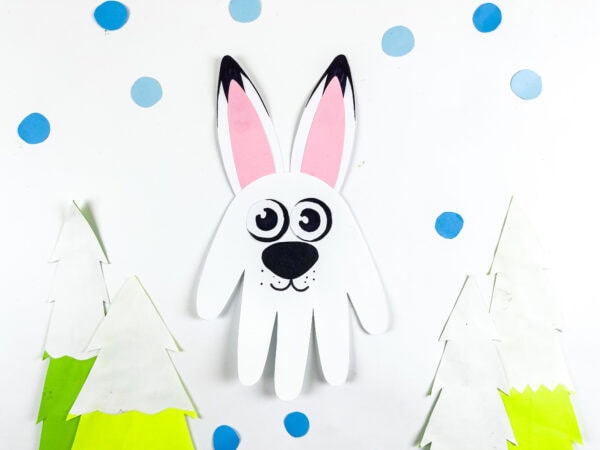
Your Arctic hare handprint craft is now complete!
Create a Snowy Arctic Habitat
The finished handprint hare can be displayed on its own, but children can also create a snowy background for it.
Glue the hare to a sheet of white, pale blue, or gray cardstock. Add paper snowflakes, snow-covered trees, hills, and icy shapes around it. Cotton balls can be pulled apart and glued along the bottom to create fluffy snow.
Children can also draw tracks behind the hare or add other Arctic animals to make a complete winter habitat scene.
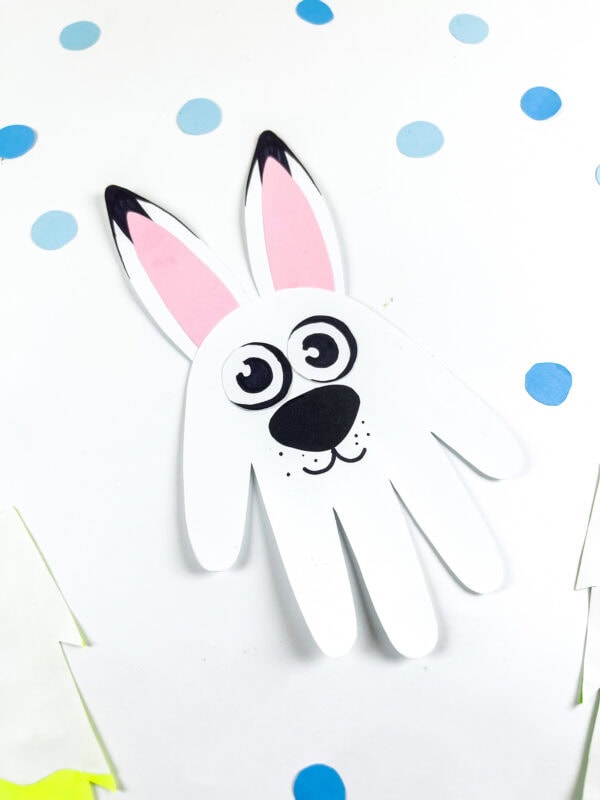
What Is an Arctic Hare?
The Arctic hare is a large hare that lives in the cold tundra regions of northern North America. Unlike some animals that sleep through the coldest months, Arctic hares do not hibernate. They rely on thick fur, sheltered resting places, and other physical adaptations to survive the winter.
Their ears are shorter than those of many hares that live in warmer climates. Shorter ears expose less surface area to the cold, helping the animal retain body heat. Their large, heavily padded feet also help them move across snow.
Arctic hares generally have thick white winter coats with distinctive black ear tips. Some populations develop gray, brown, or cinnamon-colored fur during warmer months, which helps them blend into their changing surroundings. You can read more at National Geographic and in the Government of Nunavut’s Arctic hare guide.
Arctic Hare Facts for Kids
Share these simple facts before or after making the craft:
- Arctic hares live in the tundra of northern North America.
- They have thick fur that helps protect them from cold temperatures.
- Their white winter coats provide camouflage in the snow.
- The tips of their ears remain black.
- Their large, padded feet help them travel over snowy ground.
- Arctic hares do not hibernate.
- They may dig into snow or find sheltered areas to escape severe weather.
- Several Arctic hares may gather together, especially during winter.
- Arctic hares eat grasses, leaves, woody plants, roots, and other available vegetation.
Is an Arctic Hare a Rabbit?
Arctic hares and rabbits are related, but they are not the same animal. Hares generally have longer legs and are built for running quickly across open spaces.
Baby hares, called leverets, are born with fur and open eyes. Baby rabbits are born without fur and with their eyes closed. Hares also tend to live above ground, while many rabbit species use underground burrows.
This comparison makes a helpful discussion topic during an Arctic animal or winter science unit.
Educational Activities to Pair With This Craft
This Arctic hare activity can be used for more than an art project. Pair it with one of these learning ideas:
Write an Arctic Hare Fact
Have each child write one fact about Arctic hares underneath the finished craft. Younger children can dictate their fact to an adult or complete a sentence such as:
- An Arctic hare can ______.
- An Arctic hare has ______.
- An Arctic hare lives ______.
Explore Winter Camouflage
Place pieces of white, brown, and black paper on a snowy white background. Ask children which color is the most difficult to see. Discuss how white fur helps an Arctic hare hide from predators in winter.
Compare Rabbits and Hares
Create a simple Venn diagram showing the similarities and differences between rabbits and hares. Children can compare their ears, legs, babies, homes, and behavior.
Practice the Letter H
Use this activity during a lesson about the letter H. Practice the words “hare,” “habitat,” “handprint,” and “hibernate.”
Measure the Ears
Provide rulers or linking cubes and let children measure the paper ears. Compare the ears made by different students and arrange the finished crafts from shortest to tallest.
Make a Classroom Display
Create a winter bulletin board titled “Hopping Through the Arctic.” Add every child’s handprint hare to a snowy paper landscape.
Tips for Making This Craft With Preschoolers
- Trace each child’s hand in advance if time is limited.
- Precut the ears and small facial pieces for younger children.
- Place each child’s pieces in a separate bag or tray.
- Use glue sticks to reduce drying time and mess.
- Write the child’s name and date on the back of the handprint.
- Encourage children to arrange the face before gluing anything down.
- Let each hare look different instead of requiring every child to copy the sample exactly.
Ways to Personalize the Arctic Hare
Children can make their handprint craft unique by adding:
- A small paper bow or winter scarf
- Eyelashes or eyebrows
- Cotton around the body for additional texture
- Glittery snow in the background
- A paper carrot or piece of Arctic vegetation
- The child’s name and age
- A short story about the hare’s snowy adventure
For an especially meaningful keepsake, invite children to write something they enjoy about winter on the back.
More Winter Animal Crafts for Kids
Continue your Arctic animal unit with more easy winter projects:
- 3D Cut and Paste Penguin paper dolls
- Polar Bear Diorama
- Penguin Handprint Craft
- Winter Color by Number
- Snowy Owl Handprint Craft
- Handprint Owl Craft
What age is this Arctic hare craft suitable for?
This craft works well for preschool, kindergarten, and early elementary students. Preschoolers will likely need help cutting the ears and facial pieces. Older children can trace, cut, assemble, and decorate the craft independently.
Can I make the craft without the printable template?
Yes. Draw two long ear shapes, two smaller pink inner ears, two eye circles, and one rounded black nose. The shapes do not need to be exact.
What type of paper works best?
White cardstock produces the sturdiest handprint and ears. Construction paper is easier for young children to cut but may bend more easily.
Why does the Arctic hare have black ear tips?
Black ear tips are a recognizable feature of the Arctic hare. Even when its winter coat is white, the ends of its ears remain dark.
This Arctic hare handprint craft combines art, science, and fine-motor practice in one simple activity.
Whether children create it at home, in the classroom, or during a winter camp, the finished hare makes an adorable seasonal display and a special handprint keepsake.
Handprint Arctic Hare Craft
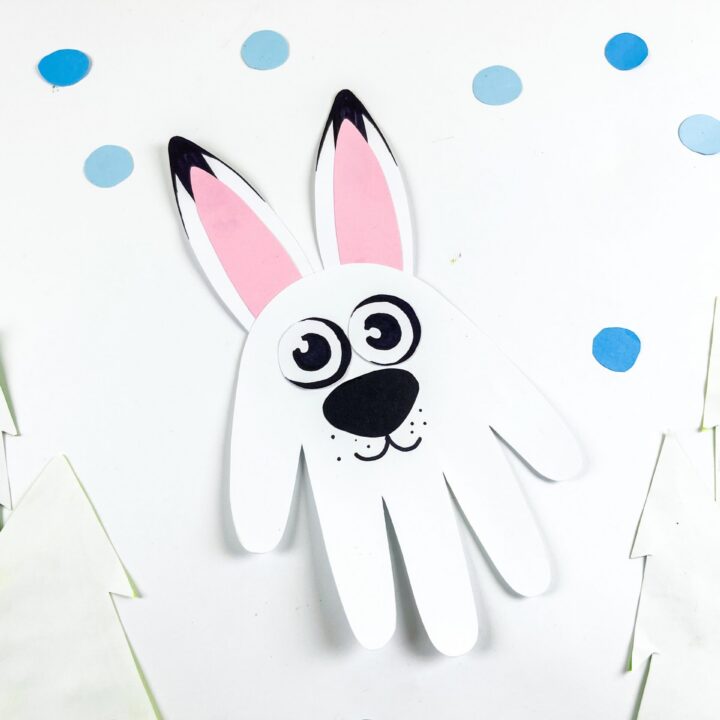
This Arctic Hare Handprint Craft is a sweet winter project where kids turn their handprint into a fluffy arctic hare. With simple shapes, soft colors, and fun details, children can create a cute winter animal that looks lively and expressive. It’s an easy craft for toddlers through early elementary ages and makes a charming addition to any snowy-themed activity.
Materials
- Arctic hare printable template
- White cardstock
- Pink construction paper
- Black construction paper
- Pencil
- Black marker
- School glue or glue stick
Tools
- Scissors
Instructions
1. Trace the Hand
Place your child’s hand on white paper and trace around it. This handprint will become the hare’s body and legs.
2. Cut Out the Shapes
Cut out the traced handprint along with additional pieces—ears, eyes, a nose, and any extra shapes you want to include. You can freehand the shapes or use a printable template for quick prep.
3. Add Details
Use a marker to add color inside the ears, outline the eyes, and draw facial features. Kids can follow example pictures or get creative with their own expressions.
4. Assemble the Hare Craft
Glue the ears to the top of the handprint body, then attach the eyes and nose. Add whisker dots, a mouth, and any decorations you’d like.
5. Display Your Arctic Hare
Place your finished hare on a winter background with paper trees or snowflakes, or use it as part of an arctic animal display. Kids can also turn it into a puppet or headband for imaginative play.
Notes
Younger children may need adult assistance with tracing and cutting. Write the child’s name, age, and date on the back to turn the craft into a winter keepsake.
