
How to Draw a Fire Extinguisher
Learning how to draw a fire extinguisher is a fun way to combine art with an important fire safety lesson.
This easy step-by-step guide breaks the drawing into five manageable stages, making it ideal for classrooms, homeschool lessons, and families.
Whether you’re looking for a fire extinguisher drawing activity, a printable tutorial, or simply want to learn how to draw everyday safety equipment, this guide makes the process enjoyable and easy to follow.
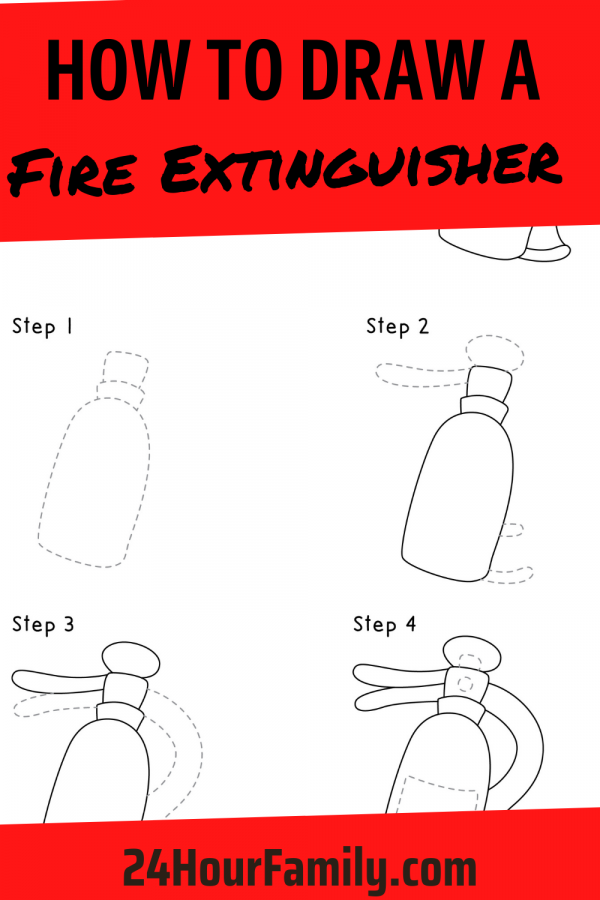
How to Draw a Fire Extinguisher: An Easy Step-by-Step Guide
Whether you’re looking for a fire extinguisher drawing activity, a printable tutorial, or simply want to learn how to draw everyday safety equipment, this guide makes the process enjoyable and easy to follow.
A Bit of Fire Extinguisher History
Fire extinguishers have come a long way. The first portable version was invented in 1818 by Captain George William Manby, a copper vessel filled with pressurized pearl ash solution that helped fight small fires.
Decades later, decorative “fire grenades” became popular. These glass bottles were filled with saltwater and thrown at the base of a fire, where they shattered to help extinguish the flames.
Today’s familiar red cylinder, complete with a hose, handle, and pressure gauge, has become one of the world’s most recognizable safety symbols. Its distinctive design also makes it a fun subject for an easy drawing that children can recognize almost anywhere.
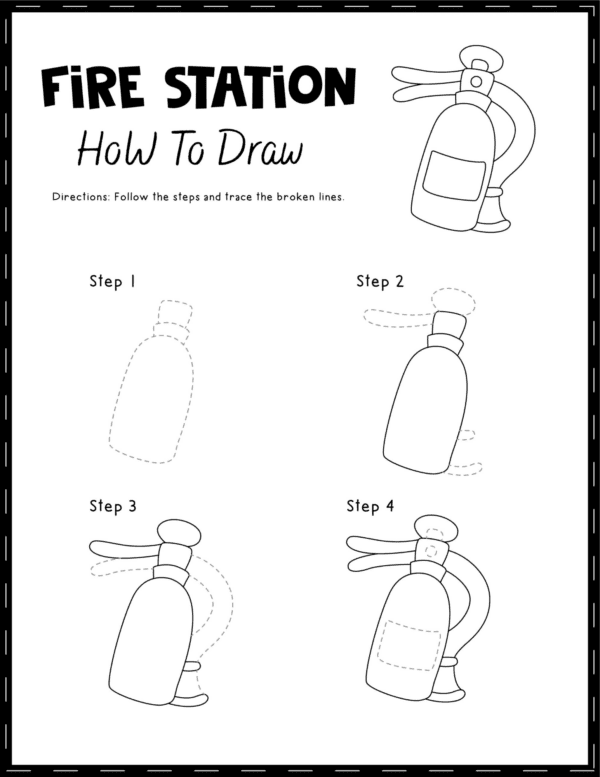
Age Guidance
This activity works well for kids ages 6 and up. At this age, most children can comfortably hold a pencil, follow multi-step directions, and complete each stage with confidence.
It’s also a wonderful opportunity to discuss where your home’s fire extinguisher is stored and why it’s important to know what it is used for. While children should never operate one without adult supervision, recognizing safety equipment is an important life skill.
Supplies Needed
You’ll only need a few basic materials:
- Pencil
- Plain white paper
- Eraser
- Fine-point marker (optional)
- Colored pencils or crayons
- Your free printable drawing tutorial
How to Draw a Fire Extinguisher
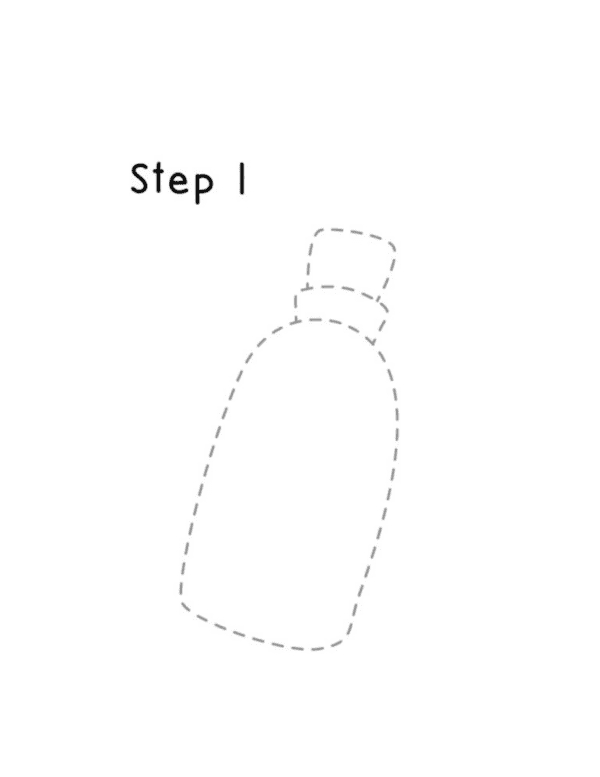
Step 1: Draw the Body
Begin by sketching the main cylinder of the extinguisher. Draw a tall shape with rounded corners that leans slightly to one side. This creates the foundation for your step-by-step drawing activity.
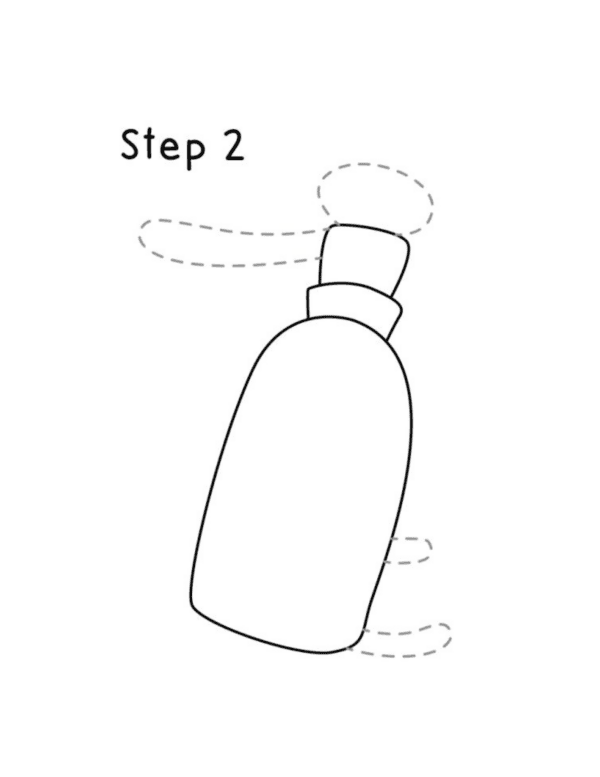
Step 2: Add the Top
Next, draw the neck and valve assembly. Add the curved collar and rounded cap above the cylinder, then sketch the beginning of the handle. This fire extinguisher step-by-step stage starts transforming the simple outline into a recognizable object.
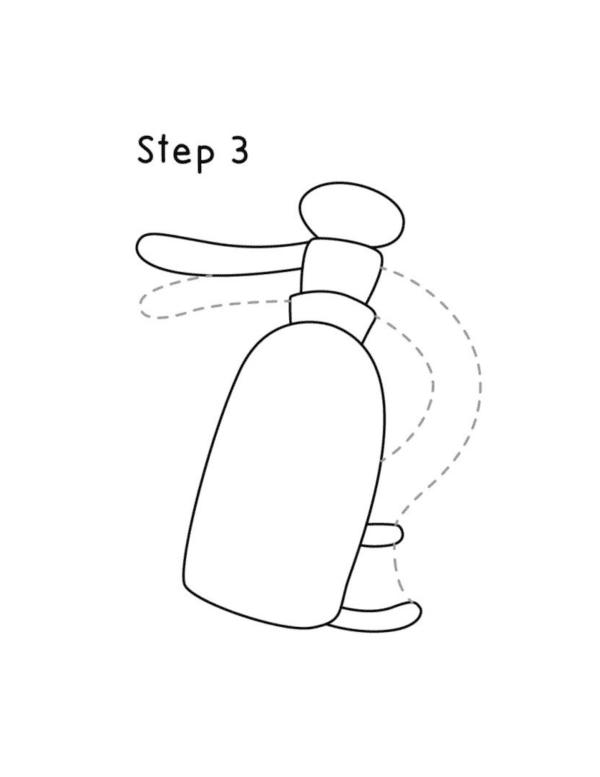
Step 3: Draw the Handle and Hose
Extend the handle toward the left side and draw the curved hose behind the cylinder. Sketch a small nozzle extending from the lower part of the cylinder. These details help the drawing look much more realistic while still remaining easy to follow.
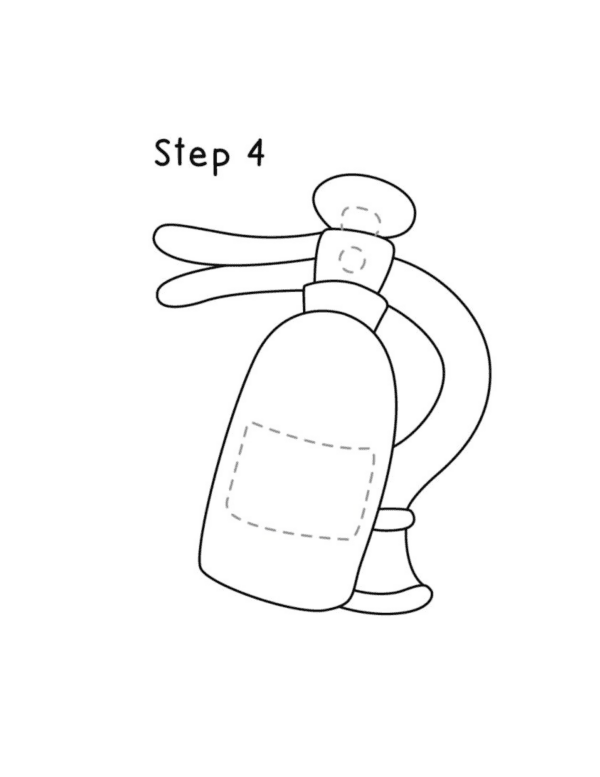
Step 4: Finish the Details
Complete the pressure gauge, safety pin, label, and remaining hose. Once everything is connected, trace over the finished lines and erase the dotted guidelines.
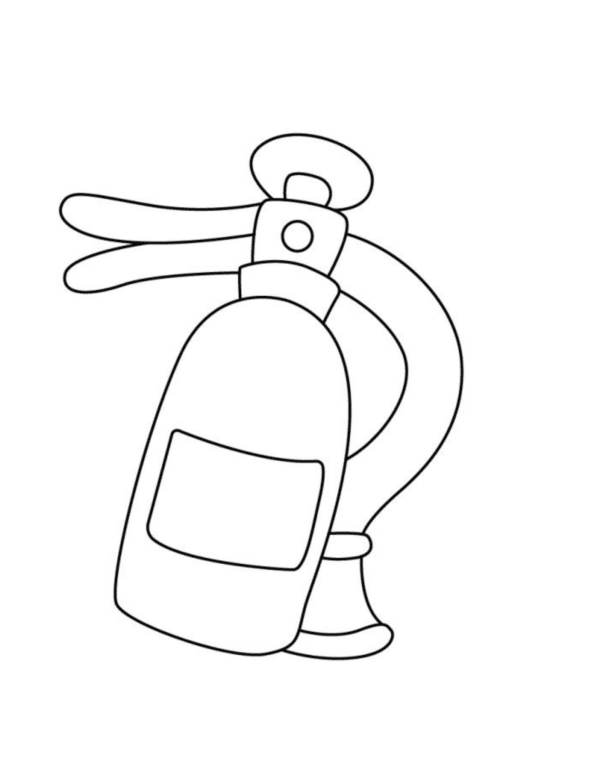
Step 5: Color Your Drawing
Finish your project by coloring the cylinder bright red while leaving the label white or light gray. Add silver to the handle and a darker gray to the hose if desired. You’ll easily have a finished fire extinguisher drawing that’s ready to display.
Drawing Tips for Beginners
If you’re new to drawing, remember that every artist starts somewhere. Every sketch gets better with practice, so don’t worry about perfection.
A few simple tips can help:
- Draw lightly before outlining.
- Use the printable to check your progress after each step.
- Use long, smooth curves instead of short lines.
- Turn your paper if curves feel awkward.
- Erase gently to keep the page clean.
- Outline your finished sketch with a marker.
With practice, you’ll become more comfortable recreating this safety tool and other everyday objects.
Fire Safety Facts for Kids
This activity naturally leads into a conversation about fire safety.
Children should know that:
- These devices help put out small fires.
- They are important pieces of emergency equipment.
- Children should never handle or play with this type of safety equipment.
- If you notice a fire, tell a trusted adult right away.
- Leave the building immediately if there’s a real emergency.
- Firefighters are trained to safely handle and put out fires.
Keeping the discussion calm and positive helps children understand safety without creating fear.
Fun Ways to Use Your Finished Drawing
Once your picture is complete, there are lots of creative ways to use it.
You could:
- Hang it on the refrigerator.
- Display it in the classroom.
- Use it as part of a fire safety poster.
- Display it in your personal art collection.
- Turn it into a greeting card.
- Decorate it with markers, crayons, or watercolor paints.
- Draw a fire station in the background.
Adding extra scenery gives children another opportunity to practice art skills.
Pair This Activity with a Fire Safety Lesson
This printable works well alongside books, discussions, and educational videos about fire safety.
After finishing the drawing, ask children where they’ve seen this type of safety equipment before. They might remember seeing one at school, in a grocery store, at a restaurant, or inside a public building.
You can also talk about smoke alarms, emergency exits, family meeting places, and calling emergency services. Combining creative activities with real-world conversations helps children remember important information much more effectively.
Why This Drawing Is Great for Beginners
This printable was designed with beginners in mind. Every stage adds just a few new lines, making the finished picture feel achievable instead of overwhelming. Children quickly discover that even detailed pictures can be created by following a few simple instructions one step at a time.
Because the activity focuses on observation and basic shapes, it helps build confidence that carries over into future drawing projects. Before long, many children can recreate the extinguisher from memory and begin adding their own creative details.
Whether you’re completing this activity at home, during Fire Prevention Week, or in the classroom, this easy printable offers an enjoyable way to combine creativity with an important safety topic.
More Drawing Tutorials to Explore
If you had fun learning how to draw a fire extinguisher, here are a few more easy drawing guides to keep the creativity going. They’re great for kids who love practicing new drawing skills one step at a time.
- How to Draw a Teddy Bear Easy – Follow simple steps to draw an adorable teddy bear that’s perfect for beginners.
- How to Draw a Frog – Learn how to sketch a cute frog with easy-to-follow instructions for young artists.
- How to Draw a Fireman – Practice drawing a friendly firefighter while learning about an important community helper.
- Robot Drawing – Create a fun robot with simple shapes and step-by-step instructions that are easy for kids to follow.
- Summer Symmetry Drawing Worksheets
Now that you know how to draw a fire extinguisher, it’s time to grab your pencil and begin. Follow each step-by-step illustration, take your time, and remember that every artist improves with practice.
This printable drawing tutorial is designed to make learning fun while introducing children to one of the most recognizable pieces of fire safety equipment.
What is this device designed to do?
It is designed to put out small fires before they spread. When operated properly, it can help prevent a small fire from growing and causing more damage.
How do I use a fire extinguisher safely and correctly?
Remember the PASS method:
Pull the pin.
Aim the nozzle at the base of the fire.
Squeeze the handle.
Sweep from side to side until the fire is out.
What varieties are available?
ABC extinguishers work on ordinary combustibles, flammable liquids, and electrical fires. CO₂ extinguishers are designed for electrical and flammable liquid fires, while water extinguishers are intended for ordinary combustible materials.
How do I inspect it to make sure it’s in good condition?
Check that the pressure gauge is in the recommended range, inspect it for dents, corrosion, or leaks, and have it professionally serviced according to the manufacturer’s recommendations.
Where should I keep one in my home?
Store it somewhere easy to reach, such as the kitchen, garage, or near an exit. Make sure it isn’t hidden behind furniture or blocked by household items.
What should I do with an expired or discharged unit?
Contact your local fire department, recycling center, or waste management service for disposal instructions. Avoid throwing a pressurized extinguisher away with your regular household waste.
Who is this step-by-step drawing activity best suited for?
Ages 6 and older will find this activity easy to follow, while younger children may need some help from an adult.
Whether you’re a beginner or simply looking for a quick afternoon activity, this printable is an enjoyable way to learn, practice, and create something you’ll be proud to display.
