
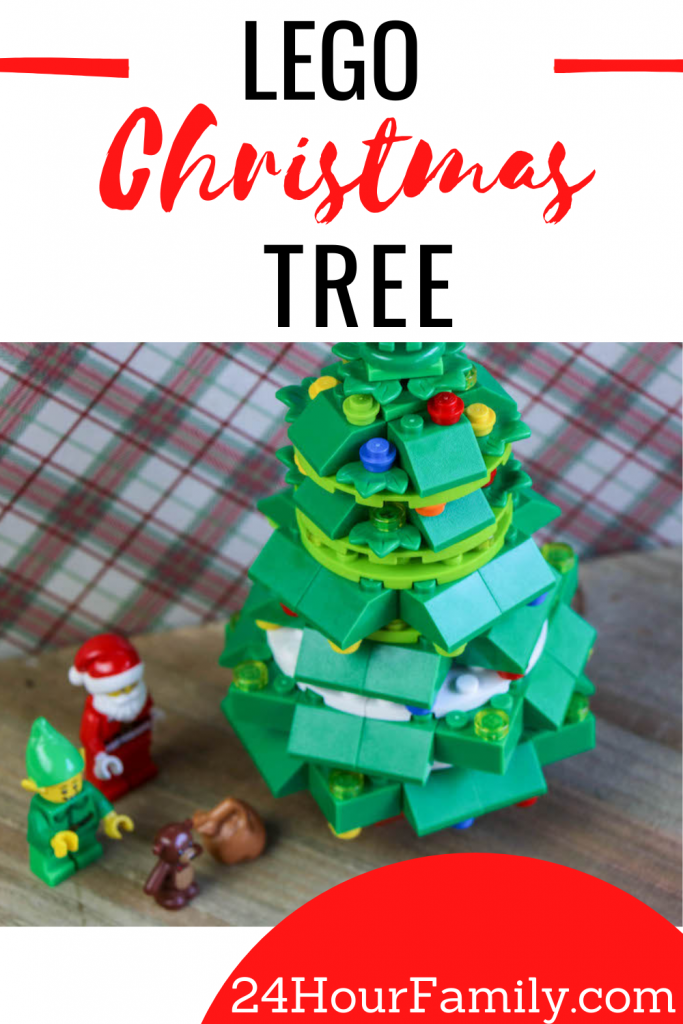
How to Make a Lego Christmas Tree
As we continue our Lego-building Christmas projects, I want to give you step-by-step instructions on how to make a LEGO Christmas Tree. This is a fun and simple Christmas tree that will provide entertainment and fun for your kids. They can also add their creative touch to this Lego Christmas tree.
Lego and STEM Building Activities combine learning with play and make education enjoyable. Building LEGO STEM projects together can be a bonding activity for parents and children, promoting quality time and shared learning.
Christmas trees come in all different shapes and sizes, so use your creativity to make this LEGO Christmas tree. If you don’t have the colors listed in the instructions, create your own LEGO Christmas tree with any colors that you may have on hand. Grab your LEGO friends and your collection of LEGO bricks and enjoy a day of holiday fun and building time.
This post contains affiliate links meaning I get commissions for purchases made through links in this post at no cost to you. Read my disclosure policy here.
LEGO Bricks used to build this LEGO Christmas Tree:

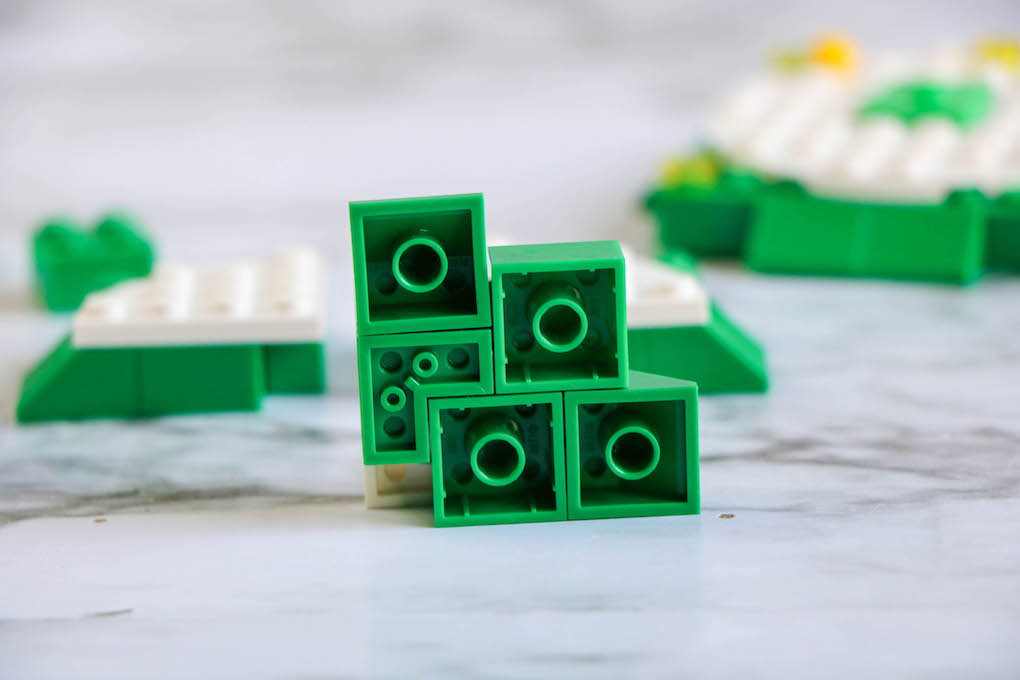
16 1x2x2 corner bricks OR 48 1x2x2 corner plates 40 2×2 roof tiles with 45 degree angle
22 2×2 green bricks
12 1×1 plant plates
6 2 x 2 Round Plates
4 6×6 round plates with tube snap
8 4×4 plates 1⁄4 circle
1 4×4 plate
8 1×4 plate
7 2×2 plates with knob
1×1 round plates in various colors for decorating one tree

How to Build a LEGO Christmas Tree Step-by-Step
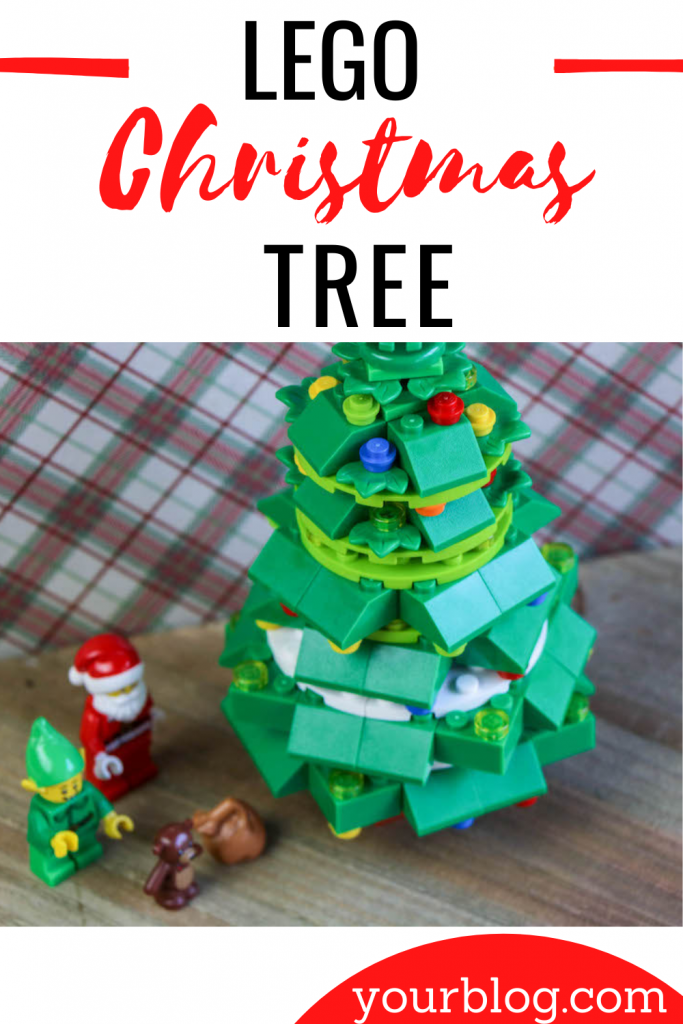
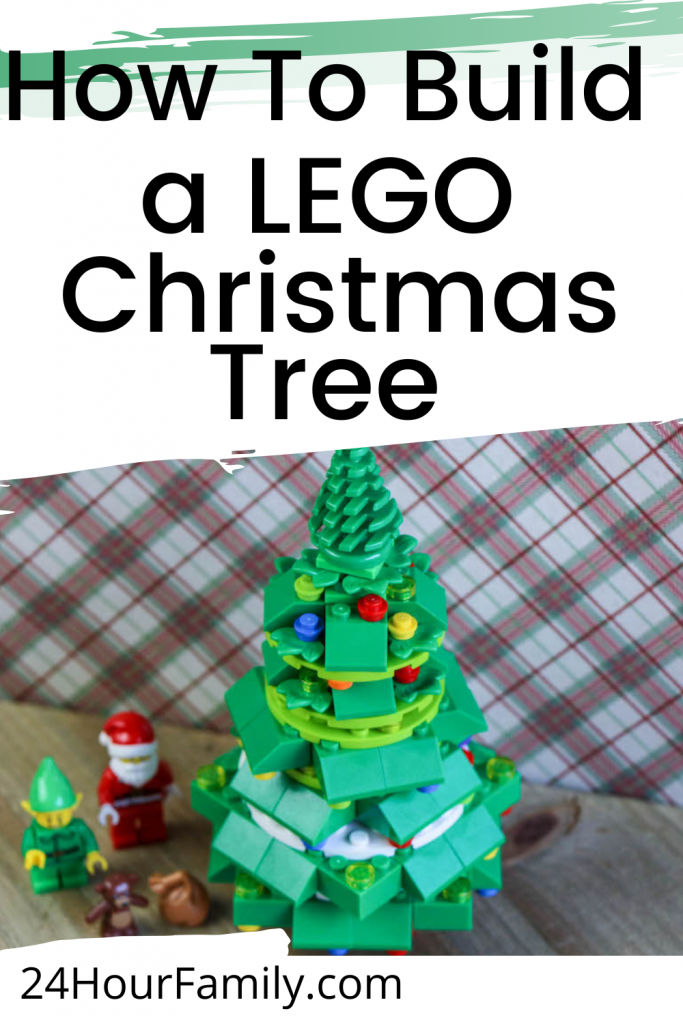
Assemble the needed Lego bricks in a pile and organize them before you start the project.
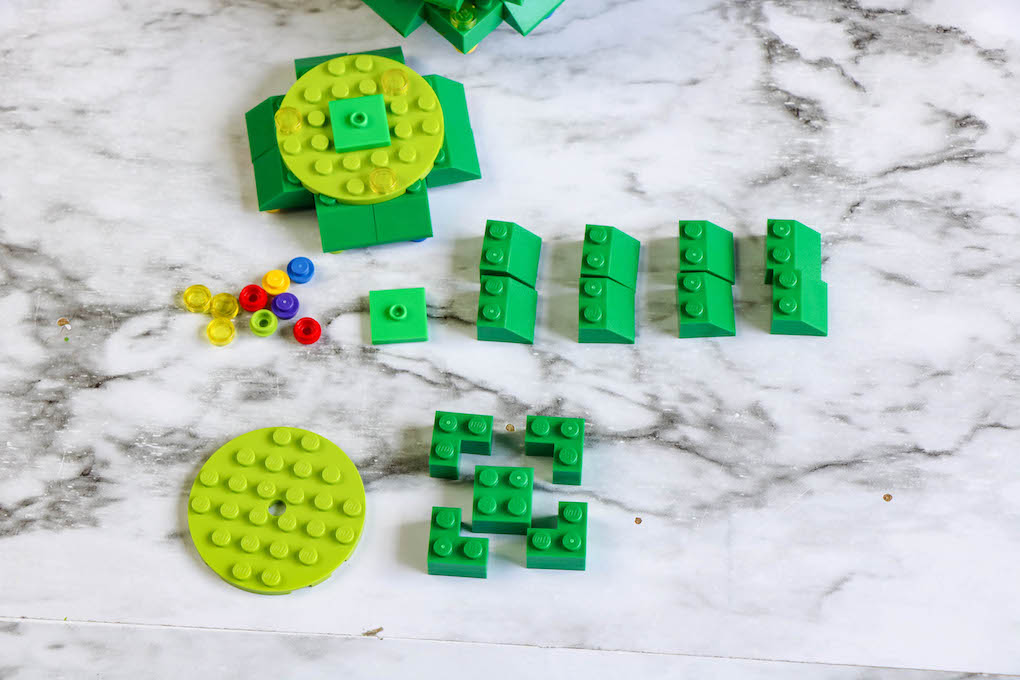

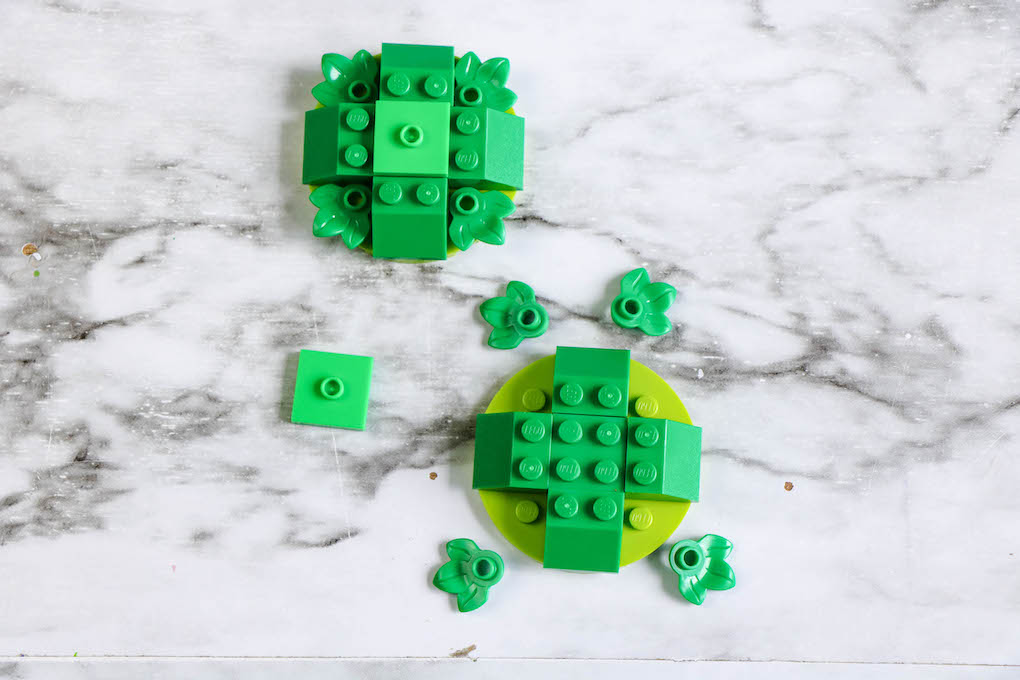
Using the baseplate, add the green 45-degree angled bricks to the base plate. Next, add the plant plates to the sides of the angled bricks.

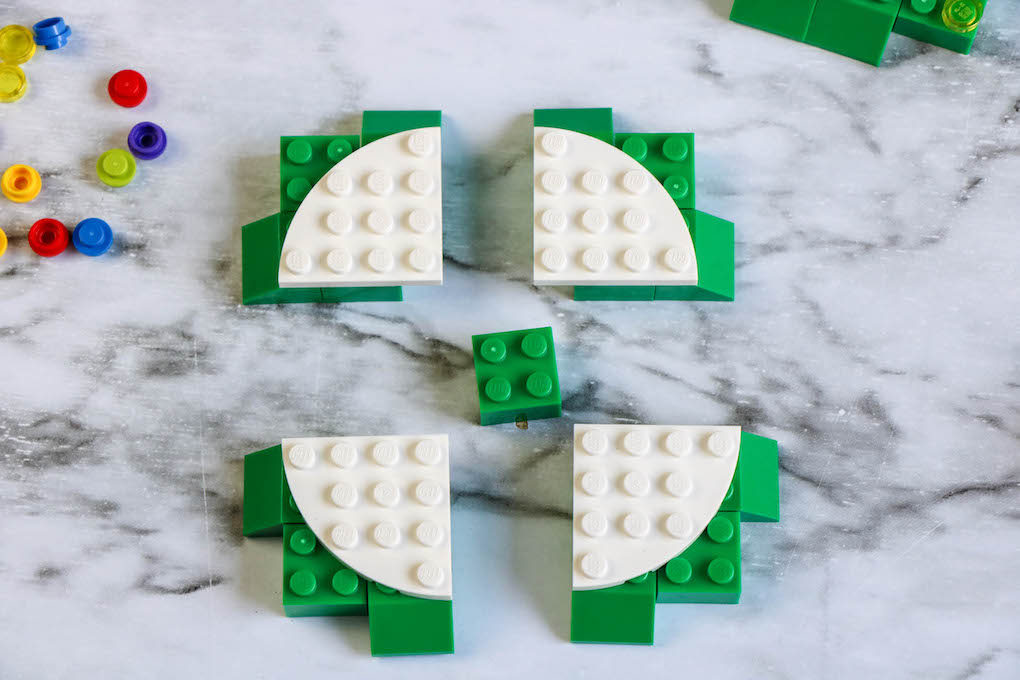
Next, add the colored circles to the bottom of the green bricks. After you have assembled the yellow plates with the green bricks on the bottom, move on to using the white 1/4 circle plates.
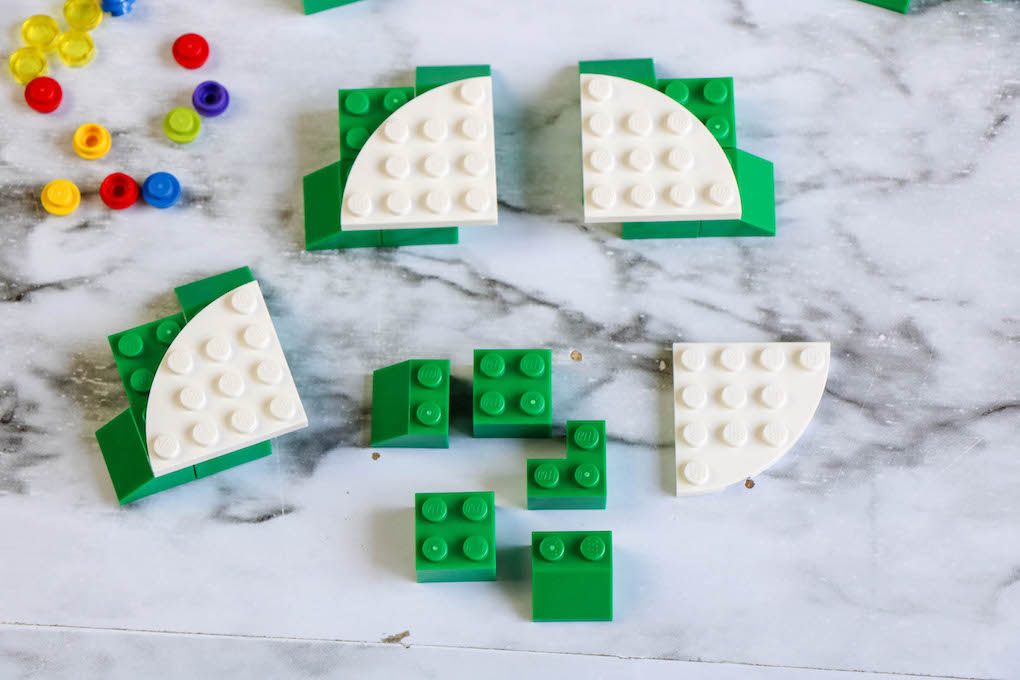

Connect the 1/4 circle plates by using the green bricks on the bottom.

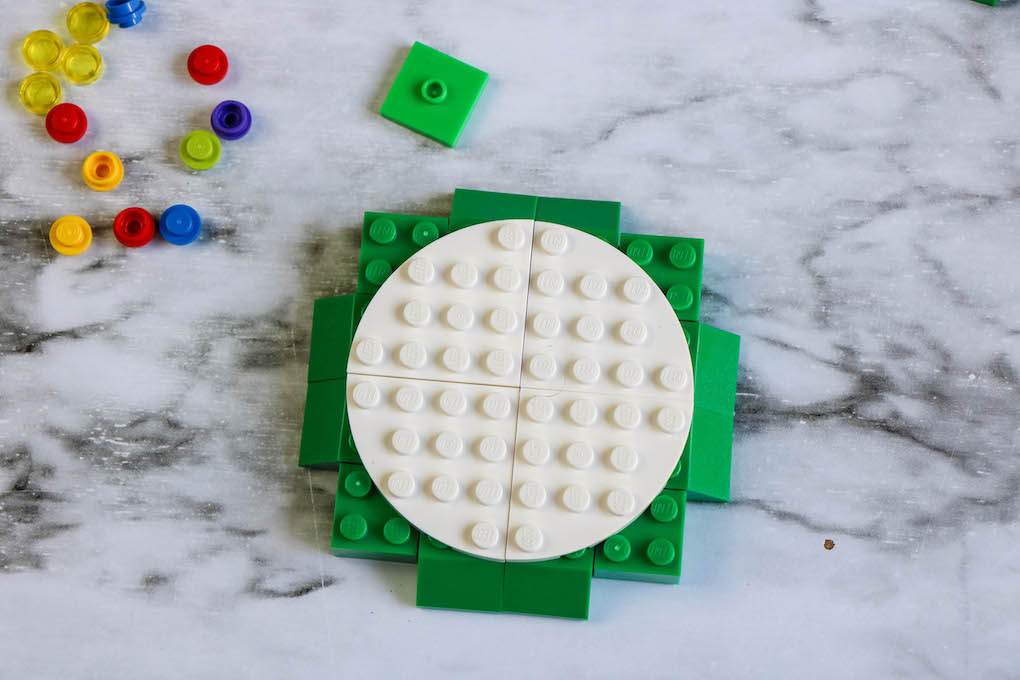
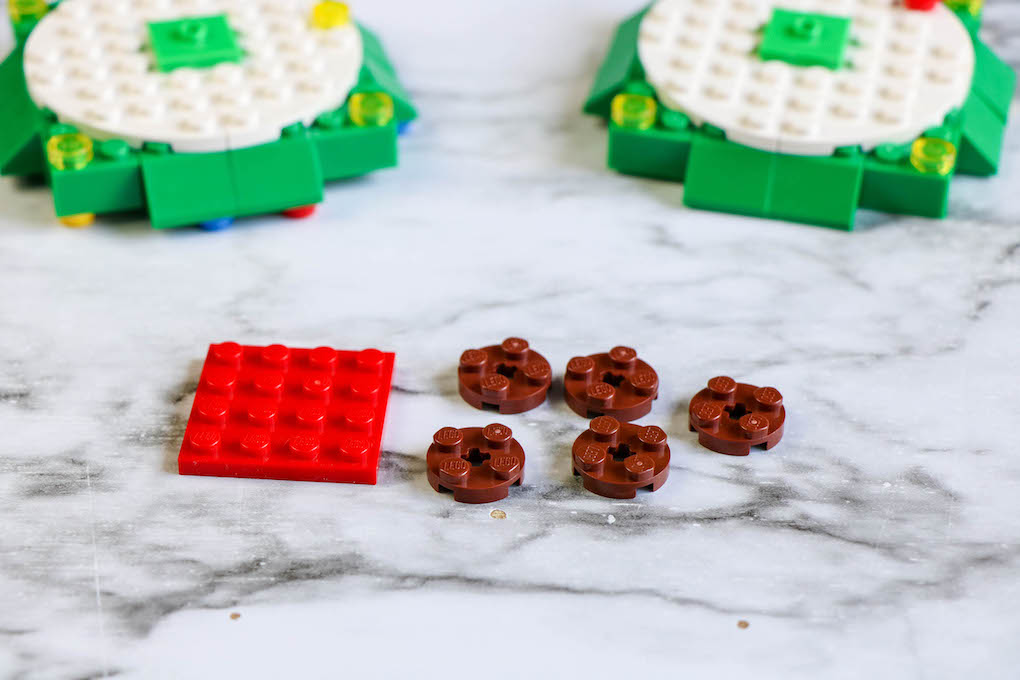
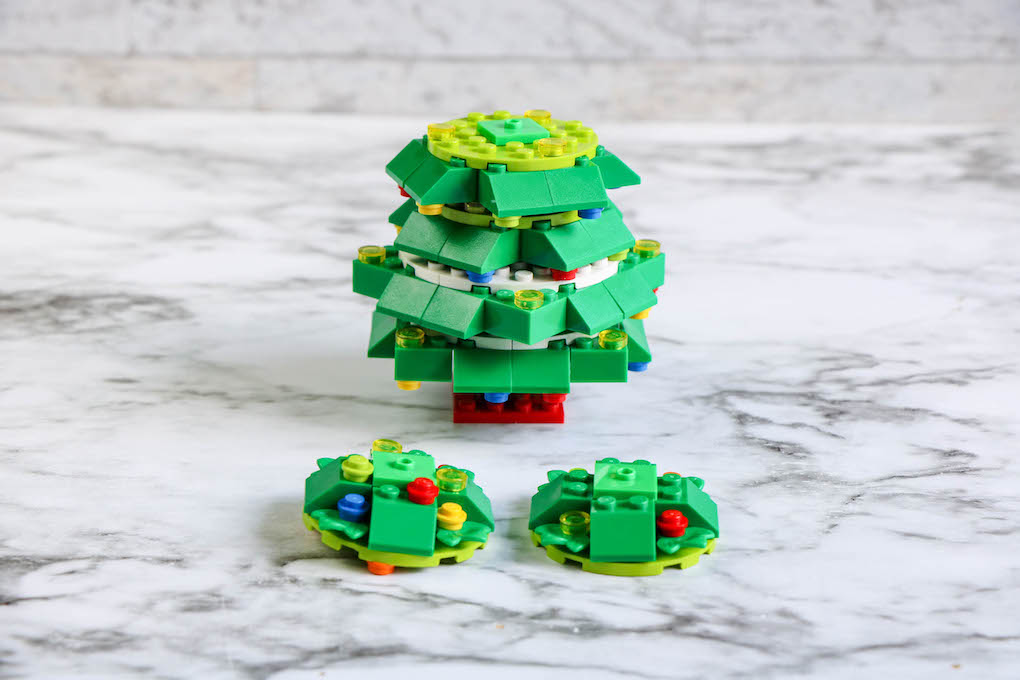
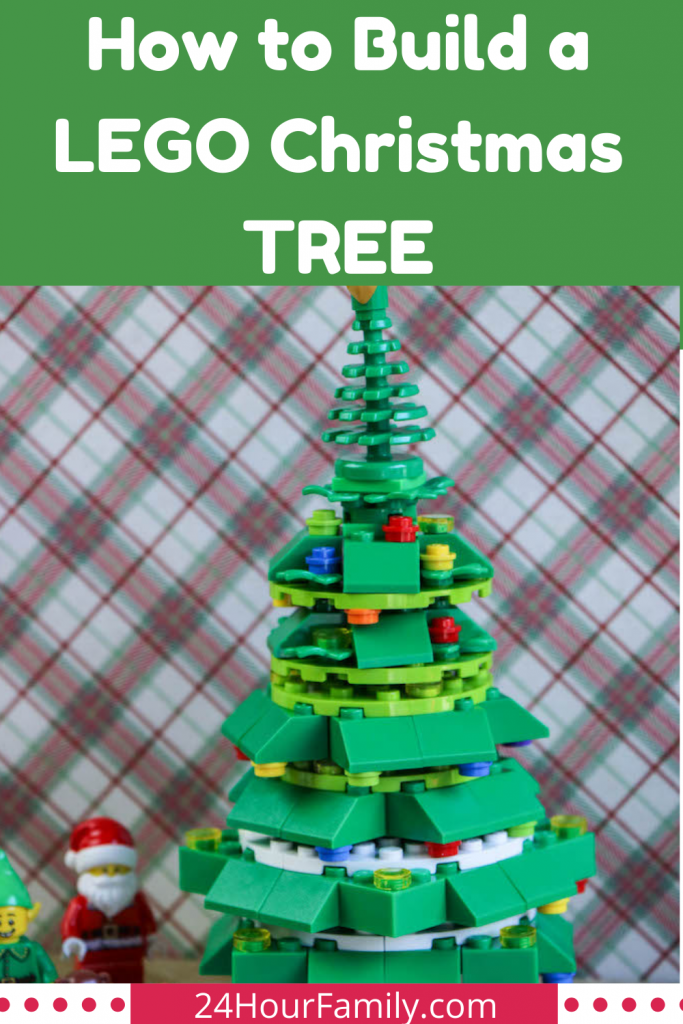
After the 1/4 bases are connected, stack the pieces to form the Christmas tree. The stack starts with the widest section at the bottom.


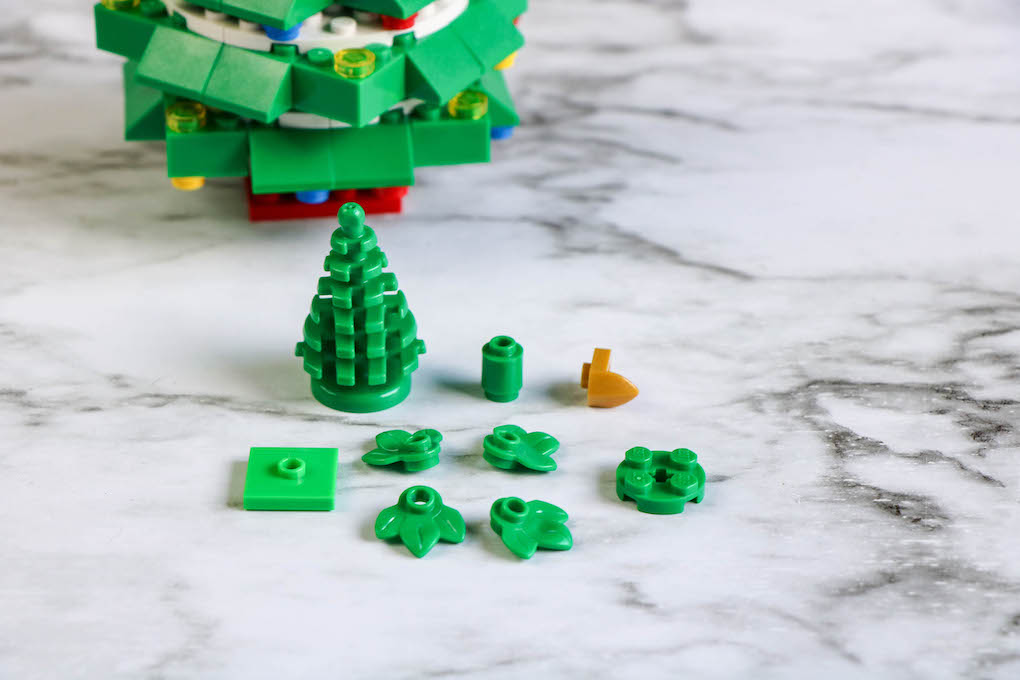
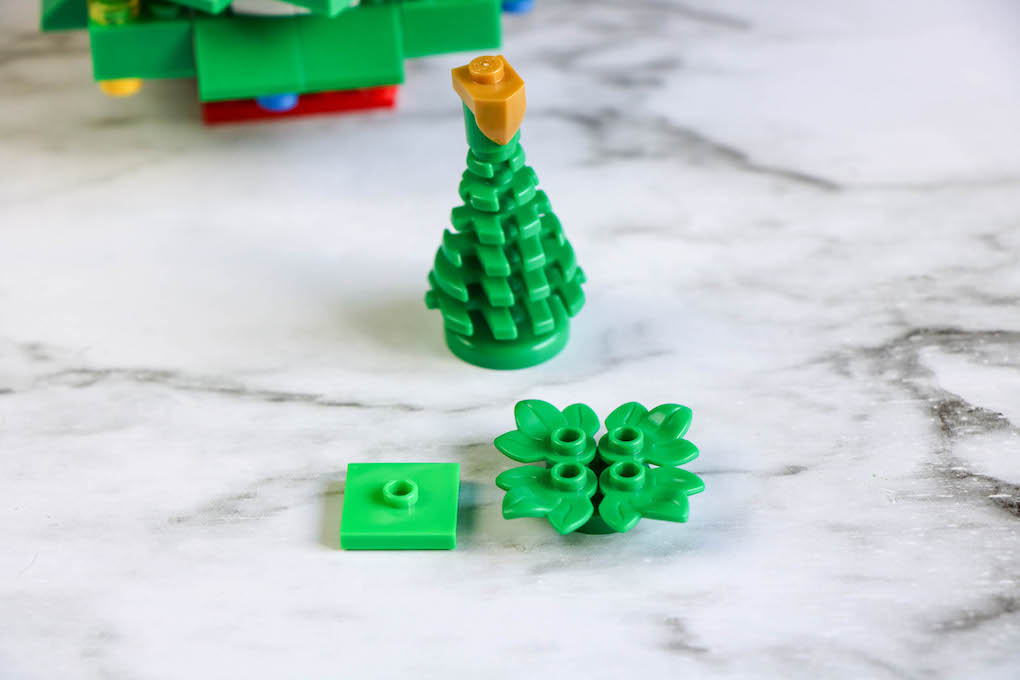
Next Step: Photos showing how to assemble the Lego Christmas Tree Topper


Building a LEGO Christmas tree with your kids is a wonderful holiday activity with numerous benefits, including quality family time, creative expression, and skill development. Here are a few additional details you can add to your Lego Christmas Tree:
- Decorate the Tree: Use colorful LEGO bricks to represent ornaments and decorations. Your kids can get creative by adding designs and patterns to the tree.
- Add a Star: If you have a LEGO star, place it at the top of the tree. Alternatively, you can build a small star using yellow and other colored LEGO bricks.
- Incorporate Minifigures: Decorate the tree with LEGO minifigures or holiday-themed pieces. They can be positioned on the branches or around the base as part of the festive scene.
- Customize: Encourage your children to customize the tree as they like. They can experiment with different ornament shapes, sizes, and colors.
- Share the Story: As you build, share stories or sing Christmas carols to make the experience more festive and enjoyable.
- Display and Celebrate: Once the LEGO Christmas tree is complete, display it prominently in your home, perhaps as part of your holiday decor. You can also use it as a holiday party or celebration centerpiece.
- Preserve the Memory: Take photos of the finished tree and your kids with their creation to create lasting memories of this special activity.

Building a LEGO Christmas tree with your kids offers family bonding, creative expression, and holiday fun. It’s a memorable way to celebrate the season and create a lasting tradition with your loved ones.


Lego Christmas Tree
Introducing the LEGO Christmas Tree! It's a fantastic and straightforward way to bring joy and excitement to your kids during the holiday season.
Materials
- 16 pcs of 1x2x2 LEGO corner bricks or 48 pieces 1x2x2 LEGO corner plates
- 40 pcs 2×2 LEGO roof tiles in a 45 degree angle
- 22 pcs 2×2 LEGO green bricks
- 12 pcs 1×1 LEGO plant plates
- 6 pcs 2 x 2 LEGO Round Plates
- 4 pcs 6×6 LEGO round plates containing tube snap
- 8 pcs 4×4 LEGO plates 1⁄4 circle
- 1 pcs 4×4 LEGO plate
- 8 pcs 1×4 LEGO plate
- 7 pcs 2×2 LEGO plates with knob
- 1×1 LEGO round plates, possibly in various colors for our tree's decors
Instructions
- Before starting the project, gather all the necessary LEGO bricks and organize them into a pile.
- Start by securing the baseplate, then begin building the foundation of your LEGO Christmas Tree by attaching the green 45-degree angled bricks to the baseplate. Once the angled bricks are in place, add the plant plates to the sides of the angled bricks.
- Take the colored circles and affix them to the bottom of the green bricks. Once you've completed this step, incorporate the white 1/4-circle plates into the structure.
- To enhance the stability of your LEGO Christmas Tree, let's reinforce its structure by connecting the 1/4 circle plates with the green bricks positioned at the bottom.
- Now that the 1/4 circle plates are securely connected let's start building up your LEGO Christmas Tree! Begin by stacking the pieces to form the tree, starting with the widest section at the bottom.
- To complete your LEGO Christmas Tree topper, first, attach the green plate atop the tree. Then, press the gold plate on top of the green one. Next, take the 1 x 1 plant plates and carefully place them on the round 2 x 2 plate to provide a sturdy base for the final touch. Finally, delicately place your completed LEGO Christmas Tree on top of this layer, anchoring it in place and completing your festive masterpiece.
- Attach the assembled topper top of your LEGO Christmas tree, and voila! You have your own LEGO Christmas tree to complete the Christmas spirit in your home.