
Paper Flower Basket Craft (With Free SVG)
This paper flower basket craft comes together from a single sheet of colored paper — curled, shaped, and decorated with paper flowers to create a hanging basket that looks like it took far more effort than it did.
The free SVG file included makes the basket frame and flower shapes easy to cut precisely with a Cricut or Silhouette. If you prefer to cut by hand, all the dimensions you need are in the instructions below. Either way, the whole project takes about 30–45 minutes and makes a beautiful result for Mother’s Day, spring decor, Easter, or a classroom craft.

Paper Flower Basket Craft with Free SVG (Step-by-Step)
This post may contain affiliate links. As an Amazon Associate and a participant in other affiliate programs, I earn a commission on qualifying purchases. Read our disclosure policy here.
Crayola Construction Paper Bulk Pack (480 Sheets) – 10 Assorted Colors, 9×12, Classroom Arts & Crafts Supplies for Kids, Art Paper for School Projects Paper Crafts for Kids: 25 Cut-Out Activities for Kids Ages 4-88 Rolls Colored Masking Tape Rainbow Colors Painters Tape Colorful Craft Art Paper Tape for Kids Labeling Arts Crafts DIY Decorative Coding Decoration Teaching Supplies, 0.6 Inch x 16 Yard, 8 ColorsARTISTRO 24 Acrylic Paint Markers for Rock, Fabric, Wood, Glass, Craft, Decoration – Dual-Tip Paint Pens – Stocking Stuffers, Christmas Gift Idea for Teens, Grandkids, Kids – Art Supplies900 PCS Pom Poms, Multicolor Bulk Pom Poms Arts and Crafts, Soft and Fluffy Craft Pom Poms, Assorted Sizes Pompoms, for Arts and Craft Making DecorationsElmer’s Disappearing Purple School Glue Sticks, Washable, 6 Grams, 12 Count – Poster, Vision Board, Back to School, #1 Teacher Brand




Supplies Needed:
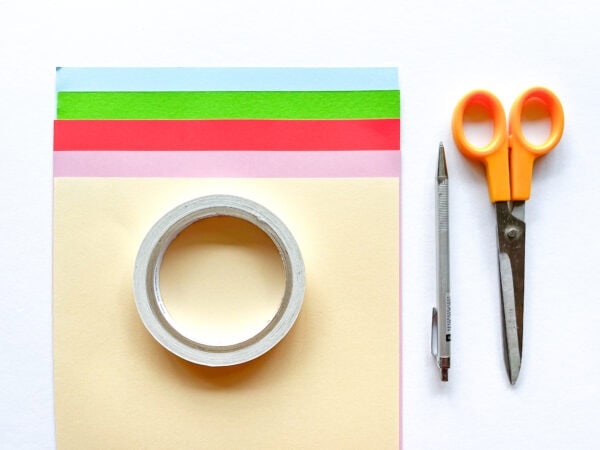
The free SVG download (link below)
Colored cardstock or construction paper in your chosen colors — cardstock (65 lb) gives a sturdier basket than construction paper and holds the curled shape better; construction paper works but may droop over time
- Scissors
- Glue stick or double-sided tape
- Pencil
- Ruler
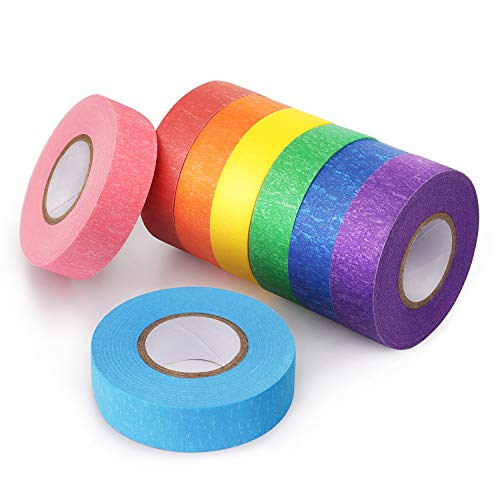
- Paper tape or washi tape
- Twine, ribbon, or rope for hanging (optional)
- A Cricut, Silhouette, or other cutting machine (optional — you can cut everything by hand using the dimensions below)
Paper Dimensions — Cut by Hand or by Machine
If you are cutting by hand without a Cricut, here are the dimensions for every piece:
The basket frame: one rectangle measuring 7 x 11.5 inches. This is the main piece — you will cut strips from most of it and curl them to form the decorative sides of the basket.
The basket holder (handle): one strip measuring 3/4 inch x 11.5 inches. This forms the handle or hanging loop at the top of the basket.
The basket base: one strip measuring 2 x 11.5 inches, cut from a contrasting color (green works well as a “grass” base). This reinforces the basket’s bottom.
The flowers: as many as you like, cut from contrasting colored paper. Simple five-petal flower shapes approximately 2–3 inches across work well. Small circles in a contrasting color for the flower centers.
If you are using the free SVG file with a Cricut, the instructions below cover the Design Space setup.
How to Make the Paper Flower Basket Craft — Step by Step
Step 1: Cut the basket frame.
Cut one rectangle of blue paper (or your main basket color) measuring 7 x 11.5 inches. This is the piece you will cut strips into to create the decorative, curling sides of the basket.
Step 2: Cut the strips.
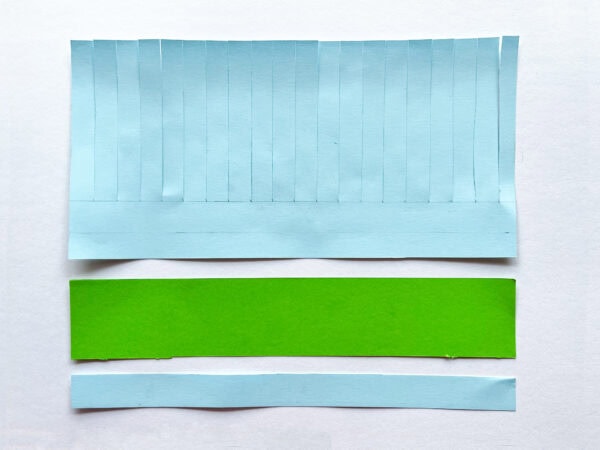
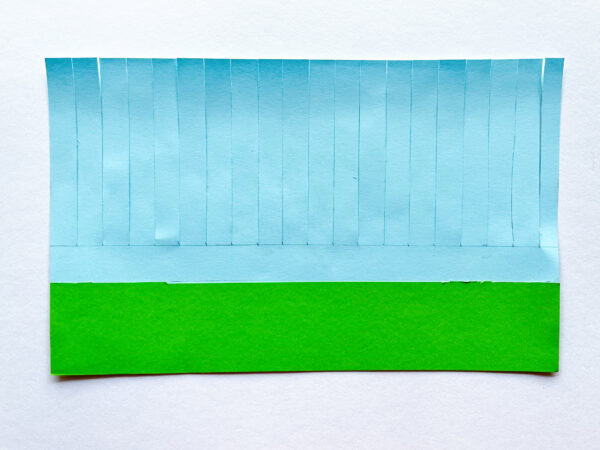
On the largest rectangle, cut vertical strips approximately half an inch wide from the top of the paper down, stopping about 2 inches from the bottom edge. Do not cut all the way through — the uncut section at the bottom will form the base of the basket ring. You should have approximately 12–14 strips depending on how wide you make each one.
Step 3: Prepare the green base strip.
Cut a green strip of paper measuring 2 x 11.5 inches. This will be glued along the uncut bottom section of the basket frame to give it color and structure.
Step 4: Attach the green base.
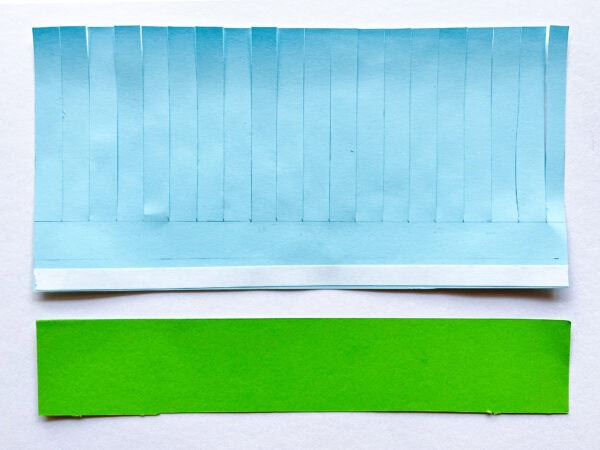
Apply double-sided tape or glue along the bottom uncut section of the blue rectangle. Press the green strip firmly along that bottom section so it lines up flush with the bottom edge. Allow it to dry or set for a moment before proceeding.
Step 5: Roll the paper into a tube.
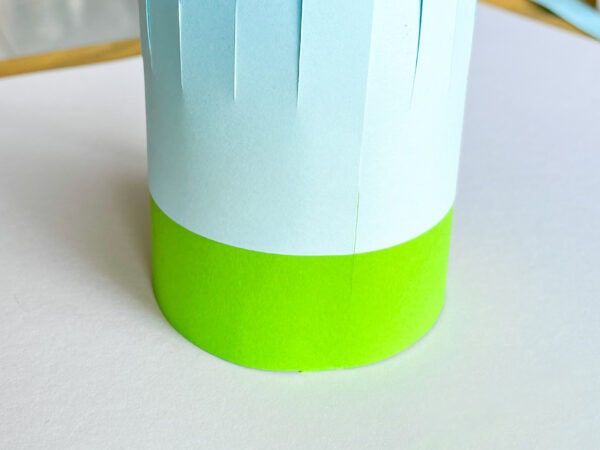
Bring the two short ends of the rectangle together to form a cylinder — the strips should be on the outside and the green base at the bottom. Attach both short ends together with paper tape or glue to hold the tube shape.
Step 6: Curl the strips.
This is the step that gives the basket its decorative look. Take each strip and curl it outward and downward using the blade of your scissors.
Hold the strip firmly between your thumb and the flat side of the scissor blade, then pull gently while applying light pressure. The strip should curl into a graceful outward curve.
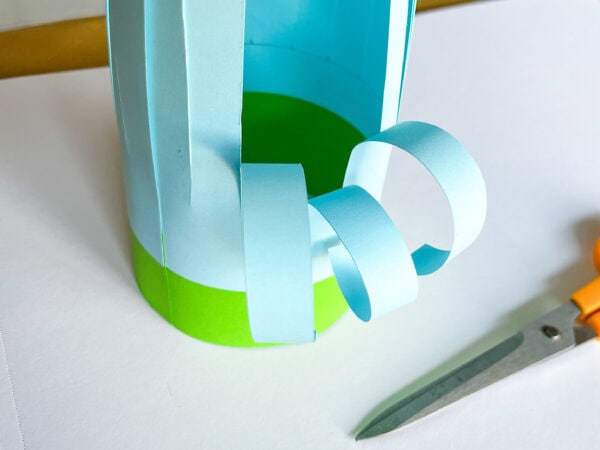
Alternatively, wrap each strip around a pencil and hold it for a few seconds, then release. The pencil method gives a tighter, more uniform curl.
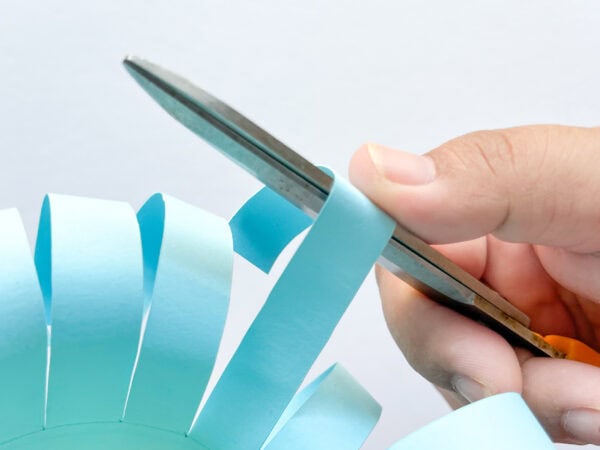
Work your way around the basket, curling each strip in the same direction for a consistent look.
Step 7: Add the handle.
Apply double-sided tape to both ends of the handle strip (the 3/4 x 11.5 inch strip). Thread the handle up through the inside of the basket and attach both ends to the inside wall of the cylinder, pressing firmly.
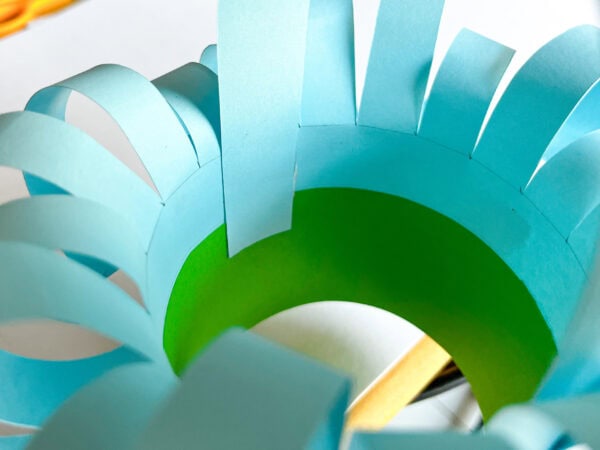
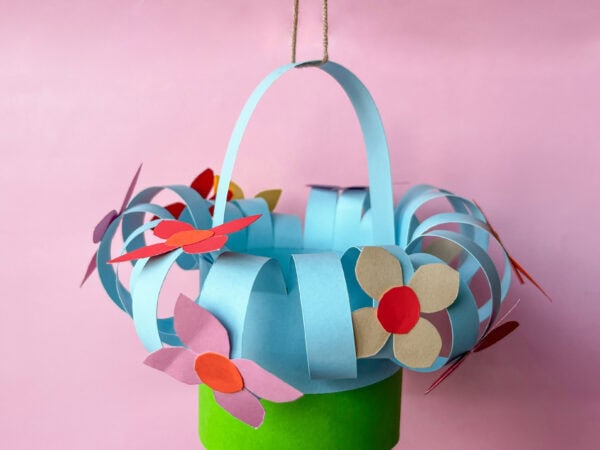
This strip serves as both the handle and the hanging loop — simply tie a ribbon or twine to the center of the handle for hanging.
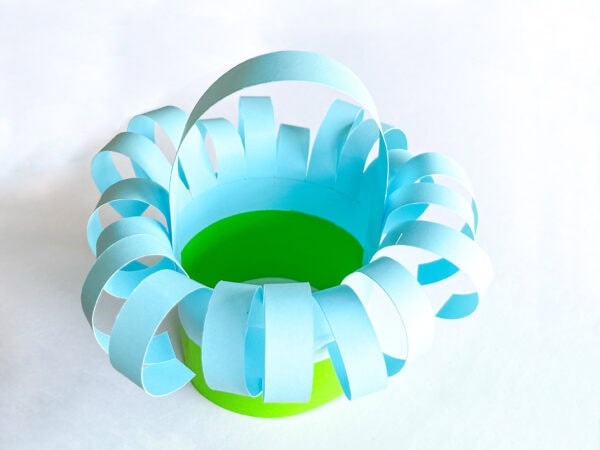
Step 8: Make the flowers.
Cut multiple flower shapes from colored paper: red, yellow, pink, beige, or any spring colors you love. A simple five-petal flower shape works perfectly. Cut small circles from a contrasting color for the flower centers.
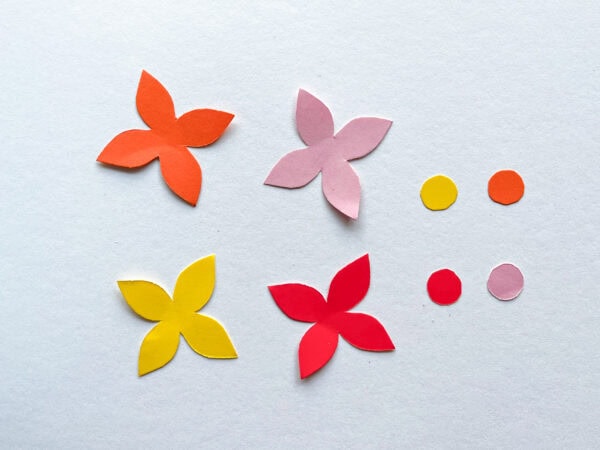
Glue one small circle to the center of each flower and allow it to dry. Make as many flowers as you want — more flowers give a fuller, more lush look. Typically 8–12 flowers cover the basket beautifully.
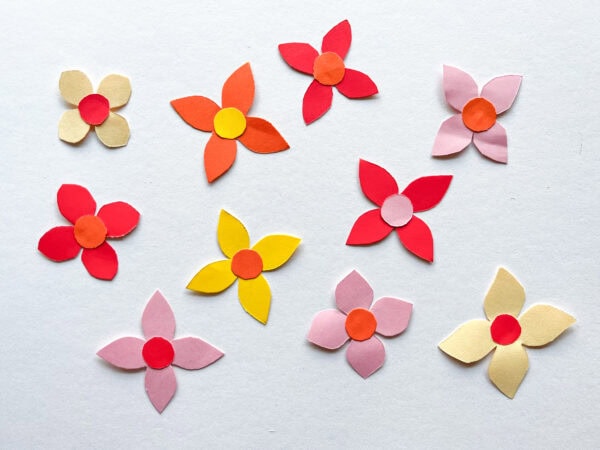
Step 9: Attach the flowers to the basket.
Starting at the top of the curled strips and working downward, glue flowers onto the curled blue strips around the entire basket.
The curled strips create natural pockets and curves that hold the flowers nicely; tuck the flowers in so they nestle among the curls for a dimensional look.
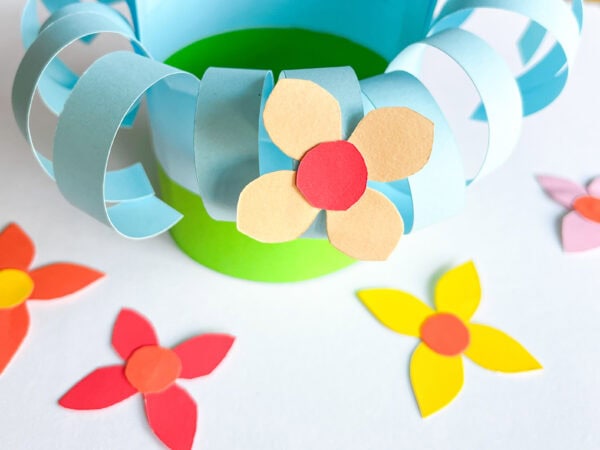
Continue adding flowers all the way around the basket until you’re happy with the fullness. There is no wrong amount; more flowers simply look more dramatic.
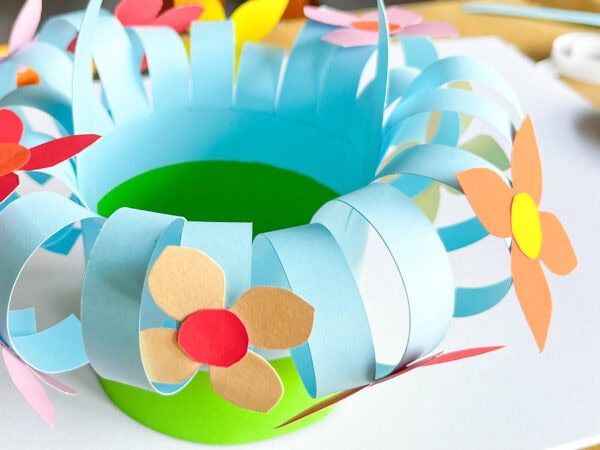
Step 10: Hang or display.
Your paper flower basket craft is complete. To hang it, attach a piece of twine or ribbon to the center of the handle and tie a loop.
For a table display, simply set the basket on a surface and let the curled, flower-covered sides face outward.
Using the Free SVG File with Your Cricut
If you want to use the free SVG file with a Cricut or Silhouette instead of cutting by hand, here’s how to set it up:
Step 1: Download the free SVG file using the button below. Unzip the download to access the files.
Step 2: Open Cricut Design Space and start a new project. Click Upload, then Upload Image, browse to your SVG file, and click Open. Click Save, then Insert Images.
Step 3: The basket frame piece should be sized at approximately 7 x 11.5 inches on the canvas. Check that the proportions are correct by looking at the width and height in the Design Space toolbar. The SVG file will also include score lines for the strips — these should already be in the file as a separate layer in a different color (usually blue in Design Space), indicating they will score rather than cut.
Step 4: Load your cardstock on a standard grip mat. Select the correct material — Cardstock or Medium Cardstock in Design Space. Follow the prompts to cut the basket frame.
Step 5: The flower shapes can be cut from any colored cardstock. Size them between 2–3 inches depending on how large you want the finished flowers to be.
Step 6: Follow the same assembly steps above — score lines on the SVG will help you fold precisely where needed.
Tips for the Best Results
Use cardstock rather than regular printer paper. The strips need to hold their curl over time, and regular paper goes limp quickly, especially in humid environments. A 65 lb cardstock is the sweet spot — heavy enough to hold shape but light enough to curl smoothly. Construction paper falls in between and works but won’t last as long as cardstock.
Curl the strips before assembling the tube. It is easier to curl the strips when the paper is still flat than after you have formed the cylinder. Do your curling in Step 6 before the cylinder gets fully assembled.
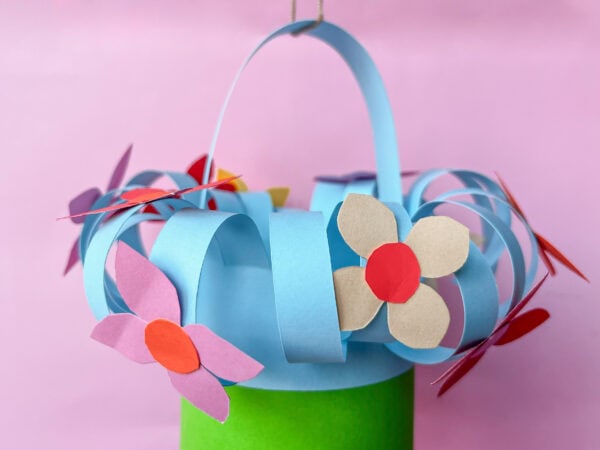
Use more flowers than you think you need. The finished basket looks sparse with fewer than 8 flowers. 12–15 flowers gives that full, luxurious look seen in the finished photos. Cut extras so you can keep adding until you’re happy.
For a cleaner curl, pull the strip slowly. Rushing the curl by pulling fast creates uneven, kinked strips. A slow, steady pull against the scissor blade gives a smooth, even curve every time.
Vary your flower sizes. Mixing 2-inch and 3-inch flowers gives the arrangement a more natural, organic look compared to having all flowers the same size. Cut some of each and mix them as you arrange them on the basket.
Ways to Use This Paper Flower Basket
Mother’s Day gift or decoration. Fill the basket with small wrapped chocolates, a gift card, or dried flower petals and give it as a handmade Mother’s Day gift. The basket is the gift — and it looks handmade in the best possible way.
Spring classroom decoration. A group of children each making one basket creates an instant spring display for a classroom door, window, or bulletin board. The curled, flower-covered baskets look beautiful clustered together and individual enough for each child to take theirs home at the end of the year.
Easter basket alternative. Use the paper flower basket as a decorative Easter display piece on a table or mantle. Fill it with a few wrapped chocolates and set it next to an Easter centerpiece for a homemade seasonal decoration.
Party table decoration. A row of these baskets down a spring or garden party table makes a charming centerpiece that doubles as a favor — guests take one home at the end of the party.
Flower pot for paper flowers. If you make rolled paper flowers on a Cricut, this basket makes a beautiful vessel for arranging them into a paper flower bouquet display.
A few sheets of paper, some scissors, and about 30 minutes — and you have something that genuinely looks like it came from a craft boutique. This paper flower basket is one of those crafts where the finished result far exceeds the effort it took to get there.
Download the free SVG below and get started.
More Spring and Mother’s Day Crafts You Might Love:
- Handprint Bouquet Flowers for Mother’s Day
- Mother’s Day Handprint Poem Craft
- Free Mom SVG for Cricut and Silhouette
- Free Happy Mother’s Day SVGs
- Spring Crafts and Printables — Full Collection
Is this paper flower basket craft easier with a Cricut or by hand?
Both work well. The Cricut cuts the basket frame more precisely and is faster if you’re making multiple baskets. Cutting by hand works perfectly for a single basket and requires no extra equipment beyond scissors and a ruler. The dimensions in the instructions above give you everything you need to cut by hand.
What type of paper works best for this basket?
Cardstock at 65 lb weight gives the best results — it holds the curled shape over time and gives the basket more structure. Construction paper works but the curls may lose their shape more quickly. Regular printer paper is not recommended — it’s too thin to hold up for this project.
Can kids make this paper flower basket craft?
Yes — with some adult help on the curling step, children ages 6 and up can manage most of this project. Ages 4–5 can cut the flowers and arrange and glue them onto the basket while an adult handles the frame and curling. The flower-gluing step is genuinely fun for young children.
How long does this paper flower basket craft take?
About 30–45 minutes for one basket. If you’re making multiple baskets for a classroom or party, set up an assembly line — cut all frames at once, then curl all frames, then make all flowers at once — and the time per basket drops significantly.
What size is the finished basket?
The finished basket is approximately 3.5 inches tall (before the curled strips extend upward) and about 3.5 inches in diameter. The overall height including the curled strips and flowers is approximately 6–7 inches.
Can I use this SVG file with a Silhouette CAMEO?
Yes — the SVG file is compatible with Silhouette Studio Designer Edition and higher. If you have the basic version of Silhouette Studio, look for a DXF version of the file in the download.

I remember doing something like years and years ago with my class; they made such lovely classroom decorations for “thinking spring!” Thank you so much for the tutorial.