
Mayflower Printable Craft and History Activity for Kids
Help children explore the Mayflower voyage with this free Mayflower printable craft and history activity. The eight-page PDF combines short reading passages, a labeled diagram of the vessel, comprehension cards, and a two-page paper model children can cut and assemble.
This printable offers more than a simple coloring page. Students first read about the 1620 journey and examine the areas inside the vessel. They can then answer review questions and build a Mayflower ship craft with a movable hull that lifts to reveal labeled sections.
Check out our ever-growing list of Thanksgiving crafts and printables for kids.
Mayflower Printable Craft and History Activity
Use this hands-on activity during a history lesson, Thanksgiving unit, unit study, or ocean study unit. The free template is available through the form at the bottom of this post.
What is included: An eight-page PDF with a cover, three history pages, a labeled cutaway, six comprehension cards, and two pages of cut-and-assemble craft template pieces and directions.
What Is Included in the Pilgrims and Ship Printable?
Each part of the Mayflower craft template serves a different purpose, allowing parents and teachers to use the pages together as a short lesson or select only the components they need for their lesson plans.

Page 1: Cover Page
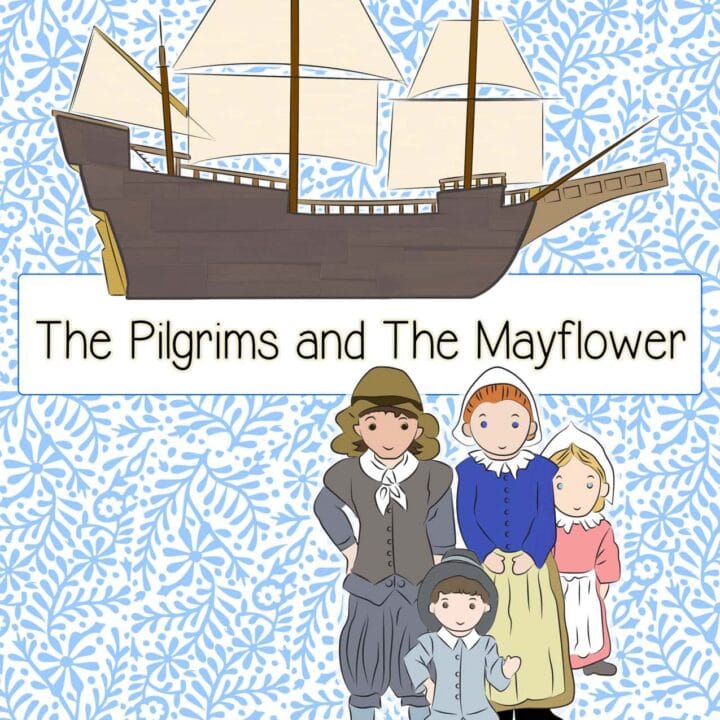
The first page features an illustration of the historic vessel and a family of English colonists. You can use it as a cover for a history folder, notebook, or completed activity packet.
Pages 2 Through 4: Mayflower Voyage History Reading
Three illustrated pages introduce the English Separatists, the unsuccessful attempt to travel with the Speedwell and its companion vessel, the 1620 Atlantic crossing, the arrival at Cape Cod, and the Mayflower Compact.
These pages work best as the beginning of the lesson. Younger students can listen while an adult reads the passages aloud.
Independent readers can highlight important names, dates, and events before answering the comprehension questions. This is also a useful introduction to learning about the Pilgrims and the events that came before the First Thanksgiving.
Page 5: Inside the Mayflower Boat Diagram
The labeled cutaway introduces eight parts of the vessel:
- Poop house
- Crew cabin
- Steerage room
- Forecastle
- Gun room
- Gun deck
- Cargo hold
- Ballast
The page also labels several sail areas and explains how different spaces may have been used. Students can keep this reference nearby while they place the labels on the craft.
Page 6: Comprehension Cards for Lesson Plans
The activity includes six question cards covering details from the reading pages. Children review the year of the journey, the Speedwell, scurvy, the Separatists, the historic Compact, and the length of the Atlantic crossing.
Cut the cards apart for a history center, oral review game, or small-group discussion. They can also be left together and used as a worksheet or handwriting activity.
Pages 7 and 8: Movable Mayflower Craft
The final two pages contain the Mayflower ship, five sail pieces, eight labels, cutting guides, folding directions, and a hull section with a tab.
Once assembled, the outer hull can move up and down. Lifting it reveals the labeled cutaway, turning this into an interactive history project that connects the paper craft to the information on Page 5.
This post may contain affiliate links. As an Amazon Associate and a participant in other affiliate programs, I earn a commission on qualifying purchases. Read our disclosure policy here.
![Washable Liquid School Glue [Set of 3] Size: 1.25](https://easyproductdisplays.com/wp-content/uploads/2014/09/41.png)
![Washable Liquid School Glue [Set of 3] Size: 1.25](https://m.media-amazon.com/images/I/5165qcqBskL._SL500_.jpg)


Supplies Needed for This Craft for Kids
Gather these materials before beginning:
- Printable PDF
- Printer
- White card stock or heavyweight printer paper
- Scissors
- Glue stick or craft adhesive
- Crayons, colored pencils, or markers for color, optional
- Paper clips or small envelopes for the question cards, optional
Card stock is recommended for the two craft pages because the movable hull and sails need enough structure to hold their shape. Regular printer paper is fine for the cover, readings, cutaway, and comprehension cards.
The template already includes illustrated wood, sails, and vessel details, so brown paint, woodgrain paper, dowels, popsicle sticks, and craft sticks are not required. Unlike a popsicle or paper plate project, everything needed to form the main model is included on the pages.
How to Make the Printable Mayflower Ship
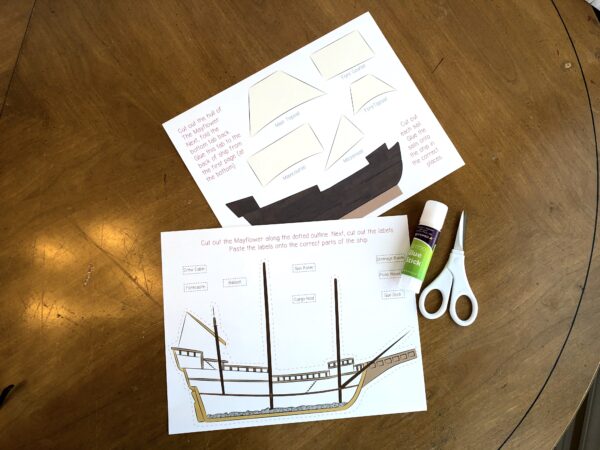
The printable Mayflower is put together from Pages 7 and 8. Children should review the completed example and read all printed directions before cutting.
1. Print the Template
Download the PDF and print Pages 7 and 8 on white cardstock. Select actual size or 100 percent in the print settings unless your printer requires “fit to printable area.”
For a complete lesson packet, print Pages 2 through 6 on regular paper as well.
2. Cut Out the Ship From Page 8
Cut around the dot-style outer line surrounding the vessel cutaway. Keep the masts, bow, stern, and bottom connected as one large piece.
Next, cut straight across the bottom edge where indicated. Little ones, preschool children, and some kindergarten students will probably need adult help with this detailed outline.

3. Cut Out the Labels
Cut apart the eight small labels on Page 8:
- Forecastle
- Crew cabin
- Ballast
- Cargo hold
- Gun room
- Steerage room
- Poop house
- Gun deck
Use the reference on Page 5 to match each label with the correct section. Glue the labels onto the white interior areas shown on the craft page.

4. Cut Out the Hull and Sails
On Page 7, cut around the dark outer edge of the hull. Keep the tan rectangle tab attached to the left side.
Cut out the five individual sail pieces labeled mainsail, main topsail, mizzen sail, fore topsail, and fore course.

5. Attach the Sails
Place each sail over the corresponding space on the vessel from Page 8. Some edges overlap slightly when positioned correctly. Compare the pieces with the complete vessel pictured on the cover or the reference page before gluing.
Press each piece firmly and allow the glue to set before handling the project.

6. Fold the Hull Tab
Fold the tan tab on the outer hull backward along the vertical line. This tab acts like a hinge, allowing the hull to lift and lower.
7. Position the Outer Hull
Place the hull from Page 7 over the lower part of the cutaway. Align its bottom edge and check that it covers the labeled interior sections.

8. Glue Only the Tab
Turn the project over and glue the folded tab to the back of the main craft page. Do not attach the entire hull. The rest must remain loose so children can lift it and look inside.
Allow the adhesive to dry. Then test the moving section by carefully tipping the hull up and down like a gentle wave.

Tips for Easier Assembly
- Print the craft pages on cardstock so the moving section is easier to handle.
- Read all instructions before cutting any pieces.
- Keep Pages 5, 7, and 8 together while putting together the model.
- Place the labels before attaching the outer hull.
- Arrange all five sails before gluing them.
- Use a glue stick sparingly to prevent the paper from curling.
- Precut the detailed outline for younger children.
- Attach only the folded hull tab if you want the craft to move.
- Store the six question cards in a labeled envelope.
Mayflower Comprehension Card Answers
Use these answers to check the six cards on Page 6:
- In what year did the vessel set sail on its historic journey? 1620
- What disease is caused by a lack of vitamin C? Scurvy
- What was the name of the other vessel that could not continue to America? Speedwell
- What were the English Separatists later commonly called? Pilgrims
- What agreement established a civil government among the colonists? The Mayflower Compact
- How many days did the transatlantic crossing last? 66 days
Children can answer orally, write on the cards, or work with a partner. For repeated use, laminate the cards and use dry-erase markers.
How to Use This Mayflower Activity in a History Lesson
Read, Build, and Review
Divide the activity into three parts. Begin with the history pages, examine the cutaway, and then assemble the craft. Finish with the comprehension cards to check understanding.
Create a Timeline
Ask students to put the major events in order: the Speedwell develops problems, the vessel leaves England, the passengers cross the Atlantic, land is sighted near Cape Cod, and adult male passengers sign the Mayflower Compact.
Make a Mayflower Voyage Map
Locate England, the Atlantic Ocean, Cape Cod, and the traditional homeland of the Wampanoag on a map. Create a simple voyage map and discuss the distance traveled and how navigation, weather, food storage, and crowded conditions made a seventeenth-century ocean crossing difficult.
Compare Spaces Inside the Boat
Use the cutaway to compare the passengers’ living space with the areas used by the crew and for cargo. Ask children what supplies people would have needed for a long crossing and a new settlement.
Add a Writing Activity
Invite students to write a short paragraph about one challenge of the journey. Older students can explain why the Mayflower Compact was created after the vessel arrived outside the territory covered by the colonists’ original permission.
Teaching the Mayflower Story in Context
The Mayflower crossing is one part of a much larger history. The passengers arrived in the homeland of the Wampanoag, whose communities, government, trade networks, and culture had existed for thousands of years before 1620.
This Mayflower craft for kids focuses primarily on the English passengers and their vessel. Pair it with age-appropriate resources created with or by Wampanoag educators so children understand that the history of this region did not begin with the English colonists.
It is also helpful to explain that not everyone aboard was a religious Separatist. The passengers included people with different backgrounds and reasons for traveling. The term “Pilgrims” is commonly used today, but the historical story is more complex than a single group seeking religious freedom.
For further teaching, consult the student and educator resources from Plimoth Patuxet Museums, which include English colonial and Wampanoag perspectives. A related picture book can also help early elementary learners explore these perspectives in an age-appropriate way.
Skills Children Can Practice With This STEM Activity
This craft for kids supports several academic and developmental skills:
- Reading comprehension
- Sequencing historical events
- Using a diagram
- Matching labels with locations
- Following multistep directions
- Cutting and gluing
- Fine motor control
- Spatial reasoning
- Historical vocabulary
- Asking questions about evidence and perspective
The movable hull also helps children connect the outside with its interior arrangement, making the layout easier to understand than a flat illustration alone. This can turn the project into a simple STEM activity by encouraging children to think about structure, movement, and how different parts work together.
More Thanksgiving History, Crafts, and Printables
- Thanksgiving activities for kids
- Disguise a turkey printable
- Printable thankful turkey craft
- Turkey handprint poems
- Gratitude box activity
- Pirate ship coloring pages
This fun moving Mayflower craft combines reading, map work, comprehension, and hands-on construction in one activity. Print the pages you need, build the movable Mayflower boat, and use the questions and reference page to continue the history discussion.
Is the Mayflower Printable Craft Free?
Yes. The eight-page PDF is available through the form at the bottom of this post under the site’s current printables use terms. No purchase is required to access the free printable through the provided form.
How Many Pages Are Included?
The PDF contains eight pages: one cover, three reading pages, one labeled reference page, one page of comprehension cards, and two craft pages.
Is This Craft Good for Kindergarten?
It works best for elementary students. Younger children can listen to the reading and help place the sails and labels, but they will need assistance cutting the detailed outline. It can also be adapted into one of several history activities for kids in an elementary unit.
Does the Craft Template Include Assembly Instructions?
Yes. Pages 7 and 8 contain printed cutting, folding, labeling, and gluing directions. The expanded instructions in this post clarify the order of assembly.
Should I Use Cardstock or Regular Printer Paper?
Use cardstock for the two craft pages if possible. Regular paper works well for the reading pages and reference material. The heavier paper makes the movable hull and sails more durable.
Does the Mayflower Boat Stand by Itself?
The finished project is primarily a movable paper model rather than a freestanding three-dimensional boat or galleon. The outer hull lifts to reveal the labeled interior.
Are Craft Sticks or Dowels Required?
No. The pages already include the masts, sails, movable hull, and labels. You do not need a popsicle stick handle, dowels, or other wooden pieces for the intended assembly.
Is There an Answer Key for the Comprehension Cards?
The PDF does not include a separate answer-key page. The six answers are listed in this blog post for parents and teachers.
Can I Use This With Other Thanksgiving Crafts?
Yes, but present it as a lesson about the 1620 crossing and English colonization rather than a complete explanation of Thanksgiving. Add resources about Wampanoag history and perspectives for a fuller unit. It can complement other Thanksgiving activities and Thanksgiving crafts without presenting the holiday story too simply.
Where Is the Download Form?
Enter your email in the clearly labeled form immediately below this article. The file will be sent according to the instructions shown with the form.
Movable Mayflower Printable Craft
Build a paper Mayflower with a movable outer hull that lifts to reveal labeled areas inside the ship. The eight-page printable also includes short history readings, a ship diagram, and six comprehension cards.
Materials
- Mayflower printable PDF
- White cardstock
- Glue stick or craft glue
- Crayons, markers, or colored pencils, optional
Tools
- Printer
- Scissors
Instructions
- Print Pages 7 and 8 on white cardstock.
- Cut around the dotted outer line of the Mayflower on Page 8.
- Cut out the eight labels and glue them to the correct interior sections using Page 5 as a guide.
- Cut out the outer hull and five sails from Page 7.
- Arrange and glue the sails over the matching spaces on the ship.
- Fold the tan hull tab backward along the printed line.
- Align the hull over the lower section of the ship.
- Glue only the folded tab to the back of the ship so the hull remains movable.
- Let the glue dry, then lift the hull to reveal the labeled interior.
Notes
- Cardstock makes the movable section more durable.
- Adults should help younger children cut the detailed ship outline.
- Do not glue down the entire outer hull.
- Keep Page 5 nearby as the label-placement guide.

Hi, I’m not seeing the link to download this Mayflower activity? Could you help me?
Hi, enter your email in the box at the very bottom of the blog post, and the printable activity will be sent to your inbox.
please send Mayflower printable! Thanks!
Hi, you can enter your email in the box at the very bottom of the blog post, and the printable activity will be sent directly to your inbox.