
Free Printable Candy Cane Holders: Deer, Owl and Mouse
Turn ordinary peppermint candy into adorable seasonal favors with these free printable candy cane holders.
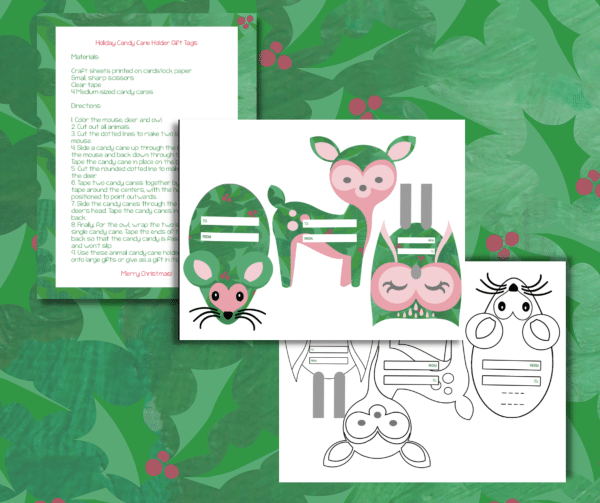
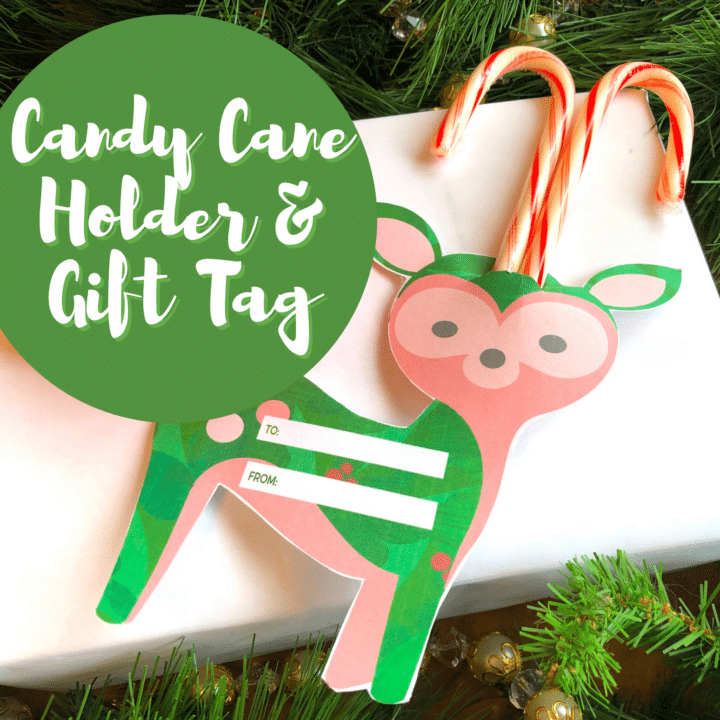
The two-page PDF includes three cute woodland animals: a little mouse that holds one sweet, a deer with two antlers, and an owl that wraps its feet around one.
Free Printable Candy Cane Holders: Deer, Owl and Mouse
Children can color the animals before an adult trims and assembles them.
Display the finished pieces as classroom favors, stocking stuffers, party treats, present decorations, or inexpensive surprises for friends and neighbors. The PDF is available through the download form at the bottom of this post.
What Is Included in the Printable?
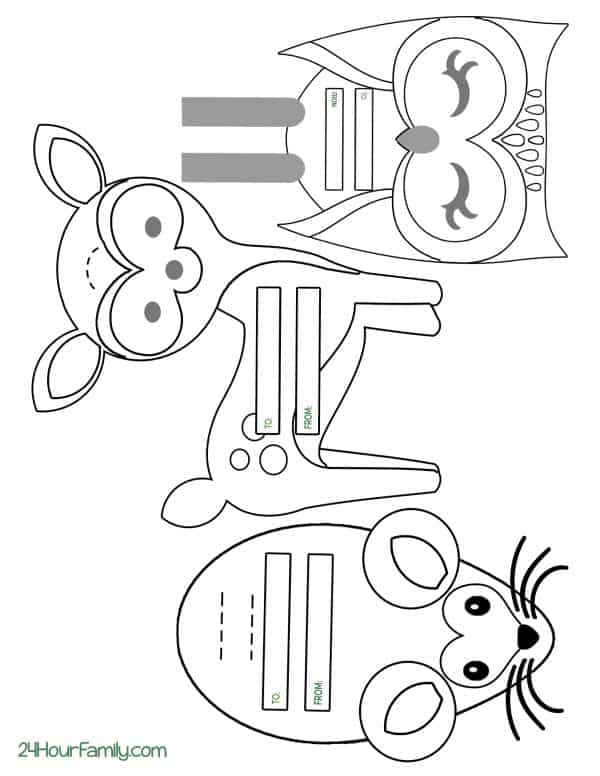
The set contains three black-and-white woodland animals:
- One mouse holder
- One deer holder
- One owl holder
You will need four standard-size wrapped sweets to complete the entire set:
- One for the mouse
- Two for the deer
- One for the owl
Each animal holds its treat differently, making the three finished favors look like a coordinated set while giving children a few different ways to assemble them.
These are holders rather than candy cane poems, legends, or standalone outlines. Do not add those unrelated phrases to the post simply because they appear in the query report.
Supplies Needed
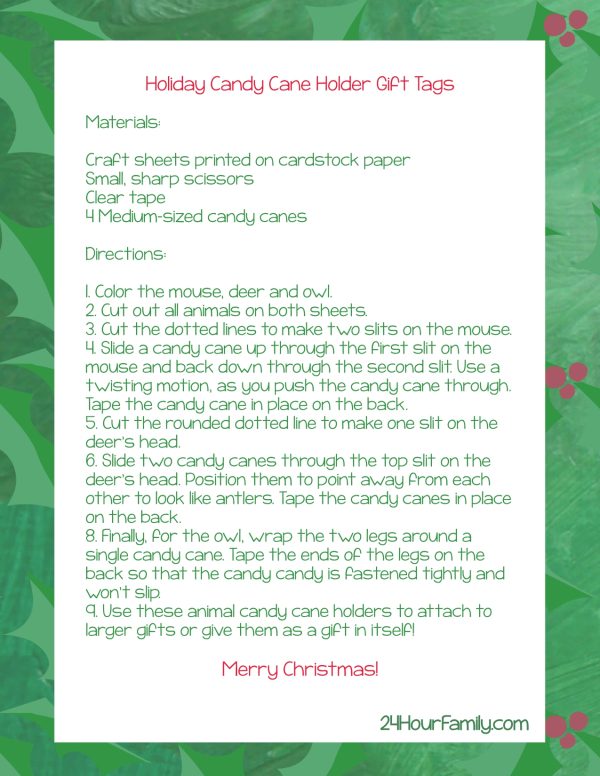
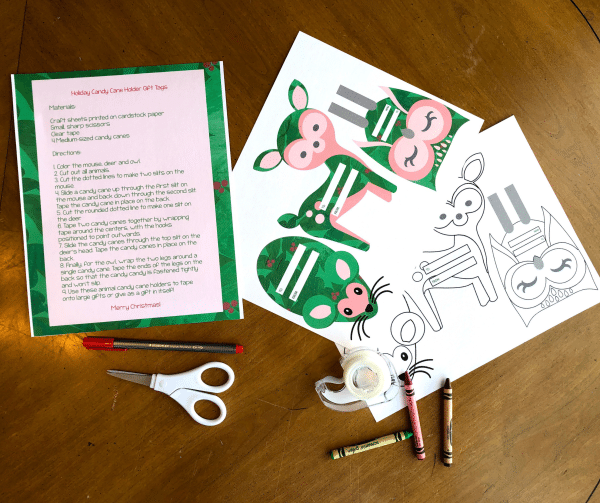
Gather these supplies before beginning:
- Printable candy cane holder PDF
- White cardstock
- Crayons, colored pencils, or washable markers
- Scissors
- Four standard-size wrapped sweets
- Clear tape
- Color printer, optional
- Craft knife, optional for adults
White cardstock is preferable to regular printer sheets because it is less likely to tear when the treats are inserted.
If you only have copy sheets, glue the printed pages to thin cardstock or a recycled cereal box before trimming out the animals.
How to Make the DIY Holders
Step 1: Print the Templates
Print the two-page file on white cardstock at 100% or “actual size.”
Black-and-white printing is sufficient because the templates are intended for children to color. If your PDF also includes precolored versions, state that here.
Step 2: Color the Animals
Color the deer, owl, and mouse before trimming them out. It is easier for children to decorate each animal while the cardstock is still flat and attached to the full sheet.
Choose natural woodland shades or create unique animals with bright seasonal colors.
Children could color:
- The deer brown with a red nose
- The owl white, gray, brown, or red
- The mouse gray, tan, or white
- Scarves and accessories in red and green
- Small details with gold or silver pencils
Allow markers to dry before trimming.
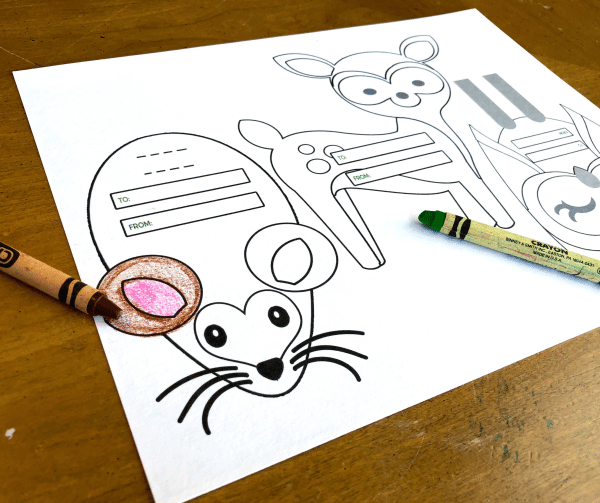
Step 3: Cut Out the Animals
Carefully trim around the outside edge of each animal.
Young children may need adult assistance around the smaller details. It is fine to leave a narrow white border instead of trimming directly against every line.
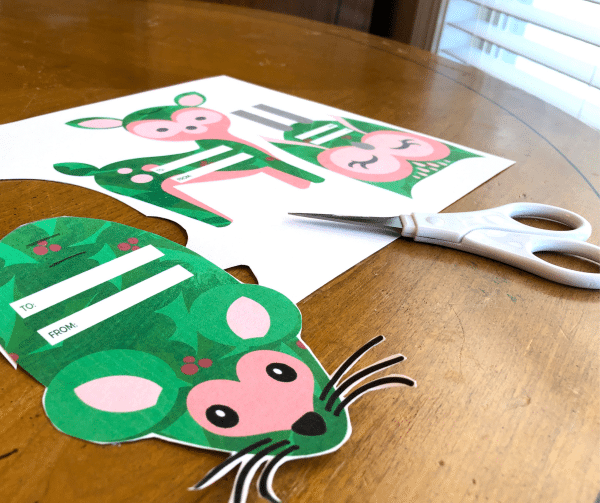
An adult should make the openings needed to hold the sweets. Do not allow young children to handle a craft knife.
How to Assemble the Mouse Candy Cane Holder
The little mouse holds one candy cane across its body.
- Locate the two dotted lines on the mouse.
- Ask an adult to slice along both dotted lines to create two slits.
- Insert the straight end of the wrapped sweet through the first slit.
- Guide it behind the mouse.
- Bring it back through the second slit.
- Adjust it until the curved end is positioned as shown in the example.
- Place a small piece of clear tape across the back.
A gentle twisting motion may help move it through the cardstock without tearing it.
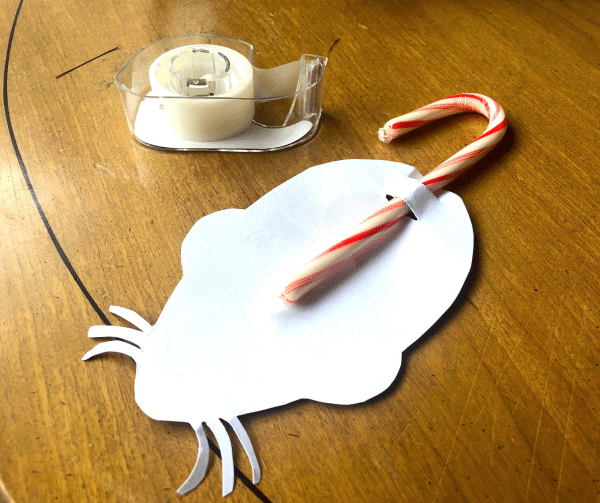
Do not force it through an opening that is too small. Remove it and extend the slit slightly instead.
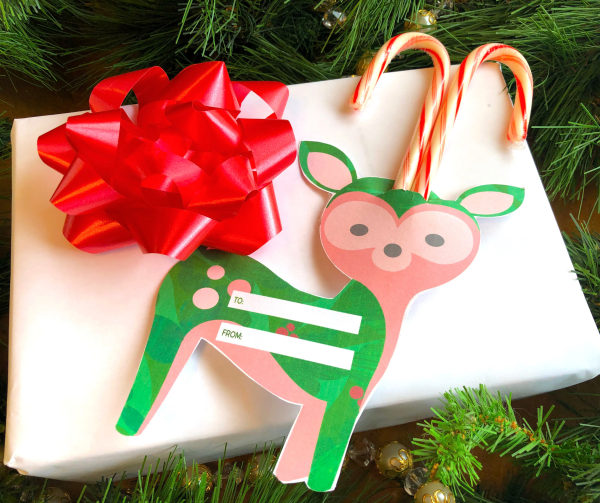
How to Assemble the Deer
The deer has two curved sweets as festive antlers.
- Locate the curved dotted line on the deer’s head.
- Have an adult slice along the line to create one opening.
- Slide the straight ends of two wrapped pieces through the opening.
- Position the curved ends so they point outward like antlers.
- Check the holder from the front and adjust it until it appears level.
- Secure both on the back with clear tape.
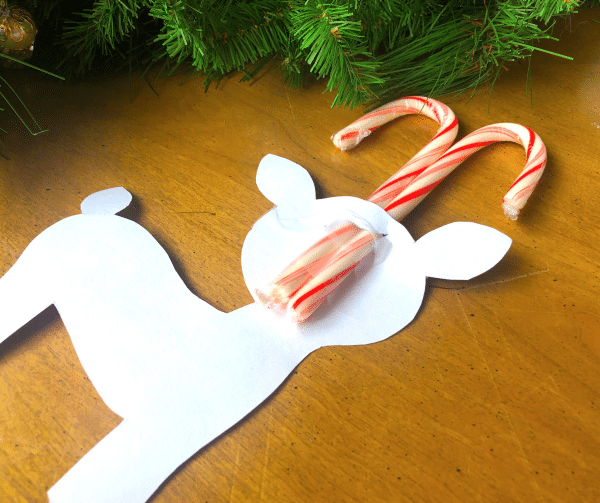
If they slide or tilt, apply two separate pieces of tape rather than trying to secure them with one large piece.
How to Assemble the Owl
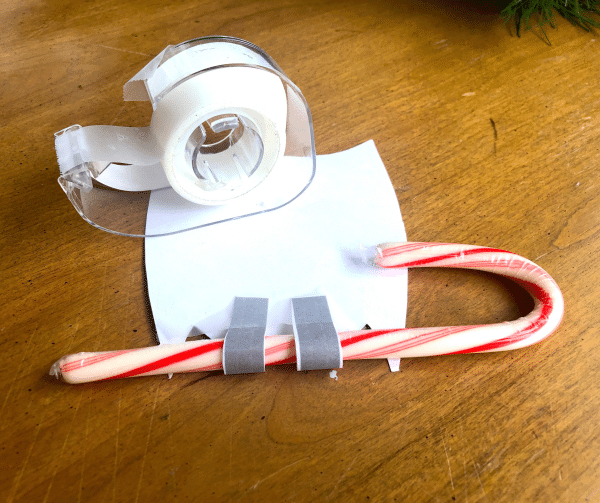
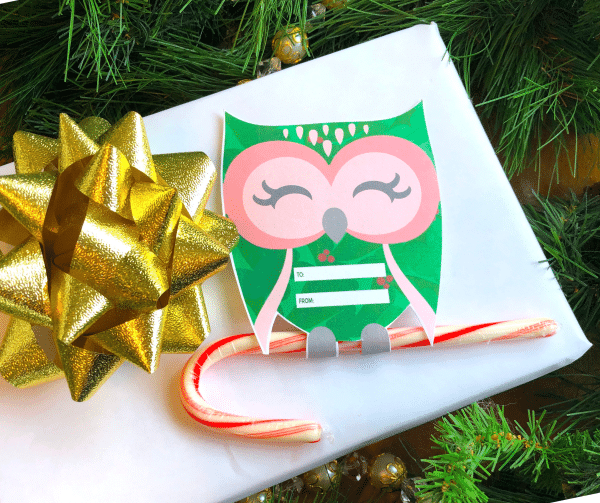
The owl wraps its cardstock legs around one wrapped sweet.
- Position it across the owl where shown.
- Fold one leg around it.
- Wrap the second leg around it from the other side.
- Turn the owl over.
- Tape the ends of the legs together or attach them directly to the back.
- Confirm that everything is held securely.
Avoid making the legs so tight that they tear.
Using the Holders as Gift Tags
The finished woodland animals can also function as gift tags.
Write the recipient’s name and a short message on the back before adding the treat. Possible messages include:
- Merry Christmas!
- A sweet treat for you!
- Have a sweet holiday!
- Wishing you a joyful season!
- To a special friend
- Thank you for being so sweet!
- Season’s greetings from your friend
- Have a hoot this season!
- Merry Christmouse!
- Happy holidays, deer friend!
- Have a holly jolly Christmas!
Write on the back while the card is still flat. Once the treat is attached, the holder will be more difficult to write on.
If you need a traditional tag with clearly designated “To” and “From” lines, check your separate Printable Christmas Gift Tags.
Ways to Display the Woodland Holders
Classroom Favors
Prepare one holder for every child and add individually wrapped sweets. The finished animals create an inexpensive classroom treat without requiring treat bags.
Before distributing food, check school rules and ask about dietary restrictions.
Stocking Stuffers
Slip the finished animals into stockings as a small extra surprise from Santa.
Present Decorations
Tape an animal to the top of a wrapped package or attach it to a bag for a simple festive accent.
Holiday Place Settings
Write each guest’s name on the back and place one holder beside every plate.
Neighbor Surprises
Add one to a seasonal card or small bag of homemade treats.
Sunday School Treats
Share them as a simple seasonal favor for children’s church. If you want to teach the Christian symbolism sometimes associated with this traditional sweet, link to your separate Meaning of the Candy Cane Poem rather than adding the entire poem to this project.
Party Favors
Arrange the completed deer, owls, and mice in a basket near the exit so each guest can take one home.
Holiday Craft Activity
Set out the animals at a Christmas season activity table and let children color them. Have an adult-supervised trimming station for the slits, then help each child insert a wrapped sweet.
Making the Holders Look Their Best
- Choose white cardstock for added strength.
- Color before trimming.
- Choose sharp scissors for clean outside edges.
- Let an adult create the openings.
- Insert the wrapped sweets slowly to avoid tearing.
- Reinforce the back of the slits with clear tape if necessary.
- Keep each piece of candy in its original wrapper.
- Write names and messages before assembly.
- Store finished holders in a shallow container to prevent breakage.
- Transport the deer flat because its two antlers are more vulnerable to cracking.
Candy Safety
Hard sweets can present a choking hazard, particularly for very young children.
Keep these precautions in mind:
- Supervise young children.
- Do not give hard candy to a child who cannot safely eat it.
- Keep every piece sealed in its original wrapper.
- Discard treats with torn wrappers.
- Check the ingredient label for allergy information.
- Follow classroom and school food policies.
- Avoid cracked pieces with sharp exposed edges.
- Handle scissors and knives only with appropriate adult supervision.
- The cardstock animals themselves should not be placed in the mouth.
More Free Christmas Printables
Continue your holiday crafting with:
- Printable Christmas Gift Tags
- Christmas Crafts and Printables for Kids
- Christmas Printables for Kids
- Gingerbread Christmas Pop-Up Card
- Meaning of the Candy Cane Poem
- Build a Santa Printable
- Build a Reindeer Printable
- Christmas Memory Game
- Christmas Dot-to-Dot Printables
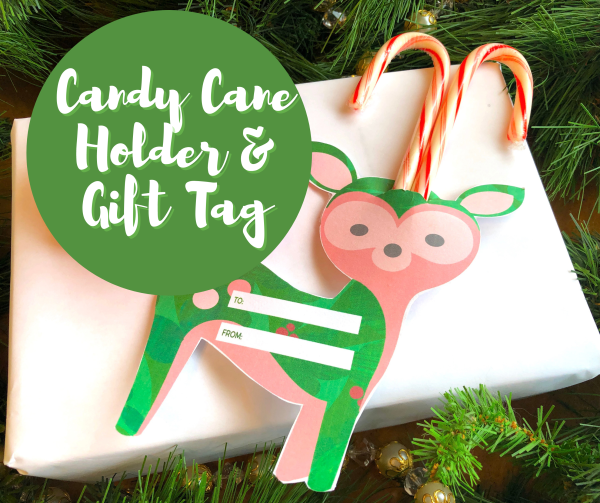
Download the Free Printable Candy Cane Holders
These deer, owl, and mouse options make inexpensive treats feel much more personal. Children can color the animals, while an adult handles the trimming and assembly.
Prepare the pages on cardstock, add four wrapped sweets, and turn the completed woodland animals into classroom favors, stocking stuffers, place cards, or present decorations.
Enter your email address in the form below to receive the PDF.
Are these holders free?
Yes. The PDF includes three options for personal use. Add your precise classroom and group-use terms near the download form.
Which animals are included?
The digital download contains a deer, owl, and mouse.
How many pieces do I need?
You need four to complete the entire set. The deer requires two, while the owl and mouse each need one.
What size works best?
Standard or medium-size individually wrapped varieties work best. Mini versions may be too small for the templates’ openings and proportions.
Should I make the holders with cardstock?
Cardstock is recommended because it is stronger and holds the treats more securely. Regular copy sheets may tear at the slits.
Can preschoolers make these?
Preschoolers can color the animals, but an adult should trim out the pieces, create the openings, and help with assembly.
Is a poem included?
No. This set contains three woodland animal holders. It does not include a poem or legend.
Is there a separate candy outline?
No. A real wrapped piece of candy is added to each animal rather than a cardstock outline.
Can I add names to the holders?
Yes. Write the recipient’s name, a short message, and the giver’s name on the back before assembly. They can even be prepared as a simple classroom candy gram.
Where is the file?
Scroll to the bottom of the post and enter your email address in the download form. The file will be delivered according to the instructions shown there rather than through an instant download.
Candy Cane Holder and Gift Tags
Create three woodland candy cane holders featuring a deer, owl, and mouse. Color and cut the printable animals, then add four wrapped candy canes to make Christmas favors, stocking stuffers, or gift tags.
Materials
- Candy cane holder printable
- Two sheets of white cardstock
- Crayons, colored pencils, or washable markers
- Four standard-size wrapped candy canes
- Clear tape
Tools
- Printer
- Scissors
- Craft knife, optional for adult use
Instructions
- Print both pages on white cardstock at 100% or actual size.
- Color the deer, owl, and mouse.
- Cut around the outside edge of each animal.
- For the mouse, have an adult cut the two dotted lines to form slits.
- Thread one candy cane through the first mouse slit, behind the paper, and back through the second slit. Tape it on the back.
- For the deer, have an adult cut along the curved dotted line on its head.
- Insert two candy canes through the opening and angle the curved ends outward to form antlers. Secure them with tape on the back.
- For the owl, position one candy cane across its body.
- Wrap both paper legs around the candy cane and tape the ends on the back.
- Write the recipient’s name and a message on the back if using the animals as gift tags.
Notes
- Four candy canes are required for the complete set.
- Keep every candy cane sealed in its wrapper.
- Cardstock is less likely to tear than regular copy paper.
- Adults should cut the slits and supervise assembly.
- Hard candy may present a choking hazard for young children.
- Check school food policies and allergy requirements before distributing classroom treats.

3 Comments