
Thing 1 and Thing 2 Handprint Craft Printable
Celebrate a favorite read-aloud with this colorful Thing 1 and Thing 2 handprint craft printable.
Children use blue handprints to create the characters’ wild hair, white paint for their faces, and a black marker to add silly expressions. The free printable already includes both red character bodies and their familiar labels.
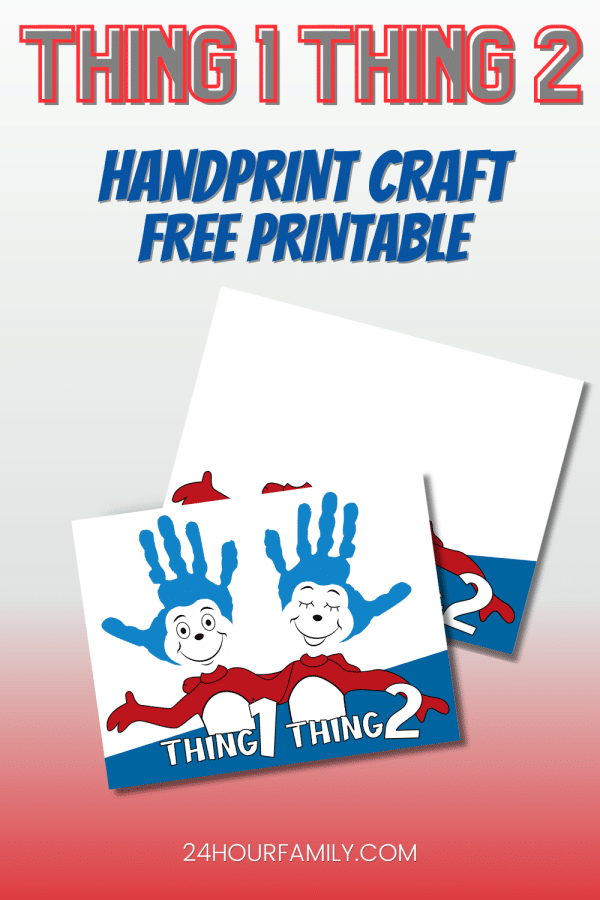
Thing 1 and Thing 2 Handprint Craft With Free Printable
This easy Dr Seuss craft works well for Seuss Day, Read Across America, a classroom literacy activity, or an art project to accompany The Cat in the Hat.
Whether you need a handprint craft for kids during a story unit or a craft to celebrate Seuss’s birthday, this project combines reading and creativity in one memorable activity.
It is especially fitting for March 2nd and can be displayed alongside other Seuss-inspired projects.
The complete three-page PDF is available near the bottom of this post.
Free Thing 1 and Thing 2 Printable Craft
The printable template provides the basis for creating both characters on a single landscape page.
The three-page PDF contains:
- A personal-use information page
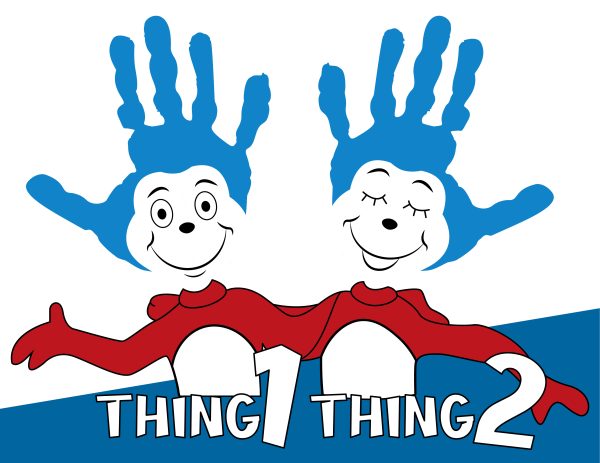
- A completed example showing where to place the hands and faces
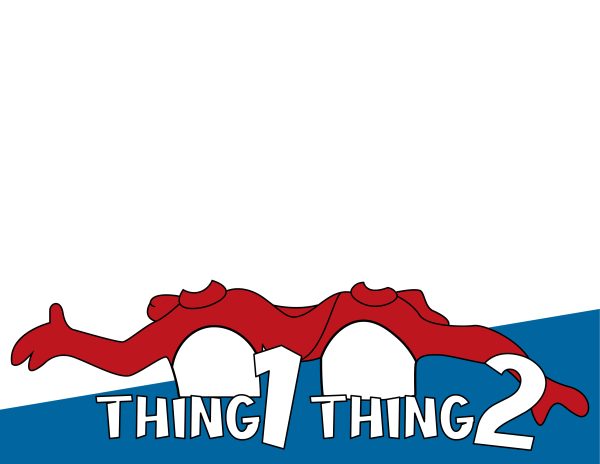
- A blank activity page with both character bodies
The blank page already includes:
- Two red character bodies
- White chest circles
- Thing 1 and Thing 2 labels
- Open space above the bodies for the blue hair
Children add the hair using their handprints and complete the faces afterward.
This is a handprint art project rather than an editable file. It does not contain separate Thing 1 or Thing 2 circles, clip-art images, or individual character cutouts.
Supplies
You will need:
- Free template
- White cardstock
- Washable blue tempera
- White washable tempera
- Paintbrush or foam brush
- Black marker
- Paper plate or tray
- Baby wipes or damp paper towels
- Table covering
- Optional art smock
Cardstock works better than ordinary printer paper because two wet layers can cause thinner sheets to wrinkle.
Washable tempera is the best choice for a child’s hands. Avoid acrylics because they are more difficult to remove from skin.
How to Make the Thing 1 and Thing 2 Handprint Craft
1. Print the Craft Template
Download the PDF near the bottom of the post.
Print the third page—the blank Thing 2 template and matching first character—on white cardstock. Keep the finished example nearby so you can check placement before beginning.
The page has a landscape orientation, so make sure your printer does not rotate or crop it.
Choose Actual Size, 100%, or Fit to Printable Area in the printer settings.
2. Prepare the Work Area
Cover the table with scrap paper, a plastic tablecloth, or a washable mat.
Pour a small amount of blue tempera onto a tray. Keep wipes or damp paper towels nearby so each handprint can be cleaned up immediately.
Write the child’s name and date on the back before starting.
3. Cover the Left Hand
Use a brush or foam applicator to spread an even layer of blue washable tempera across the left palm, fingers, and thumb.
The coating should cover the skin without forming thick puddles. Too much can cause the fingers to run together, blurring the result.
4. Make Thing 1’s Blue Hair
Position the left hand over the first character on the left side of the page.
The palm should sit above the neck, with the fingers pointing upward. Angle the thumb toward the outside edge.
Press firmly against the cardstock. Gently press each finger and the center of the palm without moving it from side to side.
Lift straight up and clean the hand immediately.
5. Make the Thing 2 Hair
Cover the right hand with blue tempera.
Position it over the second character on the right side. Place the palm above the neck, point the fingers upward, and angle the thumb toward the right edge.
Press firmly and lift straight up.
Using opposite hands makes the two thumbs point outward, matching the finished example and creating a playful “Thing 1 and Thing 2” look.
Allow both blue impressions to dry completely.
6. Add the White Faces
Once the blue areas are dry, create an oval face inside the palm portion of each impression.
Leave some blue visible around the white area so the characters’ wild hair frames their faces.
Apply one thin coat first. If the blue shows through, let the first layer dry before adding another.
Wait until the white areas are completely dry before drawing the facial features.
7. Draw the Faces
Use a black marker to draw a face inside each white oval.
Add:
- Eyes
- Eyebrows or eyelashes
- A small nose
- A smile
- Cheeks
- Any other silly facial details
The finished example shows the first character with open eyes and the second with closed eyes, but children can create any expressions they want.
They might draw:
- Two happy faces
- One surprised face
- A mischievous grin
- Winking eyes
- Different eyebrows
- Freckles
- A tongue sticking out
Tips for Clear Handprints
This type of Seuss craft can be a little messy, but these tips make the results easier to control.
Use a Brush
Brush the blue tempera onto the skin instead of asking the child to dip a hand into a puddle. This helps spread the paint more smoothly and evenly.
Practice First
Make one test impression on scrap paper. This helps children learn to keep their fingers open and lift without sliding.
Press Every Finger
After placing the hand on the page, gently press the back of each finger. Do not shift its position.
Lift Straight Up
Sliding can create smears. Help younger children lift directly away from the surface.
Allow Each Layer to Dry
The blue layer must dry before adding the white layer, and the white area should be dry before using the black marker.
Keep Wipes Nearby
Clean hands before moving on to the next step. Blue marks can quickly spread to clothing, tables, and nearby papers.
No-Paint Classroom Alternative
For a less messy option, turn this into a paper craft with blue construction-paper hands.
- Trace each child’s left and right hands on blue cardstock or construction paper.
- Use scissors to cut around each outline.
- Glue the left cutout above the first character.
- Attach the right one above the second character.
- Cut two white paper ovals for the faces.
- Glue the ovals over the palm portions.
- Draw the expressions with a black marker.
This quick and easy option has the same playful appearance while allowing children to complete the project at different times.
Adults should handle cutting for younger children. Older elementary students can trace around their own hands and cut the shapes independently.
Making the Craft With One Child
One child can use both hands to create the complete artwork.
Use the child’s:
- Left hand for the first character
- Right hand for the second character
Add the child’s name, age, and completion date to the bottom or back. The finished project becomes a keepsake showing the child’s hand size at that age.
Making the Craft With Siblings or Twins
This Thing 2 craft and matching first character also work well as a sibling or twin project.
Use:
- One child’s hand for the first character
- The other child’s hand for the second character
Write each child’s name beneath the corresponding figure.
This creates an adorable personalized piece for a shared bedroom, playroom, or family scrapbook.
Classroom Uses
This craft, inspired by the famous characters, can accompany:
- Read Across America Day
- A classroom read-aloud
- A character study
- A lesson about story events
- A discussion about choices and consequences
- A preschool letter T lesson
- A kindergarten literacy center
- A lesson about twins, pairs, or opposites
After completing the project, ask children:
- How are the two characters alike?
- How are they different?
- What problems do they create in the story?
- How do the other characters react?
- What would you do if they visited your house?
- What rules would you give them?
Writing Prompts
Turn this Cat in the Hat craft into a literacy extension by adding one of these writing prompts:
- If these two characters came to my house…
- My rule for them would be…
- They made a mess when…
- I would have an adventure with them at…
- The funniest thing these characters could do is…
- First they…, next they…, and finally they…
Children can write on a separate sheet and display their responses beneath the artwork.
Displaying the Finished Handprint Art
Once everything is completely dry, the finished piece can be:
- Displayed on a bulletin board
- Framed as a child’s keepsake
- Added to an art portfolio
- Placed in a scrapbook
- Hung in a reading corner
- Sent home after a Seuss celebration
- Given to a parent or grandparent
For a group display, arrange the completed projects under a heading such as:
Look at These Things!
or:
Reading Is Our Thing!
The display can also sit near a collection of favorite Seuss books or other themed projects, such as a Lorax or fork-painted Truffula tree craft.
More Dr. Seuss Crafts for Kids
Continue your book-themed activities with these related projects:
- Cat in the Hat Handprint Craft
- The Lorax Handprint Art
- Cat in the Hat Hat Craft
- Thing 1 and Thing 2 Craft
- One Fish Two Fish Craft
- Dr. Seuss Coloring Pages
- 16+ Dr. Seuss Crafts for Kids
Download the Thing 1 and Thing 2 Handprint Template
The three-page PDF contains a personal-use information page, a completed example, and the blank activity sheet.
Print the blank page on sturdy paper, add one blue impression above each character, create the white face areas, and finish the expressions with a black marker.
The file is provided for use at home or in learning settings. You can also save this fun craft to Pinterest for your next reading celebration or birthday theme.
Does the printable include separate circles for Thing 1 and Thing 2?
No. The labels are already printed on the character bodies. They are not separate circle cutouts.
Is the template editable?
No. This PDF is designed to be completed by hand. The words and numbers cannot be changed within the file.
Does the PDF include the characters’ faces?
The completed example includes faces, but the blank page does not. Children create the white face areas and add the features with a black marker.
Can I use construction-paper handprints?
Yes. Trace both hands on blue paper, cut them out, and attach them above the character bodies. Add a white circle or oval over each palm area and draw the faces.
What age is this craft for?
This craft for kids works well for preschool, kindergarten, and elementary-age children. Younger participants may need help positioning their hands and adding the facial details.
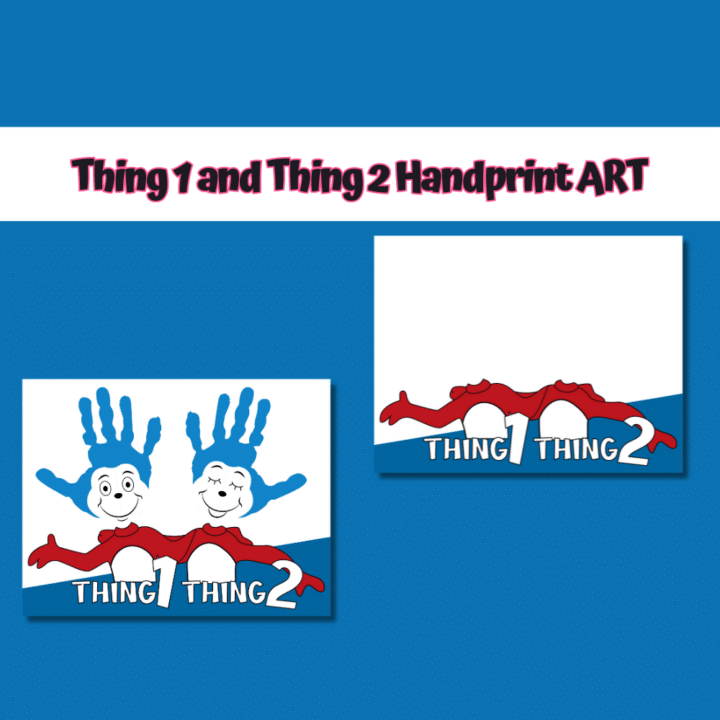
Thing 1 and Thing 2 Handprint Craft
Create handprint art for Thing 1 and Thing 2 using blue and white washable paint and a free printable template. This easy keepsake is perfect for Dr. Seuss Day and Read Across America.
Materials
- Thing 1 and Thing 2 printable template
- White cardstock
- Blue washable tempera paint
- White washable paint
- Black marker
Tools
- Printer
- Paintbrush or foam brush
- Paper plate
- Baby wipes or damp paper towels
Instructions
- Print the blank Thing 1 and Thing 2 craft page on white cardstock.
- Brush blue washable paint over the child’s left palm, fingers and thumb.
- Press the left hand above Thing 1 with the fingers pointing upward and the thumb pointing toward the left edge. Lift the hand straight up.
- Paint the child’s right hand and press it above Thing 2 with the fingers pointing upward and the thumb pointing toward the right edge.
- Allow the blue handprints to dry completely.
- Paint a white oval inside the palm portion of each handprint, leaving blue visible around the edges.
- Allow the white paint to dry.
- Draw eyes, noses and smiles inside the white face areas with a black marker.
Notes
- Practice the hand placement on scrap paper first.
- Apply the paint with a brush for clearer prints.
- Use cardstock so the paper does not wrinkle as easily.
- Blue construction-paper handprints can be used instead of paint.

How cute is this?? Pinning! Visiting from the Love Your Creativity linkup.