
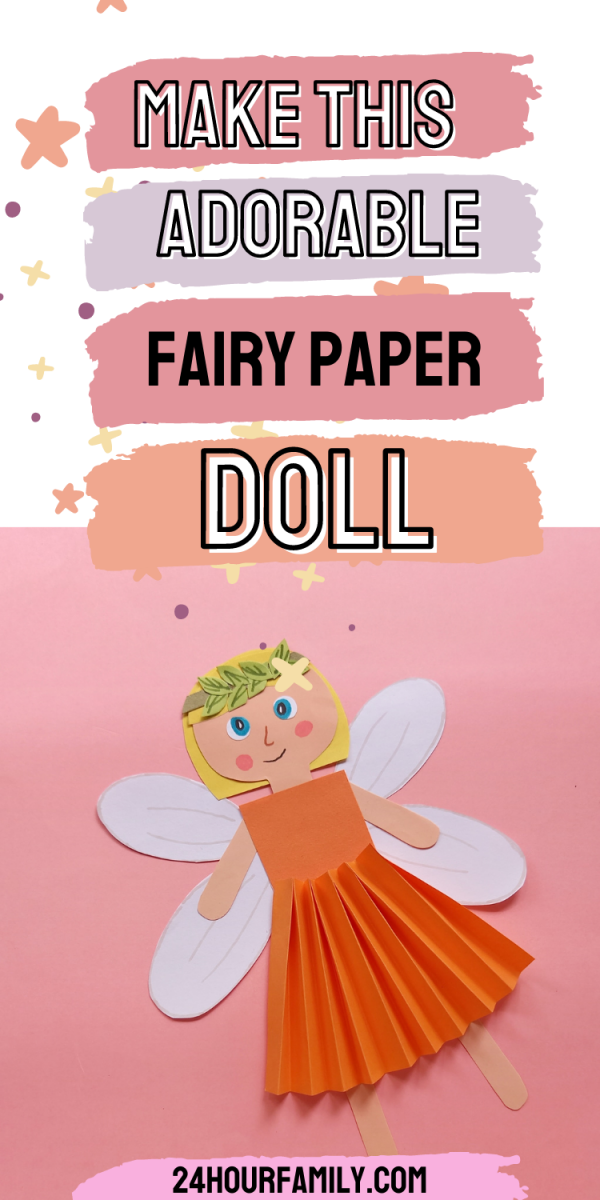
Make a Fairy Paper Doll with this Free Fairy Template
If you’re looking for a fun and easy craft project, you’ll love making a fairy paper doll! This simple tutorial will guide you through creating a beautiful paper doll fairy craft using just a few basic supplies. Once she’s finished, your little one will be able to play with her for hours on end. So grab some paper and get started!
In this blog post, we’ll show you how to make a fairy paper doll. This is a great project for any skill level, and it’s perfect for when you need a quick and easy craft. So grab your supplies and let’s get started!
Supplies Needed to Make a Paper Doll Fairy Craft
Supplies:
- Craft papers/Cardstock papers
- Pencil
- Ruler
- Scissors
- Glue
- Popsicle Stick
- Marker pen
Instructions:
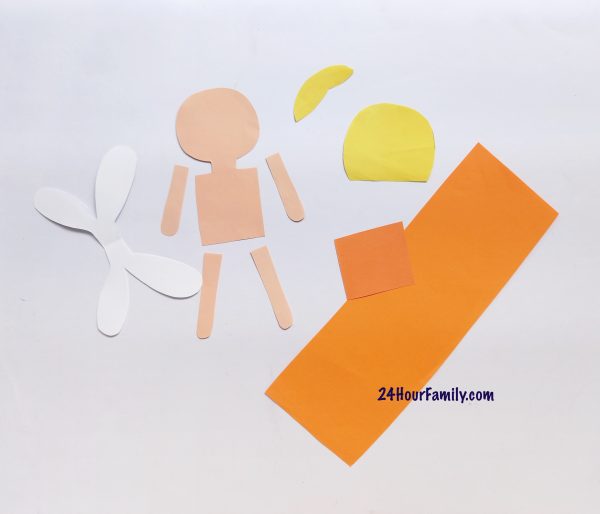
Step 1:
Cut out the pieces for our fairy craft from cardstock paper using the PDF templates. Cardstock paper is thick and will be durable enough for your child to play with the doll.
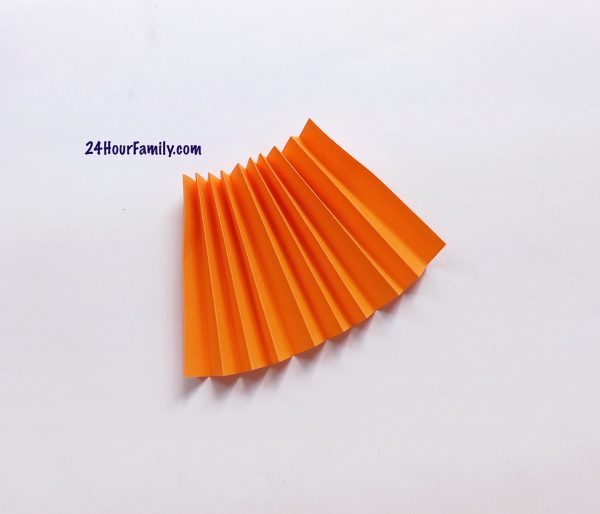
Step 2:
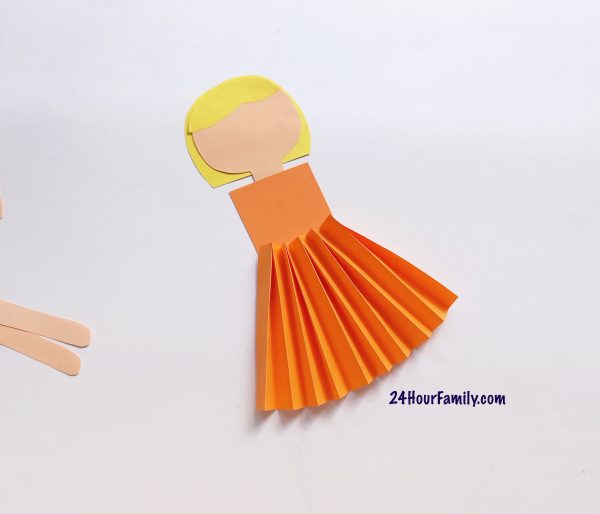
Take the long rectangular paper, and fold it into accordion folds. This does not have to be precise, but fairly even pleats in the dress.
Step 3:
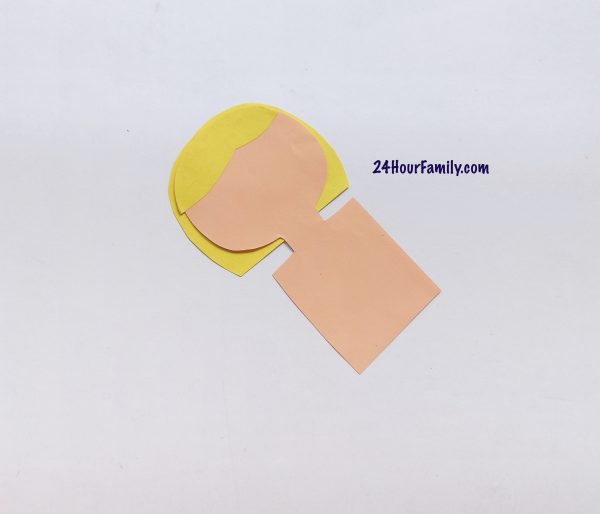
Take the front hair (the bangs) and glue it on the top front of the fairy’s head.
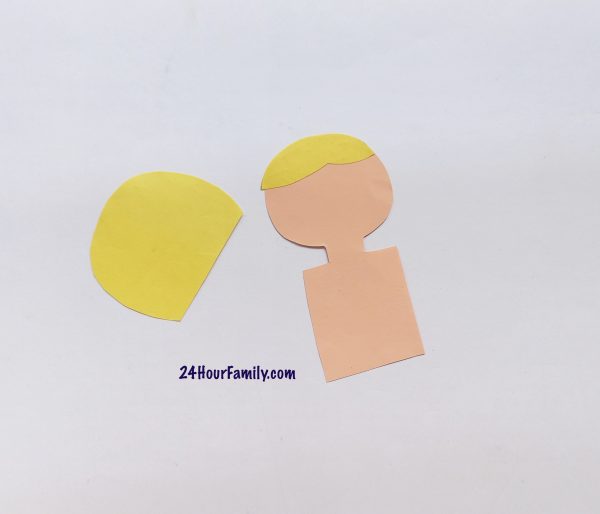
Step 4:
Glue the back hair to the head.
Step 5:
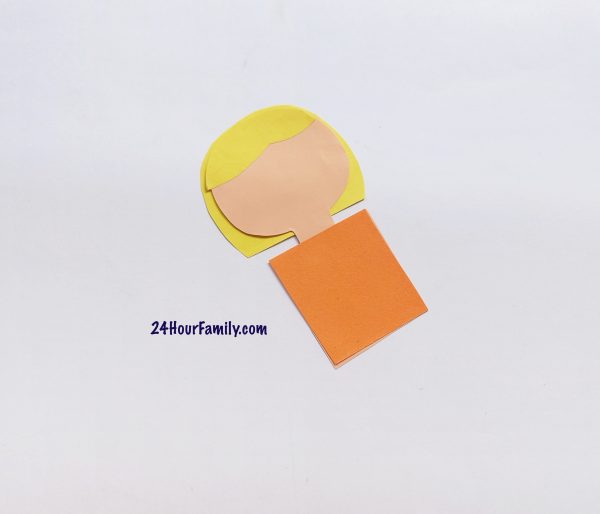
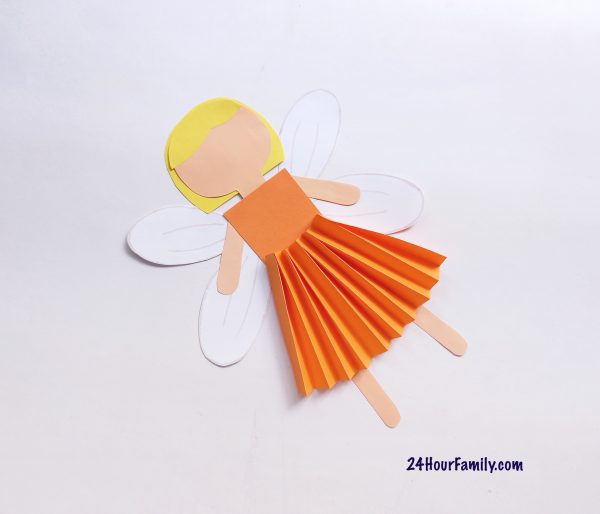
Next, add the fairy’s dress to the top of the body by gluing it.
Step 6:
Now, glue the accordion-folded skirt on the bottom of the fair craft paper doll’s body.
Step 7:
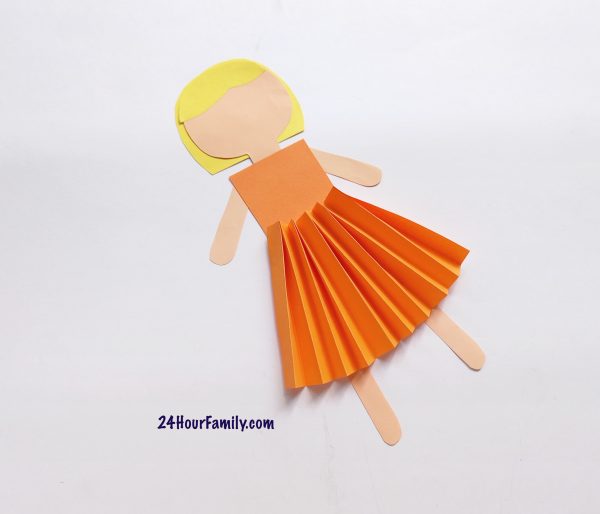
The next step is to glue the fairy’s hands and legs to her body.
Step 8:
Connect the fairy’s wings on her back using glue. This step will make her feel like a fairy doll!
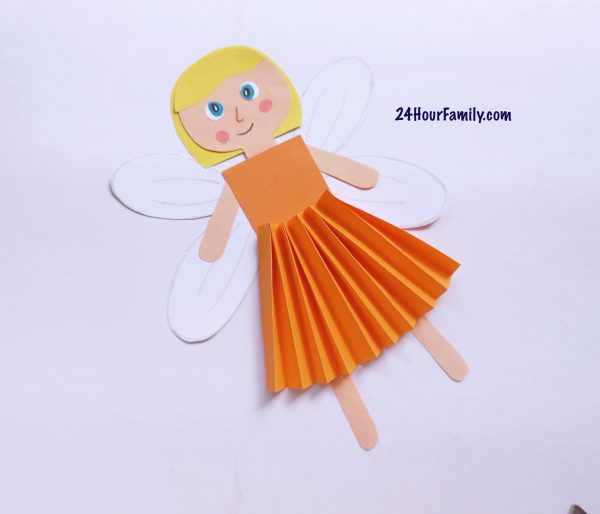
Step 9:
Glue the eyes and use marker pens to draw the face on the fairy.
Step 10:
Take the leaf crown and start gluing the leaves on the crown.
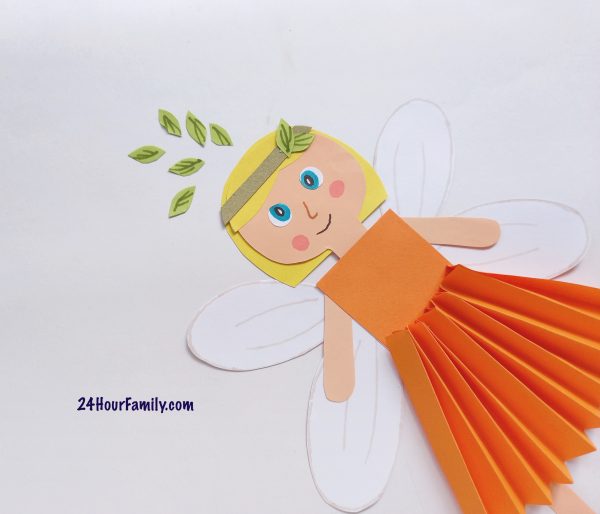
Step 11:
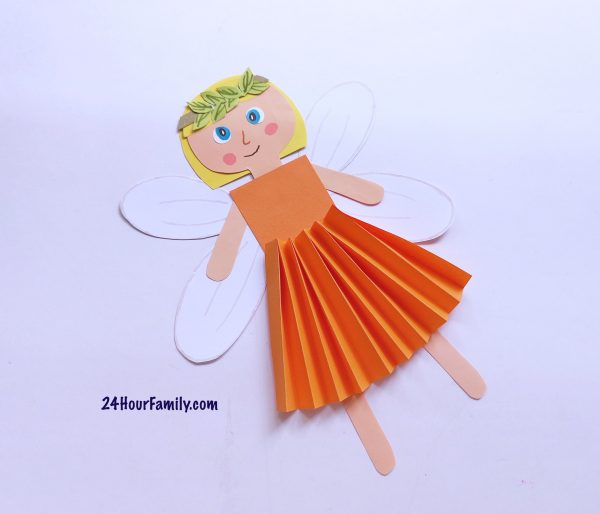
Finish gluing all the leaves to complete your fairy craft.
Paper dolls are a fun way to get creative and use your imagination. Plus, they’re easy enough for kids of all ages to make. Whether you make a paper doll fairy as a decoration for your room or to give to someone special, we hope you have enjoyed this tutorial.
If you have any questions about the process, please don’t hesitate to contact us in the comments section below. And be sure to check back often, as we will continue to add new craft tutorials for you to enjoy. Be sure to check out our other craft tutorials for more ideas on how to have fun with arts and crafts. Happy Crafting!
Similar Post:
Creative ideas for those who love Fairy Gardens: Make a Fairy Garden Wreath