
Joshua Bible Craft for Kids
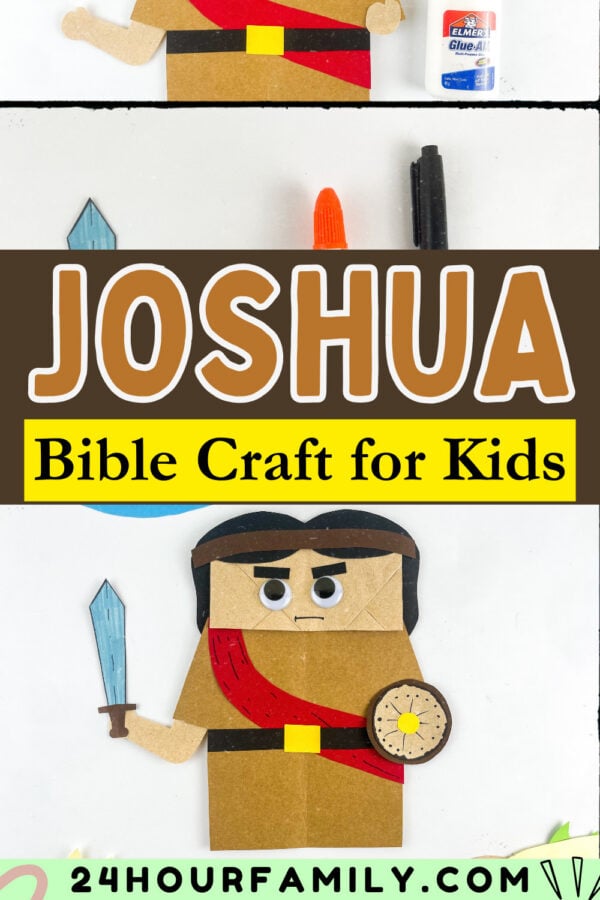
This Joshua Bible craft for kids turns that lesson into a hands-on paper bag puppet children can assemble and use while learning about this faithful leader.
Joshua’s story gives children a powerful example of what it means to trust God, follow His instructions, and move forward with courage.
Joshua Bible Craft for Kids
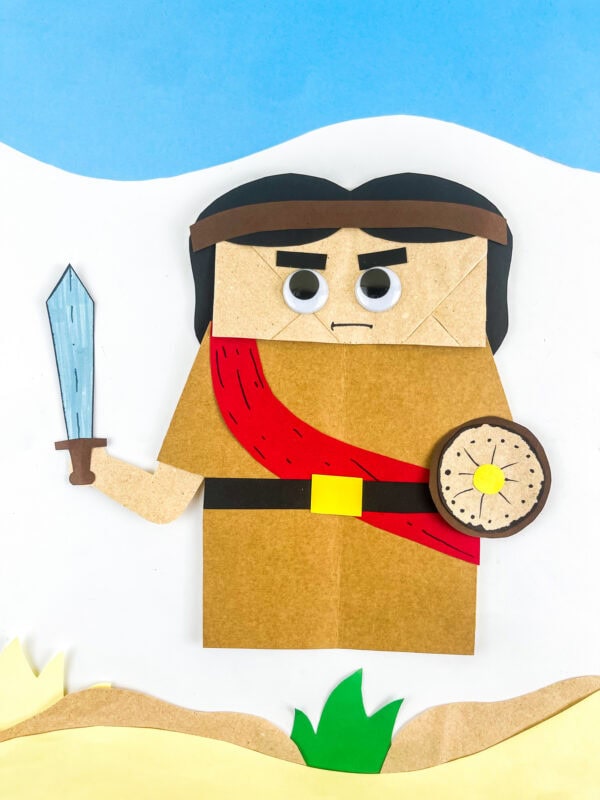
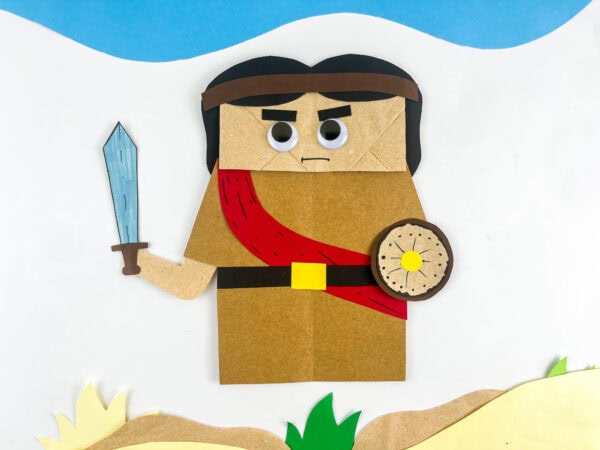
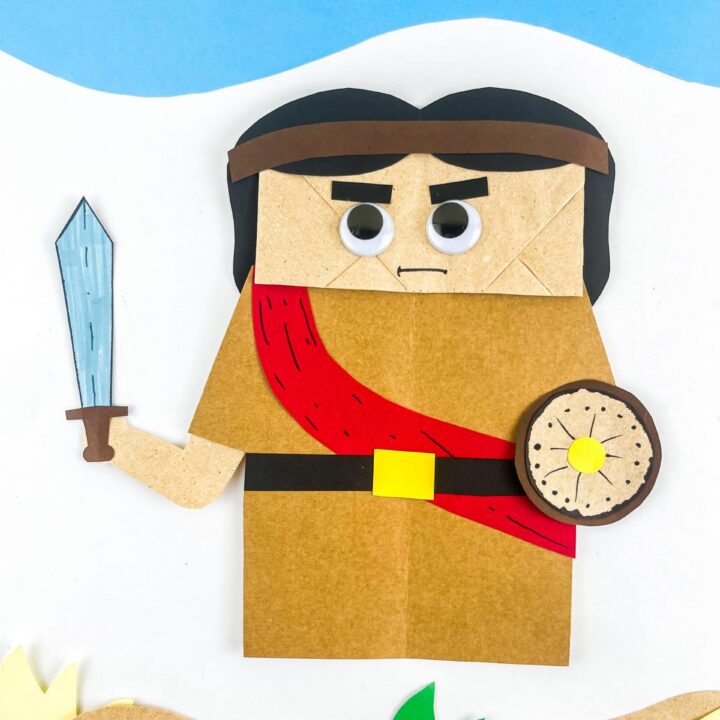
The finished puppet includes a robe, sash, belt, sword, and shield. Children can move the paper bag flap while retelling the story of Joshua, reciting the Bible verse Joshua 1:9, or explaining what they learned during Sunday School.
Use the printable template to prepare the pieces ahead of time or let older children trace and cut out their own pieces.
This activity works well for Sunday School lessons, children’s ministry, Christian school, homeschool Bible study, and Vacation Bible School. If you love sharing crafts and activities on Pinterest, this is a great project to save!
Meet Joshua: A Faithful Bible Leader
Joshua was Moses’ assistant and later became the leader of the Israelites. God chose him to lead God’s people across the Jordan River and into the promised land.
Taking Moses’ place was an enormous responsibility. He would face unfamiliar places, difficult decisions, and powerful enemies. God reminded him that he did not need to face those challenges alone.
In Joshua 1:9, God told him to be strong and courageous and not to be afraid because the Lord would be with him wherever he went.
He showed faith by relying on God and led the people with bravery. His story teaches children that genuine bravery does not mean never feeling afraid. It means choosing to be brave and follow God even when something feels difficult.
What Does This Joshua Craft Teach Children?
This paper bag puppet can support several teachings from the Book of Joshua. The sword and shield help children recognize him as a leader, while the movable puppet makes this interactive activity easier to act out and remember his story.
Depending on your lesson, use the paper craft to explore key themes:
- God chose Joshua to lead His people.
- Joshua followed the instructions God gave him.
- The Lord remained with Joshua wherever he went.
- Courage comes from trusting God.
- Joshua led the Israelites into the Promised Land.
- God keeps His promises.
- Faith and obedience often require action.
- We can ask God to help us when we feel afraid.
The sword and shield are decorative elements representing his role as a courageous leader. Be sure to remind children that his success ultimately came through divine power rather than from his weapons or personal strength.
Bible Stories That Pair Well with This Joshua Craft
This activity can be used for more than just the Battle of Jericho. It can accompany several stories about this Bible leader, making it a useful resource throughout an Old Testament Bible unit or Sunday School curriculum.
Joshua Becomes the New Leader
Read Joshua 1:1–9 and discuss how God chose Joshua to lead after Moses died. Ask children how Joshua might have felt and what promise God gave him.
Crossing the Jordan River
Joshua 3–4 describes how God stopped the water so the Hebrews could cross the Jordan on dry ground. After they crossed the Jordan River, the people built a twelve-stone memorial to remember what God had done.
The Fall of Jericho’s Walls
In Joshua 6, the fall of Jericho centers on Joshua and the city’s walls. The Israelites followed God’s unusual instructions to march around the walls of Jericho before they would tumble down.
The people gave a loud shout, the priests blew the trumpet horns, and God brought a sudden tumble to the city’s defenses. This story helps children understand the importance of obeying God so they could conquer through faith.
Joshua Chooses to Serve God
Joshua 24:15 contains Joshua’s well-known declaration that he and his household would serve the Lord. This passage works especially well for a lesson about making faithful choices.
This post may contain affiliate links. As an Amazon Associate and a participant in other affiliate programs, I earn a commission on qualifying purchases. Read our disclosure policy here.
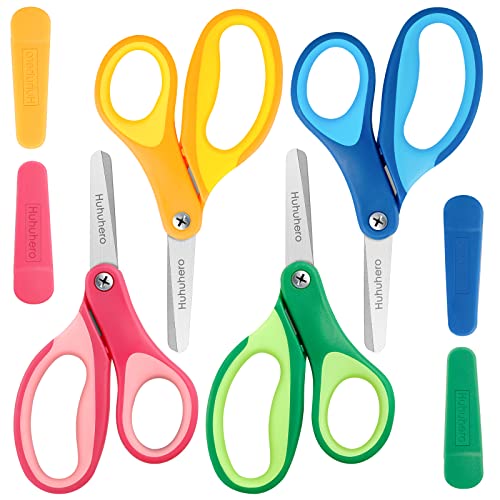
AJM Brown Paper Lunch Bags 40 Count Crafty DAB GLUES DAB N STIC SchoolElmer’s Disappearing Purple School Glue Sticks Washable 22 Grams 3 CountHuhuhero Kids Scissors, 5” Safety Toddler Scissor Blunt Tip with Cover, Small Craft Cutting Paper Scissors for Child Kid Age 4-7 8 9, Assorted Colors, 4 PackCrayola Construction Paper, 120 SheetsCrayola 587722 Non-Washable Markers, Broad Point, Classic Colors, 10/Set




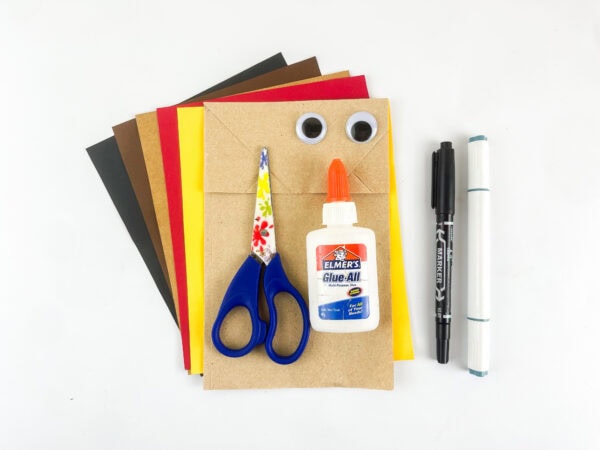
Supplies for the Joshua Paper Bag Puppet:
Gather these materials before beginning:
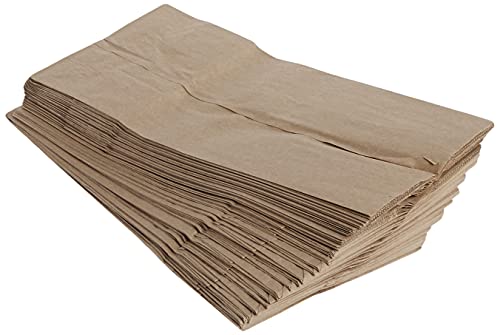
- One standard brown paper lunch bag
- Free printable Joshua craft template
- Brown construction paper for Joshua’s robe
- Light brown, tan, or skin-tone construction paper for the face, arm, hand, and shield
- Black construction paper for the hair, eyebrows, and belt
- Dark brown construction paper for the headband, sword handle, and outer shield
- Red construction paper for the sash
- Yellow construction paper for the belt buckle and center of the shield
- White or light blue paper for the sword blade
- Two medium or large googly eyes
- Black marker
- Blue marker or crayon
- Pencil
- Child-safe scissors
- Liquid school glue or glue stick
Cardstock can be used for the sword and shield if you would like those pieces to be sturdier.
Adult supervision is recommended when young children use scissors or small craft pieces. Googly eyes can be a choking hazard and should not be used by children who may put small objects in their mouths.
Download the Printable Joshua Template
The template includes the shapes needed to create the clothing, hair, headband, arm, hand, sword, and shield.
Print the template at 100% or “actual size” on standard letter-size paper. Avoid selecting “fit to page” unless your printer cuts off part of the design.
You can use the template in two ways:
- Print it on regular paper, cut out the pieces, and trace them onto construction paper.
- Print the template on cardstock and use the pieces as reusable patterns for a Sunday School class or homeschool group.
For a large class, trace and cut the smaller pieces in advance. Place one complete set in a bag or tray for each child so the activity moves more smoothly.
How to Make a Joshua Bible Craft
Before starting, place the paper bag with the folded bottom flap facing upward. This flap will become Joshua’s face and movable mouth.
Prepare the Template Pieces
Cut out each piece from the printed template. Trace each pattern onto the suggested color of construction paper, and then cut out all the pieces.
You will need pieces for:
- Robe
- Face
- Hair
- Headband
- Red sash
- Black belt
- Yellow buckle
- Arm and hand
- Sword blade and handle
- Two shield circles
- Shield center
- Eyebrows
Older children can trace and cut the patterns independently, solving the assembly like a fun puzzle. Preparing the pieces before class is usually easier for preschool and younger elementary students.
Make Joshua’s Robe
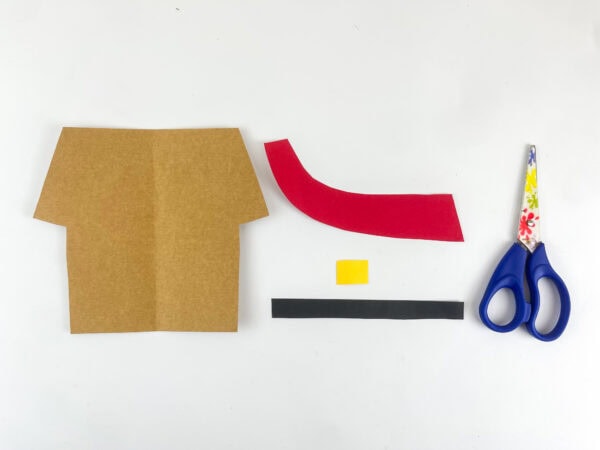
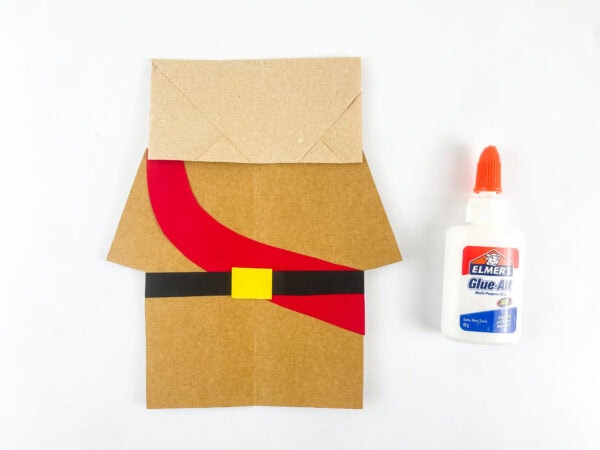
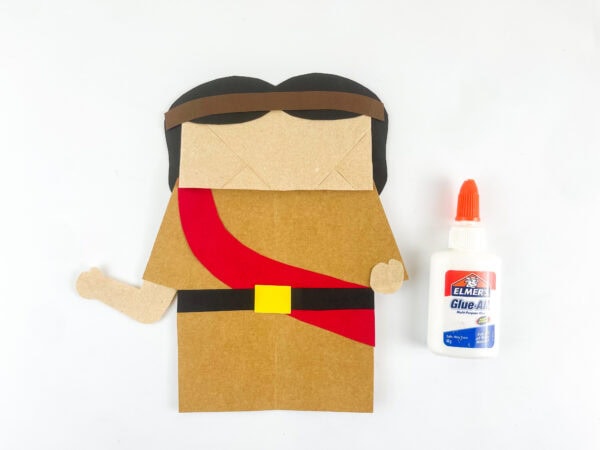
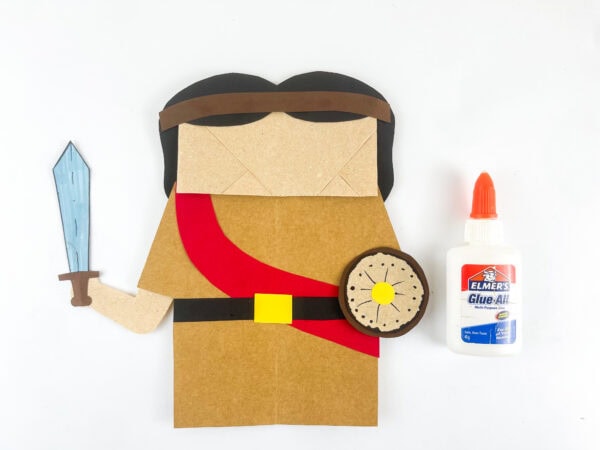
Trace the robe pattern onto brown construction paper and cut it out. Attach the robe to the front of the paper bag, placing the top directly below the folded flap.
Add the curved red sash diagonally across the robe.
Secure the long black belt horizontally across the middle of the puppet. Place the small yellow square in the center to create the belt buckle.
Add Joshua’s Face and Hair
Cut the face from light brown or skin-tone paper. Attach it across the folded bottom flap of the bag.
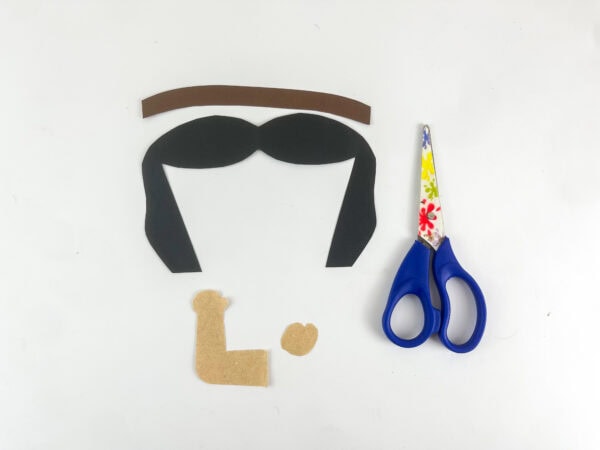
Position the black hair behind the face so the top and sides remain visible. Secure the brown headband across the forehead.
Make sure you do not seal the paper bag flap closed. Keeping it movable allows children to use the finished character as a puppet.
Add Joshua’s Arm and Hand
Attach the arm to one side of the robe. Angle it upward so it can hold the sword.
Attach the small hand piece on the other side of the body near the shield. Depending on the template arrangement, the shield may cover most of this hand.
Allow the adhesive to set before adding the accessories so the arm does not shift.
Assemble the Sword
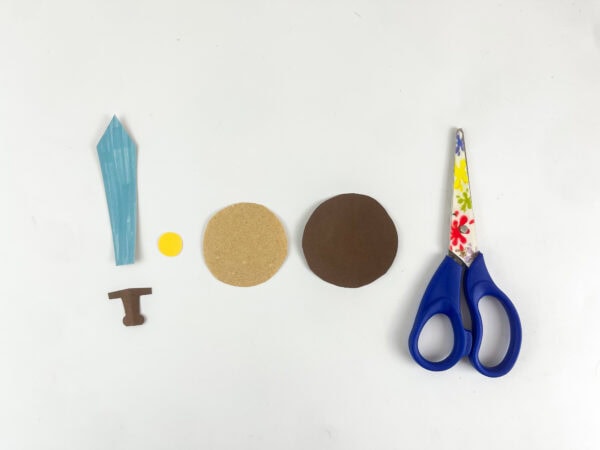
Cut out the sword blade and color it light blue or gray. Outline the blade with a black marker, then draw a few short lines to add detail.
Secure the brown handle beneath the blade. Secure the completed sword to the raised hand.
The sword is an excellent visual reminder that this leader was called to guide his people, but explain that his courage and victories came through relying on God.
Make the Shield
Cut one large circle from dark brown paper and a slightly smaller circle from tan paper. Place the tan circle in the middle of the brown circle.
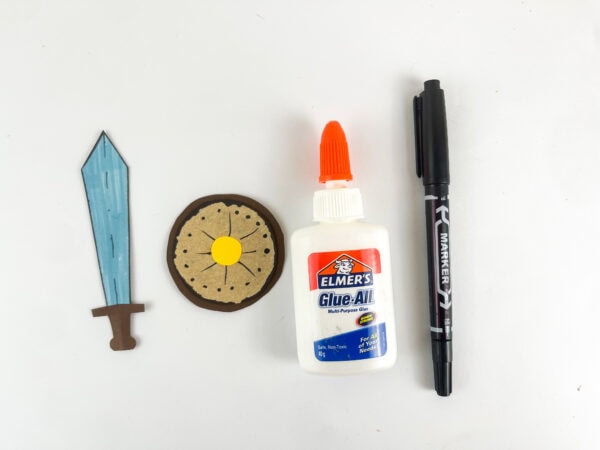
Place a small yellow circle in the center. Use a black marker to draw lines extending from the center and place small dots around the edge.
Secure the completed shield over the hand on the opposite side of the puppet.
Add the Facial Details
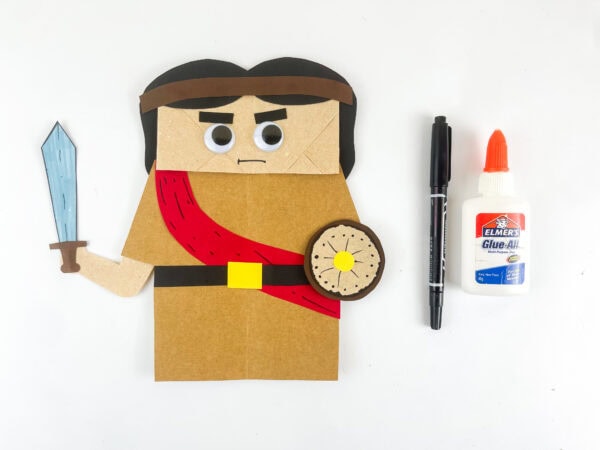
Place two googly eyes on the face.
Cut two small black rectangles for the eyebrows and place them above the eyes. Use a black marker to add the nose and mouth.
Children can give the character a serious expression, a smile, or another expression that reflects the part of the story they are learning.
Add a few marker lines to the red sash for texture, if desired, or let children decorate it with additional details.
Let the Puppet Dry
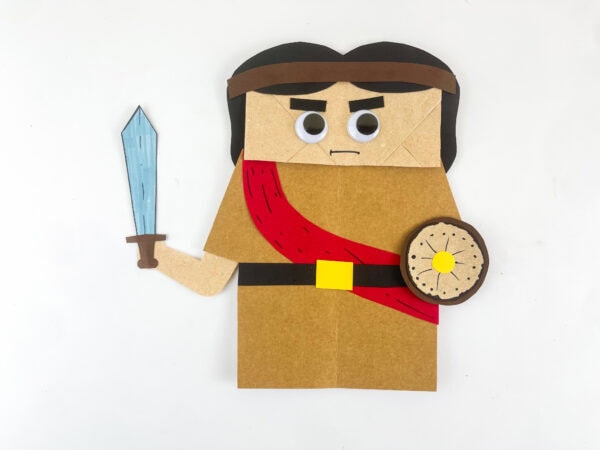
Place the finished puppet on a flat surface and allow the glue to dry completely.
Once it is dry, children can place one hand inside the paper bag and move the flap to make Joshua “talk” while retelling the Bible story.
Tips for Making This Craft with Younger Children
Paper bag crafts include several pieces, but a little preparation makes this one manageable for preschool and kindergarten children.
Try these classroom tips:
- Cut the hair, arm, sword, and shield pieces ahead of time.
- Give each child a labeled envelope containing one complete set.
- Use glue sticks for large paper pieces and liquid glue for the googly eyes.
- Show children a completed sample before beginning.
- Assemble one section at a time as a group.
- Write children’s names on the back of the bags before starting.
- Keep the flap free of glue so the puppet’s mouth can move.
- Let children decorate the facial details after the main pieces are attached.
- Older elementary children can complete more of the tracing and cutting themselves.
Joshua 1:9 Memory Verse Activity
Pair the puppet with Joshua 1:9 memory verse and help children connect the craft to the lesson.
Read the verse aloud, and then teach the children these simple motions:
- Be strong: Bend both arms and show strong muscles.
- Be courageous: Place both hands on your hips and stand tall.
- Do not be afraid: Shake your head and hold up one finger.
- God is with you: Point upward and then hug yourself.
- Wherever you go: Walk two fingers across your palm.
After practicing the verse, invite each child to use the puppet to repeat one phrase.
You can also write “Be strong and courageous — Joshua 1:9” on the back of the finished paper bag.
Discussion Questions About Joshua
Use these questions before or after making the craft:
- Who chose him to lead the Israelites?
- Whose place did he take as leader?
- What did God ask him to do?
- Why did he not need to be afraid?
- How did he demonstrate his faith in God?
- What instructions did he follow during the Battle of Jericho?
- When is a time you may need to be courageous?
- What can help you remember that God is always with you?
- What does it mean to follow God’s instructions?
- What can his story teach us about leadership?
For preschoolers, keep the discussion concrete. Ask them to name something that sometimes feels scary, such as starting school, sleeping in a new place, visiting the doctor, or trying a difficult activity.
Ways to Use the Finished Craft
Once the craft is complete, it can become part of several crafts and activities for Bible learning.
Retell a Bible Story
Let children use their puppets to retell the new leader’s appointment, Crossing the Jordan, or following the Lord’s instructions at Jericho.
Practice the Memory Verse
Children can make Joshua “say” each phrase of Joshua 1:9. Repeat the memory verse several times, allowing different children to lead.
Create a Puppet Show
Make puppets for other Bible characters and use them together in a small puppet theater. Moses, Caleb, Rahab and the Spies, and other characters would complement this activity.
Display the Craft
Hang the puppets on a bulletin board with the heading “Be Strong and Courageous.” Add each child’s name and one way he or she can show courage.
Use It in a Take-Home Bible Lesson
Send the puppet home with the memory verse and discussion questions. Encourage children to use it to tell someone in their family what they learned about this Bible leader.
Simple Joshua Bible Lesson Plan
This activity can be used as part of a complete 30- to 45-minute Bible lesson.
- Welcome the children and ask what it means to be courageous.
- Read Joshua 1:1–9 from a children’s Bible.
- Explain that God chose a new leader after Moses.
- Practice Joshua 1:9 with motions.
- Make the Joshua paper bag puppet.
- Use the completed puppets to retell the story.
- Ask the discussion questions.
- Close by praying for courage to rely on and obey God.
A Short Prayer for the Joshua Lesson
Dear God,
Thank You for being with Joshua and helping him lead Your people. Please help us to be strong and courageous. When we feel afraid, remind us that You are with us. Help us listen to You, trust You, and do what is right.
Amen.
More Bible Crafts for Kids
Continue your Old Testament lessons with more hands-on Bible character activities that encourage kids to learn, create, and remember important Bible stories.
- Moses Bible Craft – Make a paper bag puppet of Moses while learning about the leader God chose to guide His people.
- Gideon Bible Craft – Explore Gideon’s story with an easy craft that highlights courage and trusting God.
- Deborah Bible Craft – Learn about Deborah, a wise judge and leader, through a creative Bible activity.
- Daniel in the Lions’ Den Craft – Celebrate Daniel’s faith with a hands-on craft based on one of the Bible’s best-known accounts.
- Isaiah Bible Craft for Kids
His story reminds children that courage begins with relying on God. This Joshua Bible craft gives them a memorable character to use while learning how the Lord prepared him, stayed with him, and helped him lead His people.
As children assemble the robe, sword, shield, and movable paper bag puppet, they can think about his example and remember the Lord’s words: be strong, be courageous, and do not be afraid.
What age is this Bible craft best for?
This craft is best for preschool through early elementary children. Preschoolers will need the pieces cut out ahead of time, while kindergarten and elementary students can complete more of the tracing, cutting, and assembling independently.
What Bible verse works best with this craft?
Joshua 1:9 is the most natural verse to use because God tells the new leader to show courage and reminds him that the Lord will be with him wherever he goes.
Can I use this craft for the battle of Jericho?
Yes. Although the puppet represents the Israelite leader rather than the Walls of Jericho, children can use it to retell Joshua and the Battle of Jericho and explain how he followed the Lord’s instructions.
Why does the puppet have a sword and shield?
The sword and shield visually represent his role as a leader. During the discussion, explain that his victories came through divine power and his willingness to believe in and obey God.
Can I make this without googly eyes?
Yes. Children can cut eyes from black and white construction paper or draw them directly onto the face with markers.
Can the printable be used with a large Sunday School class?
Yes. Print one template to use as a tracing pattern or print enough copies for each student. For younger children, prepare the smaller pieces before class and place each set in a separate envelope.
How long does the Joshua bible craft for kids take?
The craft generally takes about 20 to 30 minutes. It will take less time if the pieces are cut out in advance.
What other Bible stories feature Joshua?
He appears as Moses’ assistant, one of the twelve spies, the leader who guided the people across the Jordan River, the leader in the Battle of Jericho, and the man who declared that he and his household would serve the Lord. His story also connects with Rahab Helps the Spies (Joshua 2) and the story of Rahab, making those accounts excellent companion Bible studies.
Joshua Bible Craft for Kids
Make a Joshua paper bag puppet while teaching children about courage, faith, leadership, and trusting God. This easy Bible craft includes a printable template and works well for Sunday School, homeschool, children’s church, and Vacation Bible School.
Materials
- One brown paper lunch bag
- Printable Joshua craft template
- Brown construction paper
- Light brown or skin-tone construction paper
- Black construction paper
- Dark brown construction paper
- Red construction paper
- Yellow construction paper
- White or light blue paper
- Two googly eyes
- Black marker
- Blue marker or crayon
- Glue
Tools
- Pencil
- Child-safe scissors
Instructions
- Print and cut out the Joshua craft template.
- Trace the template pieces onto the corresponding colors of construction paper.
- Cut out the robe, face, hair, headband, sash, belt, buckle, arm, hand, sword, and shield pieces.
- Glue the brown robe onto the front of the paper bag.
- Attach the red sash diagonally across the robe.
- Glue the black belt across Joshua’s waist and add the yellow buckle.
- Glue the face to the paper bag flap without gluing the flap closed.
- Position the black hair behind the face and add the brown headband.
- Attach Joshua’s arm and hand to the sides of the puppet.
- Assemble the sword and glue it to the raised hand.
- Layer the shield circles, decorate them with a marker, and attach the shield to the opposite hand.
- Glue on the googly eyes and eyebrows.
- Draw the nose, mouth, and additional clothing details with a black marker.
- Let the puppet dry before using it to retell Joshua’s story.
Notes
- Precut the pieces when making this craft with preschoolers.
- Cardstock makes the sword and shield more durable.
- Keep the paper bag flap free of glue so it can move.
- Supervise children when using scissors and small googly eyes.
