
Ocean Diorama for Kids: Shoebox Project and Printable
Create an underwater ocean diorama inside a shoebox with this colorful ocean habitat project for kids. Children can build an ocean floor, add coral and sea plants, and fill their scene with printable fish, seahorses, crabs, jellyfish, and other ocean creatures.
This hands-on diorama project combines science, art, and imaginative play. It is a fun and educational choice for an ocean unit, animal habitat lesson, homeschool project, science fair display, or classroom displays.
You can download two free ocean diorama starter pages from this post or use the complete 10-page printable pack to build a more detailed underwater habitat.

Printable Ocean Diorama Project
A diorama is a three-dimensional model that shows a scene, setting, or event. This type of project recreates an aquatic environment using a box, printed background, sea animals, plants, coral, and other decorative materials.
Children can arrange the pieces to show where different animals might live. Fish and whales can swim through the open water, crabs and oysters can rest along the seafloor, and coral and seagrass can create hiding places for smaller creatures.
The printable pieces make the project easier to prepare because children do not have to draw every animal and feature from scratch.
Free Starter Pages or Complete Printable Pack
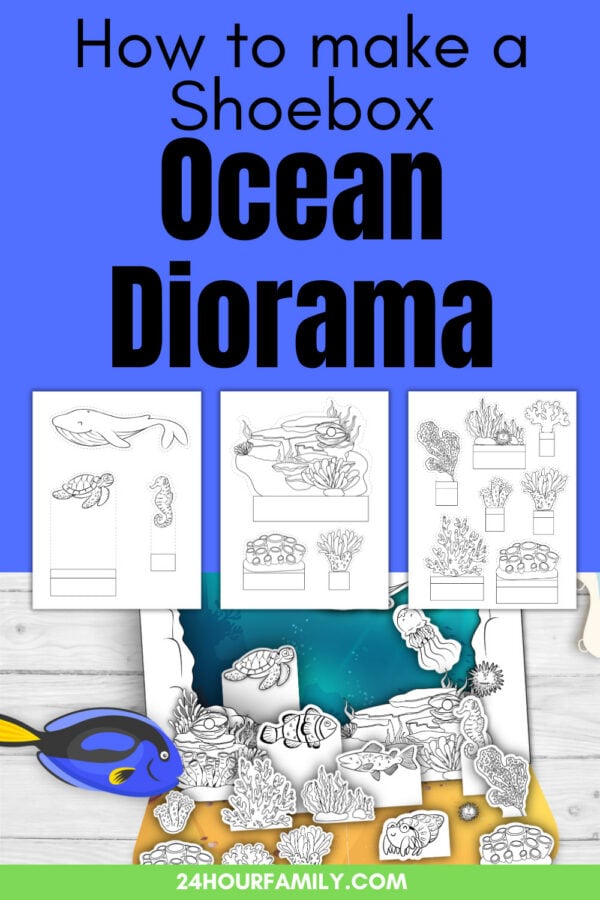
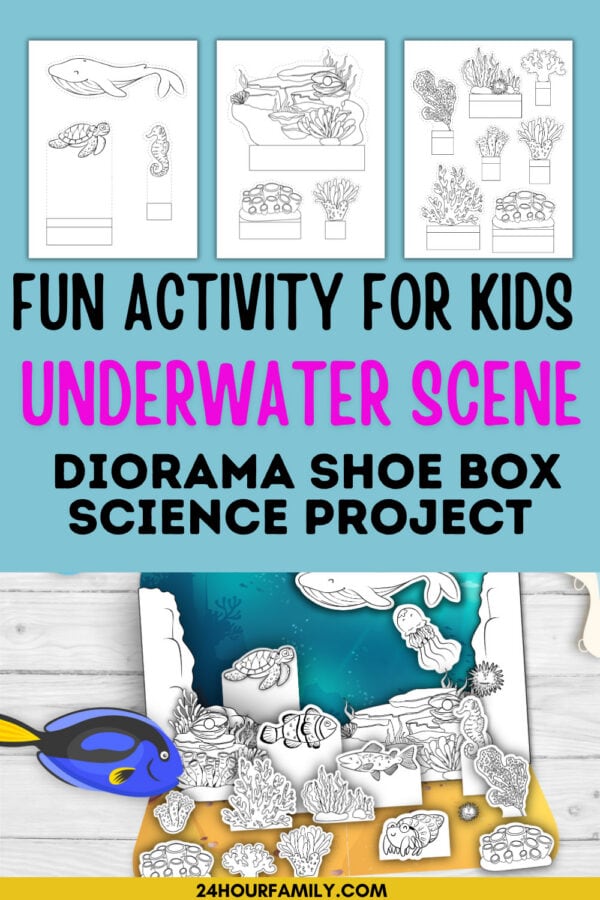
Two free starter pages are available in this post. These pages give children enough pieces to try the activity and make a simple sea scene.
The complete printable in the 24 Hour Printables shop contains 10 pages with additional animal pieces, plants, seaweed, coral, backgrounds, and decorative elements for creating a fuller scene.
The free pages are ideal for a short afternoon activity. Choose the complete set when you want more animals, more design choices, or enough pieces to fill an entire box.
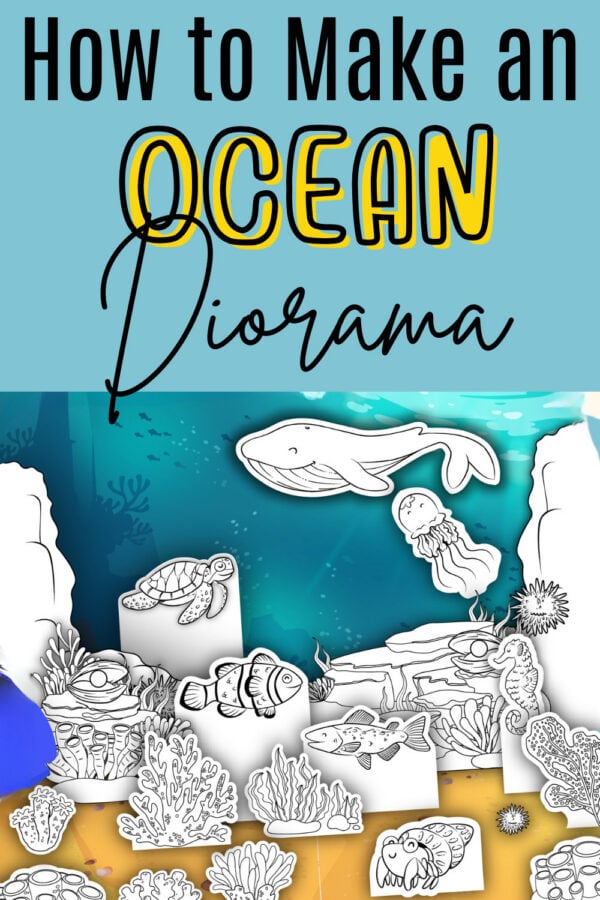
What Is Included in the Complete Printable?
The complete printable includes 10 pages of sea-themed pieces that children can personalize, cut, and arrange.
The designs include a selection of:
- Underwater backgrounds
- Seafloor pieces
- Whale
- Turtle
- Fish
- Seahorse
- Jellyfish
- Crab
- Oyster and pearl
- Coral
- Seaweed
- Underwater plants
- Additional habitat details
Children can use all the pieces or choose their favorites to create an original scene.
The black-and-white designs also function as coloring sheets before they are assembled into the diorama.

Recommended Ages
This project is suitable for:
- Preschool with adult assistance
- Pre-K
- Kindergarten
- First grade
- Second grade
- Third grade
- Fourth grade
- Fifth grade
- Homeschool science
- Elementary habitat projects
Younger children can concentrate on finishing the pieces, identifying different animals, and placing them inside the box. Older students can research a marine environment and make scientifically appropriate choices about which animals and plants to include.

Supplies Needed
Gather the following craft supplies before beginning:
- Shoebox or similarly sized cardboard box
- Printable template
- White cardstock or heavyweight paper
- Blue construction paper or blue paint
- Brown or tan construction paper, optional
- Crayons, markers, or colored pencils
- Child-safe scissors
- Glue stick
- School glue or craft glue
- Clear thread or transparent string
- Tape, optional
- Pebbles, shells, or textured materials, optional
- Ruler and pencil, optional
Cardstock works best for the printable animals because it helps them remain upright. If you only have regular printer paper, attach the finished pieces to cardstock or lightweight cardboard before placing them inside the box.
Adult supervision is necessary if you use hot glue, a craft knife, or fishing line.
How to Make an Ocean Diorama
Choose a Box
A standard shoebox works well for this project. Remove the lid and turn the box onto one of its long sides so the open portion faces forward.
The back of the box becomes the water background, while the lower side becomes the seafloor.
A cereal box, small shipping box, or cardboard display box can also be used.
Prepare the Background
Cover the inside back and side walls with blue construction paper. Use different shades of blue to make the water appear deeper.
You can also paint the inside of the box with blue tempera, acrylic, or watercolor paint. Allow the paint to dry before adding the printable pieces.
For added texture, apply lighter blue near the top of the scene and gradually blend into darker shades toward the bottom.
Create the Seafloor
Cover the bottom of the box with tan or brown paper to represent the seafloor.
For a more realistic texture, spread a thin layer of school glue over the bottom and sprinkle clean craft sand on top. Shake the excess onto a sheet of paper so it can be returned to the container.
Small pebbles, clean oysters, or crumpled pieces of tan tissue paper can also be added.
Print the Template Pieces
Print the two free starter pages or the complete 10-page printable pack.
White cardstock is recommended for sturdier pieces. Select “actual size” or “100%” in your printer settings unless the printable provides different instructions.
Finish the Animal Pieces
Decorate the fish, seahorse, crab, coral, oysters, and plants.
Children can use realistic shades or invent an amazing undersea world. If the model is for a science assignment, encourage students to look at photographs of real ocean animals for inspiration.
Cut Out the Printable Pieces
Carefully cut around each animal and feature.
Young children may need help cutting around smaller details. An adult can cut the more complicated pieces while the child prepares the larger animals and plants.
Keep all completed pieces in a container so none are lost while assembling the box.
Plan the Scene
Arrange the pieces inside the box before attaching anything permanently.
Consider placing:
- Coral and seagrass along the seafloor
- Crabs, oysters, and pearls near the bottom
- Fish and turtles in the middle of the water
- Larger animals in the open-water area
- Jellyfish hanging from the top
Leave enough space between the animals so each one can be seen clearly.
Add Coral and Plants
Glue coral, seagrass, oysters, and other stationary elements to the bottom and back of the box.
Create a small tab at the bottom of selected pieces to help them stand upright. Glue the folded tab to the seafloor rather than attaching every piece flat against the background.
This simple technique gives the display more depth.
Attach Swimming Animals
Glue some animals directly to the background. Place others on folded cardstock tabs so they extend into the scene.
To make the animals appear to be swimming, tape a piece of clear thread or fishing line to the back of each animal and hang it from the top of the box.
Vary the thread lengths so the animals appear at different depths.
Add Dimensional Details
Finish the display with optional materials such as:
- Oysters
- Craft sand
- Pebbles
- Blue tissue paper
- Green yarn
- Pipe cleaners
- Cellophane
- Craft foam
- Sponge pieces
- Recycled cardboard
- Glitter, optional
Use these materials sparingly so they complement rather than hide the printable animals.
Label the Display
For a school project, add a title and animal labels to the outside of the box.
Possible titles include:
- Sea Habitat
- Life Under the Sea
- Marine Life
- Coral Reef
- Aquatic Habitat
Older students can also add short fact cards describing the animals shown in the display.
How to Make an Ocean Diorama More Realistic
Use Several Shades of Blue
Water does not appear as one flat color. Blend light, medium, and dark blue to create depth.
The water near the surface can be lighter, while the deeper areas should appear darker.
Create Multiple Layers
Place animals at the front, middle, and back of the box.
Layering the pieces makes the scene appear larger and more three-dimensional.
Hang Some Animals
Fish, turtles, large mammals, and floating creatures will appear to swim when suspended from the top of the box with clear thread or fishing line.
Add Natural Textures
Craft sand, oysters, and pebbles can make the seafloor more convincing. Only use clean, dry materials so the finished project does not develop mold or odors.
Fold the Printable Pieces
Instead of attaching every cutout flat, create small tabs or accordion-folded paper supports. These allow the coral, plants, and animals to extend into the scene.
Choose Animals That Share a Habitat
For a science project, decide whether the display represents:
- A coral reef
- Open water
- A shallow coastal habitat
- A sandy seafloor
- A kelp forest
- The deep sea
Then choose animals and plants appropriate for that environment.
A creative craft can include any favorite sea creatures, but a graded project should show animals that could reasonably live in the same environment.
What Can Children Learn from This Diorama?
Sea Habitats
Children learn that the sea is not one uniform environment. Water depth, temperature, light, and location affect which animals and plants can survive in a particular area.
Animal Adaptations
Ask children to look at the printable animals and consider how their bodies help them survive.
For example:
- Fish use gills to obtain oxygen from the water.
- Turtles use flippers to move through the water.
- Some large mammals must surface to breathe air.
- Many sea animals use body patterns and shape as camouflage.
- Jellyfish move through the water without bones.
Food Chains
Older students can research what the animals in their display eat.
They can use arrows or fact cards to show a simple food chain.
Habitat Needs
Like all animals, sea life needs food and shelter, water, space, and suitable environmental conditions.
The project can help children think about where an animal finds protection and its next meal.
Conservation
Use the project to begin a conversation about plastic pollution, overfishing, damaged coral reefs, and ways families can help protect these ecosystems.
Ocean Diorama Ideas for School Projects
Coral Reef Diorama
Fill the box with brightly decorated coral, fish, a sea turtle, oysters, and plants.
Add a fact card explaining that coral reefs provide food and shelter for many living organisms.
Open-Water Diorama
Create a wide blue background with whales, jellyfish, turtles, and schools of fish.
You can also include a dolphin or shark to represent larger predators.
Use hanging pieces to make the animals appear to be swimming through open water.
Seafloor Diorama
Concentrate on the lower portion of the display with crabs, oysters, pebbles, seagrass, and bottom-dwelling fish.
An octopus tucked between the rocks also fits naturally into the scene.
Depth Zones Project
Divide the box horizontally to represent different water depths.
Create a gradient by using lighter blue near the surface and darker shades below. Older children can research the animals that inhabit each level.
Food Chain Display
Label the food chain with arrows to show how energy moves from one living organism to another.
Students can prepare a short oral presentation explaining their model.
Questions to Ask Children
Use these questions to extend the activity:
- Which habitat does your display represent?
- Which animal is the largest?
- Which animals live near the seafloor?
- Why did you place each animal in that location?
- How do fish breathe underwater?
- Why do some marine animals need to come to the surface?
- What might the animals in your display eat?
- Where could a small fish hide from a predator?
- How does coral help the ecosystem?
- What can people do to protect our seas?
For older students, ask them to support their answers with information from a book or another reliable science source.
More Printable Dioramas for Kids
Make another habitat project with these printable dioramas:
Rainforest Diorama – Bring the rainforest to life with lush plants, colorful wildlife, and layered forest habitats.
Printable Layers of the Ocean Diorama – Dive deeper into the ocean by exploring its different layers and the amazing animals that live in each one.
Taiga Biome Diorama – Build a forest habitat featuring evergreen trees, wildlife, and the unique characteristics of the taiga biome.
Shoebox Diorama Printables – Find a variety of printable diorama projects that make science, geography, and storytelling more interactive.
Solar System Diorama – Explore the planets and outer space by assembling a colorful solar system display.
Tundra Biome Diorama – Learn about one of Earth’s coldest environments while building a snowy habitat filled with Arctic wildlife.
African Savanna Shoebox Diorama – Recreate the African savanna with iconic animals, grassy plains, and realistic scenery.
Desert Diorama – Assemble a desert landscape complete with cacti, rocky terrain, and animals adapted to hot, dry climates.
Children can compare the completed models to discover how habitats differ in climate, plants, animals, and natural resources.
Build an Underwater World
This project gives children a memorable way to explore sea life and aquatic environments. They can decorate and arrange the printable pieces, experiment with depth and texture, and turn an ordinary box into a miniature 3D model of an ecosystem.
Children will practice creativity, fine motor skills, planning, and science as they build their own underwater world.
What is an ocean diorama?
An ocean diorama is a three-dimensional model of an underwater environment. It typically includes a box, a water background, sea animals, plants, coral reef features, and a sandy or rocky seafloor.
What type of box should I use?
A standard shoebox is usually the easiest option. A small shipping box, cereal box, or cardboard display box can also be used.
Is the printable free?
Two starter pages are available as a free download in this blog post. The complete 10-page printable is available for purchase in the 24 Hour Printables shop.
What is the difference between the free and paid printables?
The free download is a small starter sample with selected pieces. The complete printable includes more sea animals, additional scenery, backgrounds, and decorative pieces for creating a fuller display.
What age is this activity for?
The project can be adapted for preschool through upper elementary school. Young children will need help cutting and assembling the display, while older students can add research and written facts about aquatic ecosystems.
How long does this project take to make?
A simple version usually takes 30–45 minutes. A detailed school project may take one to two hours, especially when paint, textured materials, suspended animals, or written research are added.
What animals can I include?
Depending on the environment, children might include whales, fish, sea turtles, jellyfish, crabs, seahorses, oysters, sharks, dolphins, octopuses, starfish, or any other favorite sea creatures.
How do I make the animals look like they are swimming?
Suspend the printable animals from the top of the box with clear thread or fishing line, or attach them to folded paper tabs that extend from the background.
Can this be used for a school project?
Yes. Students can identify the environment they are creating, choose appropriate animals, label important features, and add researched facts.
Should I use paper or cardstock?
Cardstock is best for printable animals and freestanding pieces. Regular paper works well for the background and can also be reinforced with lightweight cardboard for extra durability.
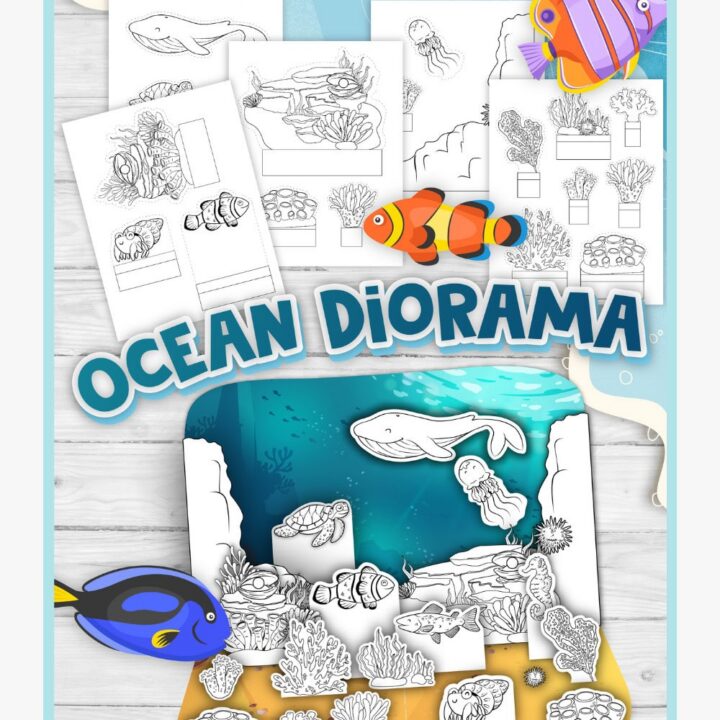
Printable Ocean Diorama for Kids
Turn a shoebox into an underwater habitat with printable sea animals, coral, plants, and an ocean floor.
Materials
- Ocean diorama printable
- Shoebox or small cardboard box
- White cardstock
- Blue construction paper or blue paint
- Crayons, markers, or colored pencils
- Glue
- Clear thread, optional
- Sand, shells, and pebbles, optional
Tools
- Printer
- Child-safe scissors
- Paintbrush, optional
- Pencil
- Ruler, optional
Instructions
- Turn a shoebox on its side with the open portion facing forward.
- Cover or paint the inside walls blue to create the ocean background.
- Add tan paper or clean craft sand to create the ocean floor.
- Print the ocean diorama pieces on white cardstock.
- Color and cut out the sea animals, coral, plants, and other details.
- Arrange the pieces inside the shoebox before gluing.
- Glue coral, seagrass, shells, and other stationary pieces to the ocean floor.
- Attach some animals to the background or folded paper tabs.
- Suspend selected swimming animals from the top with clear thread.
- Add labels or ocean facts if the diorama is for a school project.
- Allow all paint and glue to dry before moving or displaying the model.
Notes
- Adult assistance may be needed for detailed cutting.
- Cardstock creates sturdier animals and freestanding pieces.
- Choose animals that belong in the same habitat for a science assignment.
- Use only clean, completely dry natural materials.
- Hot glue and craft knives should only be handled by an adult.
