
A Rainforest Diorama to Transport You to the Amazon
Build a miniature rainforest diorama filled with towering forest canopies, leafy vegetation, and wild animals using this printable habitat kit.
The 12-page kit gives children illustrated setting panels, forest-floor pieces, foliage, grass, and figure cutouts needed to create a colorful three-dimensional habitat.
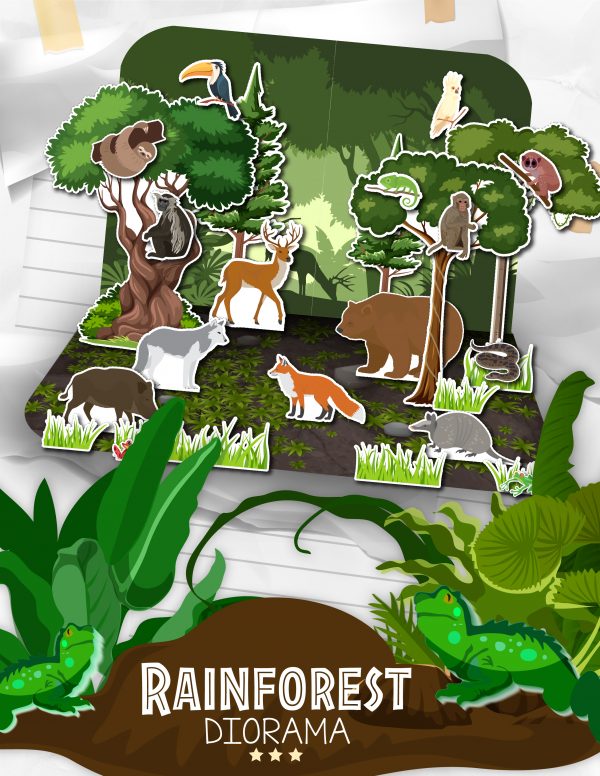
DIY Rainforest Diorama Printable for Kids
This hands-on rainforest project combines science, art, and imaginative play. Use it for an elementary science assignment, rainforest unit study, homeschool lesson, classroom project, or creative afternoon at home.
The pieces can be arranged inside a shoebox, attached to a small cardboard container, or assembled as a freestanding display.
Printable Rainforest Diorama
A diorama is a small three-dimensional model that represents a place, habitat, or environment. Creating one helps children visualize how vegetation, forest inhabitants, and other natural features work together within an environment.
The complete printable includes 12 full-color pages with:
- Two coordinating rainforest backdrop panels
- Two illustrated forest-floor panels with rocks and leafy ground cover
- Three broadleaf tree designs
- Two evergreen tree designs
- Matching tree support pieces
- Several grass and foliage pieces
- Monkeys
- A sloth
- A toucan
- A chameleon
- An armadillo
- Snakes
- Birds
- A bear
- A fox
- A deer
- A wolf
- A wild boar
- Additional tropical and woodland species
Children can choose which pieces to include rather than trying to fit every creature and type of vegetation into one habitat.
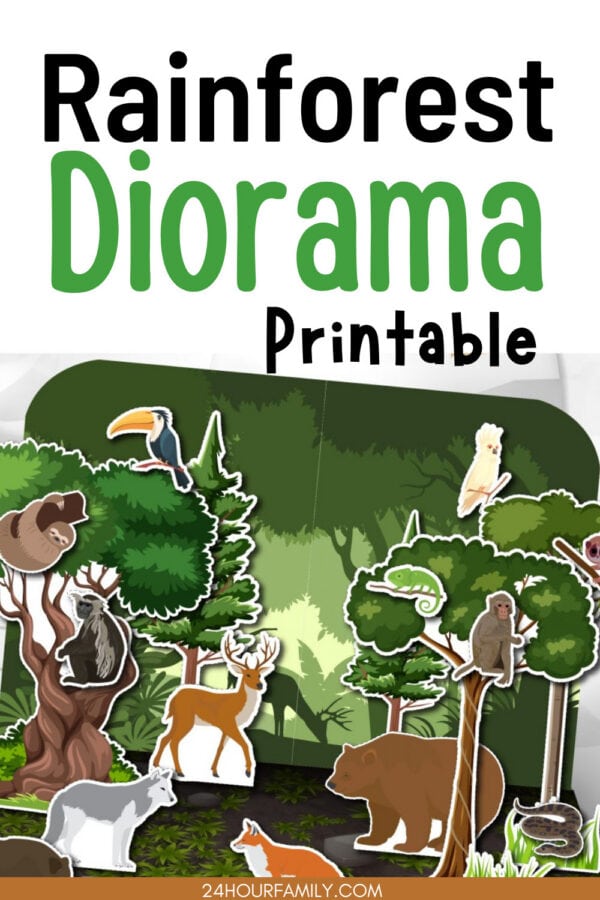
Free Rainforest Background Printable
The free download available in this post includes the two-page rainforest background. Place the panels side by side to create the lush, layered setting for a shoebox diorama or other rainforest school project.
The complete 12-page version, including the illustrated panels, floor pieces, foliage, grass, support pieces, and animal figures, is available as a digital download in the printable shop.
Supplies for Your DIY Rainforest Diorama
Gather these supplies before assembling the project:
- Printable rainforest diorama
- White cardstock
- Color printer
- Shoebox or small cardboard box
- Child-safe scissors
- Glue stick or craft glue
- Clear tape
- Ruler
- Pencil
Optional materials include:
- Green tissue paper
- Construction sheet
- Twigs
- Dried foliage
- Small rocks
- Craft moss
- Yarn for vines
- Rainforest labels
- Index cards for animal facts
Cardstock is recommended for the standing pieces because it helps them remain upright. If you only have regular printer paper, glue the sheets to construction cardstock or lightweight cardstock before trimming out the pieces.
Adult supervision may be needed when younger children cut around the smaller animals or use stronger craft glue.
How to Make a Rainforest Diorama
The printable contains coordinating pieces that can be assembled inside a shoebox or used to make a freestanding display.
Print the PDF Rainforest Diorama Printable
Download the PDF and use your printer to produce the pages at actual size or 100% scale. Use the high-quality color setting that works well with your printer.
Use regular or cardstock for the backdrop and floor panels. Use cardstock for the standing pieces whenever possible.
Before producing all 12 pages, print one test page and check the print preview image to ensure none of the edges will be cut off.
Prepare the Diorama Box
Remove the lid from a shoebox and place the container on one of its long sides so the opening faces forward.
If you are using a different cardboard container, trim away the top or front panel to create an open viewing area. An adult should handle any trimming that requires a utility knife.
You can cover the outside of the container with green or brown construction cardstock, but this is optional.
Add the Rainforest Backdrop
The printable contains two matching rainforest illustration panels. Position them side by side across the back wall of the container to create one continuous habitat.
Trim the pages if necessary, then glue or tape them securely to the inside of the container.
If the illustration panels are slightly larger than the container, allow the sides to curve around the interior walls. If they are smaller, fill the open areas with green construction cardstock.
Attach the Forest Floor and Rock Panels
Place the two forest-floor panels side by side across the bottom of the container. The rounded corners should face the front of the finished habitat.
Trim the panels to fit the container and secure them with glue or double-sided tape.
Try to line up the two designs before gluing. Slightly overlapping the center edges can prevent a strip of cardboard from showing between them.
Cut Out the Trees and Plant Pieces
Carefully trim around the outside edge of each design. The printable includes three numbered broadleaf designs, two evergreen designs, and corresponding numbered support pieces.
Keep each numbered piece with its matching support. This will make assembly easier.
Follow the exterior trimming lines and do not remove the rectangular tabs at the bottom of each piece or support. Those tabs help the standing pieces remain upright.
Assemble the Forest Diorama Trees
Fold the bottom tabs along the dotted lines. Attach the matching support to the back of its numbered piece.
Fold the bottom tabs along the dotted lines. Attach the matching support to the back of the numbered piece, or position the support at an angle behind the trunk to create a stand.
Test each piece on a flat surface before placing it inside the diorama. If it leans, adjust the fold or reinforce the back with a small piece of clear tape.
Arrange the tallest broadleaf versions toward the back and the shorter evergreen varieties closer to the middle. This creates depth and keeps the smaller figures visible between the branches.
Cut Out the Animals and Grass
Trim around the animal and grass pieces, keeping the rectangular bottom tabs attached to the figures that include them.
Bend each tab backward along the dotted line. The bent tab forms a small base that can be glued to the forest floor.
Children do not need to use every piece. Selecting a smaller number of figures usually produces a more natural habitat and leaves enough room to see the rainforest setting.
Arrange the Rainforest Scene
Before gluing anything, experiment with several arrangements.
Consider placing:
- Monkeys and the sloth among the branches
- The toucan high among the branches
- The owl perched on a branch
- The chameleon on a branch or leafy area
- Snakes near ground cover or along the forest floor
- The armadillo, bear, fox, deer, wolf, and wild boar on the ground
- Small grass sections around the bases of the trunks
Once you are satisfied with the arrangement, glue the folded tabs to the forest-floor panels.
Add Nature Details to the Rainforest
Give the diorama additional texture with materials you already have at home.
Try adding:
- Twisted green yarn for vines
- Crumpled tissue paper for leaves
- Small twigs for tree branches
- Dried leaves across the forest floor
- Pebbles or craft moss
- Blue cardstock for a river, stream, or waterfall
- Cotton stretched into thin strands for mist
- Labels identifying vegetation, species, or rainforest layers
These additions are optional. The illustrated printable provides enough features to complete the project without purchasing extra craft supplies.
Finish the Diorama Project
Allow all glued pieces to dry completely before carrying the project or placing it on display.
If this is a school project, add a title, small poster, and the child’s name to the outside of the container. A short rainforest fact card can also be attached beside the finished habitat.
Choosing Figures for Your Rainforest Habitat
The printable includes a mixture of tropical and woodland species so children can create different forest habitats. Not every included animal lives in the same natural environment.
For a general creative project, children can select any figures they like. For a science assignment, first decide which rainforest or forest habitat the project represents and research the species that live there.
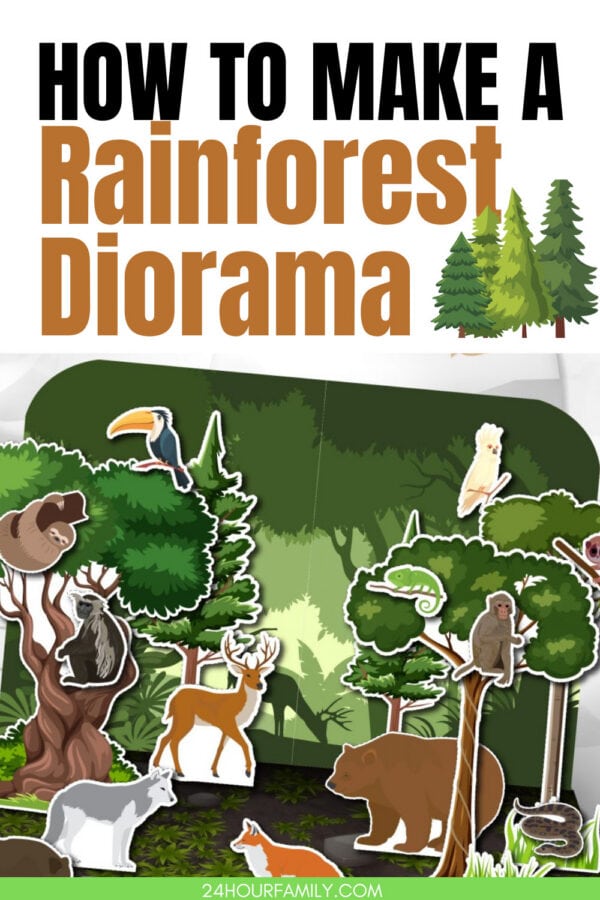
Here are a few examples:
- One of the world’s largest rainforests, the Amazon, is found in South America.
- One of the world’s largest rainforests, the Congo rainforest, is found in Central Africa.
- Tropical rainforests also occur in Central America, Southeast Asia, Australia, and on many tropical islands.
- Temperate forests have cooler climates and different vegetation and native species.
The toucan, monkeys, sloth, chameleon, snakes, and tropical birds can help create a rainforest habitat, although individual species have different geographic ranges.
Species such as the deer, wolf, fox, bear, wild boar, and evergreen varieties are better suited to temperate or woodland habitats. These extra pieces make it easy to compare different forest habitats or build a second diorama.
This sorting question can become part of the activity: Which species belong in the rainforest being studied, and which would live in another type of forest?
Learning About Rainforest Layers and Habitats
A tropical rainforest is commonly described as having four main layers. Children can add labels to the diorama to represent them.
Emergent Layer of the Rain Forest
The tallest trees rise above the rest of the forest. They receive strong sunlight and are exposed to wind and changing weather.
Canopy
The canopy is formed by the leafy tops of closely spaced forest growth. It receives abundant sunlight and provides food and shelter for many rainforest creatures.
Understory
The understory lies beneath the canopy. It receives less sunlight and contains smaller woody plants, vines, shrubs, and young vegetation.
Forest Ground
Sunlight rarely reaches the rainforest floor. Fallen foliage and other organic materials break down in the warm, damp environment.
The model cannot show every feature of a real rainforest, but arranging vegetation and figures at different heights gives children a useful visual introduction to these layers.
Rainforest Lesson and Science Project Ideas
Extend the rainforest diorama beyond the craft with one or more of these learning activities and ideas for kids.
Research a Rainforest Creature
Have each child choose one rainforest species and investigate:
- Where it lives
- What it eats
- Whether it is a predator or prey
- Which rainforest layer it uses
- What adaptations help it survive
- Whether it is endangered
The answers can be written on an index card and displayed beside the diorama.
Build a Rainforest Food Chain
Choose several producers and consumers that belong to the forest habitat you are studying. Discuss how energy moves from plants to herbivores and then to predators.
Children can draw arrows on a separate sheet rather than directly on the finished diorama.
Compare Two Forest Ecosystems
Use the tropical species in one habitat and the woodland species in another. Compare the temperature, rainfall, forest growth, vegetation, and living things found in each environment.
Write a Rainforest Story About the Amazon
After completing the project, invite children to write a story set inside their miniature habitat. The figures can become characters, or the story can follow an explorer studying the rainforest.
Practice Descriptive Writing
Ask children to describe what they might see, hear, feel, and smell while walking through a rainforest. This connects the science project with language arts.
Why This Diorama Craft Is Great for Learning
A rainforest habitat can be difficult to understand through vocabulary and photographs alone. Constructing a three-dimensional model gives children a concrete way to explore where wildlife lives and how vegetation forms different levels within the forest.
This project also practices:
- Following multi-step directions
- Trimming and gluing
- Fine motor coordination
- Spatial planning
- Species classification
- Habitat vocabulary
- Independent research
- Creative decision-making
- Oral presentation skills
A completed diorama can become a display, a storytelling setting, or the visual component of a rainforest report.
Download the Free Rainforest Background
The free printable includes two illustrated rainforest background pages that can be placed side by side inside a shoebox or cardboard habitat.
For the complete project, use the 12-page kit containing the illustrated panels, floor pieces, freestanding foliage, grass, figure cutouts, and matching support pieces.
These printables are intended for personal, classroom, and homeschool use. Please do not redistribute, resell, or upload the PDF files to another website.
More Diorama Projects to Explore
If you enjoyed building this DIY Rainforest Diorama, here are more printable diorama projects that make learning hands-on and fun. Each one lets kids create a unique three-dimensional display while exploring different science topics.
- Shoebox Diorama Printables – Find a variety of printable scenes that transform an ordinary shoebox into an exciting display.
- Rock Cycle Diorama – Help kids learn how rocks change over time by creating a hands-on model of the rock cycle.
- Water Cycle Diorama Printable – Build a three-dimensional model that shows evaporation, condensation, precipitation, and collection in an easy-to-understand way.
- Printable Leaf Anatomy Diorama – Explore the parts of a leaf with an interactive project that’s perfect for plant science lessons.
- Animal Cell Printable Diorama – Create a colorful animal cell model that helps children identify and remember important cell structures.
- Taiga Biomes Diorama – Discover the taiga biome by building a scene filled with towering evergreen trees and cold-climate wildlife.
- Solar System Diorama – Take learning beyond Earth by building a miniature solar system that introduces the planets in a fun, interactive way.
This project makes a detailed habitat much easier to assemble while still leaving plenty of room for creativity. Children can choose their wildlife figures, arrange the foliage, add natural textures, and transform an ordinary container into a miniature forest habitat. The mix of tropical and woodland pieces also makes it easy to compare different forest ecosystems during science lessons.
What age is this rainforest shoebox diorama for?
The project is best for elementary-age children. Younger children may need help cutting out the detailed pieces, while older students can add research, habitat labels, food chains, and written reports.
Do I need a shoebox?
No. A shoebox makes a sturdy base, but children can also use a shipping box, cereal box, cardstock backdrop, or foam board. The printable pieces can even be arranged as a freestanding tabletop scene.
Should I print the diorama on cardstock?
Cardstock is recommended for the standing pieces, figure cutouts, grass, and support pieces. Regular printer paper can be used for the illustrated panels and floor sections.
Does the printable include instructions?
The post provides the complete assembly instructions. The PDF contains the printable pieces, numbered trees, and coordinating supports needed to construct the scene.
Are all the included animals tropical rainforest animals?
No. The kit contains a combination of tropical and woodland wildlife, along with both broadleaf and evergreen varieties. Children can select appropriate pieces for a specific rainforest, create a general forest habitat, or compare two different forest ecosystems.
How long does the project take?
Most children can assemble the basic printable diorama in approximately one to two hours. Detailed cutting, added craft materials, and accompanying research may extend the project over several lessons.
Can this be used for a school rainforest project?
Yes. The diorama works well as the visual component of an elementary rainforest, biome, ecosystem, or animal-habitat report. Follow the teacher’s requirements and add labels or research when needed.
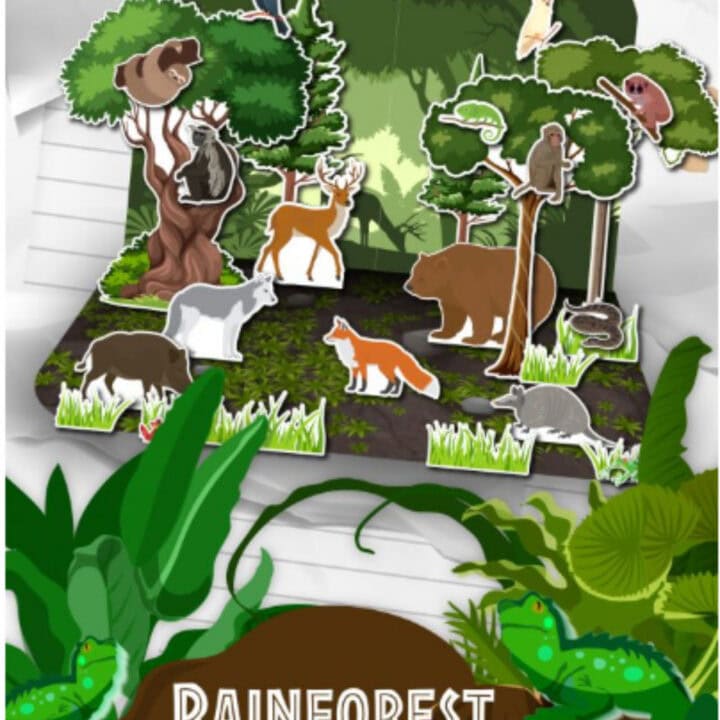
Printable Rainforest Diorama
Build a three-dimensional rainforest habitat using printable backgrounds, trees, grass, and animal cutouts. This hands-on project is perfect for elementary science, homeschool lessons, and rainforest unit studies.
Materials
- Printable rainforest diorama
- White cardstock
- Shoebox or small cardboard box
- Optional construction paper
- Optional rainforest craft materials
Tools
- Color printer
- Child-safe scissors
- Glue stick or craft glue
- Clear tape
- Ruler
Instructions
- Print the rainforest diorama pages on white cardstock.
- Position the shoebox on its side with the opening facing forward.
- Place the two background panels side by side and attach them to the back of the box.
- Trim and glue the two forest-floor panels across the bottom.
- Cut out the three trees, keeping their bottom tabs attached.
- Match each numbered tree with its corresponding support piece.
- Fold the tabs and attach the supports so the trees stand upright.
- Cut out the selected animals and grass pieces.
- Fold the bottom tabs and arrange the figures inside the habitat.
- Glue everything in place and add optional vines, leaves, rocks, or labels.
- Let the diorama dry completely before displaying or transporting it.
Notes
Cardstock helps the trees and animals stand upright. The printable includes both tropical and woodland animals, so students completing a science project should research and select animals appropriate to the rainforest they are studying.
