
Sarah Bible Craft for Kids with Free Printable Template
This Sarah Bible craft for kids is an easy hands-on activity for teaching children about Sarah, Abraham, and God’s faithfulness in the book of Genesis.
Using a simple brown paper lunch bag, colorful construction paper, googly eyes, and the free printable Sarah template, kids can create their own Sarah Bible character puppet.
I love paper bag Bible crafts because children aren’t just making something to take home. They can actually use the finished character to retell the Bible story.
This Sarah craft works especially well for Sunday school, children’s church, Christian classrooms, homeschool Bible lessons, VBS, or family Bible time.
For even more faith-based activities, browse my collection of Bible crafts and printables.
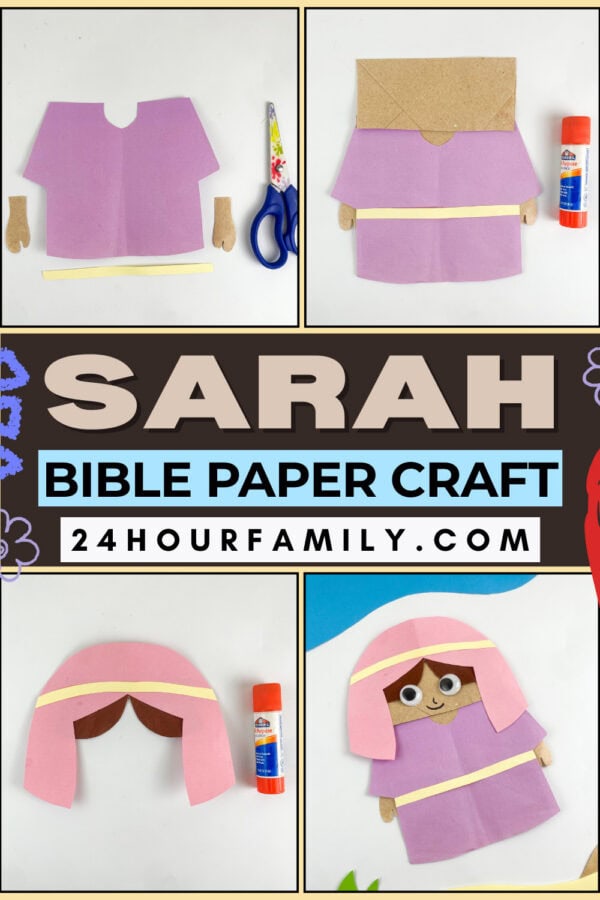
Sarah Bible Paper Bag Craft
Sarah is one of the most important women in the Old Testament, and her story gives us a wonderful opportunity to teach children about trusting God’s promises.
Sarah was Abraham’s wife. Earlier in Genesis, she was called Sarai, but God changed her name to Sarah in Genesis 17.
God promised Abraham and Sarah that they would have a son even though they were both very old.
When Sarah heard that she would have a baby, she laughed because it seemed impossible. But nothing was too difficult for God.
Eventually Sarah gave birth to Isaac, just as God had promised.
You can read this part of her story in Genesis 17:15-21, Genesis 18:1-15, and Genesis 21:1-7.
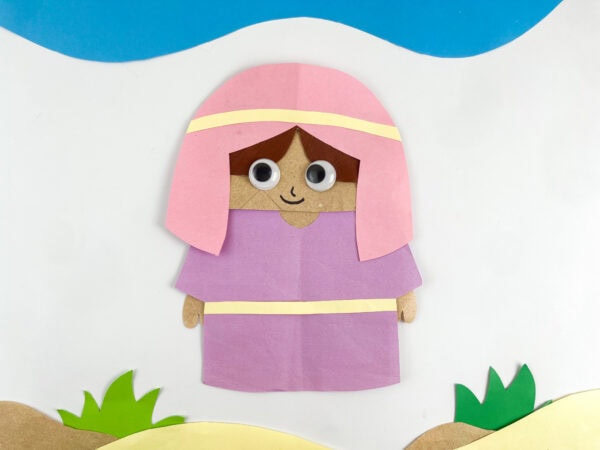
The finished Sarah paper bag puppet gives children a character they can hold while you read the story or use later to retell what they remember.
What Kids Can Learn From the Story of Sarah
Sarah’s story includes several lessons that you can adjust depending on the age of your children.
One of the easiest lessons for younger children is:
God keeps His promises.
God’s promise may have seemed impossible to Sarah, but God did exactly what He said He would do.
You can also talk about:
- Trusting God when we do not understand His plan
- Waiting patiently for God’s timing
- Remembering that God is faithful
- Believing that nothing is too difficult for God
- Learning how God used Abraham and Sarah as part of His bigger plan
For preschoolers and younger elementary children, I would keep the lesson simple and focus primarily on God keeps His promises.
Supplies for the Sarah Paper Bag Craft
This is a fairly low-prep Bible craft, and most of the materials are probably already in your craft supplies.
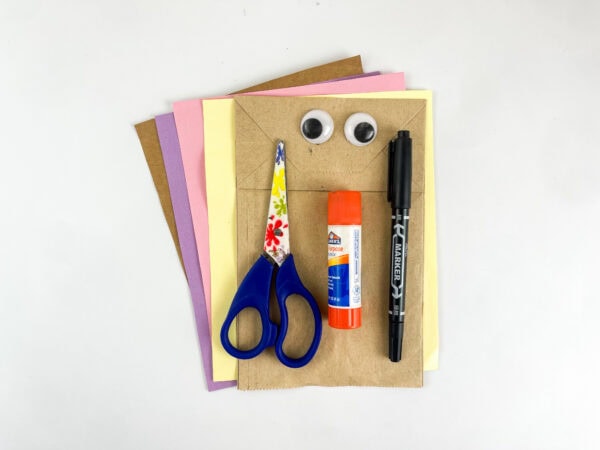
You will need:
- One brown paper lunch bag
- Free printable Sarah craft template
- Purple construction paper
- Pink construction paper
- Brown construction paper
- Tan or skin-tone construction paper
- Pale yellow construction paper
- Two googly eyes
- Glue or a glue stick
- Child-safe scissors
- Black marker
- Pencil for tracing
You can change the colors of Sarah’s clothing and head covering if you would like each child’s craft to look a little different.
Sarah Bible Craft Template
The printable template makes this craft much easier to prepare, especially if you’re using it with a Sunday school class or a group of children.
The template includes the basic pieces needed to create Sarah’s clothing, arms, hair, head covering, and decorative trim.
Print the template on regular printer paper and cut out each piece.
You can then trace the shapes onto the appropriate colors of construction paper.
For younger children, consider tracing and cutting the pieces before class. Older children can trace and cut their own pieces as part of the activity.
How to Make a Sarah Bible Paper Bag Craft
Once your template pieces have been prepared, assembling Sarah is simple.
1. Print and Cut Out the Sarah Template
Print the Sarah template and carefully cut around each shape.
Use these pieces as tracing patterns for your construction paper.
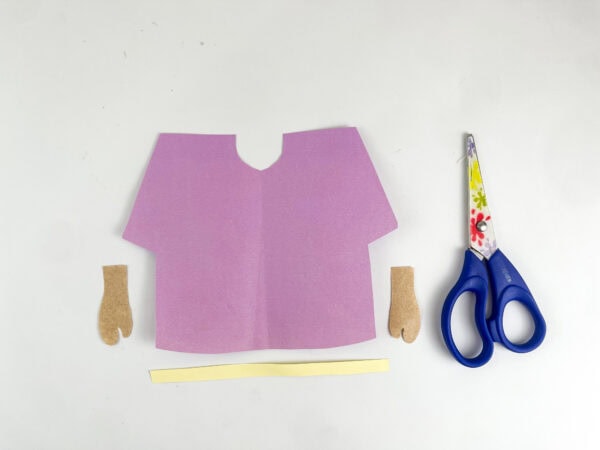
Trace the main dress or robe onto purple construction paper. Trace the arms and any visible skin pieces onto tan or skin-tone construction paper. Cut a thin strip of pale yellow paper to use as the decorative belt across Sarah’s dress.
Cut out all of the pieces and place them on the table before beginning assembly.
2. Attach Sarah’s Clothing to the Paper Bag
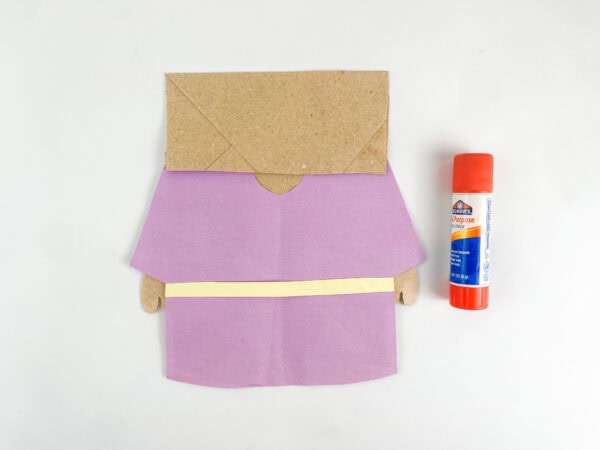
Lay your brown paper lunch bag flat. Position the purple clothing piece over the lower portion of the bag. Glue it securely into place. Attach Sarah’s arms along either side of the dress.
Next, glue the thin yellow strip horizontally across the lower portion of her clothing to create the decorative trim or belt.
3. Create Sarah’s Hair
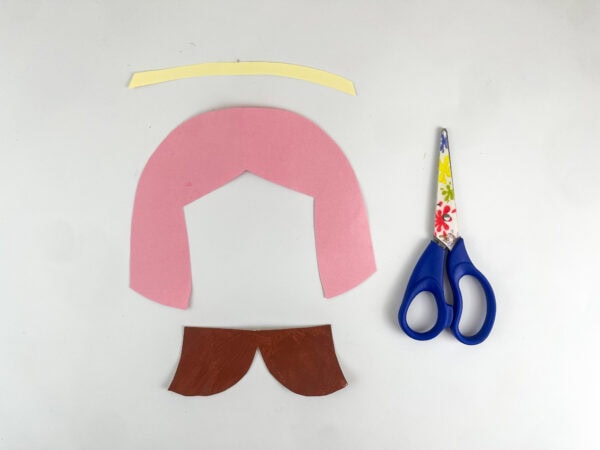
Trace the hair piece onto brown construction paper and cut it out. Position the hair along the top portion of the paper bag flap. Glue it into place.
The brown paper bag itself becomes Sarah’s face, which keeps this craft simple and gives it a cute handmade look.
4. Make Sarah’s Head Covering
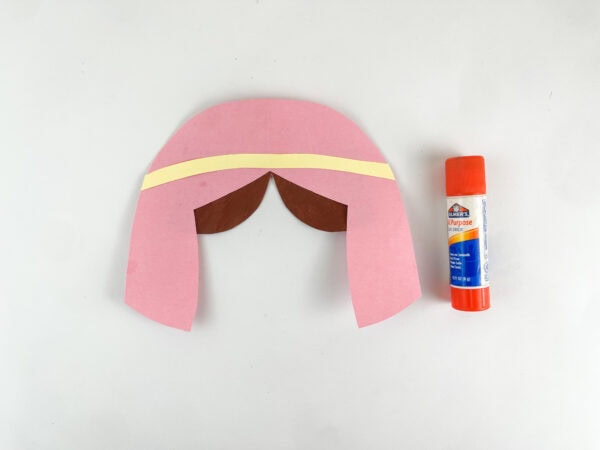
Trace the large head covering onto pink construction paper. Cut out the shape carefully. Add a thin strip of pale yellow paper across the front of the pink covering.
Glue the brown hair underneath the pink head covering so that a small portion of hair shows around Sarah’s face.
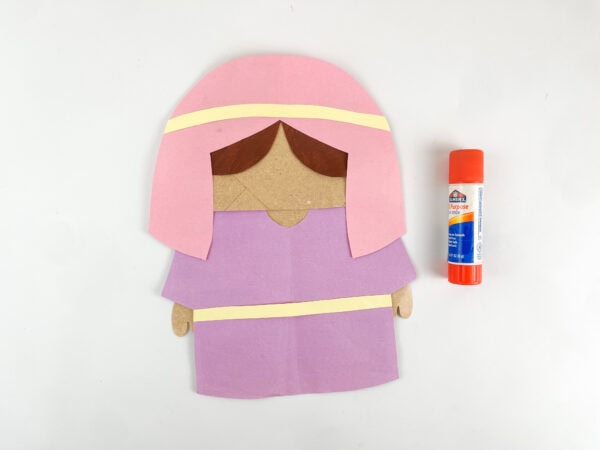
5. Glue the Head Covering Onto Sarah
Position the completed pink head covering around Sarah’s face. Glue it securely to the paper bag. Glue the two googly eyes to Sarah’s face.
Make sure the opening leaves enough room for her eyes, nose, and smile.
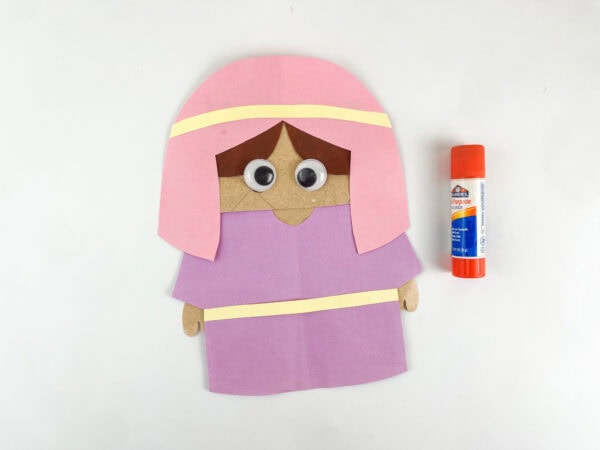
6. Draw Sarah’s Face
Use a black marker to draw a small nose and smile.
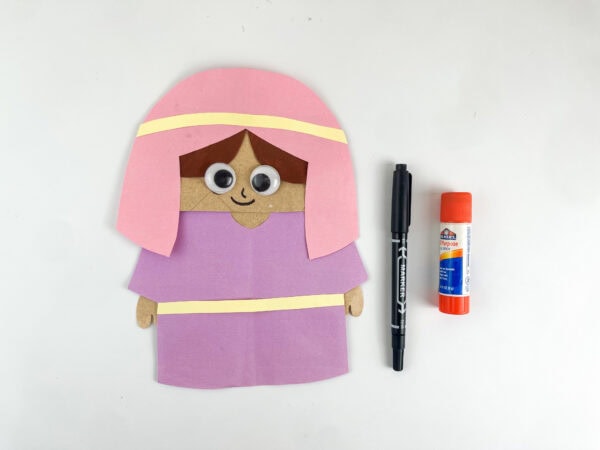
You can also let children personalize their Sarah puppet by adding rosy cheeks or other small details.
Once the glue has dried, your Sarah Bible paper bag puppet is complete.
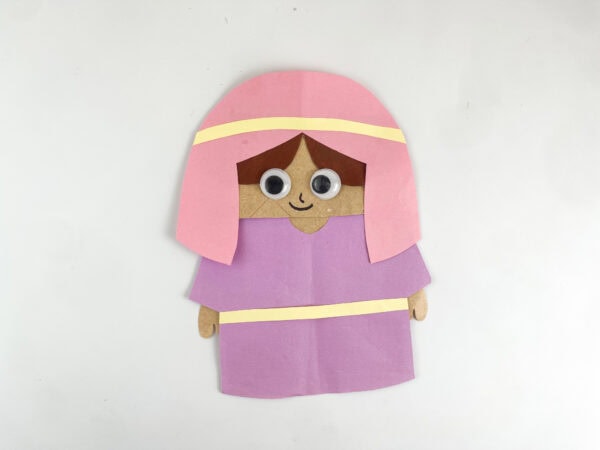
Ways to Use the Sarah Puppet During a Bible Lesson
Don’t put the craft away as soon as the glue dries.
The paper bag design makes Sarah especially useful for Bible storytelling.
Children can use their puppet while you read Genesis 18 and have Sarah react when she hears that she will have a child.
You could also have children use Sarah to retell the story afterward.
Ask simple questions such as:
Who was Sarah married to? Abraham.
What did God promise Abraham and Sarah? They would have a son.
What was their son’s name? Isaac.
Did God keep His promise? Yes.
What can Sarah’s story teach us? God keeps His promises.
These questions are simple enough for preschool and kindergarten children but can also be used to start a deeper discussion with elementary-age students.
Bible Verse to Use With This Sarah Craft
One of the best verses to pair with this lesson comes from Genesis 18:14:
“Is anything too hard for the Lord?”
This verse connects beautifully with the craft because Sarah originally found God’s promise difficult to believe.
You could write the verse on the board before starting the activity or print it on a small card for children to take home with their Sarah puppet.
For younger kids, use the shorter phrase:
Nothing is too hard for God.
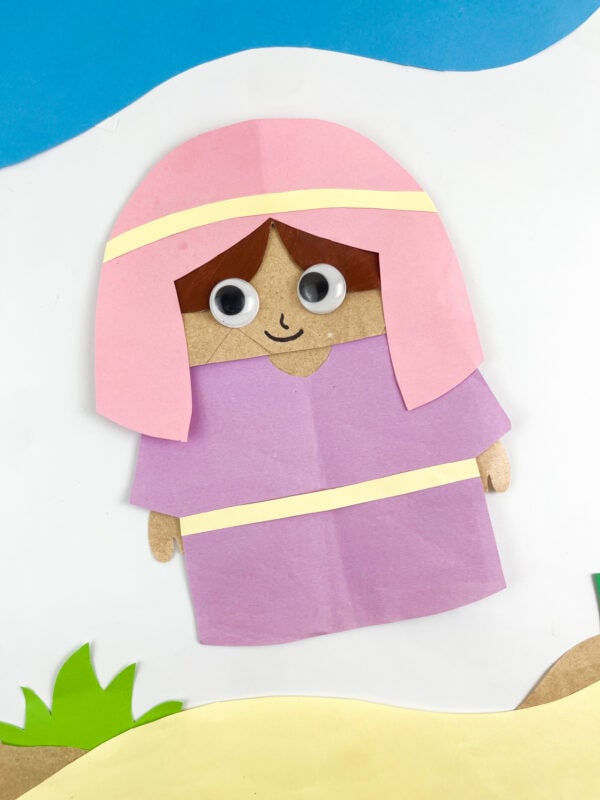
Sarah Craft for Sunday School
If you’re making this craft with a Sunday school class, a little preparation can make the activity much easier.
For preschoolers, pre-cut most of the detailed shapes and let the children concentrate on assembling and gluing Sarah.
Kindergarten and early elementary children may be able to cut the larger pieces independently.
Older elementary students can trace, cut, and assemble the entire puppet themselves.
You can also prepare separate trays or small bags containing all the paper pieces for each child. This keeps pieces from getting mixed together during a busy classroom activity.
Pair the craft with a short reading from Genesis and finish by allowing each child to show his or her finished Sarah puppet.
Make the Matching Abraham Bible Craft
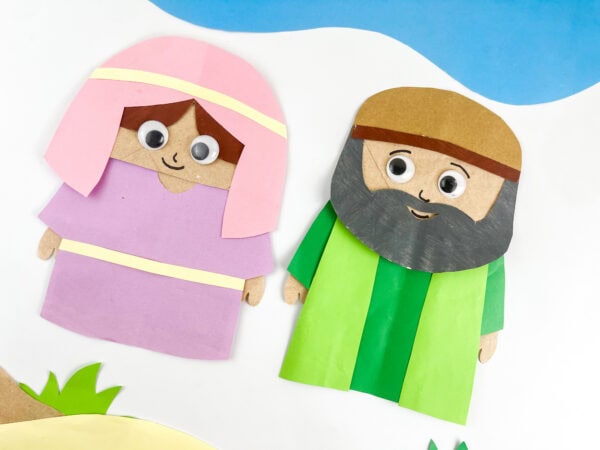
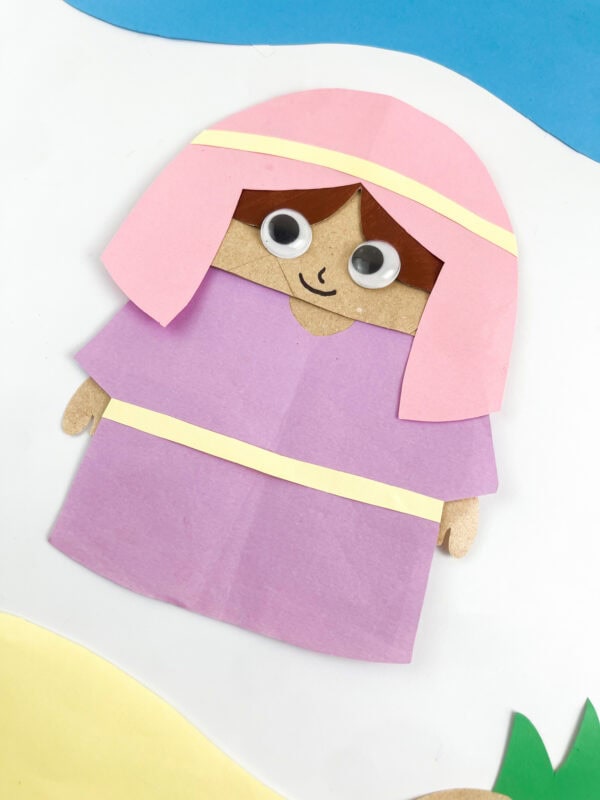
Sarah’s story is closely connected with Abraham’s, so I created a matching Abraham Bible craft that uses the same paper bag puppet style.
Making both characters gives children an even better way to act out and retell the story of God’s promise to Abraham and Sarah.
You could make Sarah during one Sunday school lesson and Abraham during another, then bring both characters together when teaching about God’s promise and the birth of Isaac.
The two finished crafts also make a cute classroom display for an Old Testament or Genesis Bible unit.
More Bible Character Crafts
If your kids enjoy making Sarah, continue building a collection of Bible paper bag characters.
This Abraham Father of Nations Craft is perfect for Sunday School.
Try the Joshua Bible Craft for Kids when teaching about courage and trusting God.
The David Bible Craft for Kids is another fun paper bag puppet for an Old Testament Bible unit.
You can also make the Cain Bible Craft and matching Abel Bible Craft when teaching about the beginning chapters of Genesis.
And don’t miss my complete collection of Bible crafts and printables for Sunday school, homeschool, children’s ministry, and family Bible study.
Do I need a printable template for this craft?
No, an outline isn’t required. You can freehand the shapes with scissors and construction paper, though a simple pattern can be helpful if you’d like tracing guides.
Who is this Sarah bible paper bag craft best suited for?
It works well for preschool through early elementary kids. Younger children may need shapes pre-cut, while older kids can usually manage the cutting and tracing themselves.
Can I use this craft outside of a church setting?
Definitely. It works just as well for homeschool Bible lessons or a simple family activity at home.
How long does the craft take to complete?
Most kids can finish in about 20–30 minutes, depending on age and how much of the cutting is done ahead of time.
What other supplies could I add to make it more creative?
Yarn for hair, fabric scraps for clothing, or stickers for extra detail are all easy add-ons if you want to dress up the basic design.
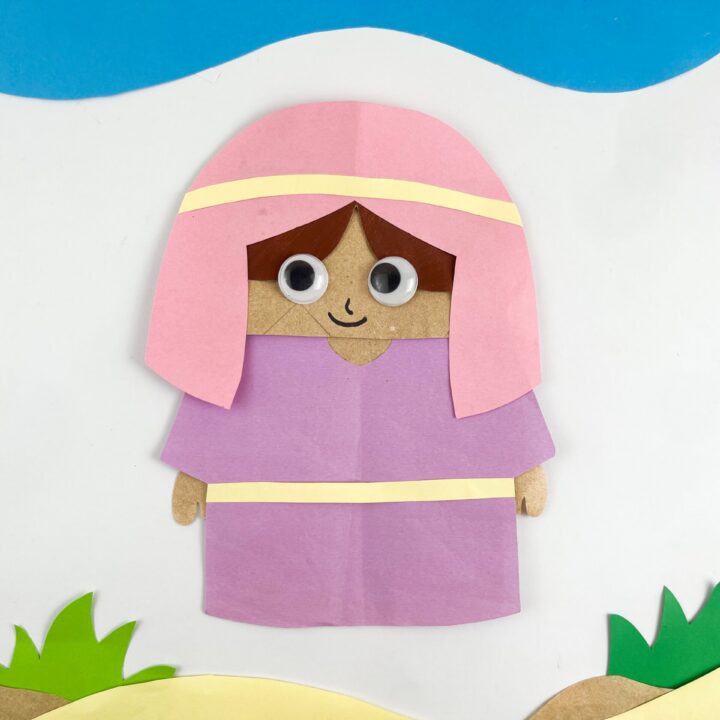
Sarah Bible Paper Bag Craft
This Sarah Bible Paper Bag Craft is an easy way for children to create a Bible character using simple craft supplies. Kids will enjoy putting together Sarah's robe, hair, and face while practicing basic crafting skills. The finished puppet can be used during Bible lessons, storytelling, or imaginative play. It's a fun activity for home, homeschool, or church. Each completed craft is a special reminder of Sarah's place in the Bible.
Materials
- Printable Sarah Template
- Paper bag
- Construction paper - in several colors
- Glue stick or glue
- Googly eyes
Tools
- Scissors
- Black Marker
Instructions
1. Cut Out the Craft Pieces
Trace and cut out the pieces you'll need from the construction paper, including the robe, hair, bangs, headband, belt, and hands. Arrange the pieces together to make sure everything is ready before assembling the craft.
2. Assemble the Outfit
Glue the robe onto the front of the paper bag. Attach the hands to each side of the robe, then glue the belt across the middle to complete Sarah's outfit.
3. Build the Head and Hair
Layer the hair, headband, and bangs together before attaching them to the top of the paper bag. Press each piece down firmly so they stay in place.
4. Add the Face
Glue the googly eyes onto the face. Then use a marker to draw a simple nose and a friendly smile to give Sarah a cheerful expression.
5. Let It Dry and Display
Allow the glue to dry completely before moving the craft. Once finished, display your Sarah puppet on a shelf, use it during a Bible lesson, or add it to a collection of Bible character crafts.
