
Reindeer Moving Eyes Craft (Free Printable Template)
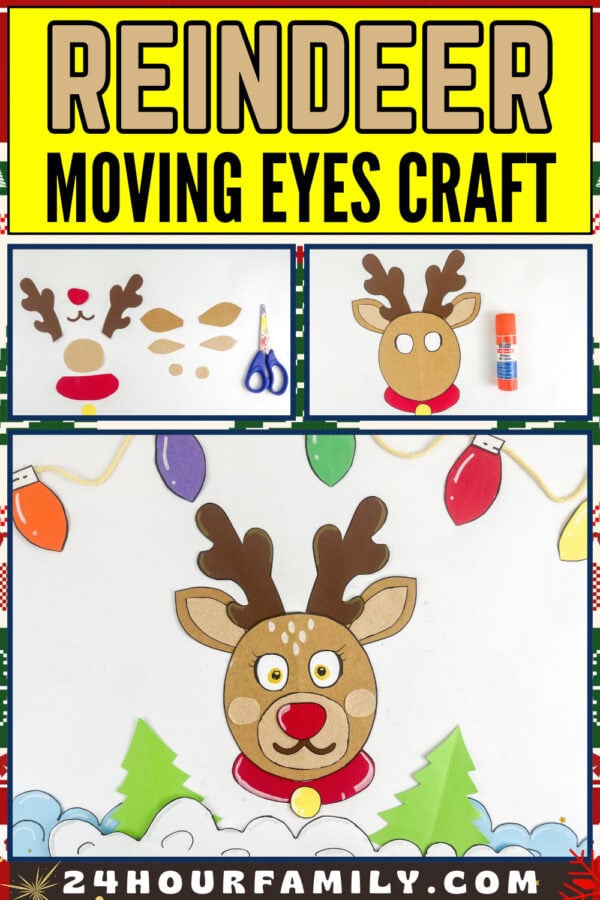
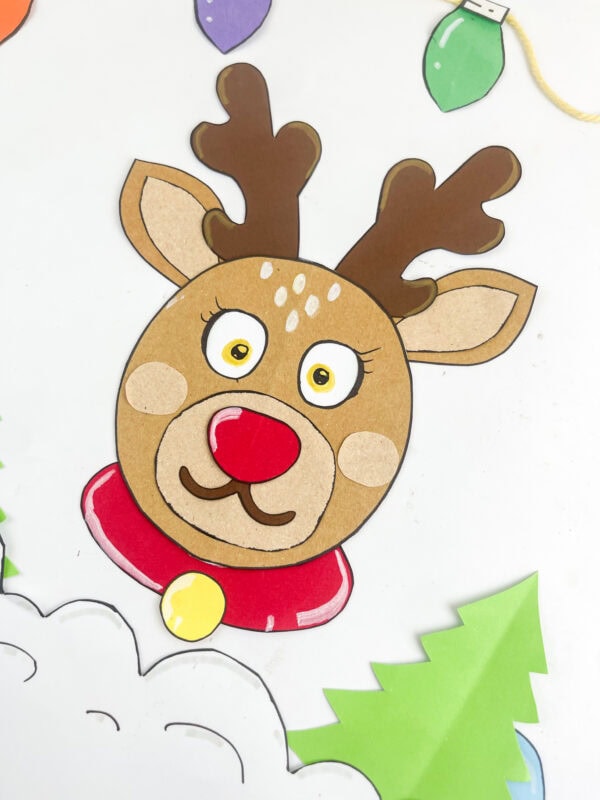
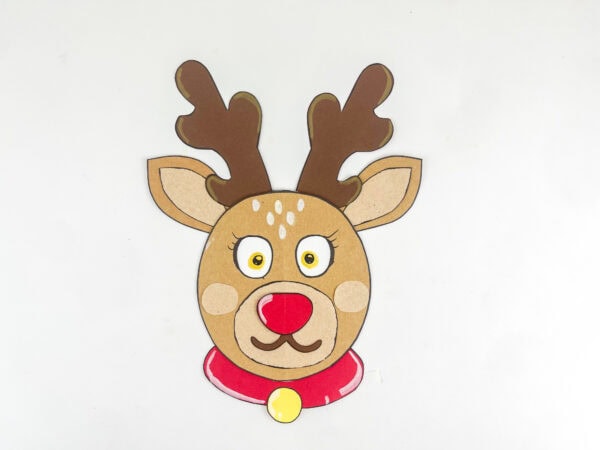
A bright red nose, tall branching ears, and eyes that peek from side to side give this paper reindeer plenty of personality! This Christmas Reindeer Moving Eyes paper craft uses a printable pattern, construction paper, and a small cardboard backing to create a character children can play with after making it.
The eyes work by sliding a loose white piece of paper behind the face. Add a red collar and a yellow paper bell, then see what your adorable reindeer spots around the room.
Make this easy Christmas craft for kids during a December craft afternoon, a homeschool lesson, or a classroom holiday activity. For more ideas to fill your craft basket, visit our Christmas crafts and printables for kids.
How Does the Sliding-Eye Mechanism Work?
Cut two eye openings in the face. A loose white paper insert sits behind them, with the pupils drawn on it. A cardboard backing holds the layers together and has a finger-access hole near the bottom.
Moving the white paper through that opening makes the pupils shift from side to side.
Keep the white insert completely unglued. Attach the face and cardboard only at the outer edges, away from the area where the paper slides.
This reindeer craft for kids works well for elementary-age children with adult help for the small openings and assembly. Preschoolers and little ones can help choose colors, glue the larger decorations, and play with the finished character while an adult prepares the moving layers.
Supplies for This Christmas Paper Craft
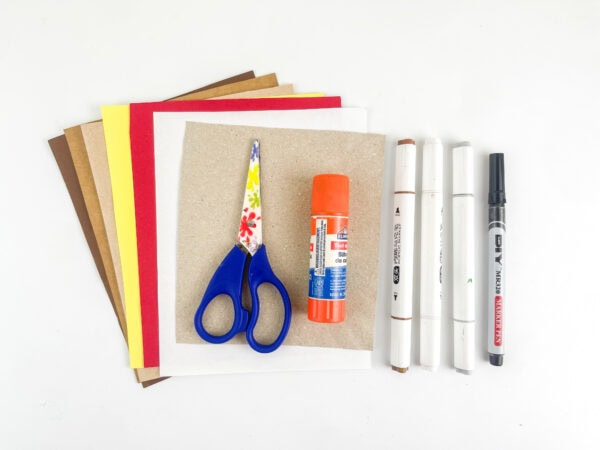
- Free printable reindeer template
- Medium brown construction paper or cardstock for the face and outer ears
- Dark brown paper or cardstock for the antlers and mouth
- Light brown or tan paper for the muzzle, inner ears, and cheeks
- Red paper for the nose and collar
- Yellow paper for the bell
- White paper for the eye insert
- Thin cardboard or a sturdy piece of cardstock paper, such as a clean cereal box panel
- Pencil
- Scissors
- Glue stick or craft glue
- Black marker
- Colored pencils, crayon, or paint pens for optional details
Use cardstock for these narrow pieces if you want the branches to hold their shape better during play. A white colored pencil or paint pen works well for the small highlights shown in the photos.
What Is Included in the Printable?
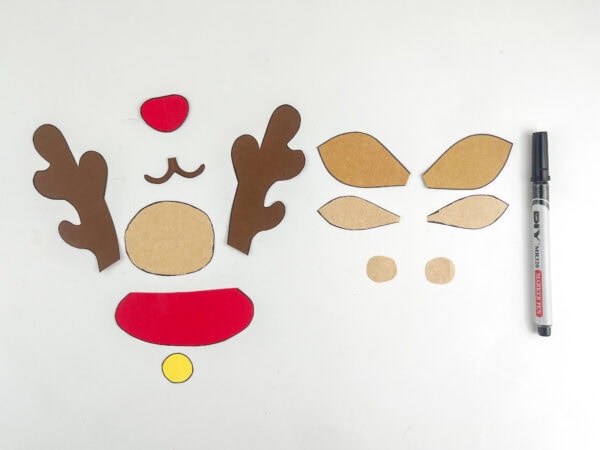
The two-page design includes the face with marked eye openings, two antlers, outer and inner ears, a muzzle, red nose, mouth, cheeks, collar, and a circle for the paper bell.
Cut the white eye insert and cardboard backing separately to fit behind the face. You will draw the pupils and finishing details by hand.
How to Make This Paper Reindeer
1. Print, Trace, and Cut the Pieces
Print both template pages at the same scale on A4 or your usual printer paper. Cut out the patterns and trace them onto your chosen paper colors.
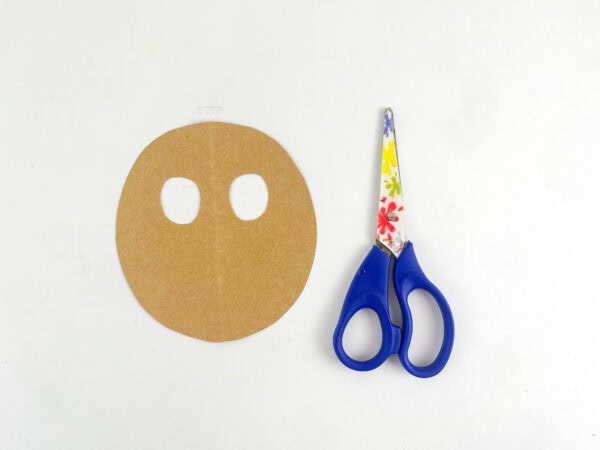
Trace the face onto medium brown paper or cardstock, then cut around it. Transfer the two eye openings to the face and have an adult help cut them out.
Cut the antlers from dark brown paper, the outer ears from medium brown, and the inner ears, muzzle, and cheeks from tan. Use red for the nose and collar and yellow for the paper bell.
You can cut the small mouth shape from dark brown paper or draw it directly onto the muzzle later.
2. Prepare the Cardboard Backing and Eye Insert
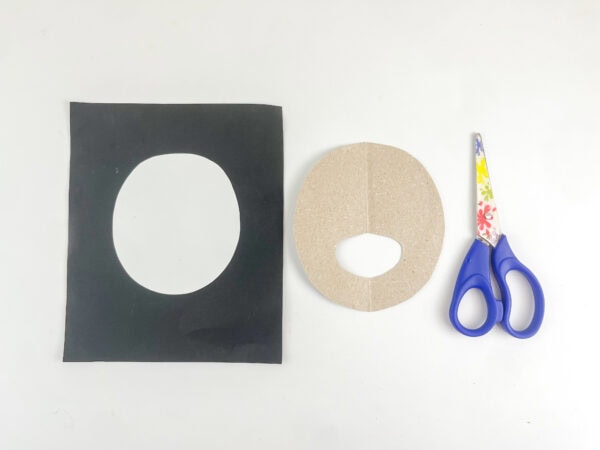
Use the face as a guide to cut an oval shape from cardboard for the backing that will hide behind it. Have an adult cut an oval finger-access hole in the lower part of the backing.
Cut a smooth white paper oval slightly smaller than the backing. It should cover both eye openings while leaving a narrow outer attachment border.
Place the white paper on the cardboard and lay the face over it without glue. Move the insert a small distance in each direction to check that it stays behind both eye openings.
3. Assemble the Sliding Layers
Stack the paper pieces with the cardboard backing on the bottom, the loose white insert in the middle, and the face on top.
Check that you can touch the back of the insert through the finger hole. The paper should move a little without catching on the edges.
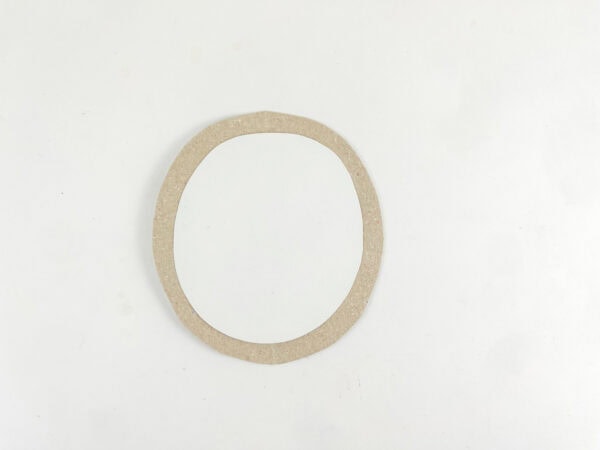
Apply a narrow line of glue only where the outer edge of the cardboard meets the back of the face, outside the insert’s sliding area. Do not glue the white paper.
Attach the layers without pressing them tightly together. Let the glue set, then test the movement through the opening in the back.
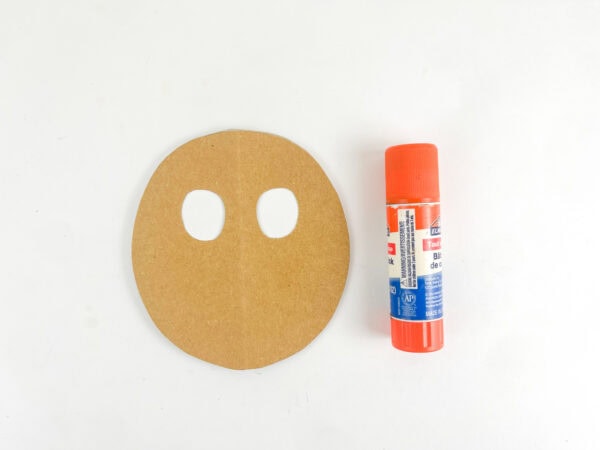
4. Outline the Face and Decorative Pieces
Use a black marker to outline the face and eye openings. Outline the ears, muzzle, collar, nose, and bell if you want them to match the sample’s bold edges.
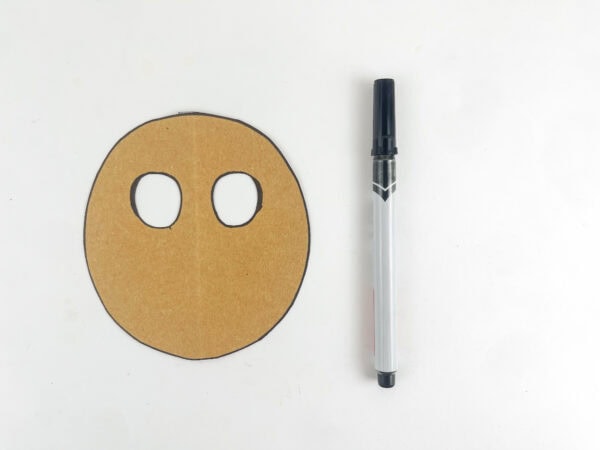
For younger children, an adult can handle the small outlines while children arrange the larger pieces. Dry-fitting the decorations before gluing helps keep everything balanced.
5. Attach the Ears, Antlers, and Collar
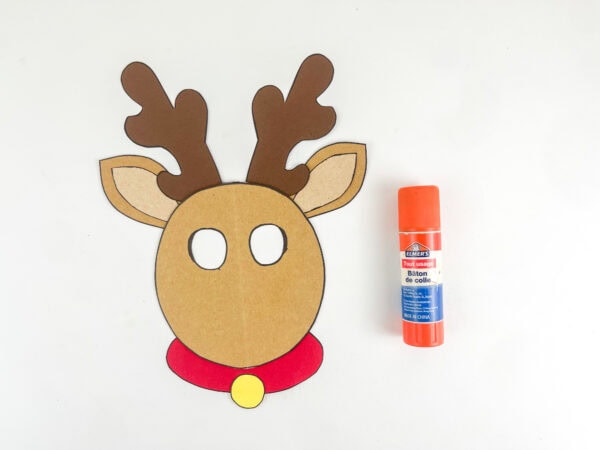
Glue each tan inner ear onto a medium brown outer ear. Attach the assembled ears behind the upper sides of the face.
Position the two antlers behind the top of the head, between the ears. Glue their bases to the back, keeping the attachment points clear of the finger hole and moving insert.
Attach the red collar below the face and add the yellow paper bell at the center.
Hold the character by its face edges when assembling it. The narrow branches can bend if used as handles.
6. Add the Muzzle, Nose, and Cheeks
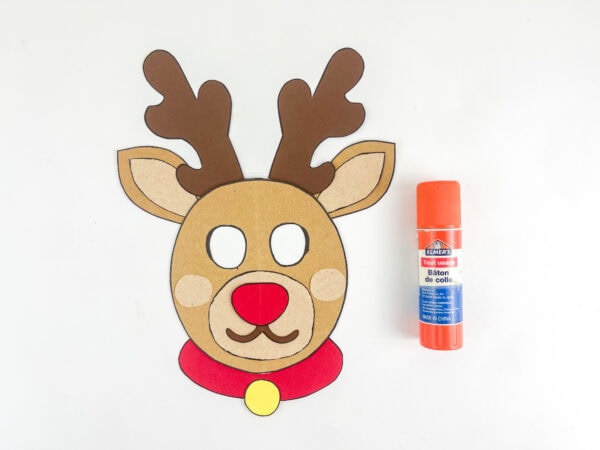
Glue the tan muzzle onto the lower part of the face, below the eye openings. Add the red nose near the top of the muzzle.
Attach the curved mouth piece beneath the nose, or draw the smile with a dark marker. Add one tan cheek on either side of the face.
A bright nose gives this cute reindeer craft a Rudolph-inspired look. Children can choose black or brown instead for a different silly reindeer.
7. Draw the Pupils and Finishing Details
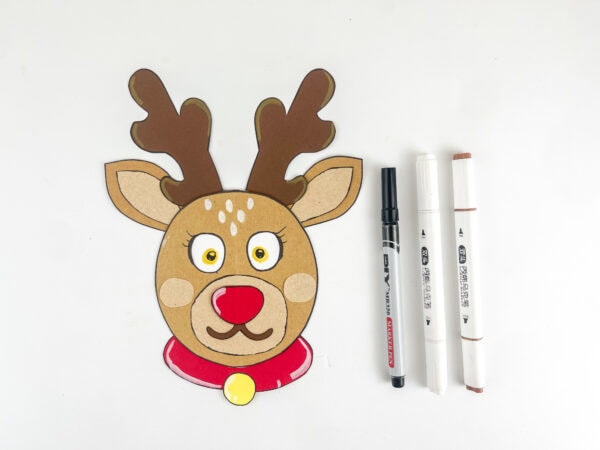
Center the white insert behind the eye openings and hold it still. Draw one black pupil through each opening onto the white paper, making both eyes look in the same direction.
The photographed character has yellow around its pupils. To copy that detail, add a small yellow iris around each black pupil, keeping the color on the sliding insert. Leave some white visible around the eyes.
Let the ink dry, then add eyelashes or eyebrows. Use a white colored pencil or paint pen for small forehead marks and highlights on the nose and collar.
8. Test the Sliding Eyes
Once the glue and marker details are dry, hold the reindeer gently along the edges of its face. Reach through the hole in the cardboard backing and slide the white paper slightly from side to side.
Watch the eyes change direction while the head stays still. Small movements are enough. If the insert has extra clearance, try a slight upward or downward movement, too.
Tips for Smooth Eye Movement
Test the moving insert before attaching the ears, upper decorations, and collar. It is easier to adjust the layers while the edges are accessible.
If the white paper will not move:
Check whether glue has touched the insert. Gently free it if you can do so without tearing the face, or replace a damaged insert.
If the insert catches on an edge:
Trim it slightly to create more room. It must still cover both eye openings during the small sliding movement.
If the layers feel too tight:
Avoid squeezing the face and backing together. Small cardstock spacers along the outer attachment edges can create extra clearance if needed. Keep them outside the sliding area.
If the pupils disappear:
Move the paper a shorter distance. The eyes only need a small shift to change the expression.
If the antlers bend:
Use dark brown cardstock and let the glue at the bases dry before playing. Hold the face rather than lifting the craft by the branches.
Christmas Activities to Try After Crafting
Play “What Does It See?”
Place a few festive objects or picture cards on a table, such as a Christmas tree, snowman, or Christmas card. Have your child move the eyes toward one object while you guess what it sees.
Take turns describing the object with clues such as its color, shape, or size. This easy, fun activity gives kids a playful reason to use descriptive words.
Make Up a Holiday Adventure
Give the reindeer a name and ask where it is going. Start a story with, “Our jolly friend looked around the snowy forest and spotted…”
Children can finish the sentence, move the eyes, and decide what happens next. Older children can write a few sentences to go with their handmade paper craft.
Plan a Classroom Craft Session
For a classroom or homeschool co-op, cut the cardboard finger holes ahead of time and help with the eye openings. Prepare one finished sample and one unglued set of layers to show how the mechanism works.
Younger children can glue the muzzle, cheeks, and collar while an adult checks each slider. Keep the upper pieces flat on the table until their glue dries.
For a follow-up activity during the holiday season, print our Christmas memory matching game and take turns finding pairs after craft time.
Get the Free Reindeer Moving Eyes Craft Printable
Print the two-page reindeer template to make the face, head pieces, ears, muzzle, nose, mouth, cheeks, collar, and paper bell.
Gather your colored paper and cardboard, then follow the step-by-step instructions above to add the hidden eye insert.
More Reindeer Crafts for Kids
Try another reindeer project using materials from your craft supplies:
- Reindeer paper bag craft: Make a paper bag reindeer for more holiday crafting.
- Reindeer handprint craft: Create a keepsake using a child’s handprint shape.
- Reindeer toilet paper roll craft: Turn a cardboard tube into a standing Christmas character.
- Reindeer popsicle stick ornament: Make a reindeer decoration to hang on the tree.
How Do the Eyes Move?
The pupils are drawn on a loose white paper insert behind the face. A finger opening in the cardboard backing lets you slide the insert, shifting the pupils behind the two eye holes.
What Does the Printable Include?
The two-page template includes the face with eye openings, decorative head pieces, outer and inner ears, muzzle, nose, mouth, cheeks, collar, and paper bell. Cut the backing and moving insert separately to fit the face.
Is This Craft Suitable for Preschoolers?
Preschoolers can help decorate and glue the larger pieces, but an adult should cut the small openings and help assemble the moving layers. For another Christmas project to try together, see our reindeer paper plate craft.
Do I Need Googly Eyes or a Real Bell?
No. The eyes are drawn on the moving insert, and the yellow bell is a paper circle. This version does not need googly eyes, metal bells, or paper fasteners.
Can I Make a Rudolph Version?
Yes. Use a bright red paper nose for a Rudolph-inspired character. The pattern also works with a brown or black nose if children want to use their creativity to make their own design.
Why Are the Eyes Stuck?
The insert may be glued down, too large, or pressed too tightly between the face and backing. Keep it unglued, leave room for a small sliding movement, and test it before decorating.
Can I Hang Up the Finished Project?
Yes, but children need access to the back opening to move the eyes. Take the craft down for play, or keep it as a handheld character. Avoid attaching hanging materials over the finger-access hole.
Reindeer Moving Eyes Craft
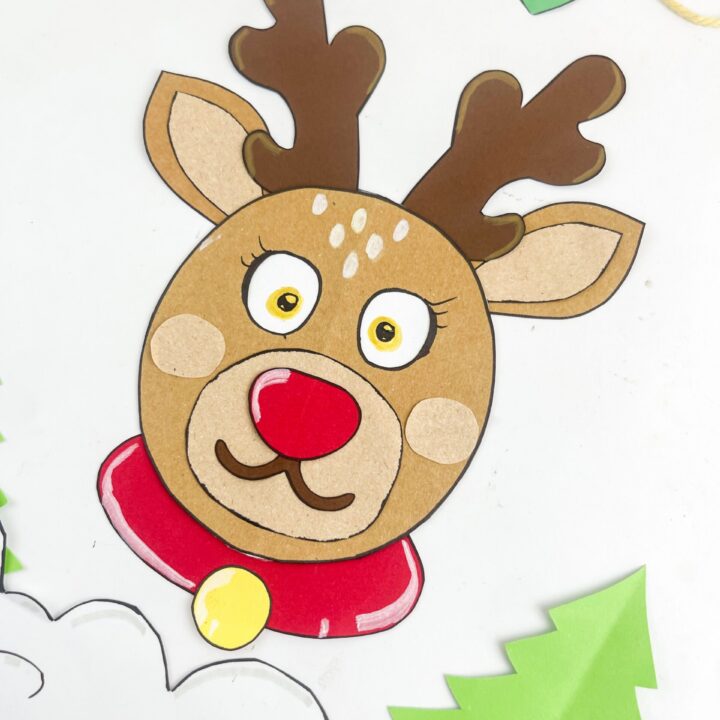
Make a paper reindeer with antlers, a red nose, and eyes that move from side to side. This Christmas craft uses a printable template, a cardboard backing, and a loose white paper insert operated through a hole in the back.
Materials
- Two-page printable reindeer template
- Medium brown paper or cardstock for the face and outer ears
- Dark brown paper or cardstock for the antlers and mouth
- Tan paper for the muzzle, inner ears, and cheeks
- Red paper for the nose and collar
- Yellow paper for the paper bell
- Smooth white paper for the eye insert
- Thin cardboard
- Glue stick or craft glue
Tools
- Printer
- Pencil
- Scissors
- Black marker
- Colored pencils or paint pens, including white and optional yellow
Instructions
- Print both template pages at the same scale. Cut out the patterns, trace them onto the chosen paper colors, and cut out the reindeer pieces.
- Transfer the eye openings to the brown face. Have an adult help cut out the two openings.
- Cut an oval cardboard backing to fit behind the face. Have an adult cut an oval finger-access hole in the lower part of the backing.
- Cut a smooth white paper insert slightly smaller than the backing. It must cover both eye openings while allowing a little sliding movement.
- Stack the cardboard, loose white insert, and face. Check that the insert slides and can be touched through the back opening.
- Glue the cardboard to the back of the face only at the outer attachment edges, outside the sliding area. Do not glue the white insert or press the layers tightly together. Let the glue set and test the movement.
- Outline the face and decorative pieces with black marker. Glue the tan inner ears onto the brown outer ears.
- Attach the ears behind the upper sides of the head and the antlers behind the top. Keep the back opening and moving insert clear. Glue the red collar below the face and add the yellow paper bell.
- Attach the tan muzzle below the eye openings. Add the red nose, mouth, and cheeks. Draw the mouth instead if the paper piece is too small to cut comfortably.
- Center the white insert and hold it still. Draw a black pupil through each eye opening onto the white paper, positioning both to look in the same direction. Add yellow around the pupils if desired and allow the ink to dry.
- Draw eyelashes or eyebrows on the face and add optional white forehead marks and highlights.
- Allow the craft to dry. Hold it by the face edges and use a finger through the back opening to slide the white insert gently from side to side.
Notes
- Cut the backing and moving insert separately; these are not provided as template pieces.
- Keep the white eye insert completely unglued.
- Adults should help cut the small openings and assemble the slider.
- Cardstock helps the antlers stay upright. Do not lift the craft by the antlers.
- The bell is made from paper; no metal bell is needed.
- Times are estimates and do not include variable drying time.
