
Turkey Paper Bag Craft With Free Printable Template
Turn a simple brown lunch bag into a colorful turkey paper bag craft for Thanksgiving. Children can cut out the provided pattern pieces and arrange the eyes, beak, wattle, feet, and colorful paper tail. When the adhesive dries, the finished project becomes a turkey paper bag puppet for stories, songs, and pretend play.
This inexpensive Thanksgiving craft is easy to prepare for preschool, kindergarten, elementary classrooms, homeschool, or a family activity afternoon. The finished project also gives children a fun way to enjoy seasonal pretend play. Find the free pattern near the end of this post.

Easy Paper Bag Turkey Craft for Kids
Paper sack characters are a simple project for young children but open-ended enough for kids of all ages to personalize. A brown paper sack already provides the bird’s body and a movable flap for its face. Children only need to add the construction paper details and tail fan.

While making this paper bag turkey, children can practice:
- Tracing and cutting shapes
- Matching each color
- Arranging pieces in order
- Gluing small paper parts
- Following step-by-step instructions
- Fine motor skills
- Storytelling and imaginative play
Most of the materials are common classroom or art supplies, making this an affordable activity for a large group during the holiday season.
Find more seasonal projects and craft ideas in our collection of Thanksgiving crafts and printables.
This post may contain affiliate links. As an Amazon Associate and a participant in other affiliate programs, I earn a commission on qualifying purchases. Read our disclosure policy here.
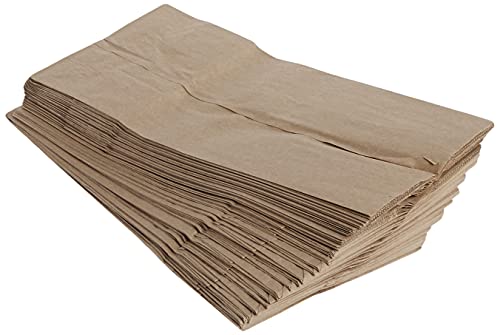
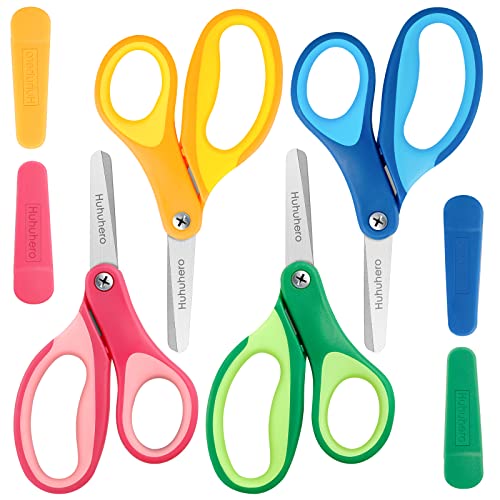
AJM Brown Paper Lunch Bags 40 Count Crafty DAB GLUES DAB N STIC SchoolElmer’s Disappearing Purple School Glue Sticks Washable 22 Grams 3 CountHuhuhero Kids Scissors, 5” Safety Toddler Scissor Blunt Tip with Cover, Small Craft Cutting Paper Scissors for Child Kid Age 4-7 8 9, Assorted Colors, 4 PackCrayola Construction Paper, 120 SheetsCrayola 587722 Non-Washable Markers, Broad Point, Classic Colors, 10/Set




Supplies for a Paper Bag Turkey Puppet
- Free turkey pattern
- One brown paper lunch sack
- Construction paper or cardstock in red, orange, yellow, and other fall colors
- White and black paper for the eyes, if needed
- Pencil
- Child-safe scissors
- Glue stick, school adhesive, or double-sided tape
- Black marker, optional
- Googly eyes, optional
- Crayons, markers, or stickers for decorating, optional
A standard paper sack works best for a handheld character. If you use a larger grocery sack, trim it to a manageable size before beginning.

How to Use the Free Turkey Template
Print the free pattern at 100 percent or Actual Size. Cut out the pattern pieces, trace them onto the suggested shades of construction paper, and cut out the traced forms.
The pattern provides the parts needed for assembly. If your version includes a pilgrim hat, children can add it as an optional Thanksgiving-themed detail. They can also skip the hat for a traditional design.
Print the pattern on cardstock if you plan to reuse it with a class or homeschool group. For more turkey outlines and tail options, visit our collection of free printable turkey templates.
How to Make a Turkey Paper Bag Craft
Step 1: Position the Paper Bag
Place the brown sack flat with the folded bottom flap facing up. The flap becomes the bird’s movable head and mouth area. The long section beneath it forms the body.
Make sure the opening remains at the bottom so a child can slide a hand inside and operate the character.
Step 2: Prepare the Turkey Pieces
Carefully separate each piece from the pattern. Use red, orange, yellow, or other autumn-colored paper to outline the feather pieces. Outline the beak on yellow or orange paper, use red for the wattle, and choose orange for the feet.

Cut white and black eye pieces or use googly eyes. If the pattern includes a separate head or hat, trace and cut those pieces now.
Step 3: Make the Bird’s Face
Glue the eyes near the upper part of the folded flap. Position the beak under the eyes, then set the red wattle along its side or underneath.

Use a black marker to add pupils, eyebrows, or eyelashes. If you are adding a pilgrim hat, attach it above the eyes without covering the moving edge of the flap.
Step 4: Add the Feet and Wings
Attach the feet near the lower edge of the paper bag so they extend slightly below the body. If the pattern includes wing pieces, place one on each side.
Keep adhesive away from the bottom opening so children can still reach inside.

Step 5: Arrange the Feather Fan
Spread the paper pieces into a wide fan shape. Place the tallest piece in the center, then arrange the other shades evenly on both sides. Overlap the lower ends and secure them together.

Allow the fan to set for a few minutes before attaching it to the body. Children can add dots, lines, stickers, or thankful words before assembly for an extra creative touch.

Step 6: Attach the Feathers
Turn the sack over and attach the fan to the back. Position it high enough for the colorful pieces to show above and beside the Thanksgiving turkey.
Press firmly, then place the project flat until the adhesive dries. Cardstock pieces may require tacky glue or double-sided tape for a stronger hold.

Step 7: Play With Your Creation
Once everything is dry, slide one hand inside. Place your fingers inside the folded flap and your thumb beneath it to make the mouth move.
Children can make gobbler sounds, act out a Thanksgiving story, or use several characters for a classroom show.

Preschool Turkey Puppet Craft
Toddlers and preschoolers can participate in this project when the small pieces are prepared for them according to their age and skill level.
- Prepare the tail sections, eyes, beak, wattle, and feet in advance.
- Arrange the pieces in separate labeled containers.
- Use an adhesive stick to reduce dripping and paper wrinkles.
- Choose large googly eyes or enlarged paper forms.
- Limit the choices to three or four colors.
- Attach the heavy fan for the child if necessary.
- Supervise closely because small paper pieces and googly eyes can be choking hazards.
Ask children to name each shade or count the pieces as they work. You can also introduce simple position words such as above, below, beside, and behind.
Pair the finished character with these preschool turkey coloring pages for a low-prep Thanksgiving activity center.
Classroom Preparation Tips
This paper bag craft is easy to organize for a class because children do not need paint or drying time.
Before the activity:
- Print enough patterns for the group.
- Write each child’s name inside a sack.
- Pre-cut the small pieces for younger students.
- Sort tail and facial pieces by shade.
- Place adhesive sticks and markers at each work area.
- Make one sample to demonstrate how to place the pieces.
Set up an assembly line with separate stations for the face, body, and tail pieces. This helps large groups work without crowding around one supply table.
When the projects are finished, invite students to introduce their creations to the class or perform a short Thanksgiving show.
Thanksgiving Learning and Play Ideas
The finished bag craft can become more than a display piece. Use the characters for these simple activities during November:
Practice Storytelling
Ask each kid to name the bird and tell a short story about where it lives, what it eats, or what happens on Thanksgiving morning.
Sing a Turkey Song
Children can move the character’s mouth while singing a familiar holiday song, bringing a little holiday spirit to the activity.
Make a Gratitude Turkey
Write one thankful word on each feather. Younger children can dictate their answers to an adult. Continue the theme with the Thanksgiving thankful tree printable or printable thankful turkey craft.
Practice Counting and Patterns
Count the tail pieces or arrange them in a repeating red, orange, yellow pattern. Older children can use their creativity to make more complex patterns.
Put On a Puppet Show
Make several paper bag animal characters and use a table, large box, or doorway as a simple theater.

Ways to Personalize the Paper Bag Turkey
Every creation can look different. Encourage children to use the pattern as a starting point and add their own details and inspiration.
- Use rainbow shades instead of traditional fall colors.
- Cut tail pieces from patterned scrapbook paper.
- Add stickers, dots, stripes, or fingerprints.
- Write family members’ names on the pieces.
- Personalize the character with yarn, glasses, a bow tie, or a handmade headband.
- Use artificial fall leaves in place of paper pieces.
- Attach a child’s photo to the face for a cute keepsake.
- Add foam pieces for extra texture.
Keep decorations lightweight so the finished character remains easy to hold and move.
Puppet or Stuffed Turkey Decoration?
Leave the paper bag open if children want to use it for pretend play. Keep the opening accessible for a hand.
To make a standing display instead, fill the sack loosely with crumpled scrap paper. Fold or tape the opening closed, then display the finished bird on a Thanksgiving table, mantel, or classroom shelf. Do not stuff it if you want the flap to move like a mouth.
Troubleshooting Tips
The tail pieces fall off: Use cardstock, tacky glue, or double-sided tape. Let the fan set before attaching it to the body.
The paper tears: Apply a thin layer of adhesive and avoid pulling on the flap while the surface is wet.
The mouth will not open: Check that adhesive and decorative pieces are not covering the opening or sealing the flap to the body.
The tail bends forward: Use cardstock or attach a second strip of paper across the back of the fan for support.
The pieces do not fit: Print the pattern at 100 percent or Actual Size rather than using a setting that enlarges the page.
Tip: Let attached pieces dry before children begin playing with their finished creations.
More Turkey Crafts for Kids
- Make a turkey clothespin craft that can hold place cards or thankful notes.
- Recycle a cardboard tube with this turkey toilet paper roll craft.
- Color, cut, and assemble a build-a-turkey printable.
- Create a keepsake with this printable turkey handprint craft.
- Combine paint and movement in a rocking turkey fingerprint craft.
- Make a festive turkey hat craft children can wear.

Download the Free Paper Bag Turkey Template
This paper bag turkey craft combines an inexpensive paper craft with imaginative Thanksgiving play. Download the free resource using the button below, choose your favorite shades, and put together an adorable turkey at home, in preschool, or in the classroom. It is a fantastic way to celebrate the holiday with a hands-on project.
How do you make a turkey puppet from a paper bag?
Lay the brown sack flat so the folded bottom section faces upward. Arrange the eyes, beak, and wattle across the folded section. Attach feet and wings to the body, then secure a fan of colorful pieces to the back. Keep the bottom open so the finished character can be operated by hand.
Which Paper Bag Size Works Best?
A standard brown sack fits most children’s hands and works well with the pattern. You can trim a grocery sack, but it may feel too large for young children to operate easily.
Is This Turkey Craft Suitable for Toddlers?
Toddlers can help place large pre-cut pieces with close adult supervision. Adults should handle the cutting and any small decorations. Googly eyes and other small supplies can be choking hazards.
Can I Create This Without Using the Pattern?
No. You can draw your own pieces, making oval tail sections, a triangular beak, a teardrop-shaped wattle, and a pair of simple feet. The pattern makes the pieces faster to prepare and easier to size consistently.
What glue works best on paper bags?
A glue stick works well for lightweight construction paper. Use tacky adhesive or double-sided tape for cardstock, foam, or several overlapping layers.
How Can I Get the Free Pattern?
Use the download form or button below to get the pattern. Review the included terms and instructions before making classroom copies or sharing the file.

Turkey Paper Bag Craft
Use a free printable template and colorful construction paper to turn a brown lunch bag into a Thanksgiving turkey puppet.
Materials
- Free printable turkey template
- One brown paper lunch bag
- Construction paper or cardstock in fall colors
- White and black paper or googly eyes
- Pencil
- Glue stick, school glue, or double-sided tape
- Black marker, optional
- Crayons, markers, or stickers, optional
Tools
- Printer
- Child-safe scissors
Instructions
- Place the paper bag flat with the folded bottom flap facing up.
- Print the turkey template at 100 percent or Actual Size.
- Cut out the pattern pieces and trace them onto the appropriate paper colors.
- Cut out the eyes, beak, wattle, feet, wings, and feathers.
- Glue the eyes, beak, and wattle to the bag flap to create the face.
- Attach the feet near the lower edge of the bag and add the wings to the sides.
- Arrange the colorful feathers in a fan and glue their lower ends together.
- Attach the feather fan to the back of the paper bag.
- Add a hat or other decorations if desired.
- Let the glue dry, then slide a hand inside the bag to operate the puppet.
Notes
- Pre-cut the smaller pieces for toddlers and preschoolers.
- Use cardstock or tacky glue for a stronger feather fan.
- Keep the bag opening clear if the turkey will be used as a puppet.
- Stuff the bag with crumpled paper only when making a standing decoration.
- Children can write thankful words on the feathers.
