
Nature’s Classroom: How to Build a Plastic Bottle Greenhouse for Kids
Gardening is a fantastic way to introduce kids to the wonders of nature, science, and sustainability. But what if you don’t have a backyard or the weather isn’t ideal for outdoor planting? The solution is simple: build a plastic bottle greenhouse!
This easy, eco-friendly craft is perfect for kids and provides a hands-on way to learn about plant growth, recycling, and the importance of caring for our environment. Plus, it’s a lot of fun! In this blog post, we’ll walk you through the steps to make your 2-liter bottle greenhouse and share tips for making this activity educational and engaging for kids.
Build a Plastic Bottle Greenhouse – Homeschool Project
There’s a big problem with the number of water bottles in landfill sites each year. But instead of tossing them in the bin, you can reuse and upcycle them to make a free greenhouse! Seriously, it’s the perfect way to turn trash into something magical.
Whether you want a small greenhouse for your kitchen herbs or a larger one for your community garden, using PET bottles offers some surprising benefits:
Insulation: The air trapped inside each bottle provides excellent insulation, helping to protect plants from frost and strong winds.
Durability: Believe it or not, this greenhouse made from bottles can last for years if properly constructed.
Sustainability: You’ll help reduce your carbon footprint by giving new life to old bottles.

How to Build a Greenhouse Using Plastic Bottles
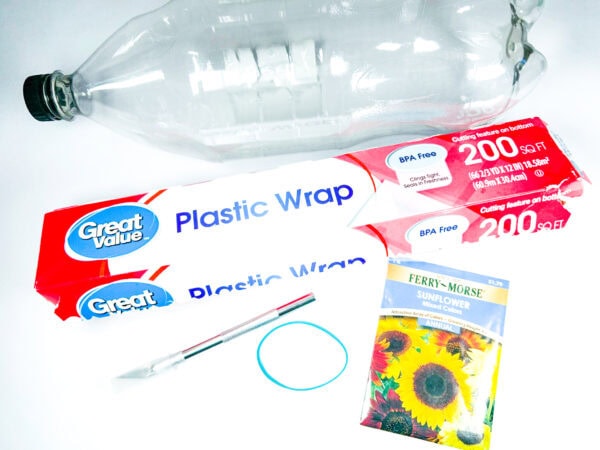
Before you get started, gather the following supplies:
- Empty and clean 2-liter bottles (1 per greenhouse)
- X-acto knife (adult use only)
- Plastic wrap
- Rubber band
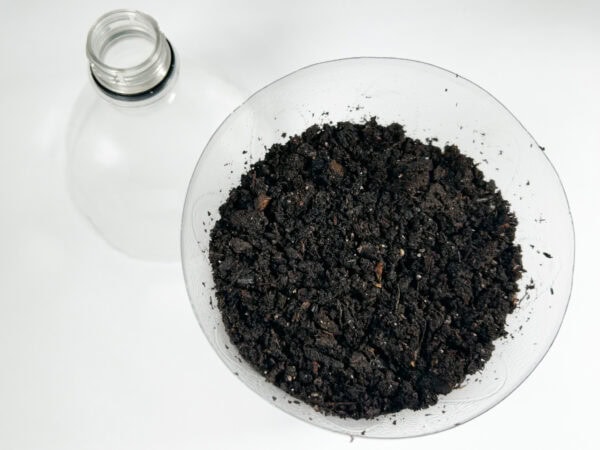
- Potting soil
- Seeds (sunflowers work great for this project!)
- Spray bottle filled with water
- Optional: Plastic tray to catch water
Before you start, collect enough bottles—this is the most time-consuming part. You’ll need both the top and the bottom of each bottle. Once you have your materials, the fun begins! The bottles act as individual bricks, which you’ll stack and secure around a frame.
Instructions:
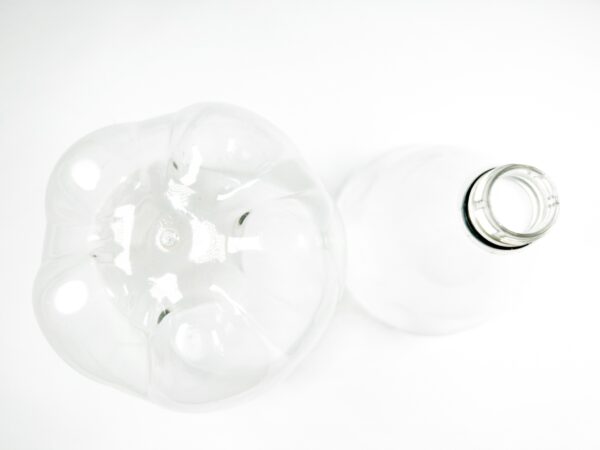
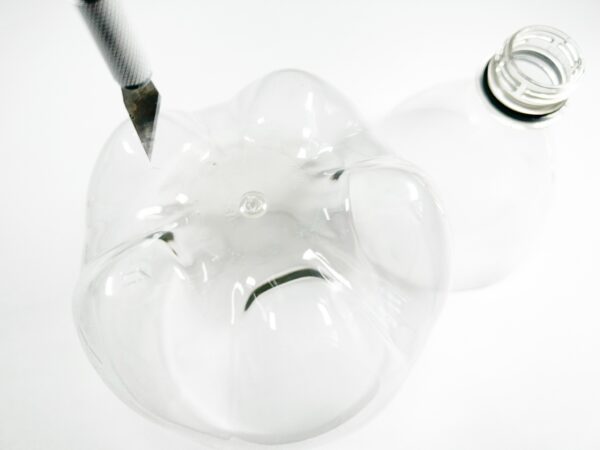
Step 1. Prepare the 2 Liter Bottle
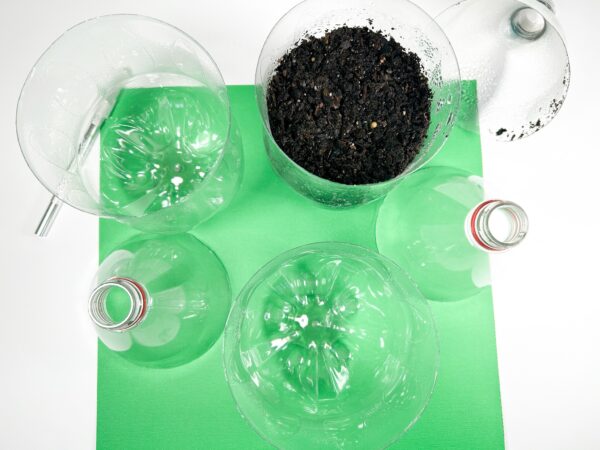
Start by thoroughly cleaning your 2-liter bottle to remove any residue. Let it dry completely. Then, carefully cut out the middle section of the bottle using an X-acto knife (adults only for this part!). You’ll end up with the top and bottom half—set aside the middle piece.
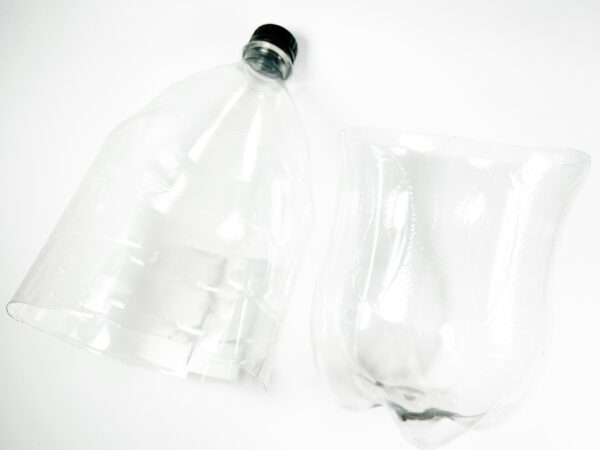
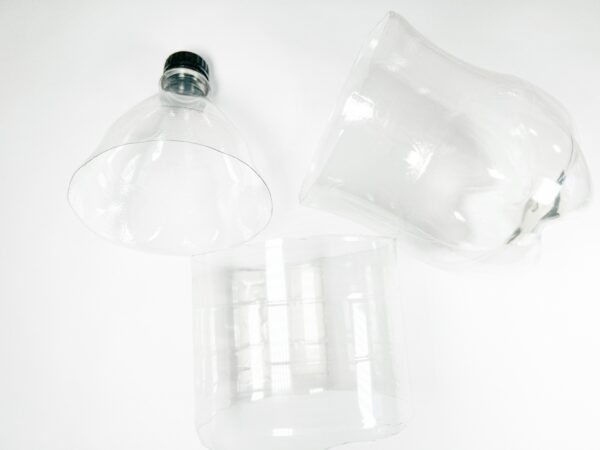
Cut a few small holes in the bottom half for drainage. These will allow excess water to escape and help keep the soil from becoming waterlogged.
Step 2. Assemble the Greenhouse
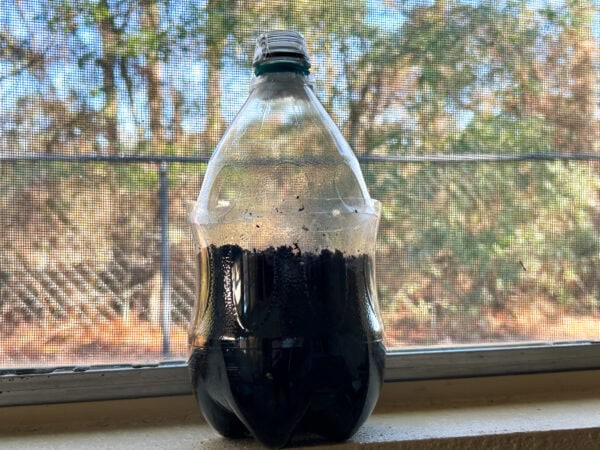
Place the bottle’s top half upside down upside down into the bottom half. This forms a snug, dome-like structure. The top acts as a greenhouse cover, trapping warmth and moisture, which helps promote healthy plant growth.
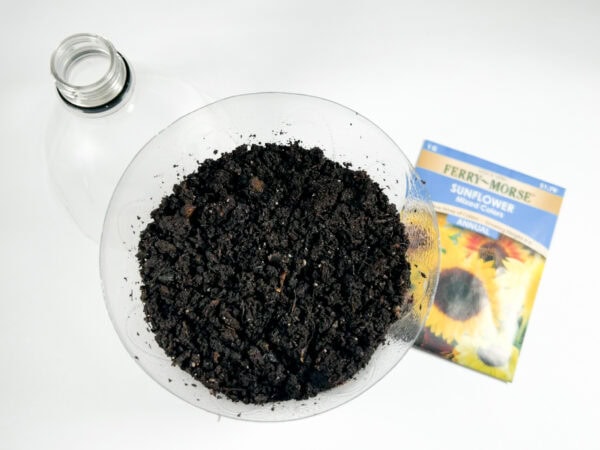
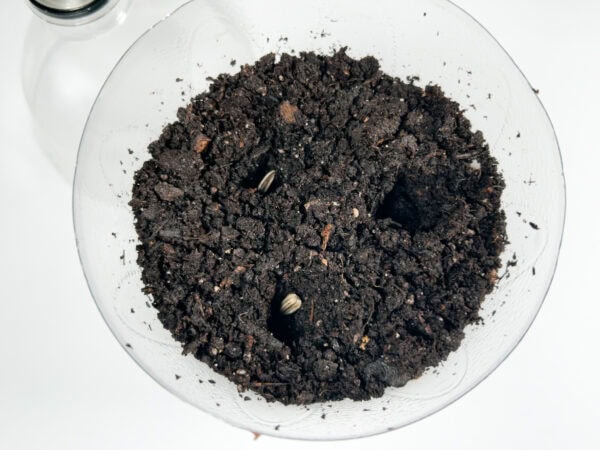
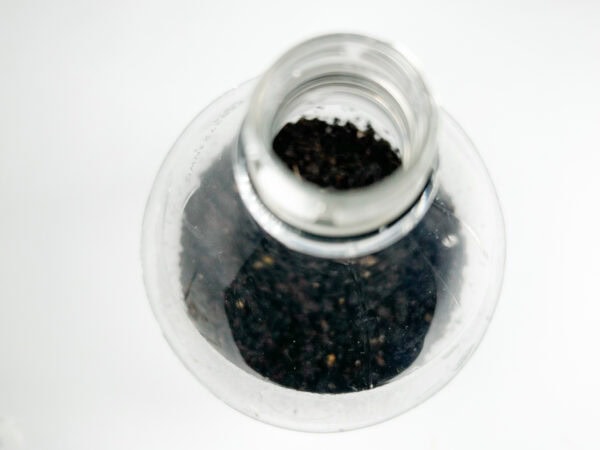
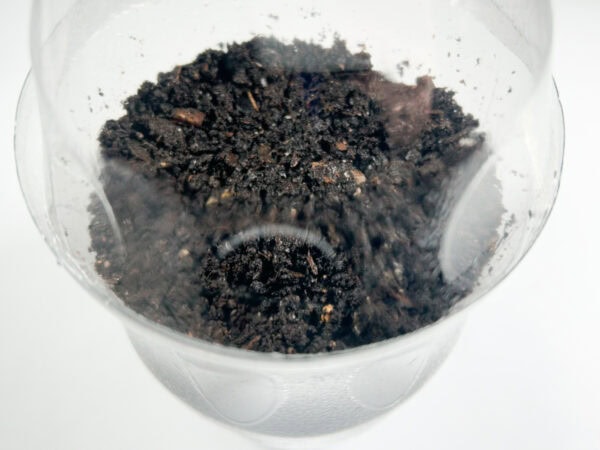
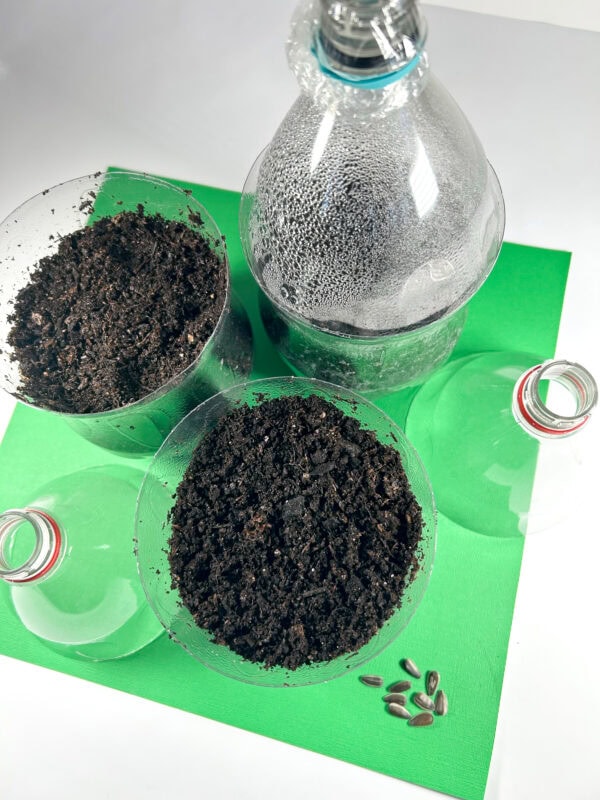
Step 3. Add Soil and Prepare for Planting
Fill the bottom half with potting soil, leaving about an inch of space at the top. Depending on how many plants you want to grow, use a finger or small tool to poke 1-3 planting holes into the soil. Place your plant cuttings or bulbs in the holes and gently cover them with soil.
Step 4. Water the Soil
Using the spray bottle, lightly moisten the soil. Be careful not to overwater—just a few sprays should be enough to dampen the soil without making it soggy. The spray bottle is a great tool for kids to use, as it helps them control the amount of water they add.

Step 5. Create the Greenhouse Cover
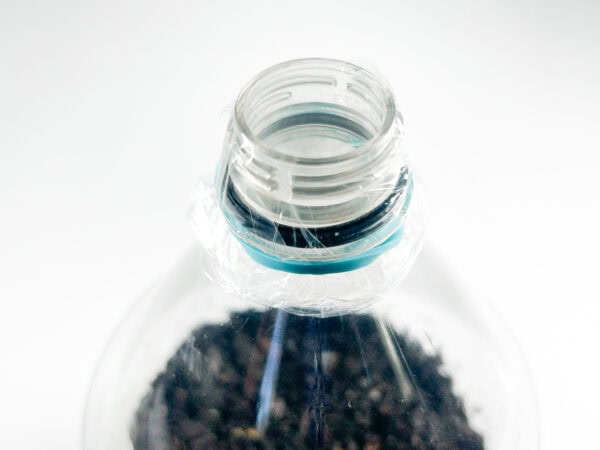
Cut a piece of plastic wrap large enough to cover the opening of the top portion of the bottle. Secure the plastic wrap with a rubber band to create a tight seal. This will help retain moisture and warmth inside the greenhouse. Finally, screw the bottle cap back onto the top portion of the bottle.
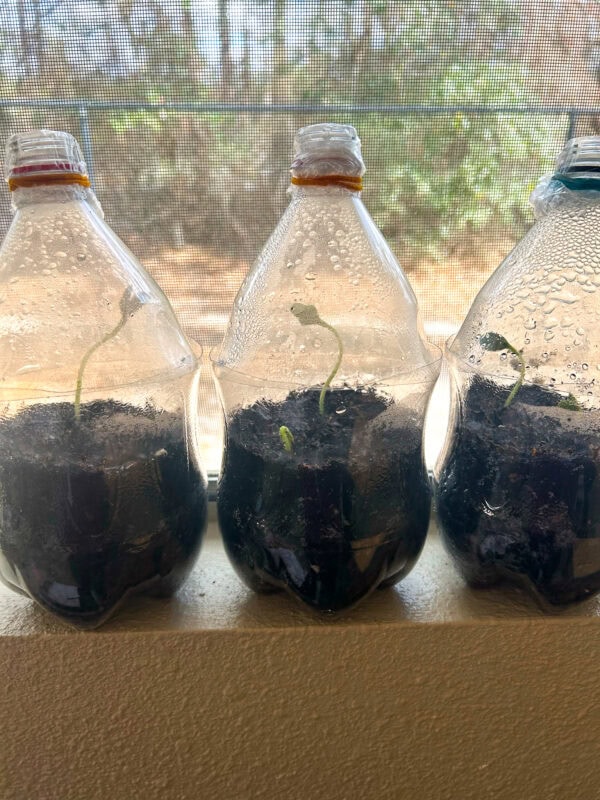
Step 6. Place in a Sunny Spot
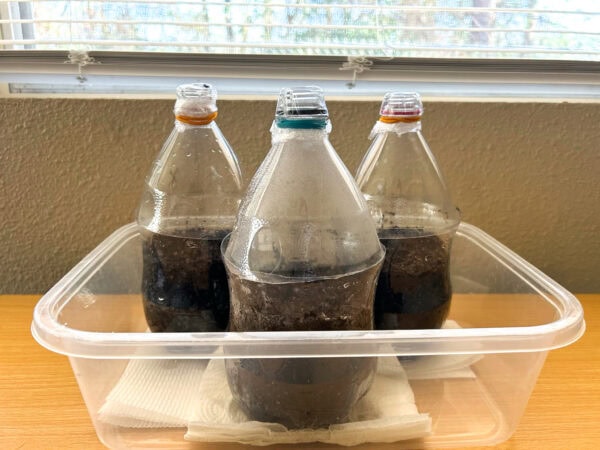
Set your mini greenhouse on a windowsill or another spot with plenty of sunlight.
If you’re concerned about water dripping from the drainage holes, place the greenhouse on a plastic tray to catch any excess water.
Managing Clutter While You Build
A project like this can generate a little clutter with cut bottle pieces and extra materials. Be sure to have a bin nearby for collecting scraps and keep your workspace organized for a smoother process.
Observing and Learning
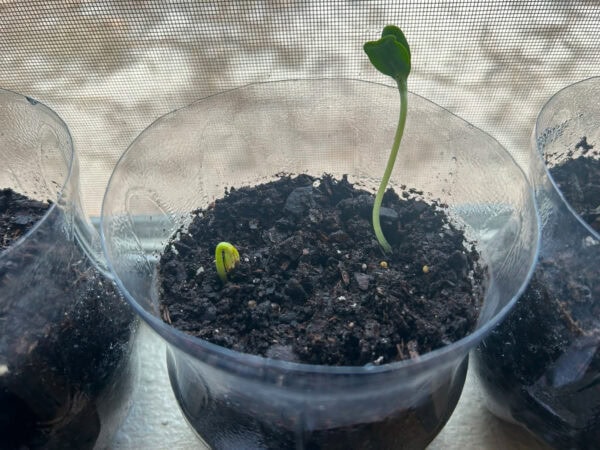
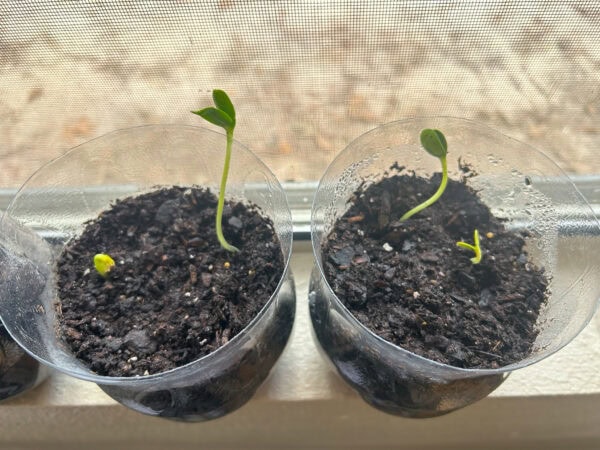
Over the next few days, encourage your kids to check on their mini-greenhouses daily. They’ll be thrilled to watch for the first signs of growth! Here are some fun ways to make this activity even more educational:
Keep a Growth Journal: Have kids draw or write about what they observe each day. How tall are the plants? How many leaves have appeared? This is a fun way to practice observation and recording skills while tracking their progress.
Discuss the Science of Germination: Explain how plants need water, sunlight, and warmth to thrive. Talk about how the greenhouse helps create the perfect environment by trapping heat and moisture, making it easier for plants to grow strong and healthy.
Experiment with Different Plants: Try planting a variety of herbs, vegetables, or flowers to see how each one grows. Compare growth rates and talk about why some plants might grow faster than others. It’s a great way to introduce basic science concepts.
Talk About Recycling: Use this project as an opportunity to discuss the importance of reusing materials like clear plastic bottles to reduce waste and protect the environment.
If your seeds don’t sprout after a few days, don’t worry! There are a few reasons this might happen:
- Old or Non-Viable Plantings: Sometimes, plant cuttings or bulbs just aren’t viable. Don’t get discouraged—try adding a few more and monitor their progress to see if they grow.
- Too Much or Too Little Water: Check the soil to make sure it’s moist but not waterlogged. Adjust your watering routine as needed.
- Insufficient Sunlight: Place the plastic bottle greenhouse in a sunny spot. If natural light is limited, consider using a grow light.
Watering Your Plants: Bottled Water or Tap Water?
You can use bottled or tap water when watering your greenhouse plants. Both are suitable, but rainwater is the most eco-friendly option if you have access to it. Remember to keep the soil moist but not overly wet to avoid waterlogging.
Why Using Recycled Materials Makes Sense
Water bottles are made from durable plastic that can withstand the test of time. While glass bottles are an option, PET bottles are lighter, easier to work with, and more forgiving for DIY projects. That’s why they’re the go-to choice for many sustainable gardening enthusiasts.
One reason this project is so practical is its use of recycled materials. Many of the bottles you’ll use to build it come from everyday household items. Even large brands like Nestle produce PET bottles, which can be used to create durable and eco-friendly structures.
And here’s another bonus: a plastic bottle greenhouse can help degrade less quickly in the sun compared to traditional plastics, especially when you use sturdy frames like bamboo or metal. Your plants will thank you!
What Makes Plastic Bottle Greenhouse the Best Greenhouse?
This project stands out because of its versatility and affordability. Unlike traditional greenhouses, which can cost hundreds (or even thousands) of dollars, you can make this one with minimal investment. All you need is time, effort, and enough bottles to get started.
Plus, the design is highly customizable—you can build a compact greenhouse for a balcony or a larger one for a community group.
Transplanting Your Seedlings
Once your plants have grown a few inches tall and the weather is warm enough, transplant them into a larger pot or garden. This is an excellent opportunity to teach kids about the life cycle of plants and how to care for them as they grow.
Sunflowers, in particular, are a fun choice because they grow tall and produce beautiful flowers that kids can enjoy all summer.
Why This Activity is Great for Kids
This 2-liter bottle greenhouse project is more than just a fun craft—it’s a hands-on learning experience that teaches kids valuable skills and concepts. Here are just a few of the benefits:
- Encourages Responsibility: Kids learn to care for their plants by watering them and ensuring they get enough sunlight.
- Teaches Patience: Watching seeds grow takes time, helping kids understand the importance of patience and perseverance.
- Promotes Sustainability: Children learn how to repurpose materials and reduce waste by reusing plastic bottles.
- Fosters Curiosity: This activity sparks questions about science, nature, and the environment, encouraging kids to explore and learn more.
More Fun Gardening Activities and Resources for Kids
DIY Gardening Kit: Easy Lemon Seed Starter Kit—This easy DIY gardening kit project Teaches kids how to grow their own lemon tree.
Parts of a Plant Worksheet—This fun and educational worksheet helps kids learn about the parts of a plant.
Plant Cell Worksheet – Introduce kids to plant biology with a simple and engaging plant cell worksheet.

Making a plastic bottle greenhouse is a simple, affordable, and rewarding activity for kids of all ages. It provides a fun way to learn about gardening and plant growth and encourages creativity and environmental awareness.
So gather your supplies, roll up your sleeves, and get ready to watch your mini garden come to life! Whether you’re planting sunflowers, herbs, or vegetables, this project will surely be a hit for kids and adults alike. Happy planting! 🌱