Egg Carton Flowers Painting Craft for Toddlers
Kids love to pick flowers for their moms! But those small flowers (or sometimes weeds!) that kids pick from the yard always die too fast. Egg Carton Flowers are easy to make, so start saving those egg cartons for a fun and easy craft the kids will enjoy.
Any mom or Grandma would love to have an egg carton flower bouquet as a keepsake. Check out more fun Easy Toddler painting ideas here.
Egg cartons are useful for storing eggs and can also be transformed into fun and easy crafts. Egg carton crafts are a great way to keep kids occupied and engaged during craft time while also fostering creativity and imagination. Plus, they’re a great way to recycle and repurpose waste. This blog post will cover how to make flowers from an egg carton. Try this toddler painting craft project with your kids or for your next DIY project.
This post contains affiliate links meaning I get commissions for purchases made through links in this post at no cost to you.
Table of Contents
Supplies needed to Make Egg Carton Flowers
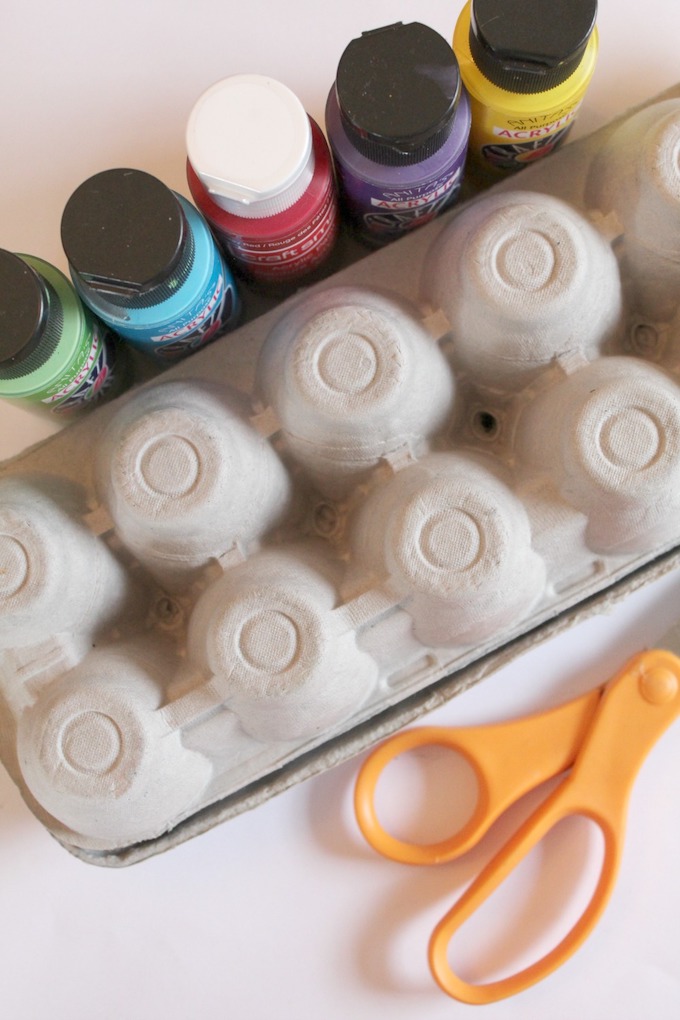
– cardboard egg carton
– scissors
– acrylic paint
– paintbrushes
– cups of water (for rinsing brush)
– heavy construction paper, cardstock, cardboard, or art canvas
– craft glue or hot glue, glue gun
How do you make Egg Carton Flowers?
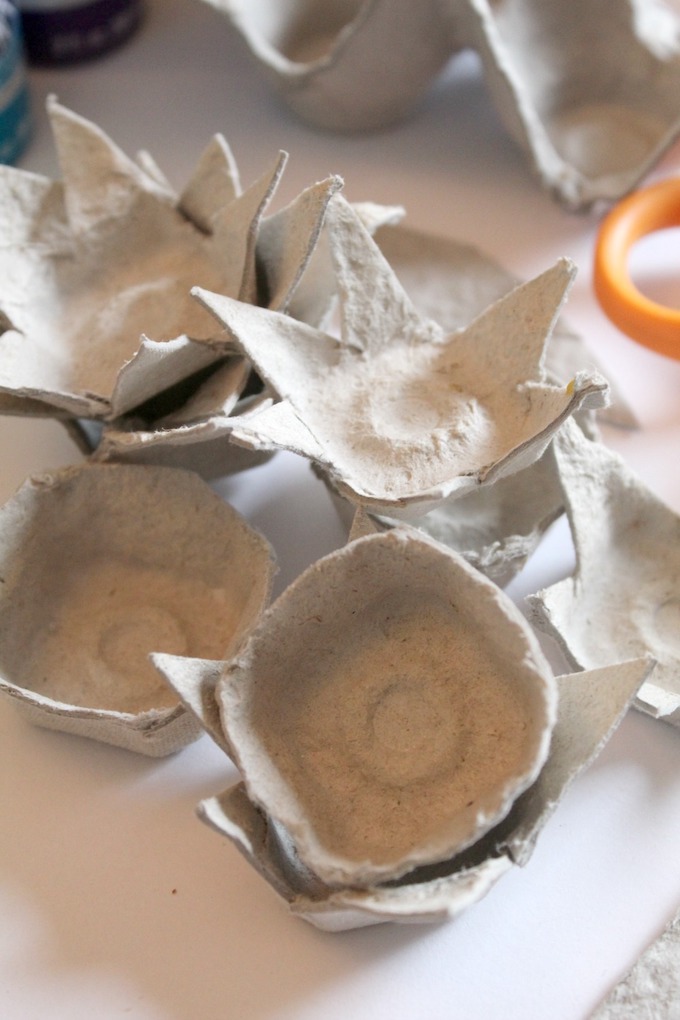
1. Begin by cutting the egg carton in half longways. This will make it easier to handle your egg carton as you cut it.
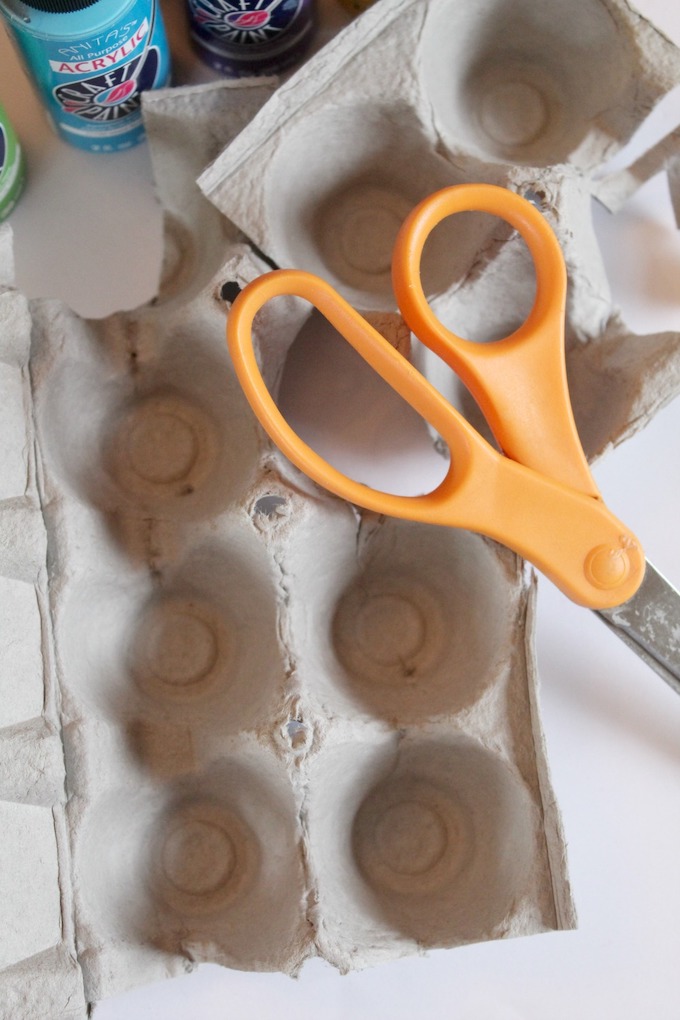
2. Start cutting out the individual egg cups. Separating them will also allow you to handle them easier as you cut. Our egg carton had some side grooves, so we cut the cups into groups of four for easy cutting.
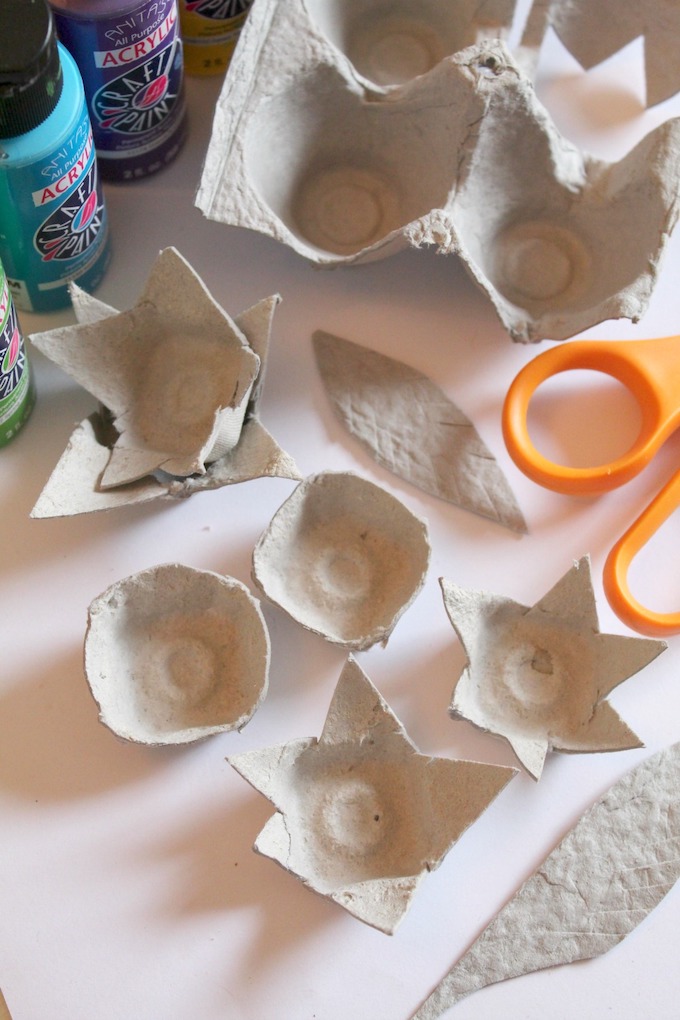
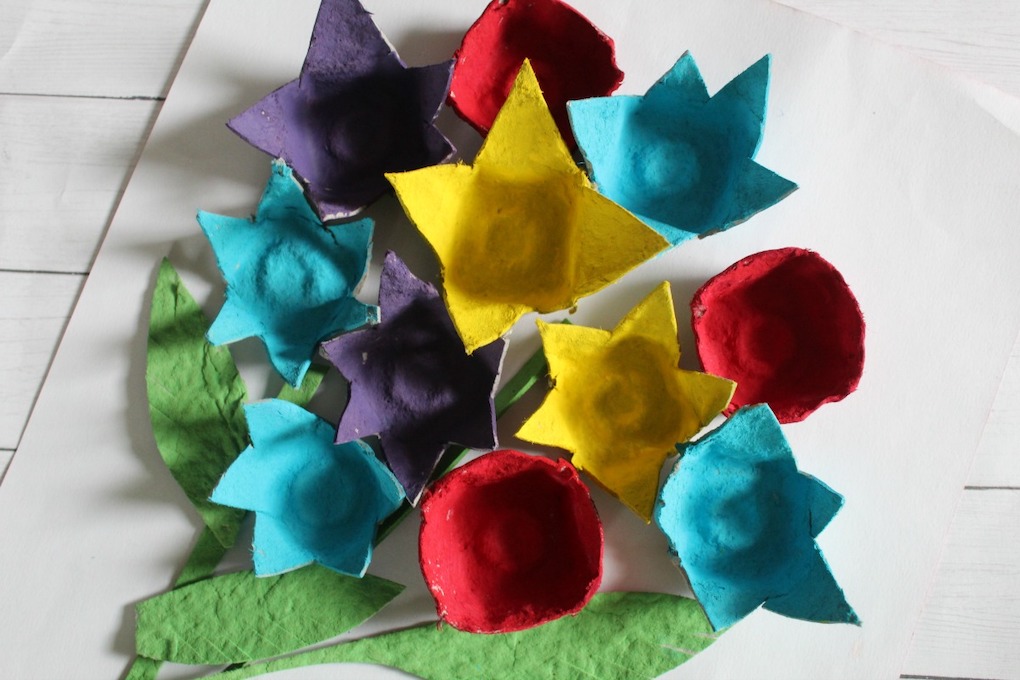
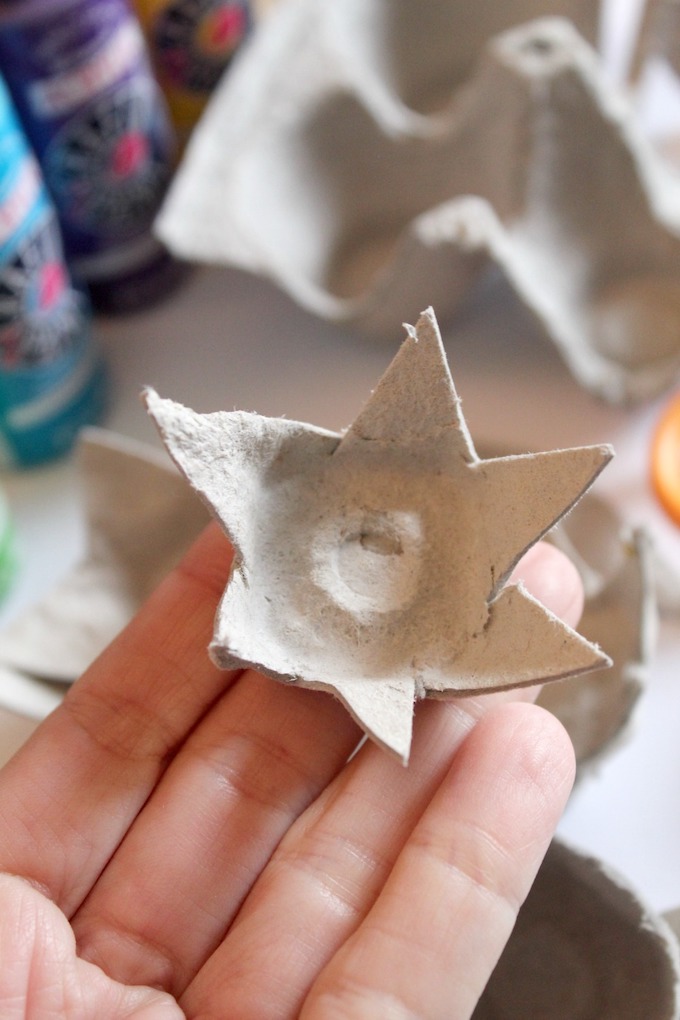
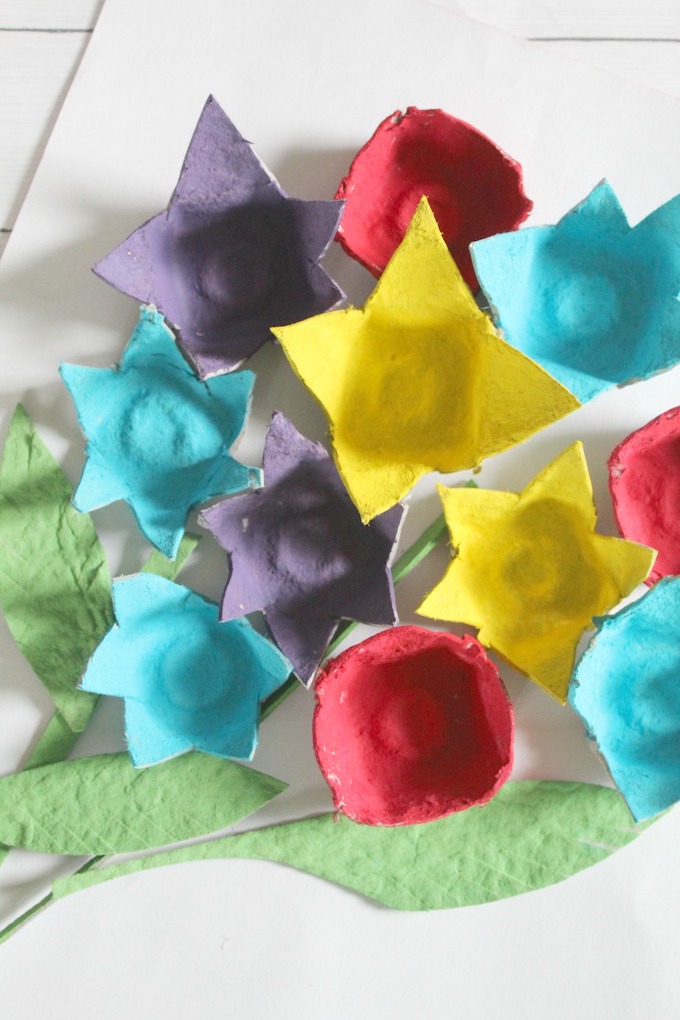
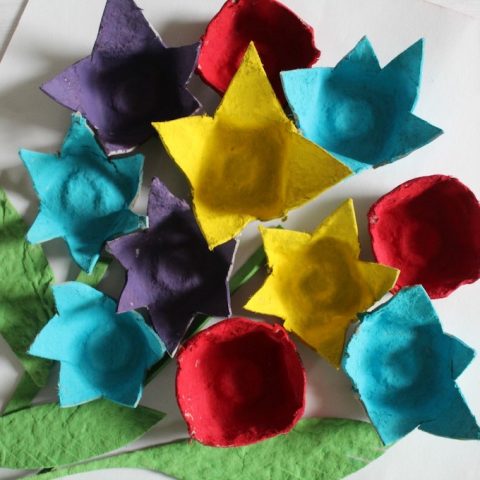
3. Work on the individual cups or flowers. Use the scissors to create “petals” by adding zig zags or ruffles. You can also create some simple round cups with smooth edges like ours.
4. Repeat, creating 7-9 blooms and leaves. We took flat parts of the egg carton lid for our leaves, cut out ovals, and fringed the edges with scissors.
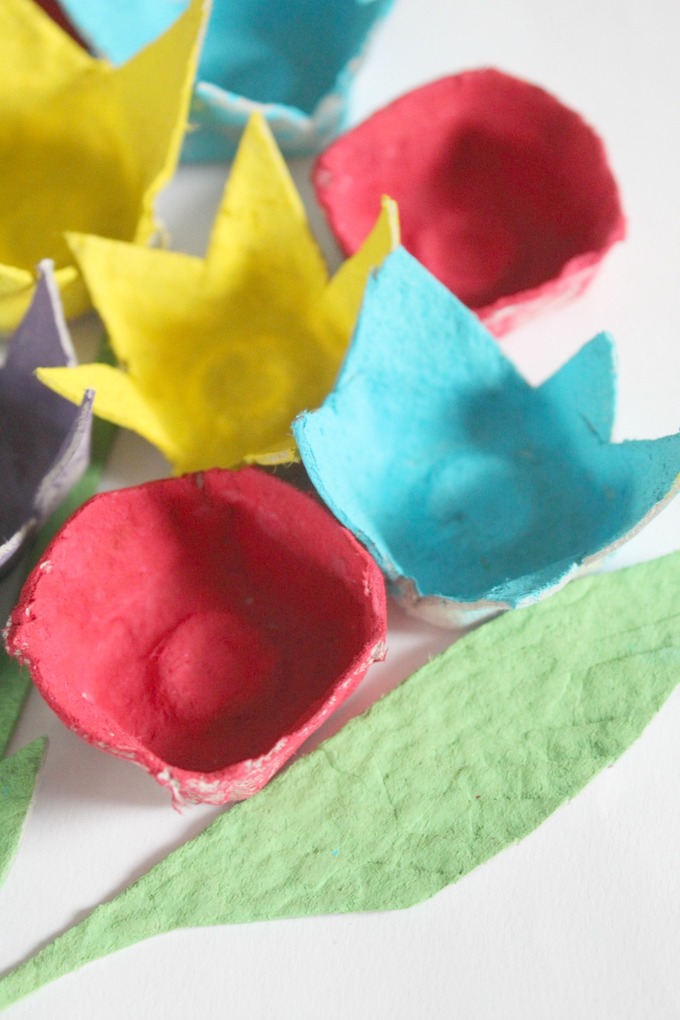
5. Start painting! Use your paintbrushes and craft paint to paint the cardboard flowers. If your cardboard is dark like ours, you should apply two coats, allowing the paint to dry well between coats.
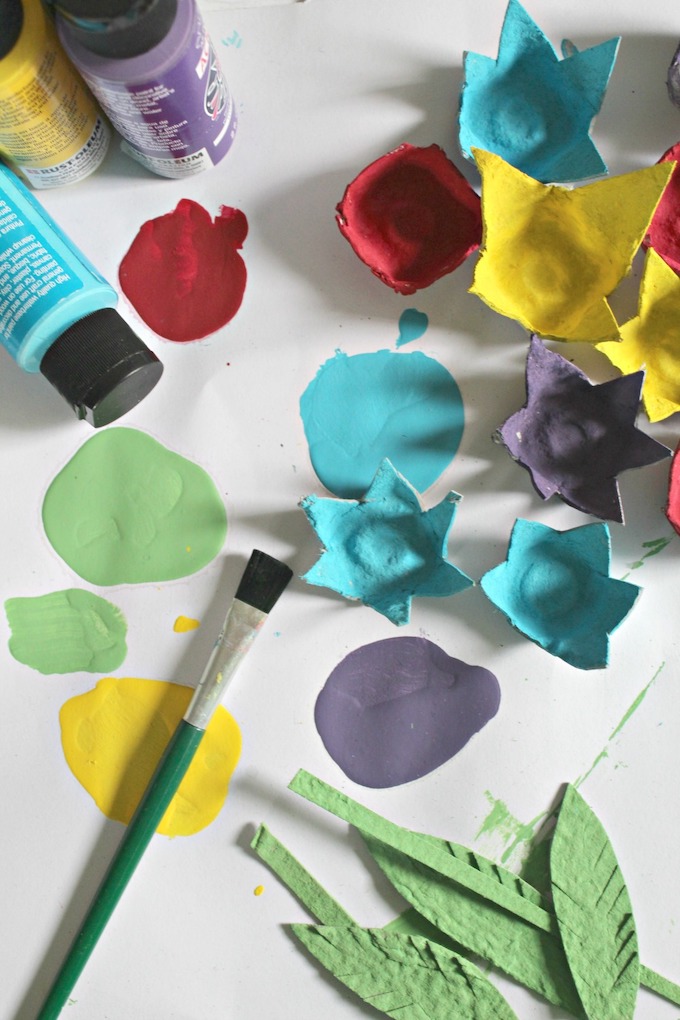
6. Allow the egg carton flowers to dry. Because the cardboard absorbs the paint, we allowed ours to dry overnight.
7. Arrange your flowers on paper, cardboard, or canvas to understand how you want to arrange them. Once you have them in place, add glue dabs to the back of the flowers and press them back onto the paper/canvas/cardboard. Hold in place until secure.
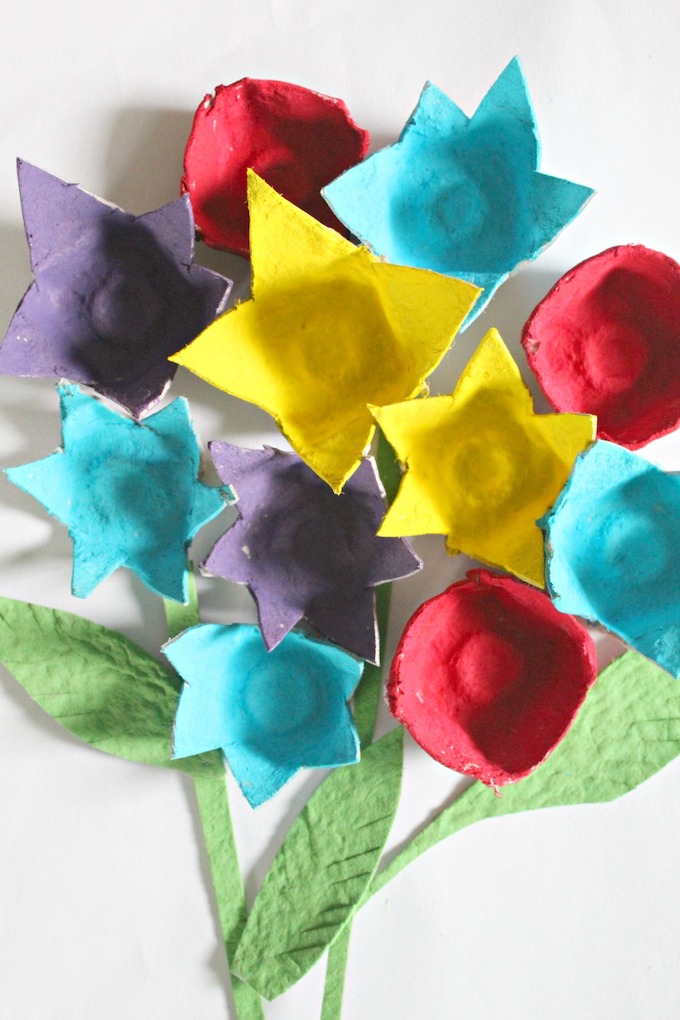
8. Continue gluing flowers until all are in place. Add your leaves and foliage last.

9. Allow to dry and display!
Egg carton crafts are a fantastic way to create something new out of one of the most common recyclable items in any house. Not only are egg cartons biodegradable, but they are also incredibly versatile. This makes them ideal for those who are environmentally conscious and want to try something unique and creative with their kids.
There are countless ways to reuse egg cartons and create unique, fun, and educational projects for kids of all ages. This easy, fun craft is perfect for entertaining your kids while encouraging environmental responsibility. Plus, it would make the perfect homemade Mother’s Day gift. Let your imagination run wild, and let the kids go wild with paint, glitter, and creativity. You’ll love the result!
Egg Carton Flowers (Perfect for Spring or Mother's Day)
Kids love to pick flowers for their moms! But those small flowers (or sometimes weeds!) that kids pick from the yard always die too fast. Egg Carton Flowers are easy to make so start saving those egg cartons for a fun and easy craft the kids will enjoy. Any mom or Grandma would love to have an egg carton flower bouquet as a keepsake.
Materials
- Cardboard egg carton
- Scissors
- Craft paint in assorted colors
- Paintbrushes
- Cups of water (for rinsing brush)
- Heavy construction paper, cardboard, or art canvas
- Craft glue or hot glue, glue gun
Tools
- Hot glue gun
Instructions
Begin by cutting the egg carton in half long ways. This will make it easier to handle your egg carton as you cut it.
2. Start cutting out the individual egg cups. Separating them will also allow you to handle them easier as you cut. For our egg carton, it had some side grooves so we cut the cups into groups of four for easy cutting.
3. Work on the individual cups or flowers. Use the scissors to create "petals" by adding zig zags or ruffles. You can also create some simple round cups with smooth edges like we did.
4. Repeat, creating 7-9 bloom as well as leaves. For our leaves we took flat parts of the egg carton lid, cut out ovals, and fringed the edges with scissors.
5. Start painting! Use your paint brushes and craft paint to paint the cardboard flowers. If your cardboard is dark like ours, you want to apply two coats, allowing paint to dry well in between coats.
6. Allow the egg carton flowers to dry. Because the cardboard absorbs the paint, we allowed ours to dry overnight.
7. Arrange your flowers on your paper, cardboard, or canvas to get an idea of how you want to arrange them. Once you have them in place, start adding dabs of glue to the back of the flowers and press them back to the paper/canvas/cardboard. Hold in place until secure.
8. Continue gluing flowers until all are in place. Add your leaves and foliage last.
9. Allow to dry, and display!