
Reindeer Hot Chocolate Bags: Easy DIY Christmas Gifts
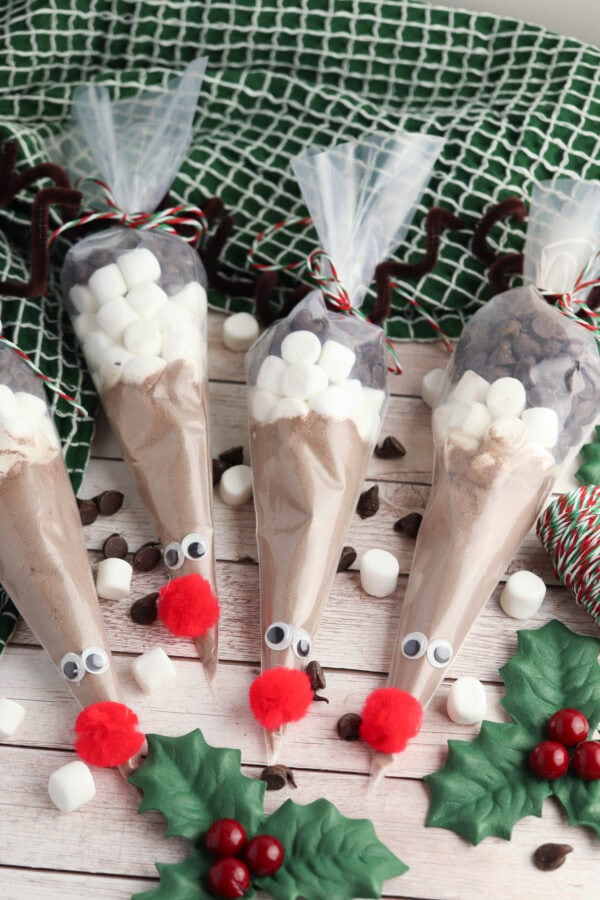
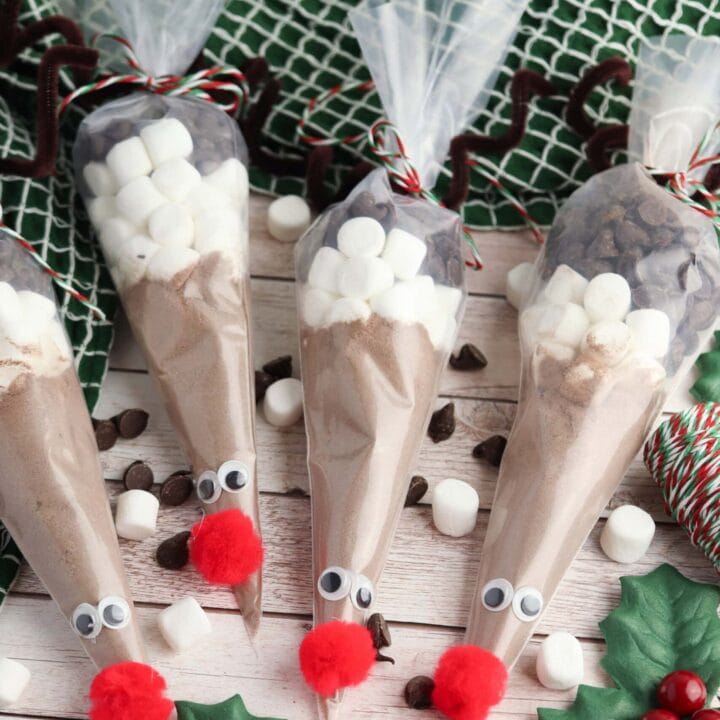
These Reindeer Hot Chocolate Bags are an adorable DIY Christmas gift made with hot cocoa mix, mini marshmallows, chocolate chips, and a few simple craft supplies. Each clear piping bag is decorated with googly eyes, a fluffy red nose, and curved brown antlers to look like Rudolph the Red-Nosed Reindeer!
These reindeer hot chocolate gift bags are perfect for classroom Christmas gifts, stocking stuffers, teacher appreciation, holiday party favors, and homemade presents for friends and neighbors.
For even more Christmas inspiration, browse our Christmas Crafts and Printables for Kids and our seasonal party recipes.
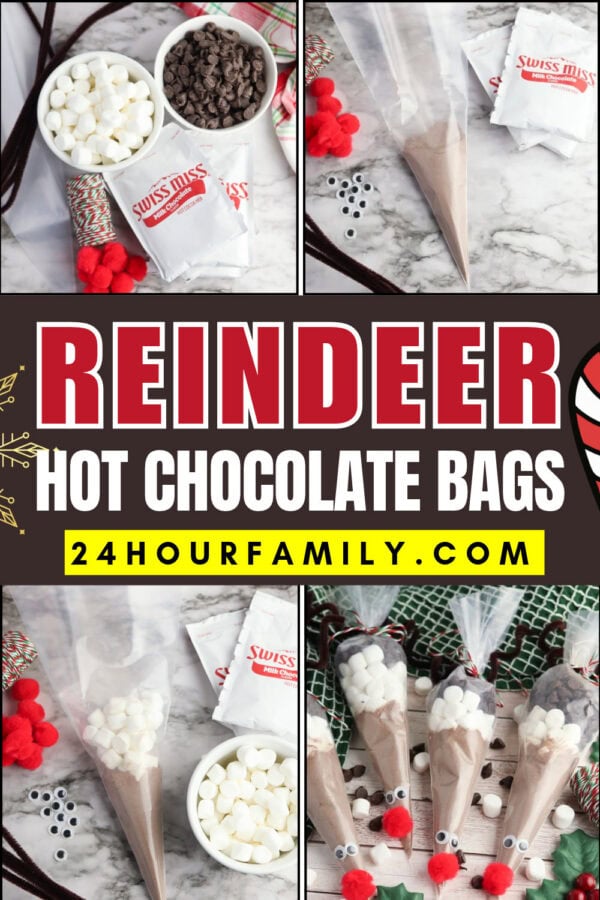
Reindeer Hot Chocolate Bags (Easy Christmas Gift Idea)
Best of all, they’re easy to assemble. Simply layer the cocoa ingredients inside a clear treat bag, tie it closed, and decorate the outside to create a cute reindeer.
This project makes eight cone-shaped treats and uses just a handful of affordable supplies. Kids can help fill the bags and decorate the faces, making it a fun Christmas activity for families and classrooms.
For another cute reindeer activity, try our Reindeer Paper Bag Craft, which includes a free printable template.
DIY Hot Chocolate Reindeer Bags for Christmas
These treat bags combine a simple edible treat with a handmade decoration.
Layer the drink mix and toppings inside a clear, cone-shaped piping bag. Once sealed, add curved brown craft stems and a red nose to create a playful reindeer design.
These Christmas treats are a fun alternative to traditional candy bags because recipients can use the contents to make a warm drink.
Why You’ll Love This Easy Project
- Easy to assemble using packaged hot chocolate mix.
- Makes eight packages in one batch.
- Requires no cooking or baking.
- Uses inexpensive craft supplies.
- Makes a cute homemade present for teachers or neighbors.
- Can be prepared ahead of Christmas.
- Fun for kids to help decorate.
- Easy to personalize with tags and ribbon.
They’re also a sweet addition to a holiday basket with Christmas cookies, a decorated mug, and a small handwritten note.
Supplies for Reindeer Hot Cocoa Cones
You only need a few ingredients and basic craft materials to make these cute reindeer treats.
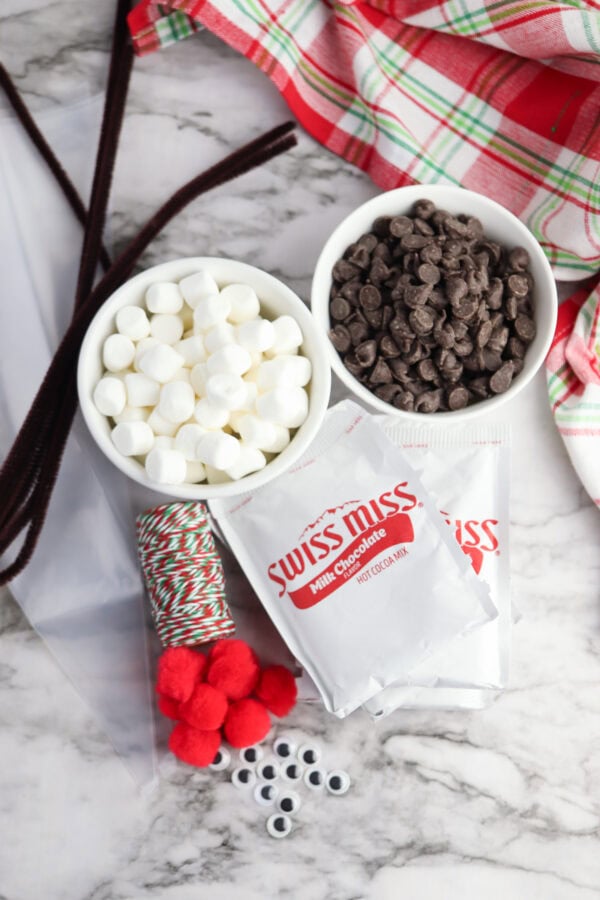
Ingredients for the Drink
- Hot chocolate
- Mini marshmallows
- Chocolate chips
Craft Supplies
- Disposable piping bags
- Brown pipe cleaners
- Googly eyes
- red craft pom-poms
- Red ribbon or baker’s twine, optional
- Craft glue or self-adhesive glue dots for attaching decorations to the outside
- Small tags, optional
Clear Cone Bags
Clear cone-shaped piping bags are ideal because their pointed bottoms create the long face. Choose new, food-safe bags intended for packaging edible ingredients.
Completely transparent bags also allow the layers of cocoa mix, marshmallows, and chips to show through.
Cocoa Mix
Use your favorite individual packets of cocoa mix. The photographs show Swiss Miss Milk Chocolate Hot Cocoa Mix, but another favorite brand can work.
Keep in mind that individual cocoa packets vary in size and may require different amounts of milk or water.
Fluffy White Layer
This fluffy filling forms a white layer between the cocoa powder and the chocolate topping. They’re also a delicious topping when the recipient prepares a cup of hot cocoa.
Chocolate Topping
These chips add another layer of chocolate flavor. You can use semi-sweet or milk chocolate morsels. Mini chocolate morsels are another option if you want smaller pieces that melt more easily into a warm drink.
Bendable Craft Stems
Each brown craft stem creates two curved branches above the bag. They’re flexible, easy to bend, and help secure the top of the bag.
Craft Eyes and Red Noses
Two craft eyes and one red pom-pom complete the friendly reindeer face. These decorations belong on the outside of the bag only and must be removed before preparing the drink.
How to Assemble the Cocoa Cones
These Christmas cocoa cones come together in just a few steps. Prepare all your supplies before starting so you can assemble several at once.
Step 1: Open the Piping Bags
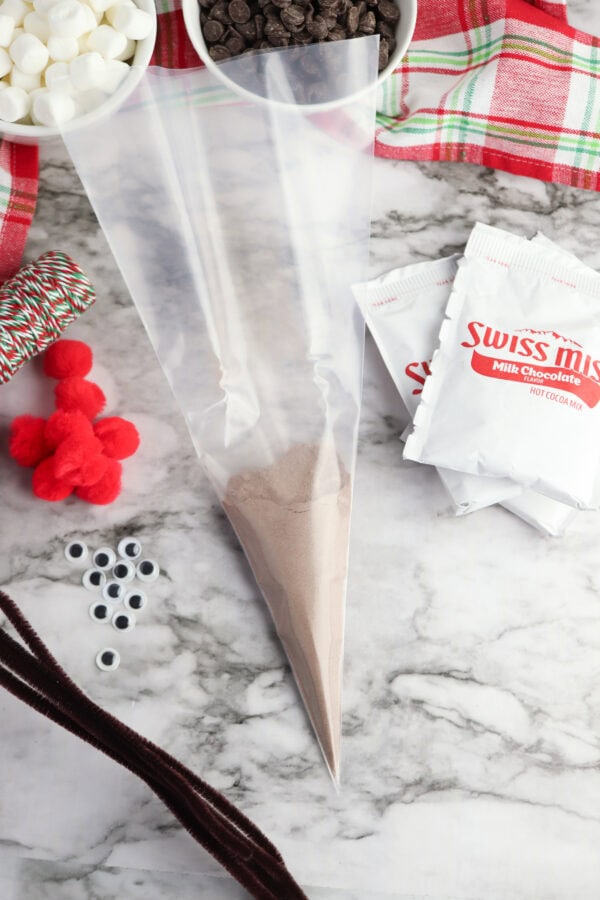
Start with eight clean, dry piping bags. Open one bag and hold it upright with the pointed end facing down. You can place the piping bag inside a tall glass to keep it open while adding the ingredients.
A small funnel may also help keep the powdered mix from spilling onto the sides of the bag.
Step 2: Add the Cocoa Mix
Open one cocoa packet and carefully pour the mix into the pointed tip of the piping bag. Gently tap the bag so the powder settles toward the bottom.
Repeat with each bag, using one packet per bag. Try to keep the sides of the bags clean, so the finished layers look neat.
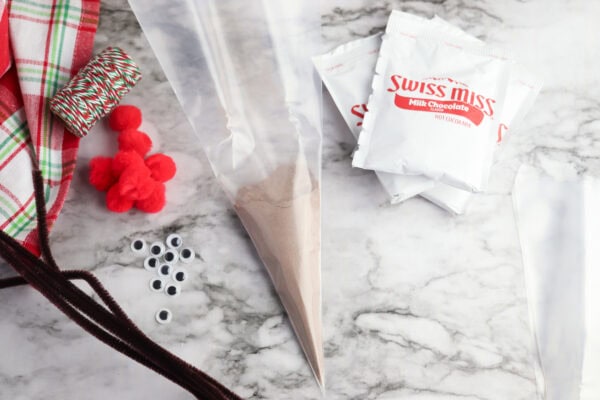
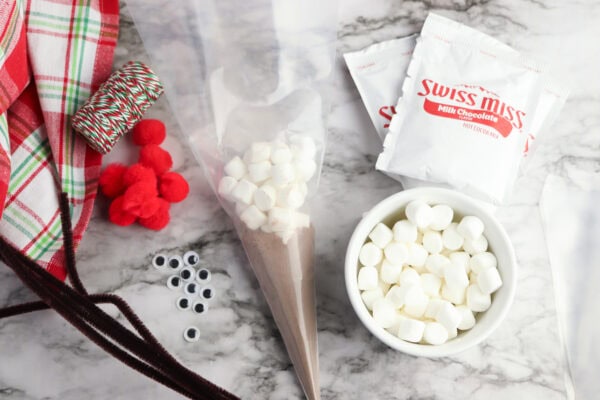
Step 3: Add the Mini Marshmallows
Measure ¼ cup of mini marshmallows. Carefully add them on top of the cocoa mix.
The white layer contrasts with the brown mixture underneath. Try not to shake the bag too much after adding them, since the layers may mix together.
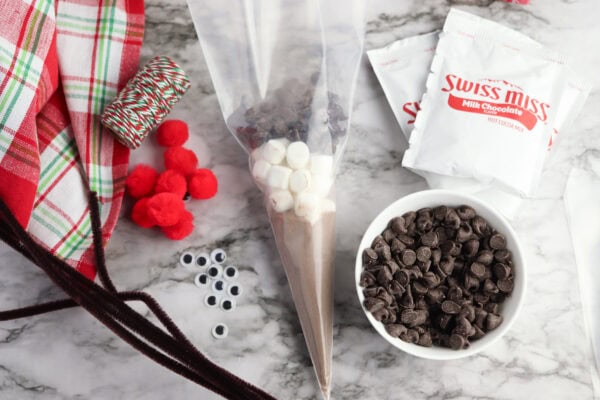
Step 4: Add the Chocolate Topping
Measure ¼ cup of chocolate chips and place them on top of the white layer.
You should now have three visible layers:
- Hot chocolate mix at the bottom.
- The white topping in the middle.
- Chocolate morsels at the top.
Repeat with the remaining bags.
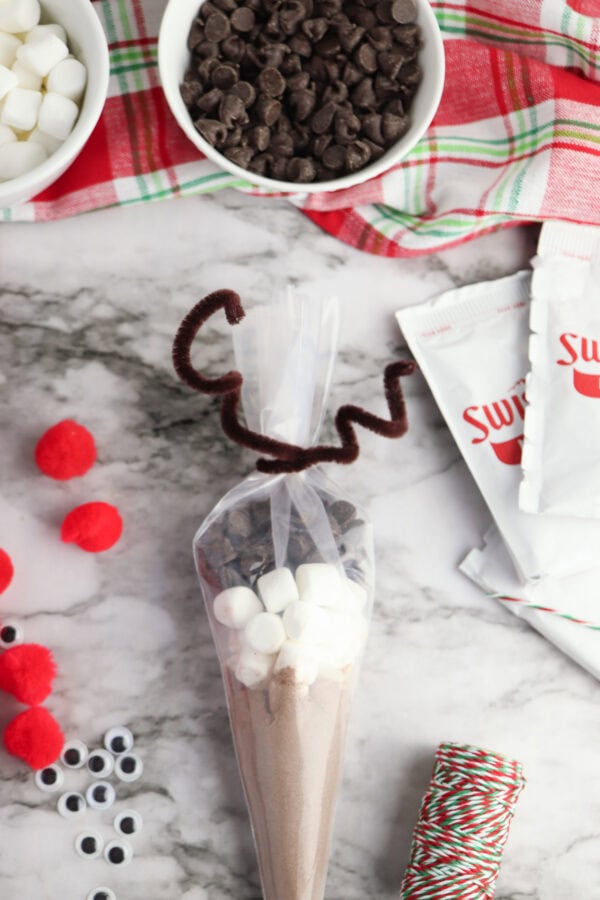
Step 5: Seal the Bag and Shape the Antlers
Gather the open end of the piping bag and twist it closed. Place one brown pipe cleaner around the twisted section. Wrap it securely around the bag and twist the ends together.
Bend the loose ends upward and curl them around your finger to create two spiral shapes.
If the pipe cleaner doesn’t keep the top of the bag closed, secure it with a food-safe twist tie first, then add the antlers over it.
Step 6: Add the Eyes
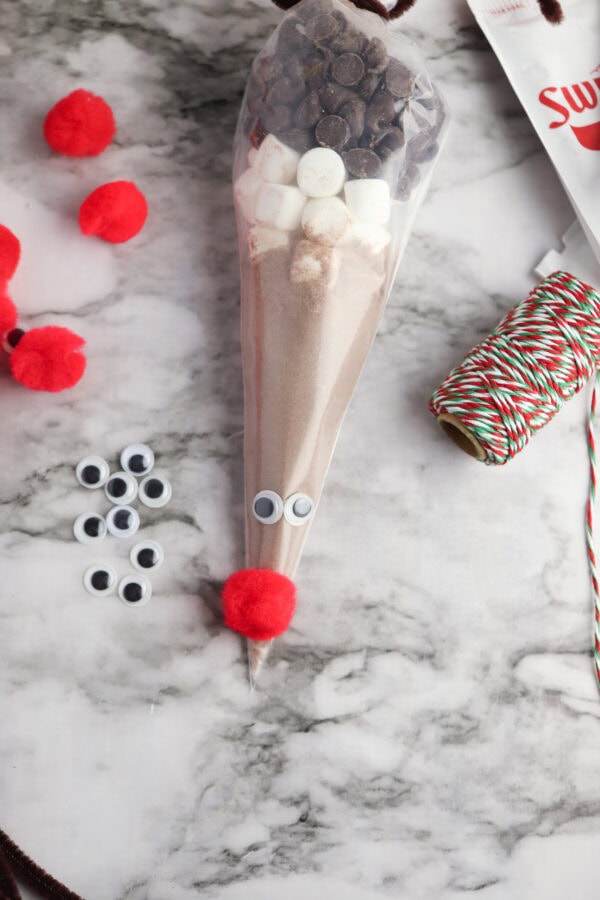
Position two small craft eyes near the narrow lower portion of the bag. Use self-adhesive glue dots or a little craft glue on the outside of the plastic to attach the eyes.
Allow the adhesive to set before handling the finished bag. Do not allow glue to come into contact with the hot chocolate ingredients.
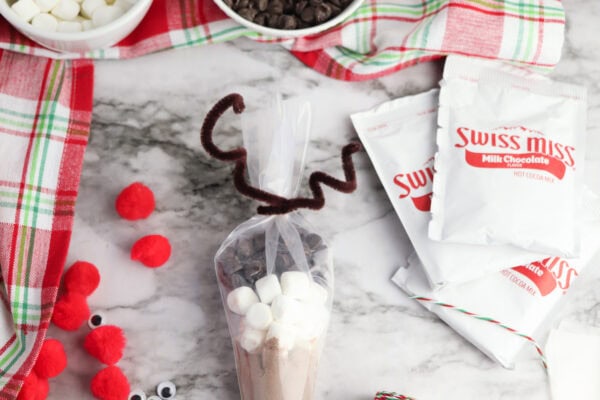
Step 7: Attach the Red Nose
Place a red craft pom-pom below the eyes, near the pointed end of the bag.
Attach it with a small amount of craft glue or a suitable adhesive dot.
The bright red nose gives the finished package its recognizable Rudolph appearance.
Step 8: Add Red Ribbon or a Gift Tag
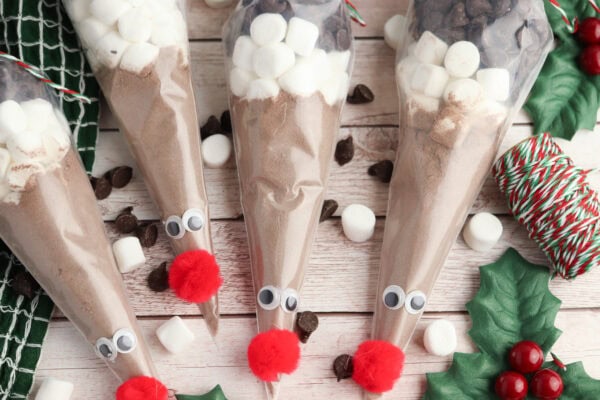
For a final decorative touch, tie red ribbon or red-and-green baker’s twine around the top of the bag.
You can also attach a tag with a short Christmas message and the original packet’s directions for preparing the cocoa. Your handmade Christmas presents are ready!
How to Turn the Cocoa Bag Into a Drink
The contents of each bag are meant to be used to prepare a warm drink. Before opening the bag, remove the craft stems, nose, eyes, glue, and any other decorations.
Carefully open the bag and separate or portion the edible ingredients as needed. Follow the hot chocolate packet’s directions for the correct amount of hot milk or water.
Add some chocolate pieces and a few of the soft white pieces to the mug, stir, and enjoy!
Because each bag includes ¼ cup of each topping, plus one cocoa packet, the recipient may prefer to use only part of the extras at a time.
Each of the eight bags contains one cocoa packet, but the number of drinks depends on the packet instructions and how you divide the toppings.
Tips for Assembling These Treat Bags
These little festive packages are easy to assemble, but a few tricks can make them look especially cute.
Use Clear Cone-Shaped Bags
The pointed shape helps create the reindeer’s face. Regular rectangular treat bags will hold the ingredients but won’t create quite the same pointed appearance.
Keep the Cocoa Mix at the Bottom
Add the cocoa powder first and let it settle into the point of the bag. This gives the package its familiar triangular shape.
Use a Tall Glass to Hold the Bag
A tall drinking glass can help support the piping bag while you fill it. This is especially helpful when making several bags at once.
Don’t Overfill the Cone Bags
Leave enough space at the top to twist the bag closed and attach the curled decorations.
Attach Decorations on the Outside
Craft eyes, red noses, glue, and chenille stems are not edible. Keep them separate from the food inside the bag.
Secure the Top Carefully
Make sure the piping bag is completely closed so the ingredients don’t spill during storage or transportation.
Tags for These Reindeer Treats
Adding a small tag makes these handmade treats feel extra special. It also gives the recipient instructions for preparing the drink.
A simple tag can say:
Have a Cup of Christmas Cheer!
Remove all decorations and pour the desired amount of cocoa mix into a mug. Add hot milk or water according to the cocoa packet’s directions. Stir and add some of the white pieces and chocolate chips on top.
You can write the directions on small cardstock tags or create your own holiday labels in Canva.
For an extra festive touch, use red and green baker’s twine to attach the tags near the curled stems.
Classroom Christmas Favors
These decorated treats are a fun party favor for elementary school Christmas celebrations and gift exchanges.
Children can help measure the dry ingredients, fill the bags, and choose where to position the eyes and noses.
For younger students, an adult should prepare the bags and handle adhesives.
Classroom Assembly Tips
Set up a few small stations to keep the project organized. At the first station, children can add the cocoa mix.
At the next, they can add the two toppings. An adult can help seal the bags and bend the craft stems.
Finally, children can decorate each bag with eyes and noses.
Before preparing classroom favors, check the school’s policies on homemade food and allergies. Some schools require commercially packaged treats or prohibit shared food.
Ways to Share These Cocoa Cones at Christmas
These little handmade treats make wonderful additions to several types of Christmas presents.
Teacher Appreciation
Place one finished bag inside a Christmas mug. Add a handwritten note to create an inexpensive teacher appreciation present.
Neighbor Presents
Pair the reindeer treat with a small bag of Christmas cookies. Wrap both in a basket or a small paper sack.
Stocking Stuffers
The narrow shape makes these packages a cute stocking stuffer. Make sure the bag is sealed securely before placing it inside a Christmas stocking.
Christmas Party Favors
Arrange several decorated bags in a basket near the Christmas party exit. Before leaving, guests can pick up a reindeer treat to enjoy at home.
Christmas Movie Night Kits
Create a Christmas movie night basket with cocoa, popcorn, and a favorite holiday movie.
You could pair the kit with our free Christmas crafts and printables for kids for more family activities.
Hot Cocoa Bag Variations
You can personalize these cones with different cocoa flavors and toppings. These are optional ideas, not changes to the original project.
Peppermint Flavor
Add a small portion of crushed peppermint candy or peppermint baking chips in a separate food-safe packet. Keep the peppermint pieces dry before sharing.
White Chocolate
Use white cocoa mix and white baking chips for a snowy version. A red nose can complete the face.
Extra Chocolate
Use mini semi-sweet chips for a richer chocolate flavor. The smaller chips may also melt more easily than large baking chips.
Dairy-Free Version
Choose a dairy-free cocoa mix, dairy-free baking chips, and a suitable white topping. Check all product labels carefully because many cocoa mixes and baking chips contain milk.
Holiday Sprinkles
Add a small separate packet of holiday edible sprinkles for the recipient to use as a topping. Make sure the sprinkles are suitable for the intended age group.
How to Store These Reindeer Cones
Because these packages contain dry ingredients, store them in a cool, dry location away from sunlight and heat. Keep each piping bag tightly sealed.
Keep the ingredients dry and away from high temperatures that could melt the chocolate. Check the expiration or best-by dates on the original cocoa packets and the packages of both toppings.
For the best quality, assemble these treats as close as possible to the date you plan to give them, especially since the fluffy filling can go stale or harden after opening.
If you’re sharing these treats with someone else, include a note identifying the ingredients and any relevant allergens.
More Christmas Crafts and Activities
If you enjoyed making these reindeer-themed treats, try these other Christmas activities from 24 Hour Family.
Paper Bag Puppet
Our Reindeer Paper Bag Craft includes a free printable template and makes a cute Christmas puppet.
Paper Plate Craft
Create a cute face with our Reindeer Paper Plate Craft with a free printable template.
Popsicle Stick Ornament
Make a cute Christmas decoration with our Popsicle Stick Reindeer Craft.
Handprint Keepsake
Our Reindeer Handprint Craft is a sweet keepsake featuring a playful face and Christmas lights.
Moving Eyes Craft
Try our Reindeer Moving Eyes Craft for a fun interactive paper project.
For even more Christmas inspiration, browse our Christmas Crafts and Printables for Kids.
Make These Reindeer Hot Chocolate Bags for Christmas
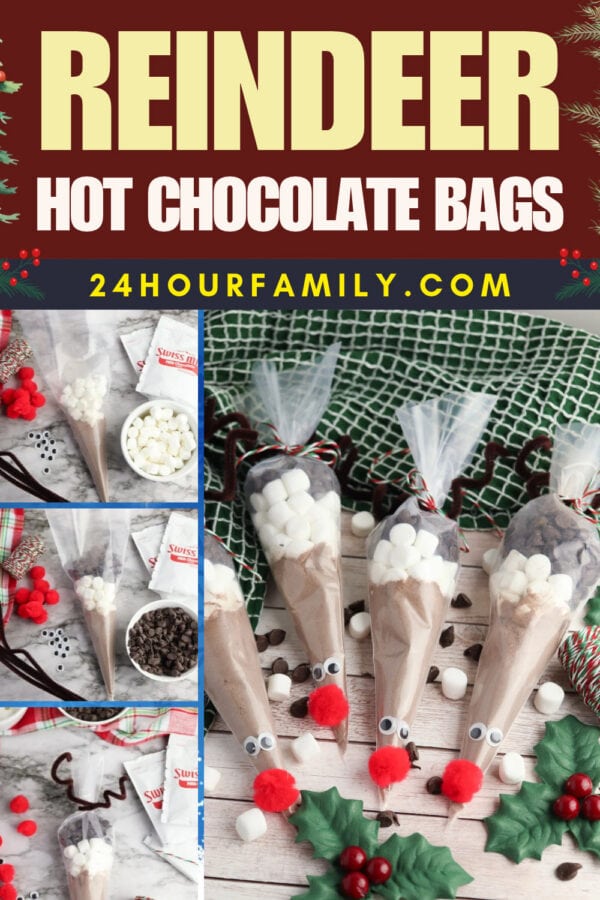
These reindeer cocoa cones are an easy way to turn simple ingredients into adorable Christmas treats.
With sweet layers, craft eyes, red noses, and curled stems, each bag looks like a little reindeer ready to spread Christmas cheer.
Make a batch for teachers, friends, neighbors, classroom celebrations, or holiday party favors. They’re a fun handmade gift that combines Christmas crafting with a cozy cup of cocoa!
How do you assemble a filled treat bag?
Fill a clear piping bag with one cocoa packet, ¼ cup of the soft white pieces, and ¼ cup of chocolate pieces.
Twist the bag closed and attach a brown pipe cleaner to create antlers.
Glue two craft eyes and a red nose to the outside to complete the face.
What kind of bags work best?
Clear, food-safe, cone-shaped disposable piping bags work best.
The pointed shape creates the long face.
How many bags does this recipe make?
The recipe makes eight individual cocoa cones.
Do you need a hot glue gun?
No. Craft adhesive or small glue dots can attach the eyes and nose to the outside of the bag.
An adult should handle any glue gun if one is used.
Can kids help assemble these bags?
Yes. Children can help fill the bags and decorate them with adult supervision.
Younger children may need assistance measuring ingredients, closing the bags, and handling small craft decorations.
Can you assemble them ahead of time?
Yes. Assemble them ahead of Christmas and store them sealed in a cool, dry place.
Check the freshness dates of all ingredients before sharing.
Do you add water or milk to the bag?
No. The bag contains dry cocoa ingredients only.
The recipient adds hot milk or water after opening the bag, according to the cocoa mix directions.
Are the eyes and red nose edible?
No. They are craft decorations attached to the outside of the piping bag.
Remove them before preparing the drink.
How many drinks does each bag make?
Each bag contains one individual cocoa packet plus the two sweet toppings.
Follow the cocoa packet’s recommended liquid amount, and divide the extra toppings as desired.
Can you leave out the fluffy filling?
Yes. Skip the middle layer and use additional chocolate or another suitable dry topping.
The appearance will be different from the original three-layer design.
Are these good for Christmas classroom gifts?
They can be a cute classroom favor if the school permits food gifts.
Check classroom allergy policies and use suitable packaged ingredients.
Reindeer Hot Chocolate Bags
Make adorable Rudolph hot chocolate gift bags using individual cocoa packets, mini marshmallows, chocolate chips, googly eyes, red pom-poms, and pipe cleaner antlers. An easy Christmas gift for teachers, neighbors, and holiday parties.
Materials
- 8 clear, food-safe piping bags
- 8 individual hot chocolate packets
- 2 cups mini marshmallows
- 2 cups chocolate chips
- 8 brown pipe cleaners
- 16 googly eyes
- 8 red craft pom-poms
- Optional baker's twine and gift tags
Tools
- Craft glue or adhesive dots, used only on the outside of the bags
Instructions
- Open one clear piping bag and hold it upright, pointed end down.
- Pour one packet of hot chocolate mix into the tip of the bag.
- Add ¼ cup mini marshmallows over the cocoa powder.
- Add ¼ cup chocolate chips over the marshmallows.
- Twist the open end of the bag closed.
- Wrap a brown pipe cleaner around the twisted section and secure it. Curl the ends around your finger to create reindeer antlers.
- Attach two googly eyes to the outside of the narrow lower portion of the bag.
- Glue one red pom-pom below the eyes to create Rudolph's nose.
- Allow the adhesive to dry, if needed.
- Repeat for the remaining bags and add optional Christmas gift tags.
Notes
- Each bag contains one individual hot chocolate packet plus extra toppings.
- Follow the cocoa packet directions when preparing a drink.
- Remove all pipe cleaners, googly eyes, pom-poms, and other decorations before opening the bag.
- Use only food-safe bags and keep craft glue away from edible ingredients.
- Store sealed bags in a cool, dry place.
- Check ingredient labels for food allergies before giving these as gifts.
- For small children, adults should handle small craft pieces and supervise assembly.
