
Spiderman Pumpkin Stencil Printables (Free To Print)
A superhero pumpkin can make your Halloween porch especially exciting for children, and you do not have to draw the design by hand. These free Spider-Man pumpkin stencil printables help you transfer a recognizable superhero design onto a real or artificial pumpkin before carving, etching, or painting it.
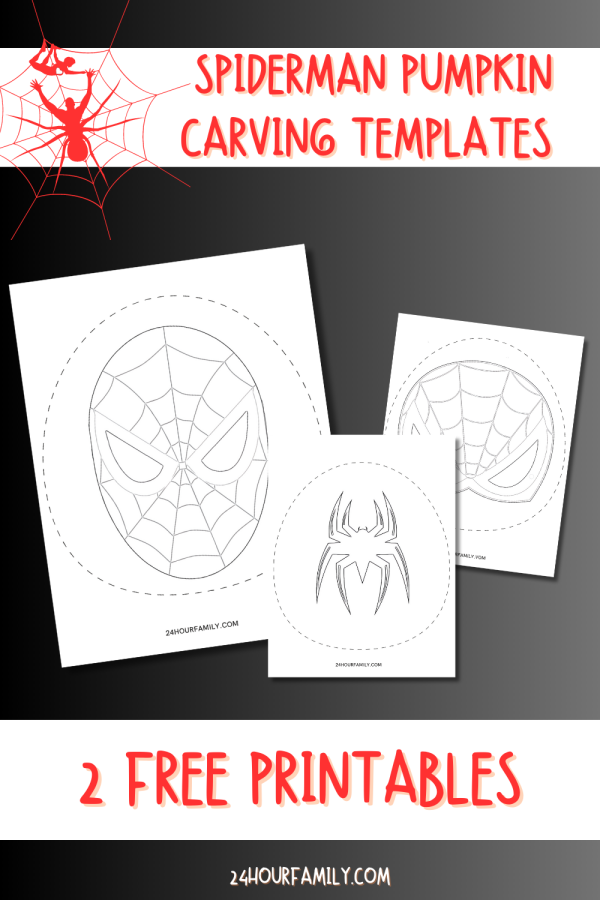
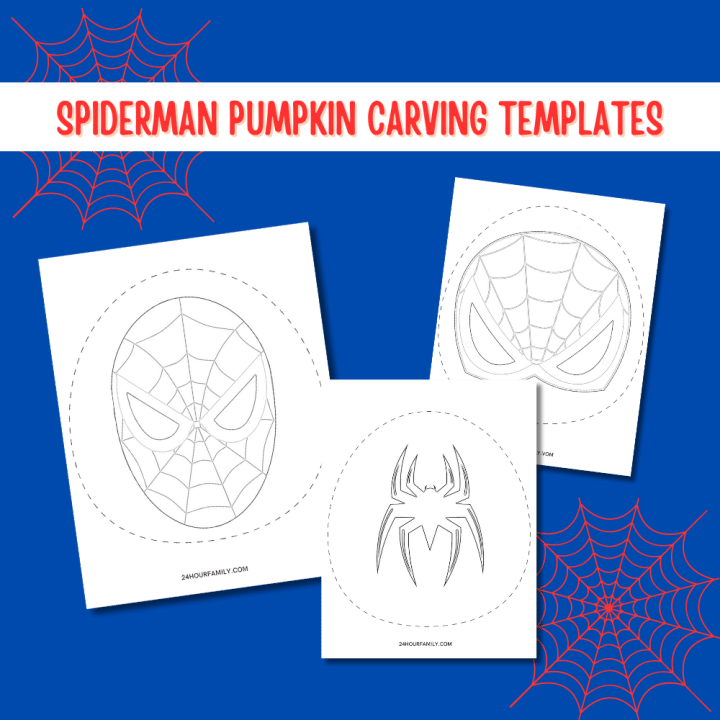
The collection includes three options: a Spider-Man face, an eye mask outline, and a spider logo. Pick one for a single display or use all three to create a coordinated superhero arrangement.
From printable masks to coloring pages, find more fun in our Superhero crafts and printables hub.
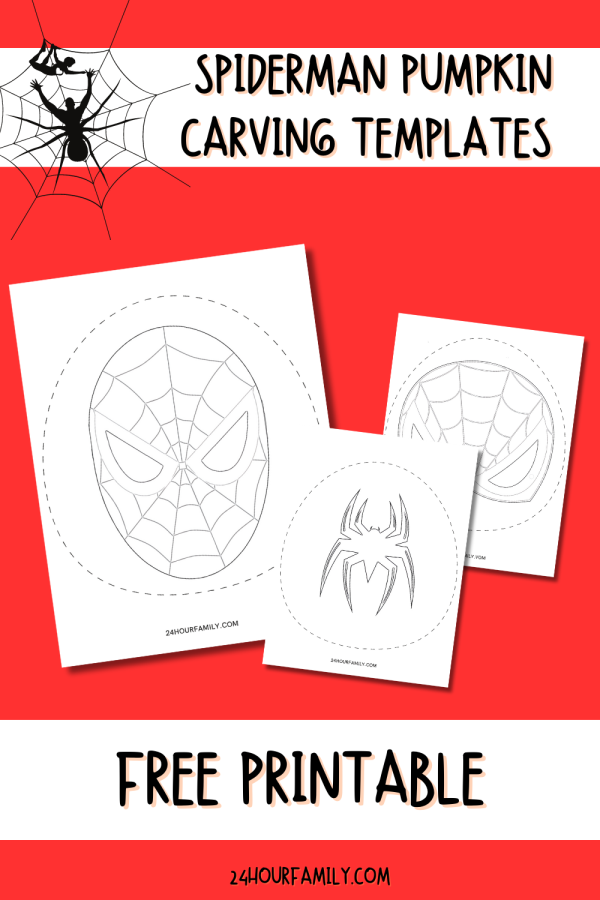
Free Printable Halloween Spiderman Pumpkin Stencil
These pumpkin carving stencils are useful for family pumpkin-carving night, a superhero-themed Halloween party, a classroom decorating activity, or a neighborhood pumpkin-carving contest.
Adult supervision is essential. Children can help choose the image, tape the stencil in place, remove seeds, and decorate the finished jack-o’-lantern, but an adult should handle sharp carving tools.
The U.S. Consumer Product Safety Commission recommends leaving Halloween pumpkin carving to adults and using battery-operated lights rather than open flames.
Three Printable Spiderman Pumpkin Stencil Carving Ideas
The free printable Spiderman pumpkin stencil collection gives you three ways to decorate a jack-o’-lantern.
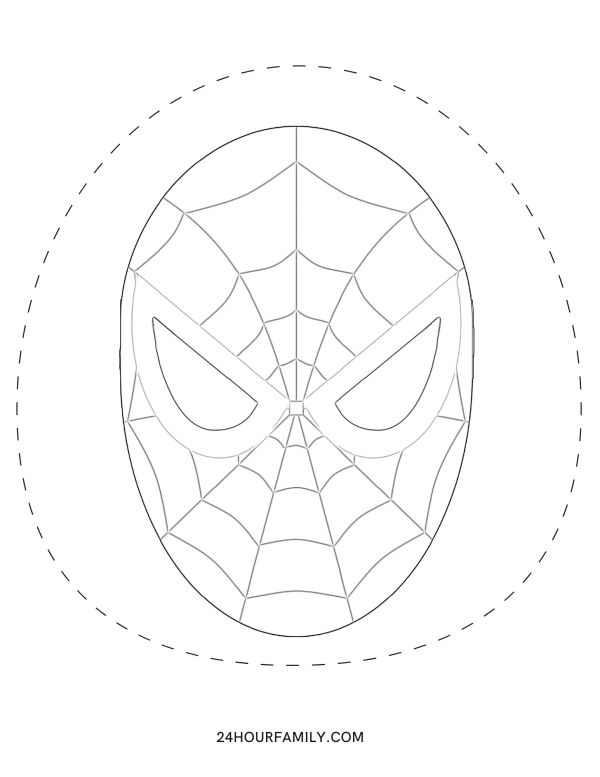
Spider-Man Face Stencil
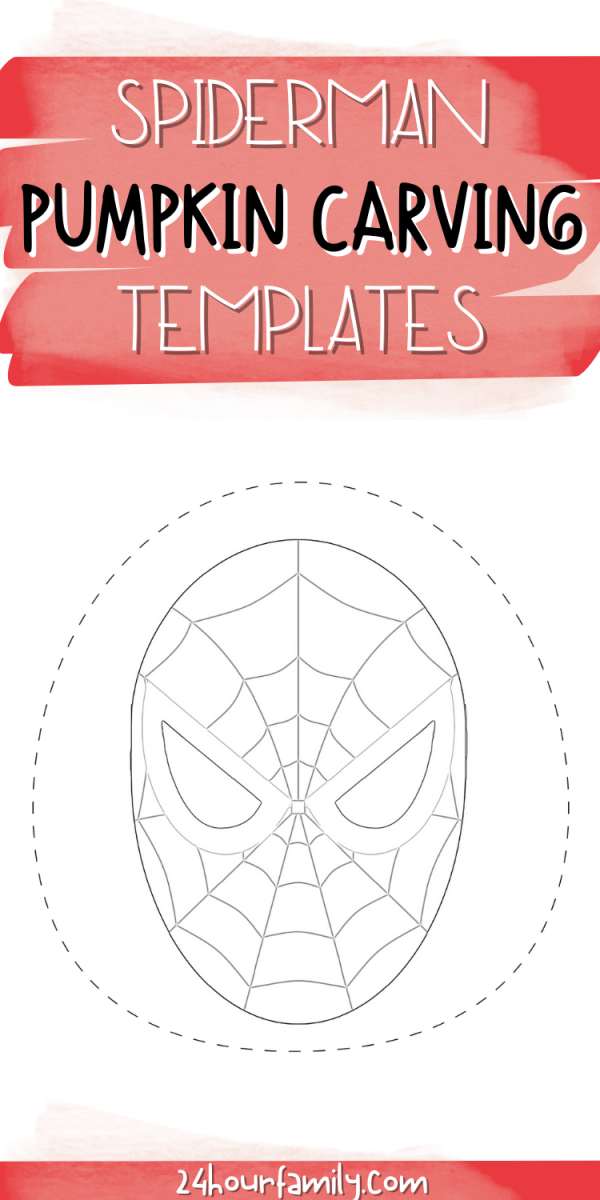
The first version features the full outline of Spider-Man’s mask with web lines and large eye shapes.
This is the most intricate option in the collection. It works best on a medium or large gourd with a relatively smooth carving surface for a classic superhero look.
Because the web pattern includes narrow sections, take your time transferring the lines. You can cut the main eye shapes and etch the smaller web details instead of removing every line completely through the shell.
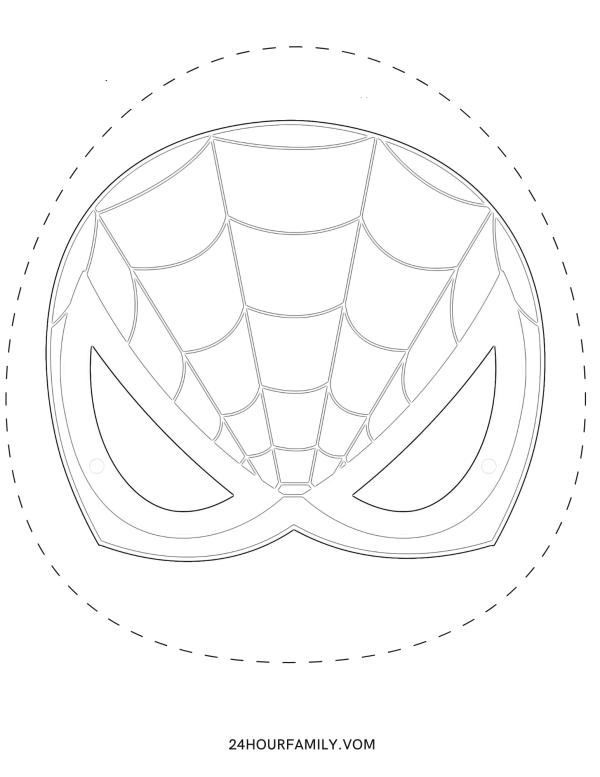
Spider-Man Eye-Mask Stencil
The second option focuses on the recognizable eye shapes and web pattern across the upper portion of the mask.
It has fewer outer details than the complete face and can be easier to position on a smaller gourd. It is also a good choice for painting or etching.
The small circles near the eyes may be used as visual placement guides. You do not need to cut them unless you want to include those details in your finished project.
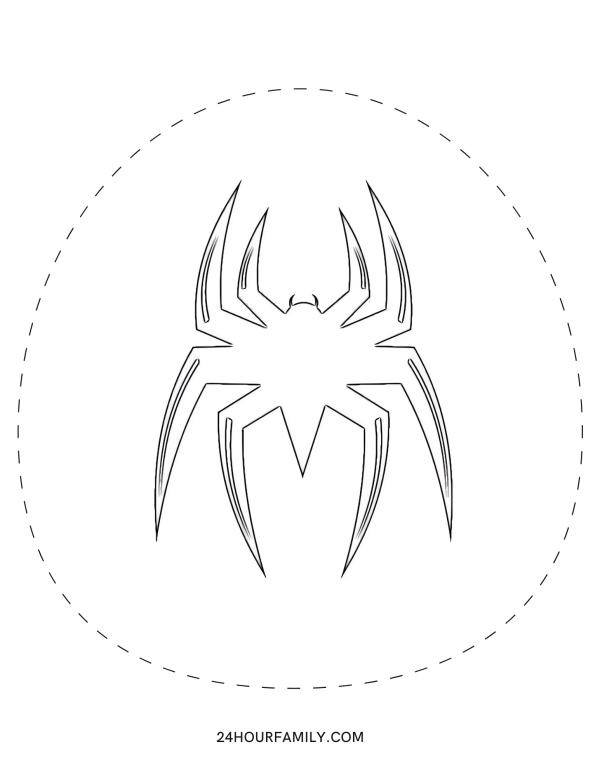
Spider Emblem Stencil
The final version displays a stylized spider logo.
This option has fewer web lines, but it contains several narrow legs and pointed sections. It is a good choice for careful carvers, older teens, or adults who enjoy a more detailed pattern.
You can also simplify the emblem by painting it black instead of cutting each narrow section.
What Difficulty Level Are the Pumpkin Carving Stencils?
The difficulty depends on whether you plan to cut, etch, or paint the image.
Easiest Option
Paint the stencil onto the surface using black paint.
This does not require cutting into the shell and is the safest choice for a younger kid.
Moderate Option
Cut the large eye shapes and etch the web lines.
Etching means removing only the dark outer skin rather than cutting completely through the outer wall. Light will glow more softly through the thinner etched areas.
More Detailed Option
Cut the entire face or spider emblem.
The narrow web lines and spider legs require slower, more precise cutting. This version is better suited to an adult or an experienced pumpkin carver.
Supplies Needed for This DIY Project
Gather your tools before beginning so you do not have to stop after the stencil has been attached.
You will need:
- Free PDF file
- Medium or large gourd
- Printer
- White printer paper
- Scissors
- Clear tape or painter’s tape
- Pumpkin carving kit
- Large spoon or scoop
- Pushpin, thumbtack, transfer wheel, or pointed tracing tool
- Washable marker
- Paper towels
- Battery-operated LED light
Optional supplies include:
- Pumpkin etching tool
- Craft knife for adult use
- Black acrylic paint
- Red and blue acrylic paint
- Paintbrushes
- Toothpicks
- Petroleum jelly for exposed cut edges
- Artificial craft gourd
A child-safe pumpkin carving kit can be easier to control than a large kitchen knife, but carving tools still require close adult supervision.
How to Choose the Best Pumpkin
The right gourd can make a detailed stencil much easier to use.
Look for one that:
- Has a smooth, fairly flat side
- Is large enough to hold the artwork
- Feels firm and solid
- Has no soft areas
- Does not have deep grooves across the carving surface
- Sits securely without rolling
- Has an intact stem
A medium or large one will usually provide enough room for the full-page sheets.
Hold the stencil against the surface before trimming it. This will help you decide whether to keep it at full size or reduce the scale.
How to Resize the Printable
The file is designed for standard letter-size paper, but gourds vary in size.
Use your printer settings to adjust the size:
- Print at 100% for a medium or large one.
- Reduce it to approximately 75% or 80% for a smaller one.
- Enlarge it when using an oversized one.
- Make one test copy before producing the final page.
Measure the smoothest area before resizing. The image should fit comfortably on the surface without the paper becoming difficult to secure with tape.
Printable Spiderman Stencil Instruction
Step 1: Download and Print the Stencil
Download the free printable PDF file and save it to your computer or device.
Open the file in a PDF reader and select the version you want to use. Print the page on regular white printer paper.
Choose actual size or 100% scale unless you need to adjust it for your gourd.
Step 2: Prepare the Pumpkin
Wash the outside thoroughly and dry it completely.
Gut it by removing the seed, pulp, and stringy pieces. Scrape the inside wall behind the area where the stencil will be placed.
A wall that is somewhat thinner is easier to cut, but do not make it so thin that the shell becomes weak or collapses.
Wipe the outside again to remove any moisture or pulp.
Step 3: Cut Around the Stencil
Use scissors to cut away excess paper surrounding the image.
You do not need to cut out every line at this point. Simply trim the page so it fits more easily against the curved surface.
Make several small cuts from the outside edge of the paper toward—but not into—the image. These relief cuts allow the paper edges to overlap as you wrap the stencil around it.
Step 4: Tape the Stencil in Place
Position the stencil on the smoothest side.
Tape the top edge first. Smooth the paper downward and add tape along the sides and bottom.
Allow the relief cuts to overlap where necessary. It is more important for the central image to remain smooth than for the outer paper edges to lie perfectly flat.
Step 5: Transfer the Pattern
Use a pushpin, thumbtack, transfer wheel, or pointed tool to poke small holes along the stencil lines.
Space the holes close enough together that you can easily follow the outline after removing the paper.
Add extra holes around:
- Curves
- Sharp corners
- Spider legs
- Eye shapes
- Narrow web sections
Do not push the tool deeply into the shell. You only need to pierce the outer skin.
Step 6: Remove the Paper
Carefully peel away the tape and stencil.
Examine the dotted outline on the surface. Use a washable marker to lightly connect any areas that are difficult to see.
Keep the original sheet beside you as a reference while working.
Step 7: Decide What to Cut or Etch
Before cutting, make a plan and determine which sections will be:
- Cut completely through
- Etched by removing only the skin
- Left untouched
For the Spider-Man face, one effective approach is to cut the eye shapes and etch the web lines.
For the spider emblem, you may cut around the main body and legs or paint the complete logo onto the surface.
Step 8: Begin With the Smallest Sections
Start with small interior details before cutting the larger areas.
Smaller sections are easier to control while the surface is still strong. If you remove the largest pieces first, the surrounding image may become less stable.
Use gentle sawing motions rather than forcing the tool through the shell.
Step 9: Support Delicate Areas
Narrow web lines and spider legs can break easily.
Hold the surrounding wall gently from the inside while working. Toothpicks can sometimes be used behind a cracked section to provide temporary support.
Do not pull loose pieces out forcefully. Push them gently from the inside after the cuts are complete.
Step 10: Clean the Edges
After cutting, remove loose pieces and smooth any rough edges.
Wipe away marker lines with a damp paper towel. Check the image from both the front and the inside.
Place a light inside to identify any areas that need additional thinning.
Step 11: Add a Light
Place a battery-operated LED light inside the finished jack-o’-lantern.
A battery-operated light is preferable to an open flame, especially around children, costumes, pets, or dry decorations. Select a light with a securely closed battery compartment and keep button or coin batteries inaccessible to children. The CPSC has issued recalls for some pumpkin lights and carving kits when their button batteries could be accessed too easily.
Turn off the surrounding lights and enjoy your Halloween display.
Which Parts of the Spider-Man Face Should I Cut?
The stencil lines can be used in different ways depending on the effect you want.
For a traditional glowing jack-o’-lantern:
- Cut out the large eye shapes.
- Etch the web lines.
- Leave the sections between the web lines intact.
- Etch or lightly cut the outer mask outline.
For a simpler version:
- Cut only the eyes.
- Use black paint or marker for the web lines.
- Leave the outer face shape uncut.
For an advanced version:
- Combine full cutting with shallow etching.
- Use different depths to create bright and dim sections.
- Carefully preserve the narrow areas separating each section.
Before cutting, lightly shade the sections you intend to remove. This tip will help prevent accidentally removing the wrong area.
Safety Tips
Pumpkin carving can be a memorable family tradition and a fun seasonal activity, but sharp tools should be handled carefully.
- An adult should perform all cutting.
- Place it on a stable, dry surface.
- Cut away from your hands and body.
- Dry your hands before handling tools.
- Do not allow children to reach into the pumpkin while someone is carving.
- Use a scoop rather than a knife to remove seeds.
- Keep carving tools in one designated area.
- Never leave a lit candle unattended.
- Choose a securely enclosed battery-operated light.
- Keep loose button batteries away from children and pets.
Children can safely participate by choosing the stencil, taping it in place, scooping the pumpkin with supervision, painting, and helping with the final display. The CPSC specifically recommends that adults handle sharp tools.
How to Make a No-Carve Spiderman Pumpkin
You do not have to cut into the pumpkin to use these pages.
A no-carve idea lasts longer, creates less mess, and allows younger children to participate more fully.
Painted Stencil Pumpkin
Tape the template to the pumpkin and transfer the design with a pencil or tracing tool.
Remove the paper and fill in the design with black acrylic paint.
For a more colorful version:
- Paint the pumpkin red.
- Add black web lines.
- Paint the eyes white.
- Outline the eyes in black.
- Add blue accents around the lower portion.
Allow each paint layer to dry before adding the next color.
Marker-Decorated Pumpkin
Use a permanent paint marker to trace the outline.
This works best on an artificial pumpkin or one that will be displayed where it cannot be touched frequently.
Decoupage Pumpkin
Cut out the image and attach it to the pumpkin with decoupage glue.
Smooth the paper gently from the center outward. Apply another thin layer of decoupage medium over the top and allow it to dry.
Artificial Pumpkin
Transfer the outline onto a carvable foam pumpkin.
An artificial version can be displayed year after year. Use tools specifically intended for foam pumpkins, and have an adult complete the cutting.
Other Ways to Use This Printable
The images can also be used for other Halloween activities.
Classic Superhero Party Decorations
Print the pages on cardstock and use them as signs, table decorations, cupcake toppers, or party banners for a DIY celebration.
Fans of the Marvel Universe can pair them with Iron Man or other favorite heroes for a coordinated party theme.
Coloring Pages
Let children color the pages with red, blue, and black crayons or markers.
Window Decorations
Trace the shapes onto black cardstock and attach them to a window or glass door.
Paper Plate Masks
Use the eye-mask artwork as a guide for creating a paper plate or cardstock mask.
Make sure eye openings are appropriately placed and do not restrict a child’s vision.
Halloween Treat Bags
Trace the spider emblem onto plain paper bags and fill it in with black paint.
Classroom Art Project
Children can use the pages to practice symmetrical patterns, line work, painting, or paper cutting without using carving tools while encouraging creativity.
How to Help a Detailed Stencil Fit a Round Pumpkin
Paper does not naturally lie flat against a curved surface, so wrinkles are normal.
These techniques can help:
- Trim away excess paper.
- Make relief cuts around the outer edge.
- Use several small pieces of tape instead of two long pieces.
- Begin taping at the center of the image.
- Let outer edges overlap.
- Choose the flattest side of the pumpkin.
- Reduce the scale slightly if needed.
- Transfer one section at a time when necessary.
Do not worry when the paper is not perfectly smooth around the outer edge. Concentrate on keeping the eyes, emblem, or other central details correctly positioned.
How to Fix Common Pumpkin-Carving Problems
The Stencil Keeps Wrinkling
Make more relief cuts around the edges and overlap the paper slightly.
You can also reduce the size so the image covers less of the curved surface.
The Poked Holes Are Hard to See
Use a washable marker to connect the dots after removing the paper.
Keep the stencil nearby so you can compare the lines.
A Narrow Piece Broke
Use a toothpick to secure the broken section from behind.
You can also adjust the artwork by enlarging the opening or converting the damaged section into an etched area.
The Pumpkin Wall Is Too Thick
Scrape more pulp from the inside directly behind the image.
Test the thickness carefully rather than scraping the entire inside unnecessarily.
The Paper Became Wet
Dry the pumpkin thoroughly before attaching the stencil.
Make another copy rather than attempting to cut through torn or distorted paper.
The Design Does Not Glow Evenly
Turn on the light and examine the jack-o’-lantern in a dark room.
Thin the inside wall behind dim sections or clean away pieces of pulp that may be blocking the light.
How Long Will a Carved Pumpkin Last?
A carved pumpkin does not last as long as an uncut one. In warm weather, softening, mold growth, and deterioration happen more quickly, so it is best to finish the project shortly before displaying it. University of Minnesota Extension similarly recommends waiting until near Halloween when temperatures are warm.
To help it last:
- Begin with a firm, unblemished pumpkin.
- Use clean tools.
- Keep it out of direct sunlight.
- Move it into a cool location during the day when practical.
- Protect it from rain.
- Remove the light when it is not being displayed.
- Check daily for mold or soft spots.
- Discard it when it begins to smell, leak, collapse, or develop significant mold.
Do not expect a finished jack-o’-lantern to remain fresh for several weeks.
Can You Use the Stencil for Pumpkin Etching?
Yes. The Spider-Man face is especially well suited to etching because the web pattern contains many thin lines.
To etch the pumpkin:
- Transfer the image as directed.
- Carefully use a linoleum cutter or pumpkin etching tool to remove the outer skin.
- Remove only the orange outer skin along the web lines.
- Leave the inner wall intact.
- For brighter illumination, etch those sections a little deeper.
- Test the result with a pumpkin light as you work.
Etching creates more detail than full cutting and reduces the risk of the narrow web sections breaking apart.
Adults should handle etching tools.
How to Download the Stencil
Use the download form or button below to receive the PDF file.
After downloading:
- Once downloaded, save the PDF to your computer or device.
- Open it in a PDF reader.
- Select the version you want.
- Choose actual size or adjust the scale.
- Print on standard white letter-size paper.
- Trim around the stencil before attaching it to the pumpkin.
These pages are intended for personal and educational classroom use. Please direct friends, parents, and teachers to this post so they can download their own copies rather than distributing the digital file.
More Superhero and Halloween Printables to Explore
If you enjoyed this Spider-Man pumpkin stencil, here are more superhero and Halloween printables that are perfect for decorating, dress-up, and seasonal fun.
- Printable Pumpkin Carving Templates – Browse a collection of carving patterns featuring a variety of popular characters and festive designs.
- Printable Mickey Mouse Pumpkin – Add a touch of Disney magic to your Halloween decorations with this Mickey Mouse carving stencil.
- Printable Batman Mask Free Template – Transform into Gotham’s legendary hero with an easy-to-assemble printable mask.
- Printable The Hulk Mask – Bring the mighty green superhero to life with a bold mask that’s great for pretend play and costume events.
- Wonder Woman Mask Printable – Complete your superhero collection with a printable inspired by Wonder Woman’s iconic look.
This Spiderman pumpkin stencil makes it easier to create a superhero-inspired Halloween decoration without drawing a complicated image from scratch.
Pick the complete face, eye mask, or spider emblem, then cut, etch, or paint it using the method that best fits your experience level. Whether the finished jack-o’-lantern sits on your porch, decorates a superhero party, or becomes part of a family carving contest, it is sure to stand out after dark.
Is the Spiderman pumpkin stencil printable free?
Yes. The free templates can be downloaded for personal, classroom, or family use according to the download terms provided on the page.
How many options are included?
The set includes three options: a complete Spider-Man face, an eye-mask version, and a spider emblem.
What size pumpkin should I use?
A medium or large pumpkin with a smooth side works best. You can reduce the scale for a smaller one.
Which stencil is the easiest?
Painting the spider emblem is the easiest no-carve option. For cutting, the eye-mask version can be simplified by removing only the large eye sections.
Which stencil is the most difficult?
The complete face and spider emblem contain thin lines and narrow areas that require careful cutting or etching.
Can children help with pumpkin carving?
Children can help with preparation and decorating, but an adult should handle sharp carving and etching tools.
Do I cut on every printed line?
Not necessarily. Some lines, particularly the web pattern, are better etched or painted. Decide which areas will be cut, etched, or left intact before beginning.
Can I paint the image instead of cutting it?
Yes. Painting is an easy no-carve alternative and works well for younger children.
Can I use the templates on artificial pumpkins?
Yes. The artwork can be transferred onto carvable foam pumpkins, although an adult should use the cutting tools.
What paper should I use?
Regular white printer paper works best because it bends around the pumpkin more easily than cardstock.
How do I keep the stencil from moving?
Use several small pieces of tape around the edges. Snip small relief cuts into the paper so it bends and overlaps more easily around the pumpkin.
What should I put inside the pumpkin?
Place a battery-operated LED light inside, making sure the battery compartment closes securely. Keep loose or accessible coin batteries away from children and pets.
Find more masks, coloring pages, and activities in our Superhero crafts and printables collection.
How to Use a Spiderman Pumpkin Stencil
Download and transfer a free Spiderman pumpkin stencil to create a carved, etched, or painted superhero pumpkin for Halloween.
Materials
- Pumpkin
- Free Spiderman pumpkin stencil printable
- White printer paper
- Clear tape or painter’s tape
- Battery-operated pumpkin light
Tools
- Printer
- Scissors
- Pumpkin scoop
- Pushpin or transfer tool
- Pumpkin carving or etching tools
- Washable marker
Instructions
1. Cover your workspace, and get out a pumpkin carving tool and a spoon
2. Carve out the top of your pumpkin (making sure it is carved inward) and scoop out the pumpkin guts with a large spoon
3. Print your free Spiderman printable
4. Trim off any excess paper, leaving you with half an inch border around the pattern
5. Make sure to cut some relief cuts in the printable to make your craft as easy as possible
6. Once you've taped your printable onto your pumpkin, poke holes along the pattern lines using a push pin, then remove the paper
7. Carve out your design and place a small light inside
