St Patrick’s Day Slime Recipe
Are you ready to have some fun this St. Patrick’s Day? How about making your slime? It is an easy project that kids are bound to love! This St. Patrick’s Day Slime Recipe is the perfect pot of Gold Slime recipe for the March 17th holiday.
Slime recipes are an excellent activity for children of all ages, providing hours and hours of fun and learning from basic scientific principles. So let’s get started on making the coolest St. Patrick’s Day slime that’s sure to be cherished!
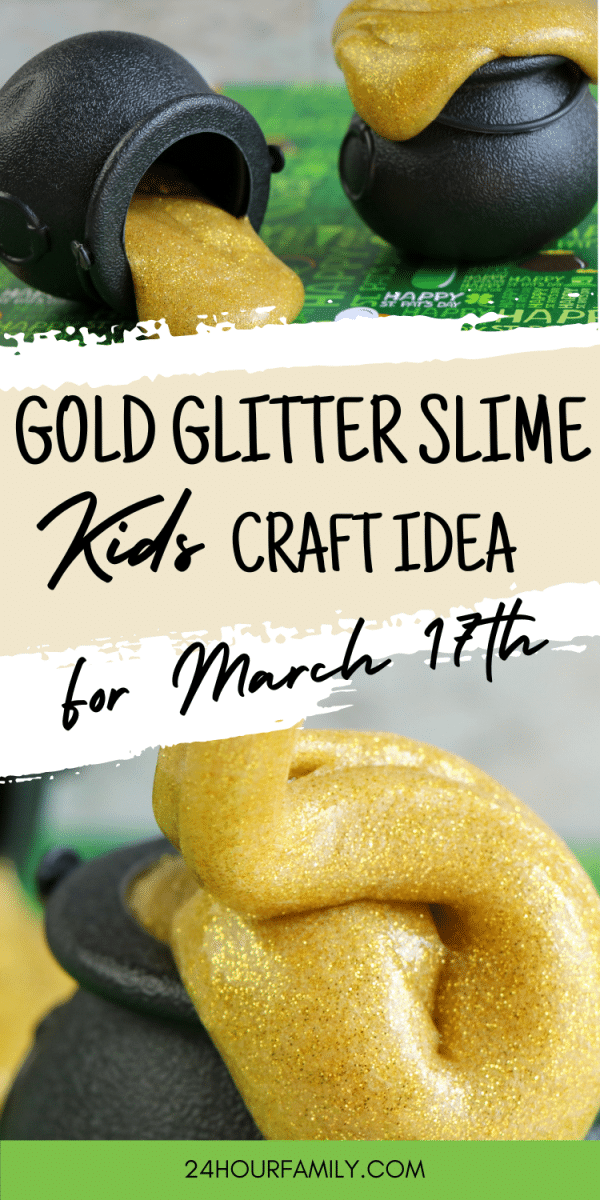
Table of Contents
What Materials are Needed?
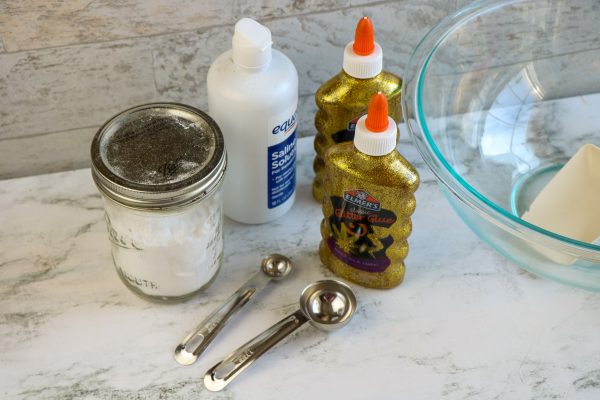
- 1 (6-ounce) bottle of Elmer’s Specialty Glues (Gold Glitter)
- About ½ cup of water (Preferably Warm)
- ½ teaspoon baking soda
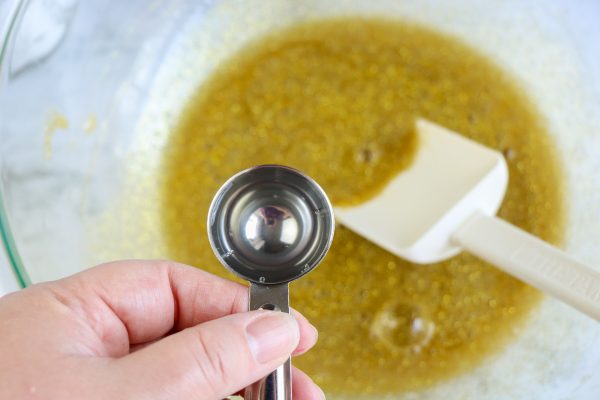
- 1 tablespoon Contact Solution (containing boric acid), for each batch
Empty the glue into a large bowl.
Fill the empty glue bottle about ⅓ full with warm water (about ¼ cup) and seal with the lid. Shake well to combine the remaining glue with the water. Pour into the bowl with glue and stir to combine.
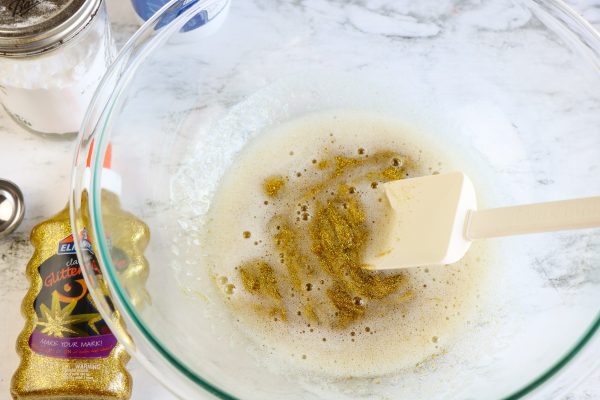
Add the baking soda to the glue and stir to mix thoroughly.
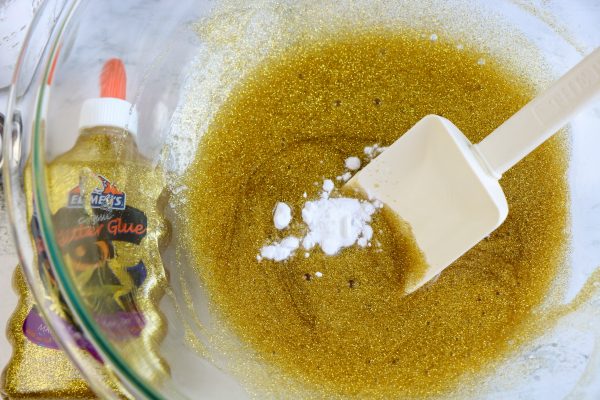
If you are adding additional glitter, food coloring, scents, or confetti, stir into the glue mixture before adding the contact lens solution.
Add contact lens solution to the glue mixture and stir well. (Note: regular glue will require less contact lens solution than glitter glue. Add the contact lens solution slowly, mixing between additions, and add only enough to bring the glue together into a soft ball.)
Remove the slime from the bowl. The slime will be sticky. Begin to play with the slime, stretching or kneading it as you would bread dough, to bring the slime together. The slime is ready when it is no longer sticky.
Best if stored in an airtight container in the refrigerator when not in use.
Can We Customize Our St. Patrick’s Day Slime Recipe?
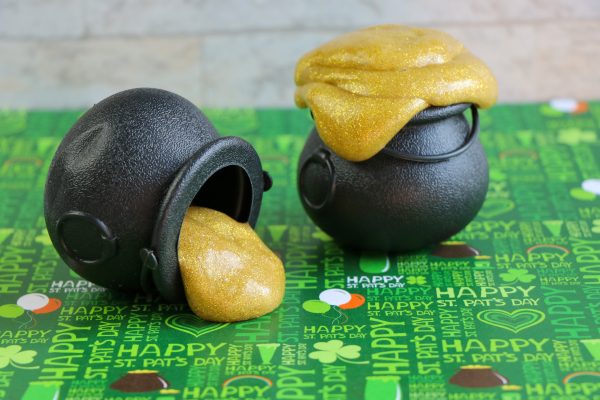
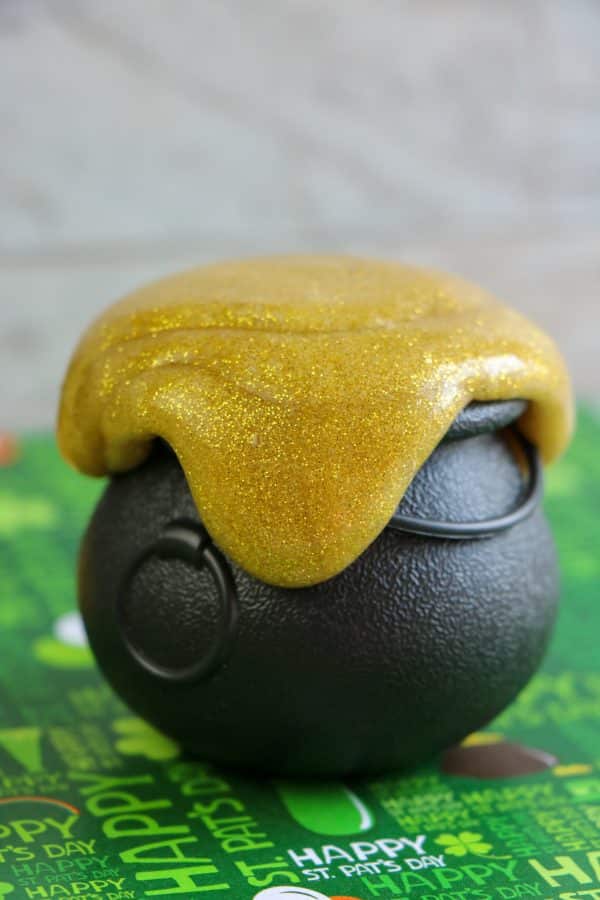
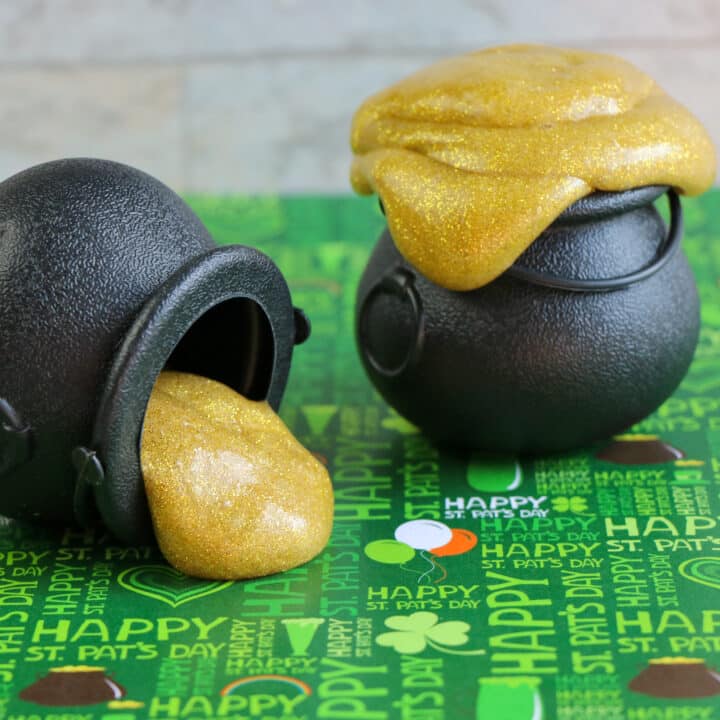
This is the best part of making homemade slime and the most fun thing about it! You can turn it into a glittery green slime or gold glitter slime by adding as much glitter as you like to get that perfect sparkle.
For a festive feel, especially for St. Patrick’s Day, sprinkling some shamrock confetti can make your St. Patrick’s Day slime extra special. If you want to make your slime even more unique, consider using small condiment containers to neatly store and display different types of slime.
You can make a collection of gooey slime, clear slime, or fluffy slime, and maybe even color-changing ones for sensory experiences.
Safety Tips When Making Slime
While slime-making is a fun activity, it’s important to ensure safety, especially with younger kids. Always supervise children to prevent any skin irritations from the borate ions found in the slime activators.
If you’re using borax powder, make sure it’s diluted properly in water. Remember, a very small amount of these activators goes a long way. Also, keep your slime away from small children who might be tempted to taste it.
What Are Some Fun Ideas for St. Patrick’s Day Gold Slime Recipe?
Here are some delightful ideas to make your slime-making experience even more special and thematic for the holiday:
1. Mix gold coins or gold glitter into your slime. This transforms your slime into a treasure hunt, where kids can stretch and pull the slime to discover hidden treasures, making it an exciting St. Patrick’s Day activity.
2. Incorporate shamrock confetti or cut out shamrock shapes from green paper and mix them into the slime. This not only adds to the St. Patrick’s Day theme but also makes for an interesting texture in the slime.
3. Start with a basic slime recipe and add color-changing pigments that react to temperature. Kids will be amazed to see their slime change colors while they play, adding a magical touch fit for a sneaky leprechaun!
4. Create a St. Patrick’s Day sensory bin with green glitter slime as the base. Add various St. Patrick’s Day-themed items like plastic shamrocks, little leprechauns, and rainbows for kids to find and explore within the slime.
Add a glow-in-the-dark element to your St. Patrick’s Day slime for a fun twist. Turn off the lights and watch the slime glow, adding an element of wonder to your St. Patrick’s Day celebrations.
The key to the best slime recipes is to have fun and be creative. Whether you’re hosting a St. Patrick’s Day party for large groups or just looking for a fun St. Patrick’s Day activity for your family, this amazing slime recipe will surely be a huge hit. Enjoy your sensory play and have a happy St. Patrick’s Day!
St Patrick’s Day Slime
Indulge in the enchanting festivities of March 17th with this delightful St. Patrick’s Day Slime Recipe, crafted to perfection for the occasion.
Materials
- Elmer's gold glitter glue
- Warm water
- Baking soda
- Contact solution with boric acid
Tools
- Mixing bowl
- Spoon or spatula
Instructions
- Begin by pouring all the contents of the glue bottle into a spacious bowl, ensuring that you do not leave anything behind.
- Next, fill the emptied glue bottle approximately one-third with warm water, equivalent to about a quarter cup, and securely seal the lid. Give the bottle a vigorous shake, effectively blending the residual glue with the water. Once well mixed, pour the diluted glue into the initial glue bowl and stir thoroughly until all components are combined.
- Add baking soda to the glue mixture, ensuring even distribution throughout the bowl.
- Now is the time to incorporate additional elements such as glitter, food coloring, scents, or confetti to enhance your slime.
- It's time to add the contact lens solution to the glue mixture. Pour the contact lens solution into the bowl containing the glue mixture, ensuring that you add it gradually while stirring continuously. As you stir, you'll notice the slime forming and coming together. Keep mixing until the slime begins to pull away from the sides of the bowl and becomes less sticky. Once the slime reaches the desired texture, it can be played with and enjoyed!
Notes
When working with regular glue, it's important to note that it will require less contact lens solution compared to glitter glue. Therefore, it's best to add the contact lens solution slowly, mixing well between each addition.
Such a fun crafts for the kids. I am pleased to feature your St. Patrick’s Day slime recipe at Love Your Creativity. Happy St. Patrick’s Day.
Awesome, Thank you!