
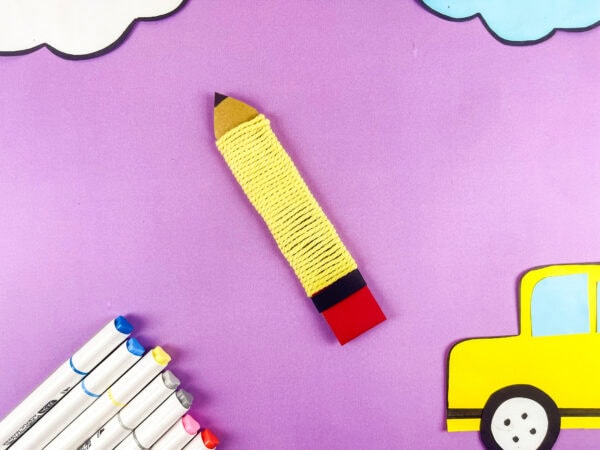
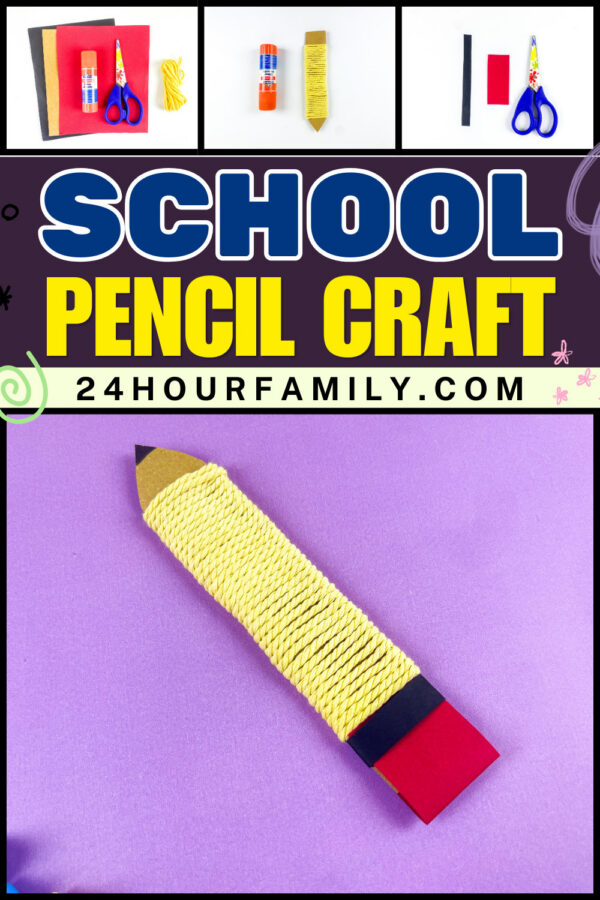
Yarn School Pencil Craft
This yarn school pencil craft is a fun and colorful back-to-school project that kids absolutely love making! Bright yarn, cheerful colors, and simple supplies come together to create an adorable pencil complete with a bright yellow body, a pink eraser, and classic pencil details that make it instantly recognizable.
This easy school pencil craft is perfect for preschoolers and early elementary kids — giving little hands plenty of fun as they wrap, cut, trace, and decorate their way to a finished project they’ll be proud of.
Whether you’re planning a classroom craft, a homeschool activity, or just a creative way to celebrate the start of a brand-new school year, this yarn pencil craft for kids is a simple setup with a seriously cute result.

Yarn School Pencil Craft
This pencil craft works wonderfully for preschool, prek, kindergarten, and elementary learners. Since the project involves wrapping, cutting, and arranging simple shapes, it also doubles as a helpful craft activity for practicing fine motor skills.
One of the best things about this pencil craft is how easy it is to personalize. You can turn it into a pencil-name craft by writing names across the pencil body, letting each kid create a unique version for the classroom or a home display.
Teachers can even use the finished pencils for a back-to-school bulletin board during the 1st week of the new school year.
This post may contain affiliate links. As an Amazon Associate and a participant in other affiliate programs, I earn a commission on qualifying purchases. Read our disclosure policy here.
Crayola Construction Paper Bulk Pack (480 Sheets) – 10 Assorted Colors, 9×12, Classroom Arts & Crafts Supplies for Kids, Art Paper for School Projects Paper Crafts for Kids: 25 Cut-Out Activities for Kids Ages 4-88 Rolls Colored Masking Tape Rainbow Colors Painters Tape Colorful Craft Art Paper Tape for Kids Labeling Arts Crafts DIY Decorative Coding Decoration Teaching Supplies, 0.6 Inch x 16 Yard, 8 ColorsARTISTRO 24 Acrylic Paint Markers for Rock, Fabric, Wood, Glass, Craft, Decoration – Dual-Tip Paint Pens – Stocking Stuffers, Christmas Gift Idea for Teens, Grandkids, Kids – Art Supplies900 PCS Pom Poms, Multicolor Bulk Pom Poms Arts and Crafts, Soft and Fluffy Craft Pom Poms, Assorted Sizes Pompoms, for Arts and Craft Making DecorationsElmer’s Disappearing Purple School Glue Sticks, Washable, 6 Grams, 12 Count – Poster, Vision Board, Back to School, #1 Teacher Brand


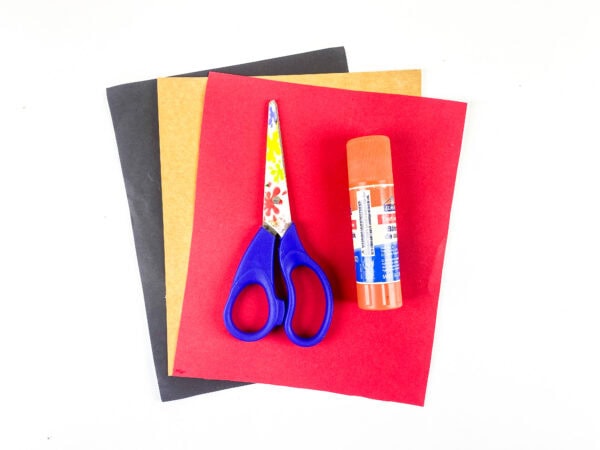
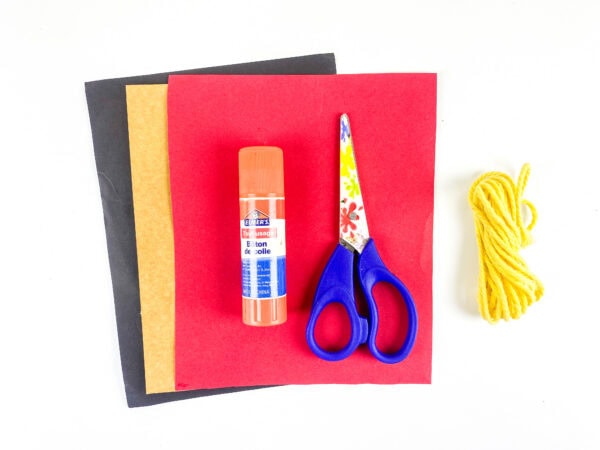
Materials You’ll Need To Make This Back To School Craft:
Before starting this craft, gather the supplies below:
- Construction paper
- Yellow Yarn
- Glue
- Scissors
- Markers
You can use regular paper or cardstock for this project, but heavier cardstock or white cardstock can make the base sturdier for younger children. If you prefer guided prep work, you can also download a template or use printable pieces to save time.
How To Make This School Pencil Craft:
This pencil craft for kids comes together in just a few simple steps.
Step 1: Cut and Trace the Pencil Shape
Start by making the pencil base. Use a pencil template to trace a long pencil shape onto brown paper, cardstock, or white cardstock.
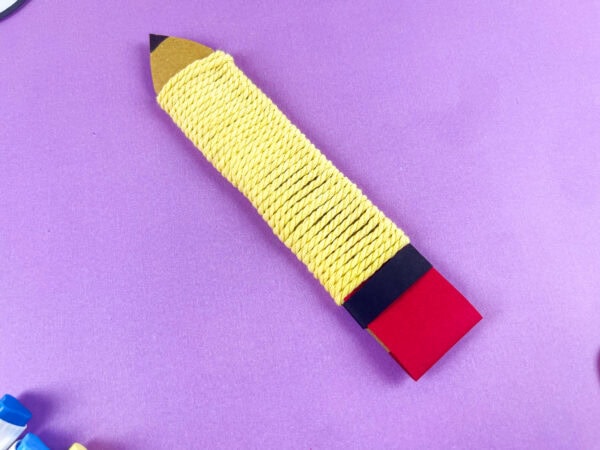
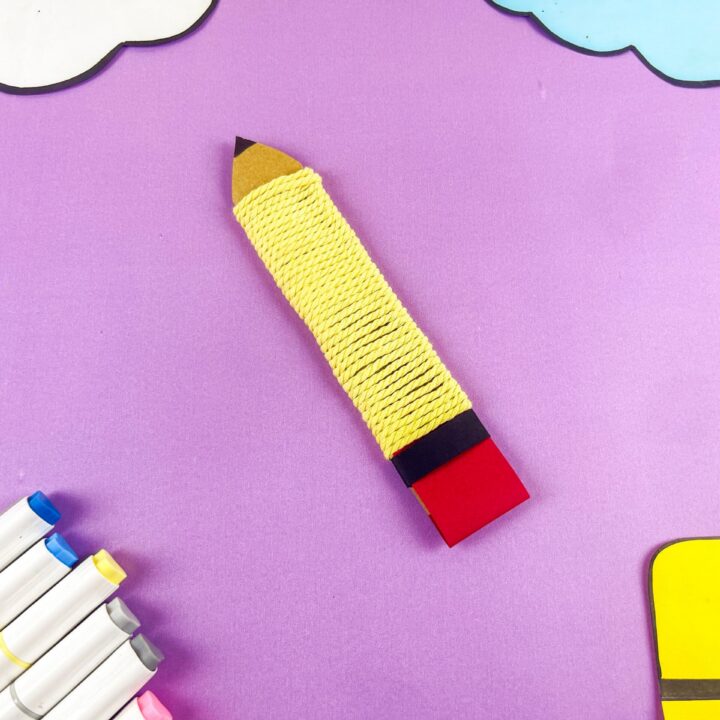
Cut out the shape carefully using scissors. The bottom point forms a triangle shape for the pencil tip, while the top stays flat for the eraser section.
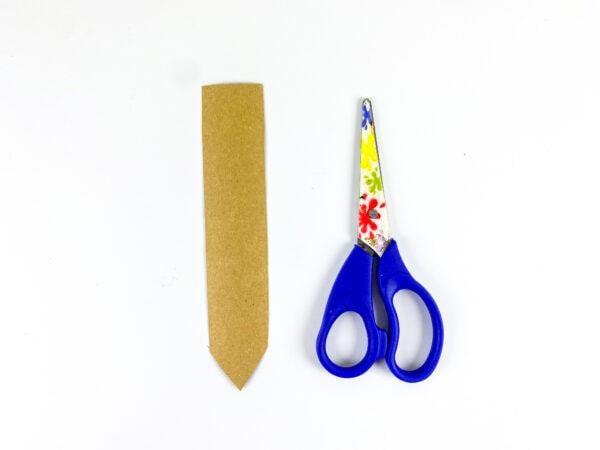
If you’re working with a group in a classroom setting, having the template pieces prepared in advance can make the activity run much more smoothly.
Step 2: Wrap the Yarn Around the Pencil
Now for the fun part.
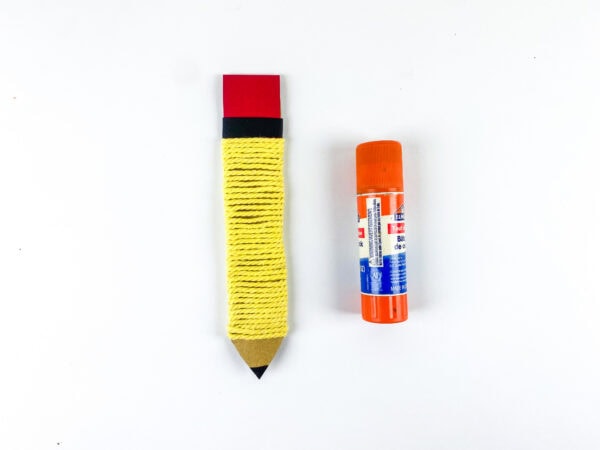
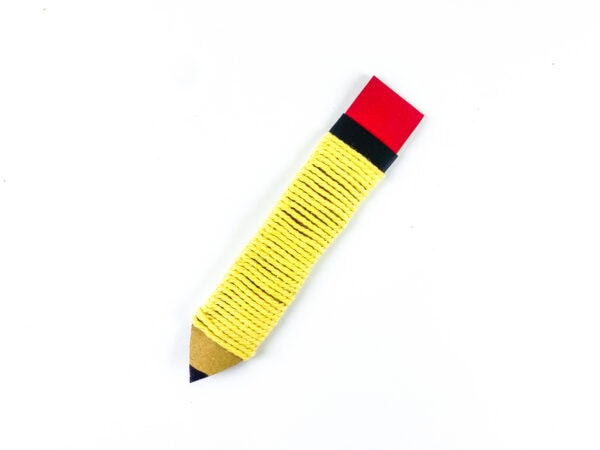
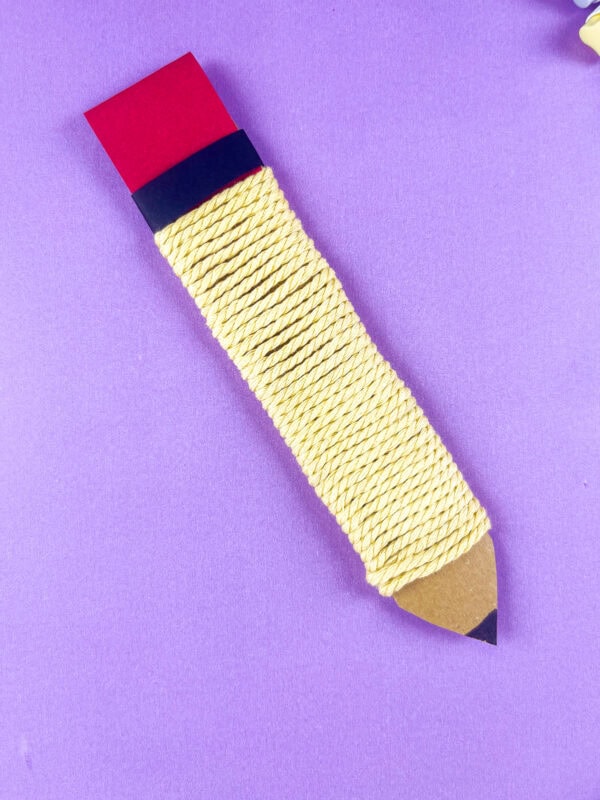
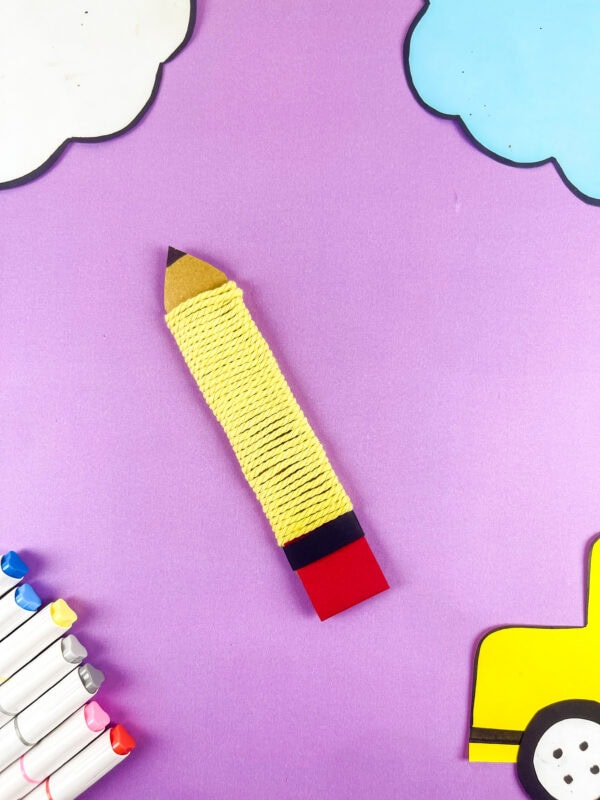
Take your yellow yarn and begin wrapping it around the pencil base until the middle section is fully covered. Use a little glue underneath the starting end to keep everything secure.
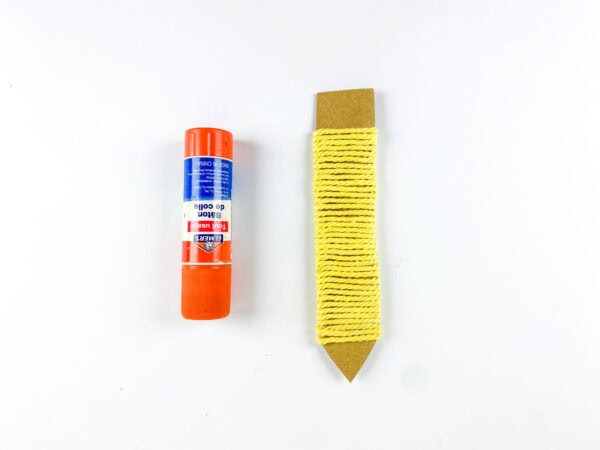
Continue wrapping evenly until the pencil body is completely covered. This part of the craft is surprisingly relaxing and also gives kids extra fine motor skill practice.
If needed, a small piece of tape can hold the yarn in place while wrapping.
The wrapped yarn creates a soft texture that makes this pencil craft stand out from other back-to-school craft projects.
Step 3: Create the Eraser Section
Cut a small red rectangle from paper and place it on top of the pencil to create the classic pink pencil detail.
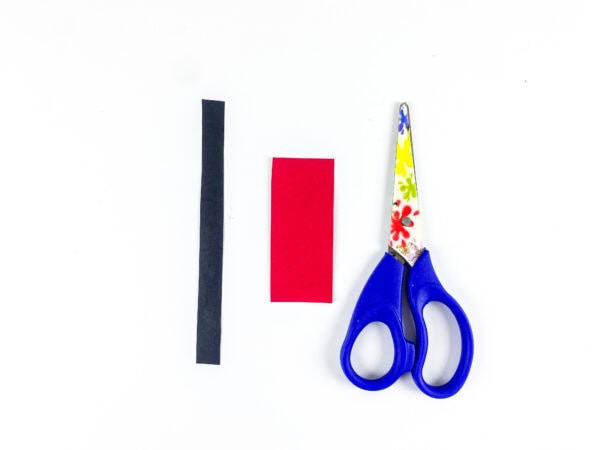
Next, cut a thin black strip to act as the metal band between the wrapped yarn and the top section.
Attach the red paper to the top of the pencil base, then place the black strip between the wrapped yarn and the eraser area.
These small details instantly make the craft look more polished and recognizable.
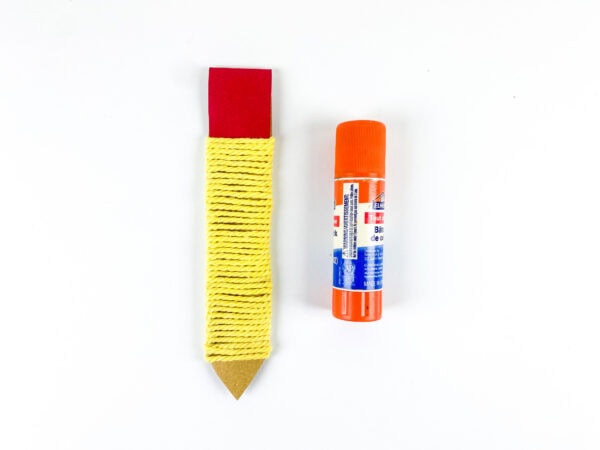
Step 4: Finish the Pencil Tip
Use a black marker to draw the pencil lead at the pointed end.
You can keep the design simple or add extra touches like initials, names, little doodles, or even a tiny crayon drawing along the side to personalize your finished project.
Once everything is secure, your pencil craft is ready to display.
Fun Ways To Customize Your Pencil Craft
One reason this school pencil craft is so enjoyable is that there are so many ways to make it your own.
Try swapping the yarn color instead of using traditional yellow. Bright blue, green, rainbow, or glitter yarn can create a more creative version.
You can also turn the project into a themed back-to-school craft by matching colors to a teacher’s classroom theme.
Want another fun idea? Turn it into a paint-stick version by using a wooden paint stick for the pencil base instead of paper. It gives the project a totally different look while keeping the same simple design.
For extra personality, use a hole punch to create hanging holes so finished pencils can be turned into a door display, wall banner, or bulletin board decoration.
Why This Craft Is Great For School Season
There’s just something fun about pencil projects during the back-to-school season.
A pencil is one of those classic symbols of learning, creativity, and fresh beginnings, making this craft such a fitting choice for the first day of school or the exciting days leading up to it.
Teachers can use this activity as part of back-to-school activities in the classroom, while parents may enjoy it as a simple afternoon craft to build back-to-school excitement at home.
Because the project involves wrapping, cutting, tracing, and assembling, it also serves as a low-prep resource for practicing coordination and fine motor skills.
Some teachers even pair this craft with a writing prompt, a crayon lesson, or a name activity to create a complete themed learning experience.
Helpful Tips For Making This Craft
A few simple tricks can make this craft even easier.
- Use thicker yarn if you want faster wrapping coverage.
- Apply glue lightly so the yarn stays neat.
- Keep extra paper nearby for testing colors or practicing how to trace shapes.
- Use sturdy cardstock if making a large classroom display.
- Follow the step-by-step instructions slowly when working with preschool or kindergarten groups.
You can also print a reusable, editable template for repeated classroom use. That’s especially handy for busy teachers preparing projects for multiple students.
More Back-to-School Craft Ideas for Kids
If you enjoyed making this School Pencil Craft, here are a few more school-themed activities that are perfect for creative classroom projects, back-to-school fun, and hands-on craft time.
- Paper Bag School Backpack Craft – A fun backpack-themed craft that lets kids create their own colorful school bag using simple paper supplies.
- Paper Bag School House Craft – A playful school-inspired activity where kids can build a mini school house with easy-to-use craft materials.
- School Backpack Paper Craft – A creative paper craft that turns simple shapes into a bright backpack design perfect for school-themed activities.
- Pencil Topper Craft – A cute and practical craft idea that adds extra personality and fun to everyday pencils.
- Back to School Scavenger Hunt
- Back to School Schoolbus Craft
- Back to School Color By Number
This cheerful school pencil craft brings together simple supplies, fun textures, and plenty of creative possibilities in one easy project. Whether you’re a teacher planning back-to-school fun, setting up a bulletin board, or simply looking for fresh inspiration for a seasonal craft, this yarn-wrapped pencil is an easy win.
With bright colors, hands-on wrapping, and an adorable finished result, it’s a fun way to celebrate learning, creativity, and the excitement of a brand-new school year.
School Pencil Craft
This School Pencil Craft is a fun and colorful activity that turns simple materials into a classic school-themed design. Kids can wrap yarn, cut paper pieces, and add details to create their own oversized pencil craft. It’s a great way to practice fine motor skills while getting creative. This project works well for classroom activities, school themes, or crafting at home. The finished pencil makes a fun decoration for walls, bulletin boards, or learning spaces.
Materials
- Construction paper — yellow (for the pencil tip/sharpened end), red (for the eraser), black (for the eraser band), and brown or kraft cardboard (for the pencil tip point)
- Yellow yarn — enough to wrap tightly around the full length of the pencil body
- White craft glue or a glue stick — to secure the yarn as you wrap and to assemble the paper pieces
- Black marker — to draw the pencil tip point and add any outline details
Tools
- Kid Safe Scissors
Instructions
1. Cut and Create the Pencil Base
Draw a large pencil shape onto construction paper, including a pointed bottom and flat top. Carefully cut out the shape to create the main base for your craft.
2. Wrap the Yarn Around the Pencil
Begin wrapping yellow yarn around the center section of the pencil shape. Add a small amount of glue at the starting end to hold it in place, then continue wrapping until the middle area is fully covered.
3. Make the Top Section
Cut a small rectangle from red paper for the top part of the pencil. Next, cut a thin black strip and glue it between the yarn section and the top piece to create the band detail.
4. Finish the Pencil Tip
Use a marker to draw the pencil lead at the pointed end of the shape. Add extra details if you'd like, such as a name, small designs, or simple decorations.
5. Let It Dry and Display
Allow the glue to dry completely before moving the craft. Once finished, display your pencil craft on a wall, bulletin board, desk area, or classroom space.