How to Make a Cricut Christmas Ornament
One of the most cherished traditions of this season is decorating our homes with beautiful Christmas ornaments. Why not elevate this tradition this year by crafting your Christmas decor using a Cricut machine? This Cricut Christmas Ornament is an Easy DIY Ornament
This blog post will guide you through the delightful process of making Cricut Christmas ornaments. If you want to add a personal touch to your tree or search for special, handmade gifts for loved ones, this adorable DIY Christmas Craft is the perfect solution. So, gather your craft supplies and make this festive project together!

Table of Contents
What Materials are Needed to Make this DIY Cricut Ornament?
This post contains affiliate links, which means I may earn a small commission for purchases made through the links in this post at no additional cost to you.
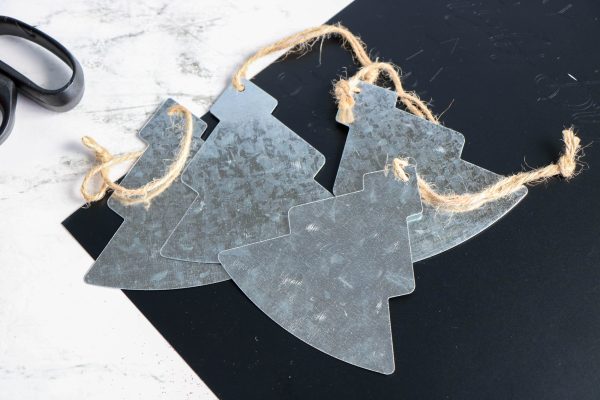
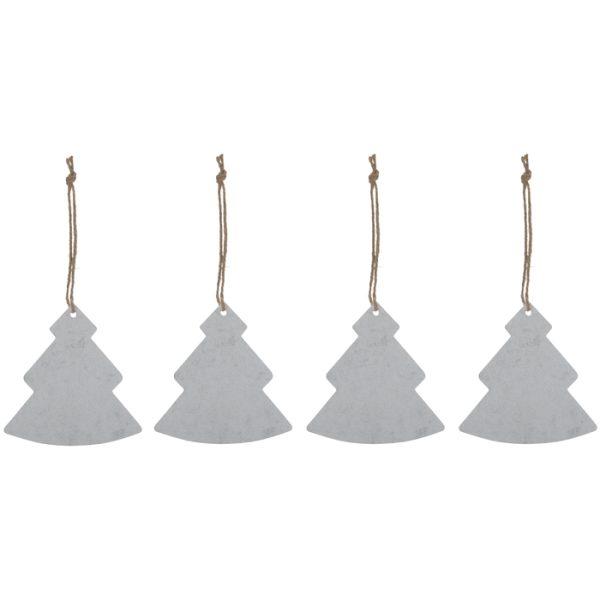
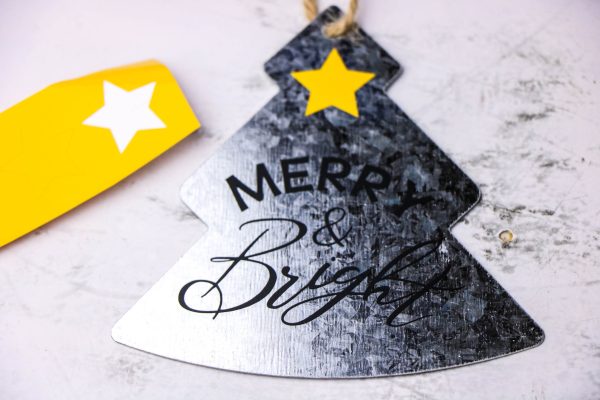
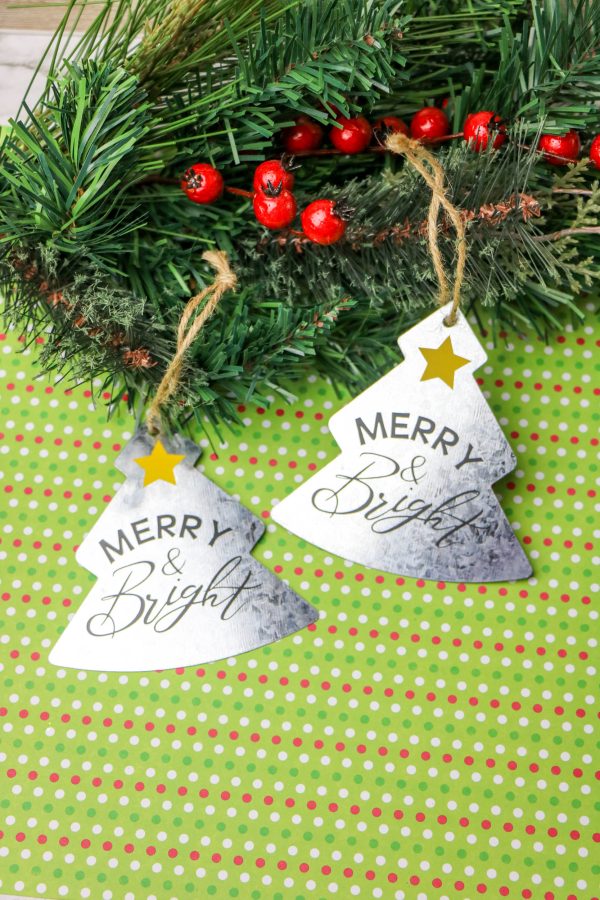
Galvanized tree ornaments
Permanent vinyl
Weeding tool
Transfer tape
Ribbon
Scissors
How do you make a Cricut Christmas ornament?
1. Open the Cricut Design Studio and create a new project.
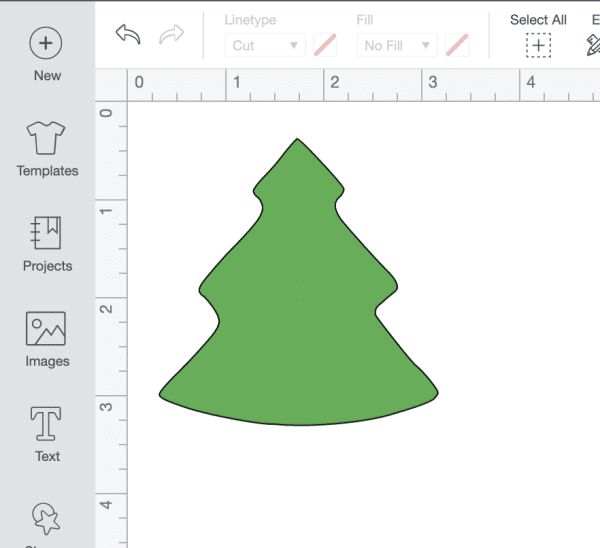
2. Trace the shape of your Christmas tree ornament on white paper and take a picture of it. Or, grab a screenshot of your ornament if the background of the sales image is white. Make sure to save the file as a JPG or JPEG. Upload the picture of the Christmas tree ornament to the Cricut Design Studio.
3. Select to remove the image’s background and save it as a cut file.
4. Insert the image into your project and adjust the size of the images to match the dimensions of the ornament.
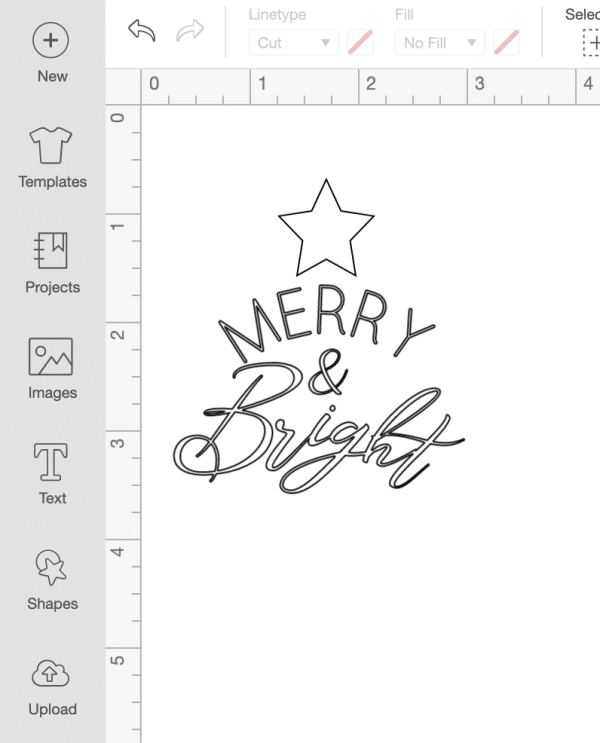
5. Insert a text box and type your desired word/s. Select your favorite font. (For this project, we used Merlot and Birthday Cakes.)
6. Arrange the text and images as desired over the ornament’s image. Adjustment is needed to fit.
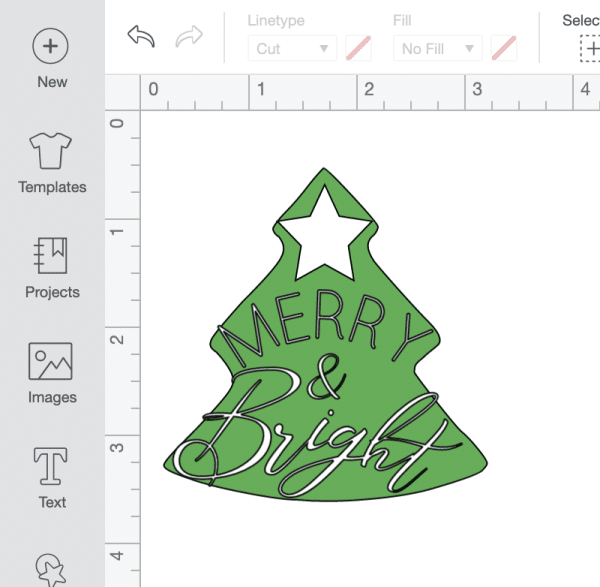
7. Delete the ornament image.
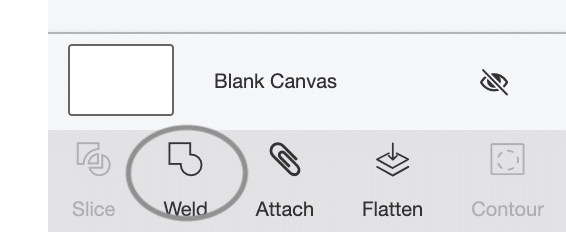
8. If all of the details of your ornament will be the same color, click and drag to select the elements for the ornament and select to weld the items together.

9. Copy the welded image and paste as many as you plan to make into the open project.

10. Cut the text and images from vinyl.
What are some creative ideas for decorating your ornaments?
Here are some creative ideas to decorate your ornaments using various materials and techniques:
1. Elegant Paper Ornaments: Use the Cricut machine to cut delicate and intricate designs from paper. These paper snow globe or winter felt ornaments can add an elegant touch to your Christmas tree.
2. Personalized Vinyl Decorations: You can create personalized ornaments using permanent or removable vinyl. Add the names of family members, holiday sayings, or even 2023 milestones. Remember to use your weeding tool for those intricate cuts!

3. Heat Transfer Vinyl for a Unique Touch: Heat transfer vinyl (HTV) is not just for fabrics. For a stunning effect, apply it to wood rounds or ceramic ornaments. The Cricut Joy’s precision is perfect for these intricate designs.
4. DIY Glitter Ornaments: Inside clear plastic ornaments, swirl a bit of glue and glitter for a sparkling effect. Use adhesive vinyl on the outside for a complementary design or message.

5. Adorable Wood Slice Ornaments: Give your Christmas a rustic touch with wood slice ornaments. Use the Cricut Explore Air to cut designs and then transfer them onto the wood slices for a charming, homespun look.
6. Festive and Fun Paper Snow Globe Ornaments: Another great idea is to create 3D paper snow globe ornaments. These can be an excellent project for the whole family and a fun way to spend time together during the most wonderful time of the year.
Mason Jar Reindeer Christmas Craft
How to Make a Ballerina Christmas Ornament
Edible Nutella Christmas Playdough
Tips for maintaining and storing your handmade Cricut ornaments
Proper maintenance and storage are key to ensure they remain as beautiful as the day you made them. Here are some tips to help you keep your ornaments in pristine condition for years to come:

- Wipe ornaments with a soft cloth to remove dust before storing.
- Wrap each ornament in tissue paper or bubble wrap to prevent scratches.
- Use durable boxes for storage to protect against damage.
- Group ornaments by size and type for easy access and extra care.
- Clearly label storage boxes for easy identification next season.
- Adjust your storage strategy as your collection grows.

Embrace the joy of the holiday season by creating your own personalized Cricut Christmas ornaments. This delightful and easy project adds a unique touch to your holiday decor and offers a great way to craft meaningful gifts for loved ones.
Remember, these handmade ornaments are more than just decorations; they’re cherished keepsakes that capture the season’s spirit.

Cricut Christmas Ornament
Decking the halls with Christmas ornaments is a beloved tradition that brings joy to the season. But why not take it up a notch this year? Enter the Cricut Christmas Ornament, your ticket to an easy yet impressive DIY ornament that'll elevate your holiday decor game.
Materials
- Galvanized tree ornament
- A permanent vinyl
- Ribbon
- Tape
Tools
- A pair of scissors
- Weeding tool
- A Cricut machine
Instructions
- Grab your Cricut Design Studio and begin by opening it up and creating a new project.
- First, grab some white paper and trace the shape of your ornament onto it. Then, snap a picture of your masterpiece. Alternatively, take a screenshot if you've found a similar ornament with a white background online. Just remember to save it as a JPG or JPEG. Once you've got your image, upload it to the Cricut Design Studio.
- Select the option to remove the background, ensuring you have a clean-cut file. Once that's done, insert it into your project in the Cricut Design Studio. Next, adjust the images' size to match your ornament's dimensions.
- It's time to add a personal touch! Insert a text box into your project and type out the words or words that you want to include on your ornament. Then, browse through the font options and pick your favorite.
- Arrange your text and images exactly how you want them over the ornament image in your project. Play around with the layout until it looks just right.
- Delete the ornament image from your project. Now, if the details will be the same color, here's a fun trick: click and drag to select all the elements for the ornament, then hit the weld button. This will seamlessly merge them, giving you a clean and cohesive design.
- Now that you've got your welded masterpiece let's make a bunch of them! Copy and paste them into your open project as often as you plan to whip up these festive ornaments.
- It's time to bring your design to life! Get ready to cut those text and images from vinyl. Load your vinyl material into your cutting machine and let it work magic.