
Day 6 of Creation Craft for Kids: Animals, People & God’s Greatest Work
Teaching the creation story just got even more exciting with this Day 6 of Creation craft for kids! On the sixth day of creation, God made land animals and created people in His own image — making it one of the most memorable and beloved days in the entire creation account. If you’re looking for a Bible craft for kids that brings this moment to life, you’ve landed in the right place.
This colorful, hands-on 6th-day-of-creation craft gives children a fun and engaging way to explore this important part of the Bible story while building creativity and fine motor skills along the way. Whether you’re a homeschool mom, Sunday school teacher, or just looking for a meaningful creation craft for kids, this one is sure to be a hit!
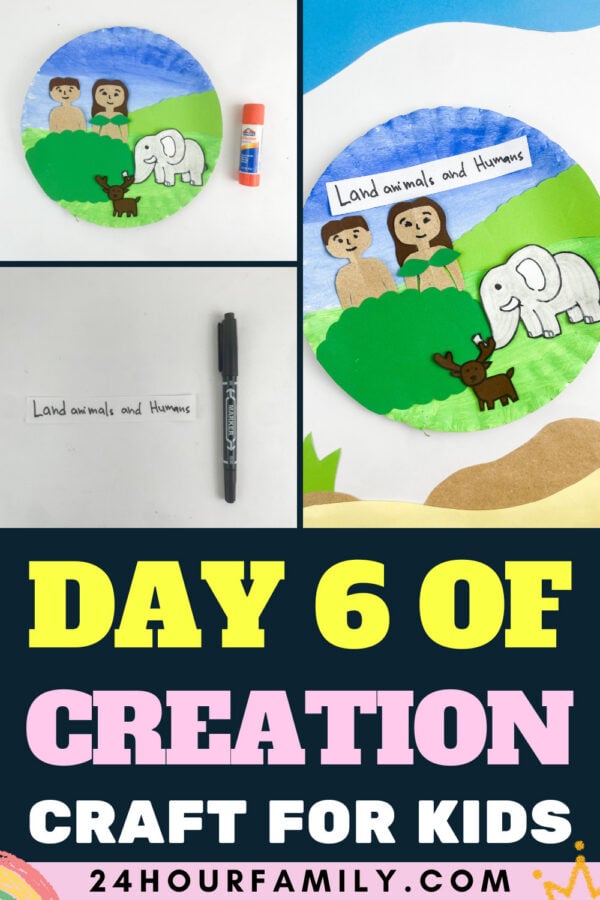
Day 6 of Creation Craft for Kids
The story of creation tells us that on Day 6 of Creation Craft for Kids, God said, “Let the land produce living creatures” — wild animals, livestock, and every creature that moves along the ground.
God then spoke, saying, “Let us make people in our image and likeness.” After that, He formed Adam and Eve as the first humans.
God observed all His creation and said it was very good. He blessed them and told them to spread across the earth and have stewardship over the fish and all living creatures.
Every living creature that moves, every green plant, every tree that has fruit, every green plant for food — all of it was given as a gift. It was the most full and beautiful day of creation yet.
That’s what we’re bringing to life today with this simple craft!
This post may contain affiliate links. As an Amazon Associate and a participant in other affiliate programs, I earn a commission on qualifying purchases. Read our disclosure policy here.
Stock Your Home 9-Inch Paper Plates Uncoated, Everyday Disposable Plates 9KTOJOY 100Pcs Jumbo Wooden Craft Sticks Popsicle Stick 6” Long x 3/4”Wide Treat Ice Pop for DIY Crafts,Home Art Projects, Classroom SuppliesMod Podge Gloss Sealer, Glue & Finish: All-in-One Craft Solution- Quick Dry, Easy Clean, for Wood, Paper, Fabric & More. Non-Toxic – Craft with Confidence, Made in USA, 16 oz., Pack of 1Crayola Construction Paper – 480ct (2pck), Bulk Teacher Supplies, Back to School Essentials For Kids, Classroom Must Have, Arts & Crafts Art PaperGoodyKing Arts and Crafts Supplies for Kids – 1170Pcs+ Craft Art Supply Kit for Toddlers Kids Craft Supplies & Materials Age 4 5 6 7 8 9 – All in One D.I.Y. Crafting School Supplies900 PCS Pom Poms, Multicolor Bulk Pom Poms Arts and Crafts, Soft and Fluffy Craft Pom Poms, Assorted Sizes Pompoms, for Arts and Craft Making Decorations


What You’ll Need:
Day 6 of Creation Craft for Kids: Here’s what you’ll want to gather before you get started:
- Paper plate (one per child)
- Blue and green acrylic paint
- Construction paper (green, brown, black, and white)
- Glue stick
- Scissor
- Marker (black works best)
- A gray crayon or marker for the elephant
- Optional: sticker embellishments, yarn for hair details, or printable animal templates
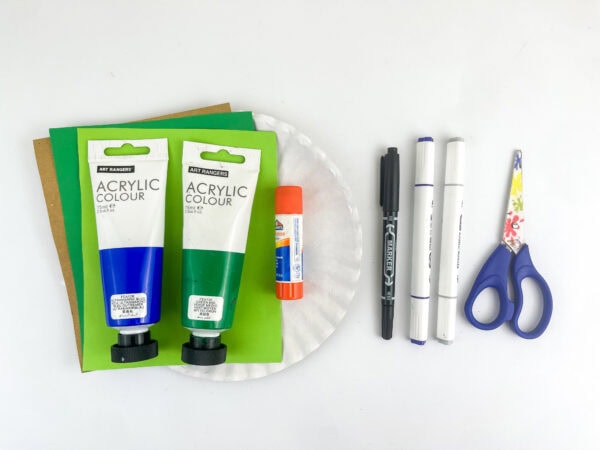
That’s it! Simple supplies for a big biblical moment.
How to Make a Day 6 of Creation Craft for Kids
Here’s the step-by-step guide so everything goes smoothly — even with wiggly toddler hands in the mix!
Step 1 — Paint the Background
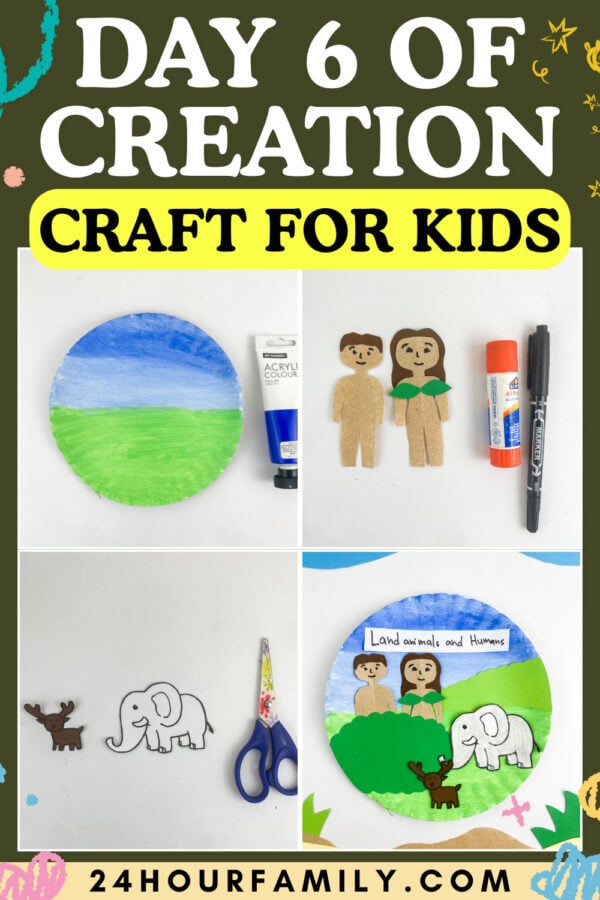
Start with your plate and paint it in a gradient. Use dark blue at the top, fading into light blue and then shades of green at the bottom. Think sky on top, ground below.
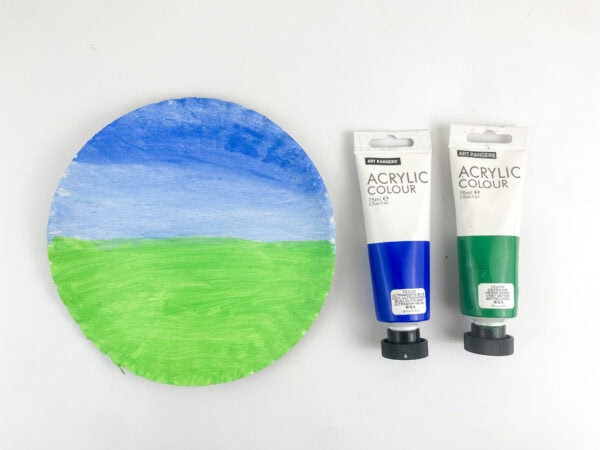
This sets the scene for what God created on creation day six — a beautiful earth ready to be filled with life.
Step 2 — Cut the Templates
While the plate dries, use your construction paper to cut out the pieces you’ll need. Here’s what to make:
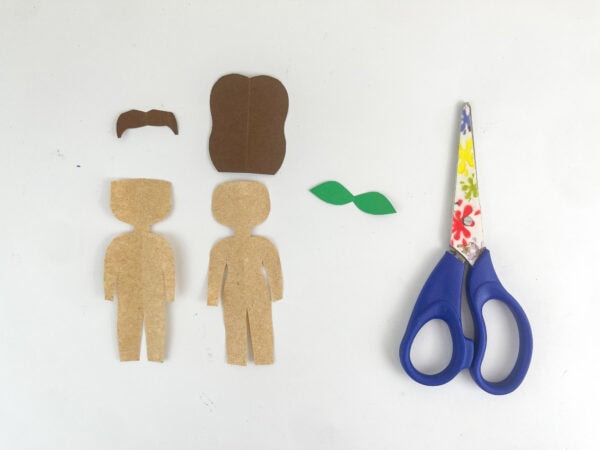
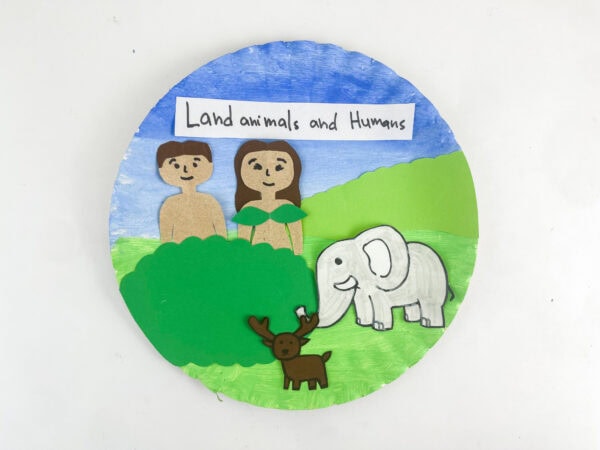
- Two human figures (Adam and Eve) from brown cardboard or tan construction paper
- Brown hair pieces — longer for Eve, shorter for Adam
- A small green leaf piece of paper covering for Eve
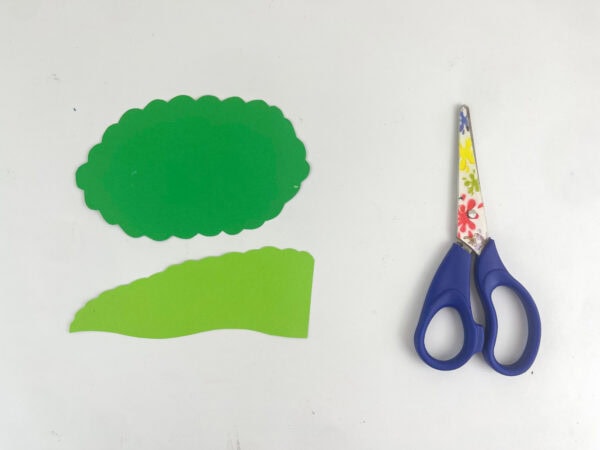
- A large green bush/tree shape (use a scalloped edge for fun texture!)
- A lighter green grass strip with a wavy top edge
- Animal shapes — we used construction paper for the deer, and drew the elephant on white paper with a marker
Step 3 — Assemble the Figures
Now it’s time to build Adam and Eve! Glue the hair onto the head of each figure. Add facial features using a black marker — little dot eyes, curved brows, and a simple smile.
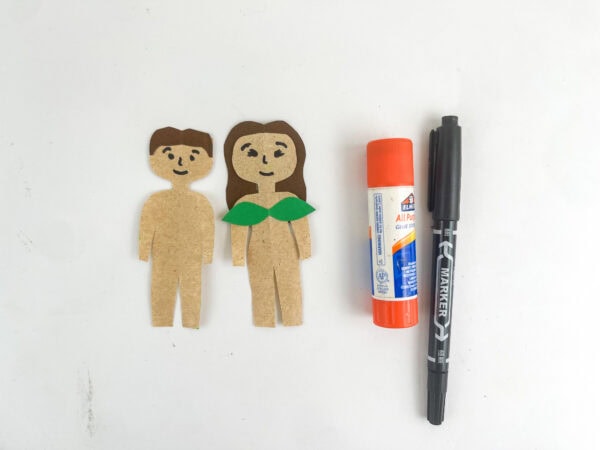
Attach the green leaf covering to Eve. These two look so cute once they’re glued together!
Step 4 — Color the Animals
For the elephant, draw the outline on white paper and color it in using a gray crayon or light gray marker.
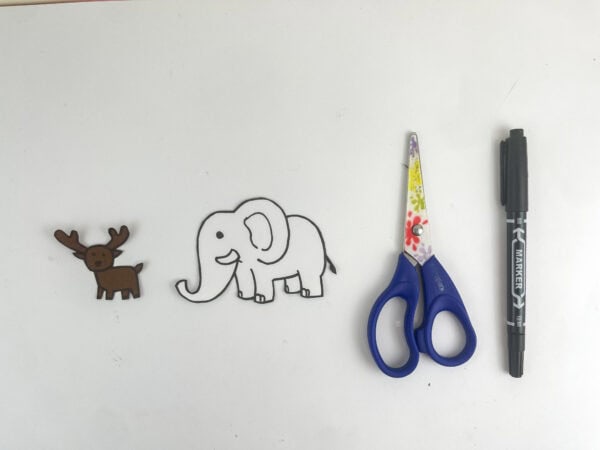
Cut it out carefully with your scissors. For the deer, use dark brown construction paper
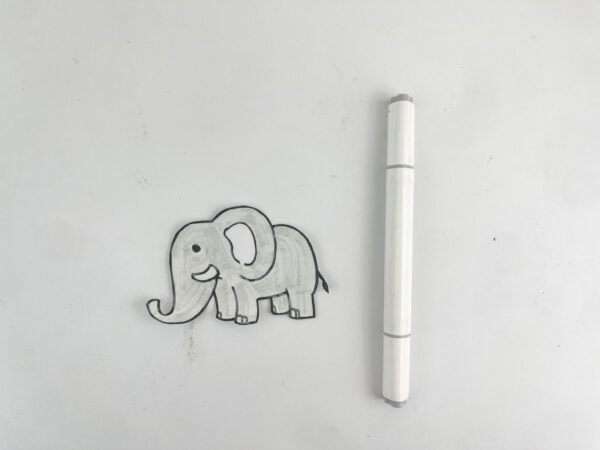
and cut out the body and antlers separately, then glue them together.
Step 5 — Place in Order and Assemble
Now for the fun part — putting it all together! Here’s the order:
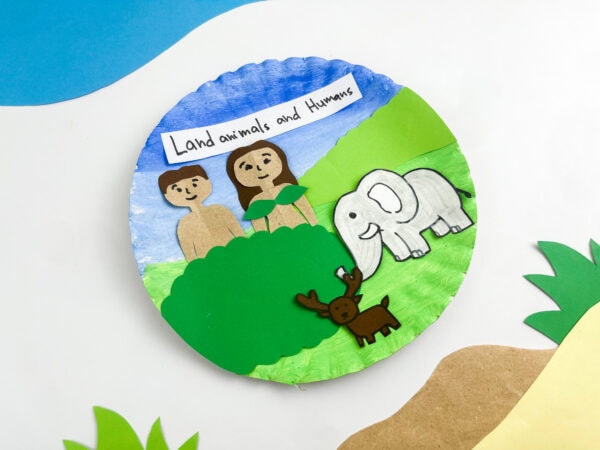
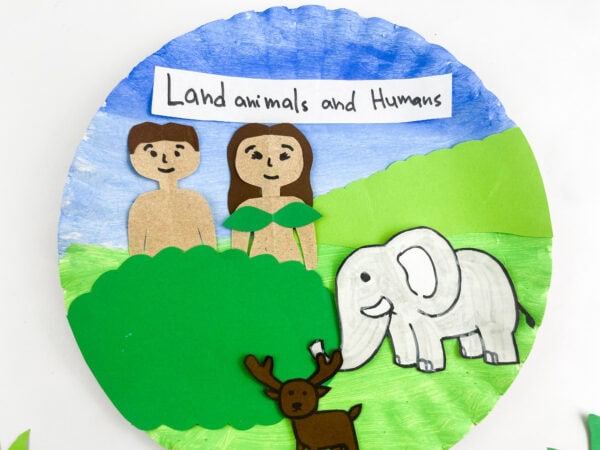
- Glue the wavy green grass strip across the lower portion of the plate
- Add the big green bush/tree to the lower left
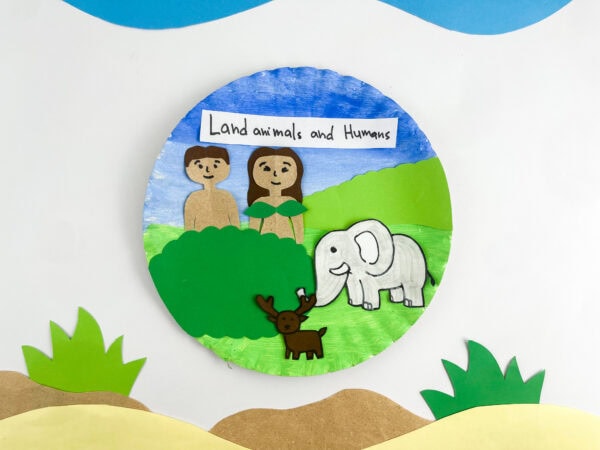
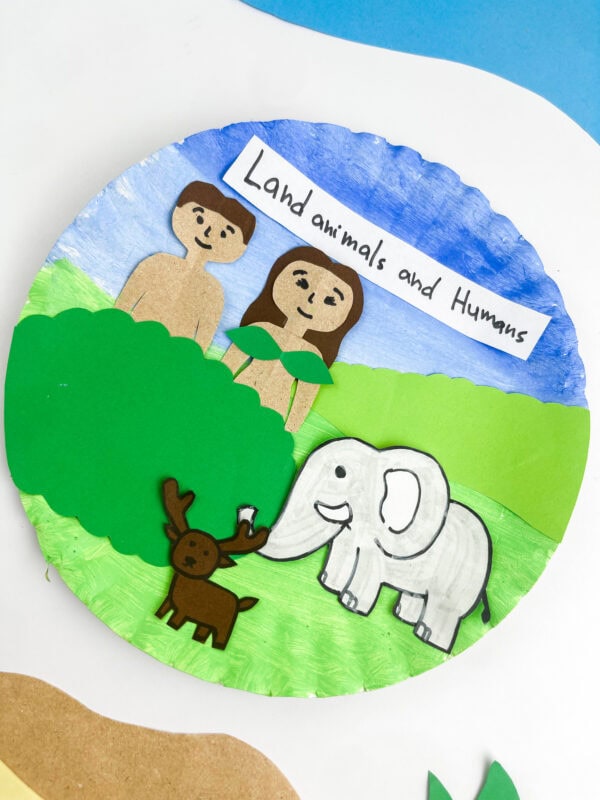
- Place Adam and Eve standing in the middle, partially behind the bush (as the bible verse in Genesis describes them covered by leaves!)
- Add the elephant to the right side
- Tuck the little deer near the bush
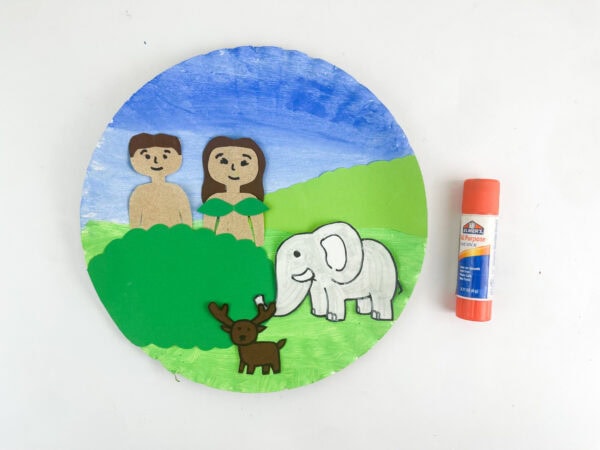
The layering gives it a nice 3D feel that kids absolutely love. Children use the glue stick to attach everything — let them take the lead!
Step 6 — Add a Title
Write “Land Animals and Humans” on a small piece of paper (white works great!) and glue it across the top of the plate.
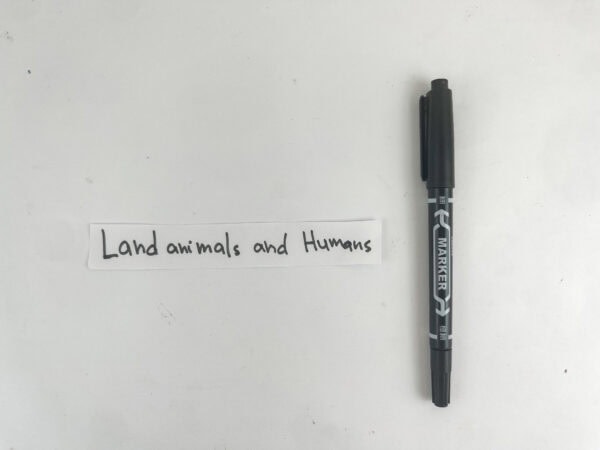
This becomes like a little title page for their craft.
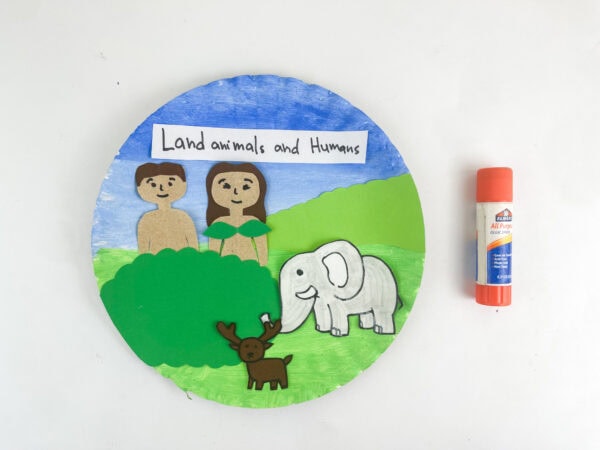
You could also add a title with a sticker label if you want it extra polished!
Why This Craft Works So Well
This is such a perfect way to teach bible lessons about God’s creation because kids aren’t just hearing the story — they’re building it. It’s a truly hands-on way to explore what happened on each day of creation.
Little ones — even toddlers and pre-k learners — can participate in tearing paper, painting, and gluing. Preschoolers can cut simple shapes with help. And older kids can tackle the finer details like drawing faces or cutting the animal outlines. Everyone has a role, and everyone walks away proud of what they made.
For Sunday school or group settings, you can set the supplies around the room at stations and let the children take turns at each step. It keeps things organized and gives every child their moment to shine.
The Bigger Picture
This Day 6 of creation craft for kids fits beautifully into a 7-day creation series. You can pair it with a simple coloring sheet for younger kids or a more detailed drawing project for those who want a challenge.
And don’t forget — after this, Day 7 comes. That’s the day God rested, which is a lovely conversation to have with kids about rest, gratitude, and why we thank God for everything He made.
The 6 days of creation — and especially day 6, when God made mankind and animals — show us how much thought and love went into building this world.
Creation, when God formed human beings in His image, is such a powerful moment in bible stories, and helping kids connect to it through art makes it stick in a way that words alone sometimes can’t.
A Few Fun Extras
Want to mix things up? Here are some bonus creation ideas:
- Let kids draw a picture of their favorite animal that God created on 6th day and glue it to yellow paper as a frame
- Use yarn for Eve’s hair for a fun texture twist
- Add a staple or paper clip to turn the plate into a hanging display
- Use dark blue paint on black construction paper to make a separate Day 4 night sky craft to display alongside this one
Each day of creation has so much visual potential. The six of the creation story days (and Day 7!) are filled with beauty, life, and meaning.
This series is one of the best ways to teach the story of creation — and the creatures that move along the earth on Day 6 make for the most fun craft of the bunch!
More Bible Crafts to Explore
If your kids enjoyed creating this Day 6 of Creation Craft for Kids, these Bible-themed crafts are a great way to continue discovering God’s Word through hands-on activities and creative play.
- Armor of God Breastplate of Righteousness Craft – A meaningful craft that teaches children about righteousness and its place in the Armor of God.
- Armor of God Shield of Faith Craft – A fun activity that helps kids understand how faith can strengthen and protect them in their daily lives.
- Eve and the Garden of Eden Craft – A creative project that introduces children to the story of creation and life in the Garden of Eden.
- Baptism of Jesus Craft for Kids – A hands-on way to learn about Jesus’ baptism and why this event is important in the Bible.
- Day 7 of Creation Paper Plate Craft
Whether you’re a teacher building lesson plans, a parent looking for a meaningful weekend project, or anyone who wants to make bible stories come alive for the little ones in your life — this Day 6 of Creation craft for kids delivers.
It’s a simple craft with a big message: God created a beautiful world, filled it with creatures, and placed people at the heart of it all. And that’s worth celebrating with a paper plate, some paint, and a whole lot of joy.
What ages will enjoy this craft the most?
This Day 6 of creation craft for kids works beautifully for a wide range of ages! Toddlers (around 3-year-olds and up) can join in with painting and gluing, while preschoolers and pre-K kids can try cutting simple shapes with help. Older kids can handle the finer details like drawing animal faces and assembling the figures on their own.
Do I need any special supplies for this project?
Not at all! The materials needed are very basic — a paper plate, construction paper in a few colors, a glue stick, a marker, scissors, and some blue and green paint. You may already have most of what you need. The only “optional” extras are things like hair yarn or printable animal templates if you want to skip the freehand cutting.
Can I use this craft for Sunday school or a large group?
Absolutely — it’s actually one of the best crafts for group settings! Set up stations around the room (painting, cutting, assembling) and let children take turns at each one. Prep the paper plate backgrounds ahead of time so the paint is dry and ready to go. It helps things run smoothly while keeping the experience fun and easy to follow.
What Scripture goes with Day 6 of Creation?
Genesis 1:24–27 is the heart of Day 6. God said, “Let the land produce living creatures,” including wild animals, livestock, and every creature that moves along the ground. He then created human beings in His own image and likeness. A simple, child-friendly version to share is: “God made the animals and people, and it was very good!” Kids really connect with that.
How does this fit into a 7 Days of Creation series?
Perfectly! This is Day 6, so if you’re doing a full seven days of creation craft series, this one pairs well with earlier days — like a night sky craft for Day 4 or a bird/fish craft for Day 5. Day 7 is a great opportunity to talk about rest and gratitude. Each day of creation has a distinct theme that lends itself to a different hands-on project.
What if my toddler can’t cut or draw yet?
No worries at all! You can pre-cut all the pieces ahead of time and let your little one focus entirely on gluing and assembling. Even just placing the animals and figures onto the plate and pressing them down is a meaningful, satisfying activity for younger kids. They’ll feel so proud of the finished piece either way.
Day 6 of Creation Craft for Kids
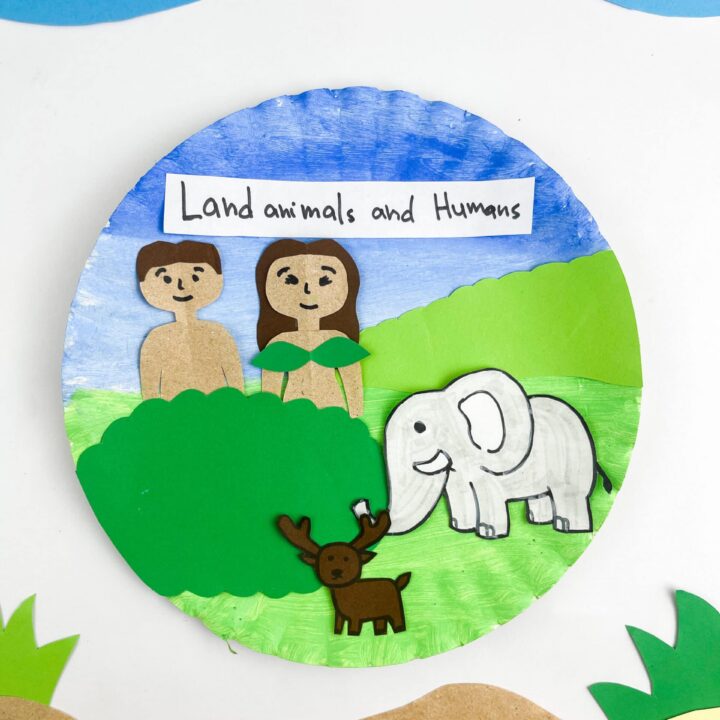
This Day 6 of Creation Craft for Kids helps children learn how God created people and all land animals. Kids will build a colorful paper plate scene showing Adam and Eve along with animals on the land. It’s a hands-on activity that brings the Bible story to life in a simple and creative way. This craft encourages imagination while also practicing cutting, gluing, and arranging pieces. It’s perfect for preschool, Sunday school, or homeschool lessons.
Materials
- Paper plate
- Acrylic paint (blue & green)
- Construction paper (green, brown, black, white)
- Gray crayon or gray marker
- Glue stick or glue
- Black marker
- Optional: stickers, yarn, printable animal templates
- Free Day 6 of Creation printable template
Tools
- Scissors
Instructions
1. Paint the Background Scene
Paint the paper plate using a gradient effect. Start with blue at the top for the sky, then blend into lighter blue, and finish with green at the bottom for the land. Let the paint dry completely before moving on.
2. Cut Out the Characters and Animals
Cut two human figures from tan or brown paper for Adam and Eve. Add separate hair pieces using brown paper. Cut a green leaf shape for Eve’s covering. Create a large green bush or tree, a wavy grass strip, and simple animal shapes like a deer from brown paper. Draw and color an elephant on white paper using a gray marker or crayon, then cut it out.
3. Assemble Adam and Eve
Glue hair onto both figures and use a black marker to draw simple facial features. Add the green leaf covering to Eve. Make sure all pieces are securely attached so the figures are ready for the scene.
4. Prepare the Animals
Color and cut the elephant if it hasn’t been prepared already. Assemble the deer by attaching its body and antlers if cut separately. Keep the shapes simple so they are easy for children to handle.
5. Build the Scene on the Plate
Glue the grass strip across the bottom of the plate. Place the bush or tree on one side, then position Adam and Eve near the center. Add the elephant to one side and the deer near the bushes. Arrange everything so the scene feels full and balanced.
6. Add the Label
Write “Land Animals and Humans” on a small strip of paper using a black marker. Glue it at the top of the plate to complete the craft and connect it to the Bible lesson.
7. Let It Dry and Display
Allow everything to dry fully before handling. Once finished, display the craft on a wall, bulletin board, or as part of a creation-themed series.
