
Nativity Toilet Paper Roll Craft for Kids
Turn two empty paper tubes into Mary, Joseph, and Baby Jesus with this Nativity toilet paper roll craft. Construction paper forms the clothing and hair, soft felt becomes the shawls, and a small piece creates the baby figure held in Mary’s arms.
This recycled Christmas craft is easy to adapt for Sunday school, children’s church, homeschool, elementary classrooms, or family activities. The finished characters can become a seasonal display or hands-on props children can move as they talk about Jesus’ birth.

Easy Cardboard Tube Nativity Craft
This DIY Nativity project uses two cardboard toilet paper rolls, one for Mary and one for Joseph. Make Baby Jesus separately from a small oval wrapped in felt or paper, then attach it to Mary’s figure.
Children can practice cutting, wrapping, gluing, drawing, and following step-by-step directions. When the Nativity characters are finished, they can use them for Bible-story retelling, imaginative play, or an interactive Christmas lesson.
Find more religious Christmas activities in our collection of Nativity crafts for kids and Christmas crafts and printables.
Nativity Craft Supplies
- Two clean cardboard toilet paper rolls
- Pink construction paper
- Blue paper
- White or skin-tone paper
- Brown paper
- Pink felt
- Blue felt
- Thin cardstock for Baby Jesus
- Pencil
- Washable markers
- Child-safe scissors
- Glue stick or washable PVA craft glue
Felt adds texture, but paper works for every part of the project. You can also cut paper towel tubes into toilet roll-sized sections.

How to Make a Toilet Paper Roll Mary and Joseph
Step 1: Cover Mary and Joseph’s Body
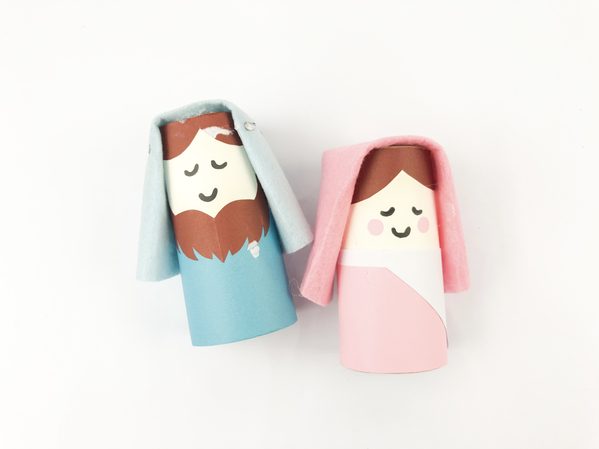
Cut a rectangle of pink paper wide enough to wrap around one cardboard tube. Apply glue, wrap it around the cardboard form, and press the overlapping edge flat.

Leave the upper section available for the face. If preferred, attach white or skin-tone paper around the top before adding the pink clothing.
Step 2: Add Mary’s Hair
Cut a simple hair shape from brown paper. It can include a curved top and longer sections that extend down the sides of the face.
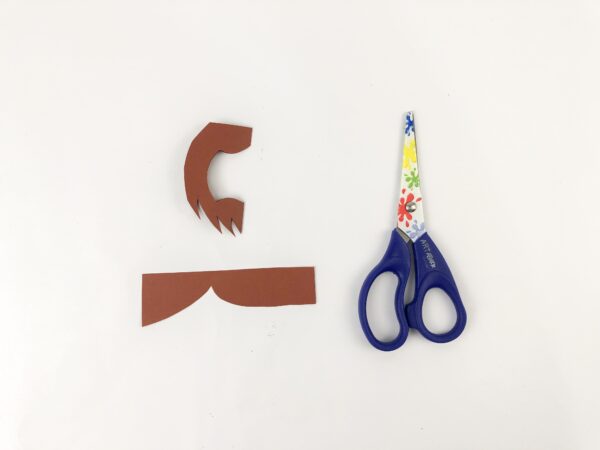
Glue the hair near the top, keeping the center uncovered.
Step 3: Draw The Face
Use washable markers to add two eyes, rosy cheek details, and a small smile. Older children can draw additional features, while preschoolers may prefer a simple face.
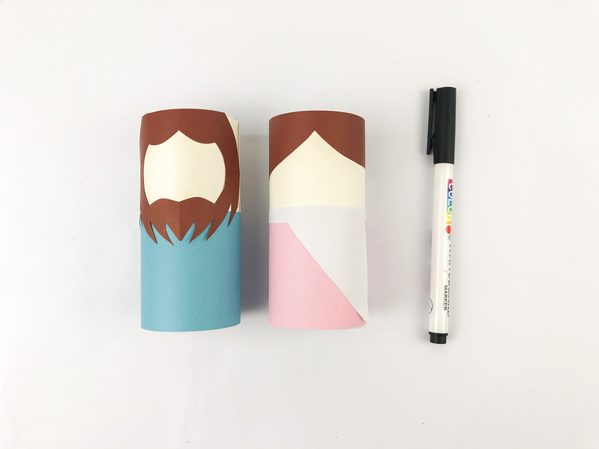
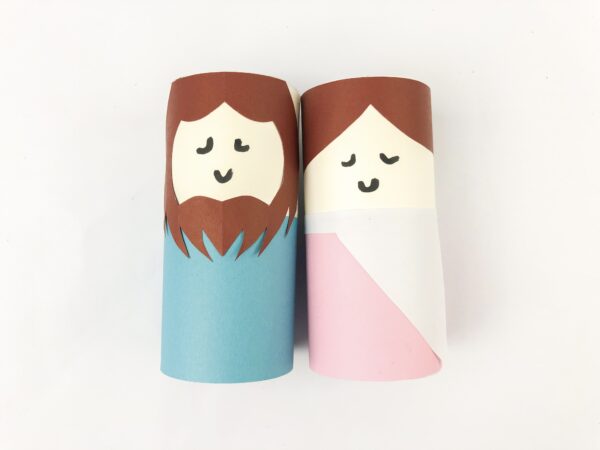
Step 4: Make The Shawls
Cut a strip or rounded shape from both the pink and blue fabric or felt. Wrap it over the head and shoulders like a shawl, then secure the ends to the sides or front.
Keep the material away from the bottom edge so the figure can stand upright.
Step 5: Create Baby Jesus
Shape a small oval from thin cardstock, then wrap it in blue felt or paper to resemble swaddling clothes.

Leave a small rounded section uncovered for the face. Draw two eyes and a small smile with a fine-tip marker.

Glue the piece to the front or right side of the figure so she appears to be holding Him.
How to Make a Toilet Paper Roll Joseph
Step 1: Cover Joseph’s Body
As shown above, cut a rectangle of blue paper and wrap it around the second roll. Glue the overlapping edge securely.
Add a strip of white or skin-tone paper around the upper section if you want a separate face area.
Step 2: Add Hair and a Face
Cut brown paper for the hair and attach it near the top. Use markers to draw eyes, a mouth, and optional facial hair.

Step 3: Make Joseph’s Shawl
Layer pink and blue paper or felt to create a shawl. Wrap it around the top and secure it in place without covering the face.

Children can add a narrow belt or decorative border to the clothing.
Step 4: Add the Staff
Cut a narrow strip of brown paper. Fold or roll it lengthwise to make it sturdier, then curve the top into a shepherd-style hook if desired.
Attach the staff to the left side. Position the bottom so it lines up with the figure and still stands securely.

Arrange the Toilet Paper Roll Nativity Scene
Place Mary and Joseph beside a simple paper manger, stable, or star. A small piece of cardboard covered with brown paper makes an easy display base.
Children can draw a night sky, Bethlehem, or a barn on the background or place the figures inside a decorated shoebox. Because each piece remains separate, children can move them while telling the Nativity story.

This roll Nativity display can also become a simple puppet setup for storytelling.
How This Craft Differs From the Baby Jesus Manger Craft
This page focuses on building full paper figures, with one character holding the baby. The separate Baby Jesus toilet paper roll craft uses a cut tube to make the manger and a yarn-wrapped craft stick for the child.
Keeping the projects distinct helps you choose the version that best fits your lesson:
- Choose this toilet paper roll craft for movable figures.
- Choose the other project for a small manger-focused activity.
- Make both projects if you want the figures standing beside a separate manger.
Teaching the Christmas Story
Read or retell Luke 2:1-20 while children assemble the figures. Explain that the couple traveled to Bethlehem, Jesus was born, and He was laid in a manger. An angel announced His birth to shepherds, who went to see Him.
Ask children:
- Who traveled to Bethlehem?
- Who is being held in this craft?
- Where was the baby laid after He was born?
- Who told the shepherds about Jesus?
- Why do Christians celebrate Christmas?
Children can move the figures as they retell the story. This is a great way to teach your kids about the meaning of Christmas through hands-on play.
Pair the lesson with Nativity coloring pages, free Advent Scripture cards, or the Nativity Christmas story pop-up card.
Preschool Nativity Craft Tips
A toddler or preschool-age child can help assemble these figures after an adult prepares the difficult pieces.
- Pre-cut the paper shapes, hair, shawls, and small oval.
- Draw a light line showing where each face belongs.
- Use glue sticks to reduce dripping and wrinkles.
- Use paper instead of felt if children find it easier to handle and cut.
- Prepare larger pieces that younger children can hold more easily.
- Let adults attach the staff and smaller details securely.
- Complete the two main figures during separate short sessions if needed.
Toddlers require direct supervision. Do not give small decorations to children who may put them in their mouths. Only an adult should handle a hot glue gun.
Sunday School and Classroom Preparation
Collect and prepare clean tubes before the activity. Some schools or churches may prefer purchased craft rolls rather than household TP rolls.
For a group project:
- Give each child two paper forms.
- Place the pieces for each character in separate labeled bags.
- Pre-cut the smaller figure and staff for younger students.
- Provide glue sticks and washable markers at every table.
- Display one completed sample, but don’t require children to copy every detail.
- Write each child’s name inside the bottom of both rolls.
- Use a separate table for optional felt, yarn, wool, and decorations.
Create the figures during one class and use them for story retelling during the next. This keeps the craft for kids from feeling rushed and gives the adhesive time to dry.
Add More Toilet Paper Roll Nativity Figures
The three main figures can become the beginning of a larger Nativity set for kids. Expanding the display is also a fun way for kids to learn who took part in the biblical account.
Shepherds
Cover rolls with earth-tone paper, add simple head coverings, and attach folded brown paper staffs. You can also pair a shepherd with a small paper sheep.
Wise Men
Use bright or patterned wrapping-paper scraps for robes. Add a paper crown and small boxes representing gifts. Older children can create the three Wise Men, sometimes called the Three Kings, with a different king or wise man design for each figure.
Angels
Wrap a roll in white paper and attach paper wings and a yellow halo. You can also follow the separate angel toilet paper roll craft.
Animals
Shorten the cardboard pieces for sheep, donkeys, or a camel. Add paper ears, faces, legs, and tails.
Stable
Decorate a shoebox with brown paper, popsicle sticks, or corrugated material. Add a paper star above the opening and place the Nativity set inside.
Ways to Personalize the Nativity Figures
- Use patterned scrapbook or wrapping paper for the clothing.
- Substitute yarn for paper hair.
- Decorate the clothing with leftover fabric, ribbon pieces, or simple felt belts.
- Draw different expressions on each character.
- Place the figures on a display base.
- Add a large Star of Bethlehem behind the display.
- Write the child’s name and year beneath each figure.
- Include a printable Bible verse on the display base.
Avoid heavy decorations that could make the figures tip over. These simple changes make it easy to create a unique DIY Nativity set for personal use.
Troubleshooting Tips
The paper unwraps: Apply glue along the entire overlapping edge and hold it briefly. Use a small piece of clear tape to secure the seam.
The figures fall over: Trim the paper and felt so nothing extends beneath the bottom edge. Attach the figures to a base if needed.
The felt will not stay attached: Use tacky craft glue or replace the felt with paper.
The small figure falls off: Reinforce the oval and use a stronger adhesive appropriate for children’s crafts.
The pieces are different sizes: Trim them to equal heights or let the variation become part of the handmade design.
More Nativity Crafts for Kids
- Moving Nativity Paper Plate Craft
- Candy Nativity Craft
- Printable 3D Nativity Scene
- Nativity Diorama Printable Craft
- Nativity Scene Printable Craft
- Nativity Matching Puzzle Game

Make a Toilet Roll Nativity Display
This recycled tube Nativity gives children a meaningful way to create the Holy Family while learning about Jesus’ birth. Gather two rolls for the basic figures, then add more characters if you want to build a complete DIY Nativity display.
You can also do this fun toilet paper roll activity leading up to Christmas as part of an Advent lesson or family tradition.
How do you make a Nativity scene from toilet paper rolls?
Wrap two rolls with colored paper to create the main figures. Add paper hair, drawn faces, felt shawls, and a staff. Make the smaller figure from an oval wrapped in felt and attach it to the front.
How many rolls do you need for this craft?
You need two rolls for the basic tutorial. Additional figures such as shepherds, wise men, angels, and animals require more cardboard forms.
Is there a printable template for this craft?
You can make the basic figures from simple rectangles and hand-drawn shapes, so you don’t need a template. For a print-and-cut project, try the printable 3D Nativity scene or Nativity scene printable craft.
What age is this Nativity craft for?
It works best for preschool and elementary-age children. Adults should pre-cut the smaller pieces and supervise younger children using scissors and glue.
Will paper towel rolls work for this project?
Yes. Cut a paper towel roll into smaller pieces similar in size to the figures in this tutorial. Store-bought cardboard forms work as an alternative.
How can I make a complete toilet roll Nativity set?
Add cardboard shepherds, kings, angels, and animals. Place the figures inside a decorated stable with a paper star and a separate manger. This turns the basic project into a Christmas display children can use for storytelling.
Nativity Toilet Paper Roll Craft
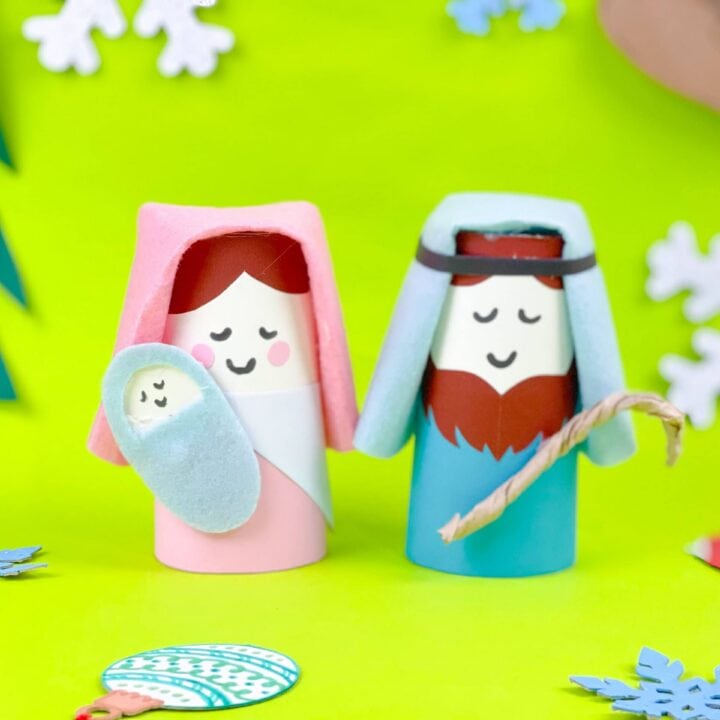
Use two cardboard tubes, construction paper, felt, and markers to create Mary holding Baby Jesus and a separate Joseph figure.
Materials
- Two clean cardboard toilet paper rolls
- Pink, blue, white, skin-tone, and brown construction paper
- Pink and blue felt
- Thin cardboard or cardstock
- Pencil
- Washable markers
- Glue stick or washable craft glue
Tools
- Child-safe scissors
Instructions
- Wrap one cardboard tube with pink construction paper to create Mary's body.
- Add white or skin-tone paper near the top for her face, if desired.
- Cut brown paper hair and glue it around the top of the tube.
- Draw Mary's eyes and smile with a marker.
- Wrap pink felt over her head and shoulders to create a shawl.
- Cut a small cardboard oval for Baby Jesus and wrap it with blue felt or paper.
- Draw Baby Jesus' face and glue the figure to the front or right side of Mary.
- Wrap the second cardboard tube with blue construction paper for Joseph.
- Add brown paper hair and draw Joseph's face.
- Layer pink and blue paper or felt around Joseph's head and shoulders for a shawl.
- Fold or roll a narrow strip of brown paper into a staff and glue it to Joseph's side.
- Let the glue dry, then arrange the figures as part of a Nativity display.
Notes
- Pre-cut small pieces for preschoolers.
- Substitute construction paper for felt when needed.
- Use paper towel tubes cut to size or purchased cardboard craft rolls.
- Keep all paper and felt above the bottom edge so the figures stand flat.
- Add shepherds, wise men, angels, and animals to expand the Nativity scene.
