
Paul and Silas Craft for Kids With Printable Template
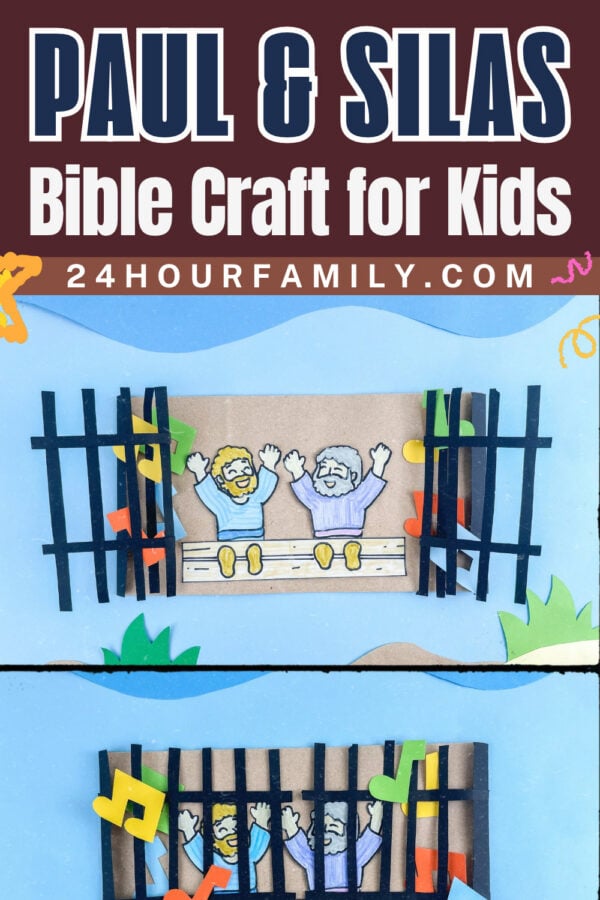
Make a Paul and Silas craft with prison doors that open! This paper bag Bible activity uses colorful music notes, printable characters, and black paper bars to help children retell the story from Acts 16.
Children can close the doors to show Paul and Silas praying and singing in prison. Then they can open them while remembering the earthquake that shook the prison and opened its doors.
We have over 100 Bible crafts and printable activities for kids!
Paul and Silas Craft for Kids With Printable Template
Use this activity for Sunday school, children’s church, or a homeschool Bible lesson. If your children enjoy creating Bible scenes with simple supplies, try our Moses and the burning bush craft for another lesson.
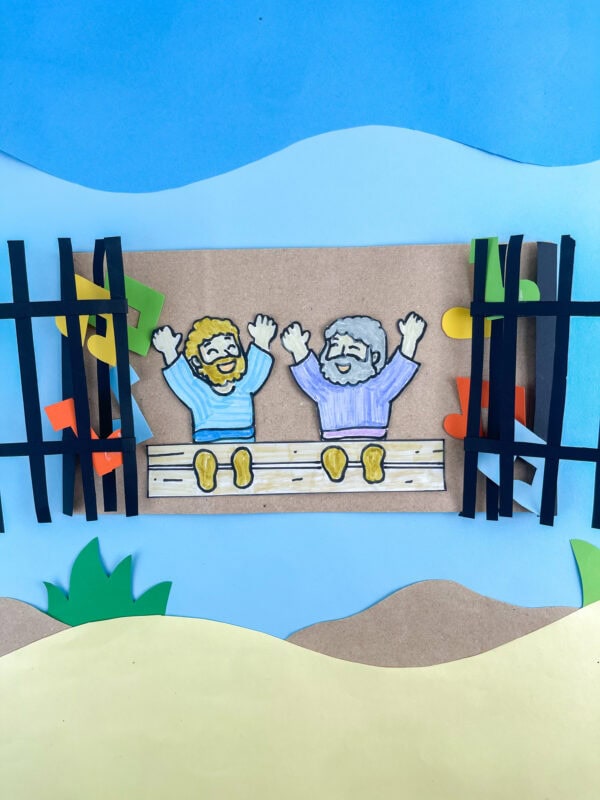
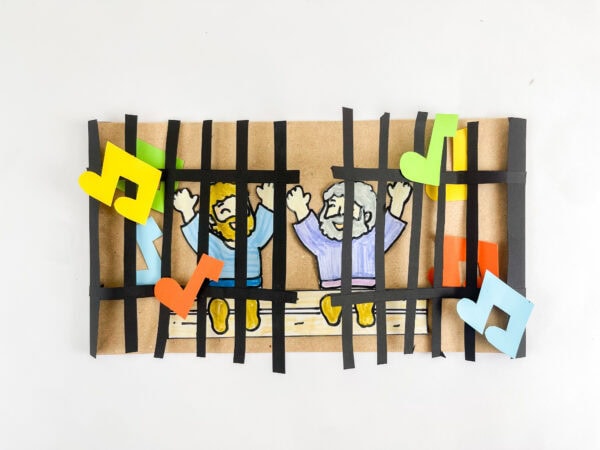
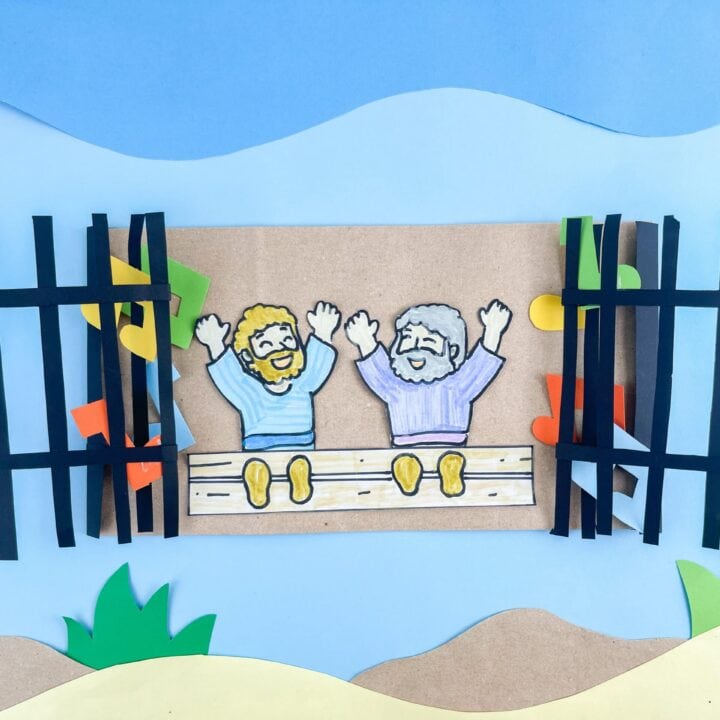
The finished craft shows Paul and Silas behind two paper prison doors. Each door has black paper bars and a folded attachment along the outside edge. These attachments act as hinges so children can open and close the doors.
Bright music notes represent Paul and Silas singing praises to God.
The brown paper bag becomes the background for the scene. You do not need to fill the bag or use it as a moving-mouth puppet.
Project at a glance:
- Suggested ages: Preschool with adult preparation through elementary
- Time: About 25–35 minutes, depending on coloring and cutting
- Main skills: Coloring, cutting, arranging, gluing, and storytelling
- Bible passage: Acts 16:25–34
- Mess level: Low
The Paul and Silas Bible Story
Paul and Silas were in prison in Philippi. Late that night, Paul and Silas worshiped God through prayer and song as the other inmates listened.
An earthquake shook the prison. The doors opened, and the prisoners’ restraints came loose. Paul and Silas did not run away. Paul called out to the terrified jailer, telling him that no one had escaped.
Afterward, they spoke about God’s message to the jailer and everyone in his home. The jailer washed their injuries, and afterward he and the members of his household were baptized.
For young children, focus on this simple lesson: We can pray and praise God during difficult times.
Explain that prayer is not a promise that every problem will disappear immediately. Paul and Silas’s story gives children an example of trusting God and showing care for others during hardship.
What Is Included in the Printable Template?
The black-and-white template includes:
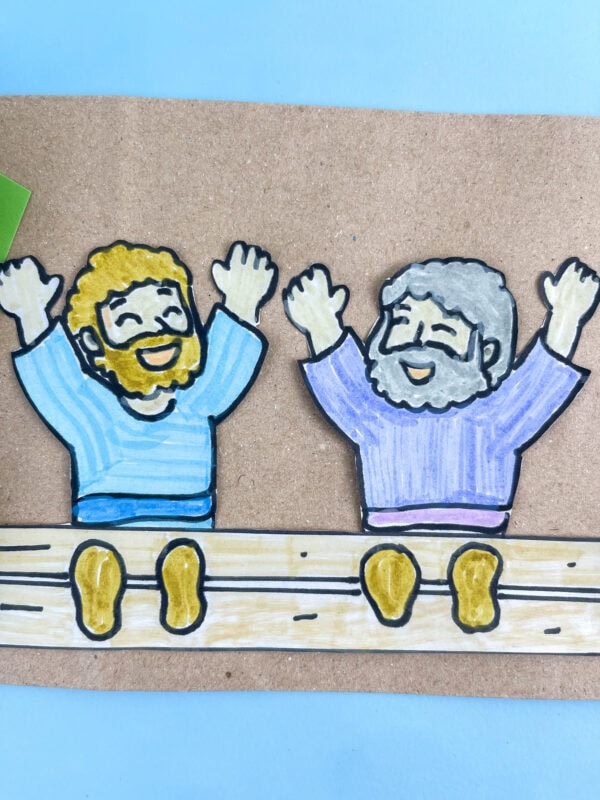
- Paul and Silas together, with their feet in stocks
- Music-note shapes
- Two rectangular pieces for preparing the paper door supports
Children can color the figures and music notes or trace the notes onto colored construction paper. Cut the narrow prison bars separately from black paper.
The supplied template is a single page. A separate instruction sheet gives a brief materials list and assembly directions.
Supplies You Will Need:
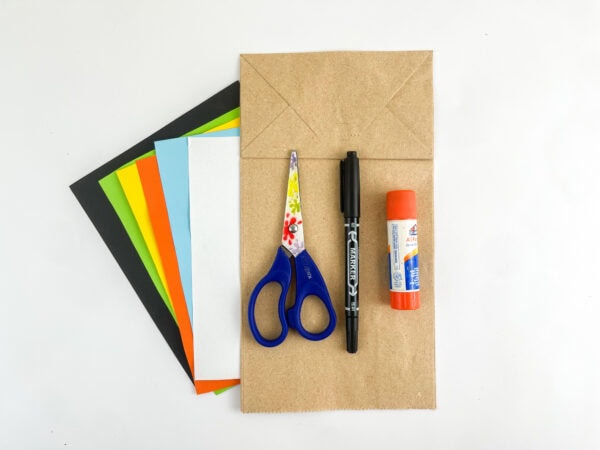
Gather these supplies before starting:
- Paul and Silas printable template
- Brown paper lunch bag
- Black construction paper
- Brightly colored construction paper
- White printer paper or lightweight cardstock
- Glue stick
- Child-appropriate scissors
- Crayons, colored pencils, or markers
Optional supplies:
- Ruler
- Pencil
- Small pieces of clear tape for reinforcing hinges
- Additional cardstock for a firmer backing
No hot glue is needed. A glue stick helps keep the paper relatively flat. If using school glue, apply small dots and allow extra drying time.
How to Make the Paul and Silas Craft
1. Print the Template
Print the template on white paper or lightweight cardstock. Check the print preview to make sure the figures and rectangular pieces are fully visible.
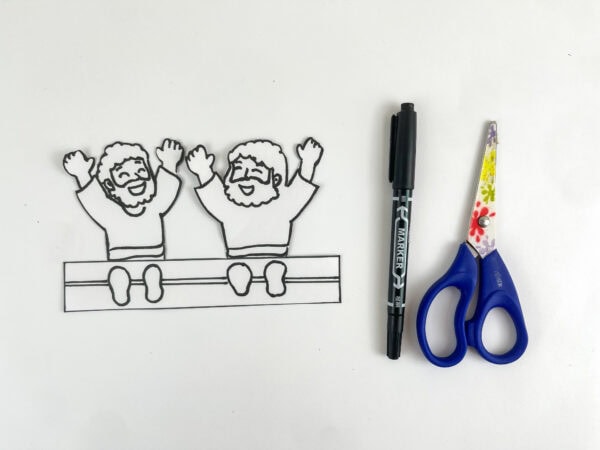
If any edges are clipped, select Fit or Shrink to printable area. Print one test copy before preparing a class set.
2. Prepare the Paper Bag Background
Flatten the brown paper bag and place it horizontally. Choose a smooth side for the front of the scene. Keep the folded bag bottom on the reverse side if it makes the front uneven.
Before gluing, place the Paul and Silas cutout in the center to check the available space.
The two doors should eventually close over the figures and open outward from the sides.
3. Color Paul and Silas
Let children color the printable figures. The example uses blue and purple clothing, but children can choose their own colors.
Coloring before cutting gives younger children a larger sheet to hold.
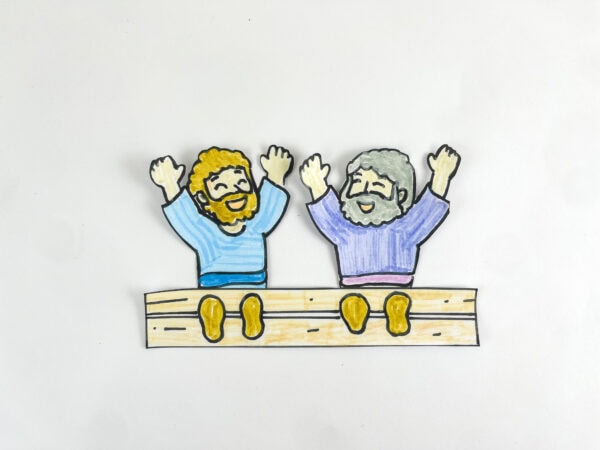
Cut around the outside of the combined figure and stocks. Keep Paul and Silas together as one piece.
Adult preparation tip: Cut around the general outline rather than between every finger or small detail.
4. Cut the Black Paper Pieces
Use the rectangular template pieces to help prepare the wider black door supports.
Cut additional narrow strips for the prison bars.
You will need:
- Two wider outside supports
- Several narrow vertical bars for each door
- Two horizontal crossbars for each door
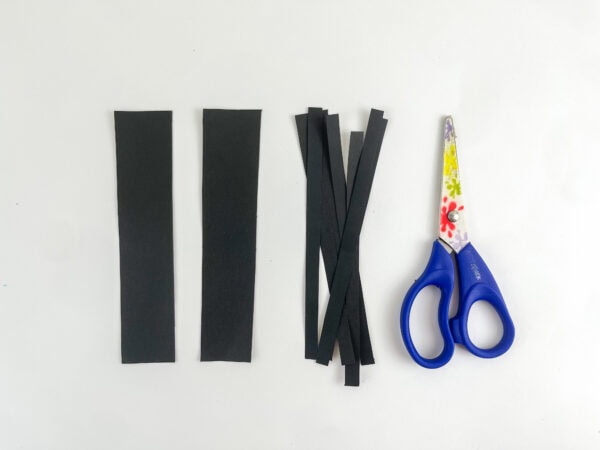
The exact number of bars can vary with the size of your bag. Lay everything out before gluing. Leave openings between the strips so children can see the figures behind the bars.
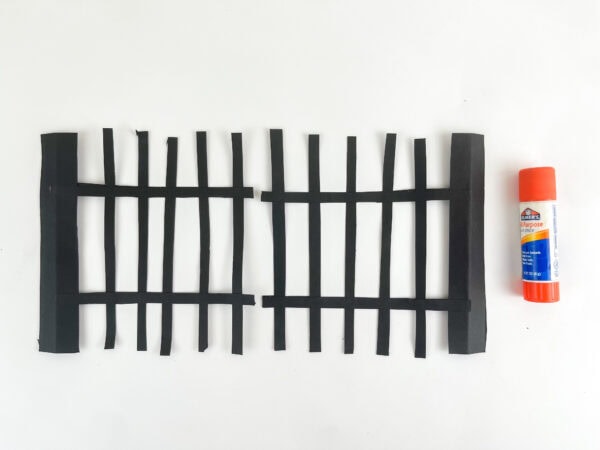
5. Assemble Two Separate Prison Doors
Build each door on a washable work surface.
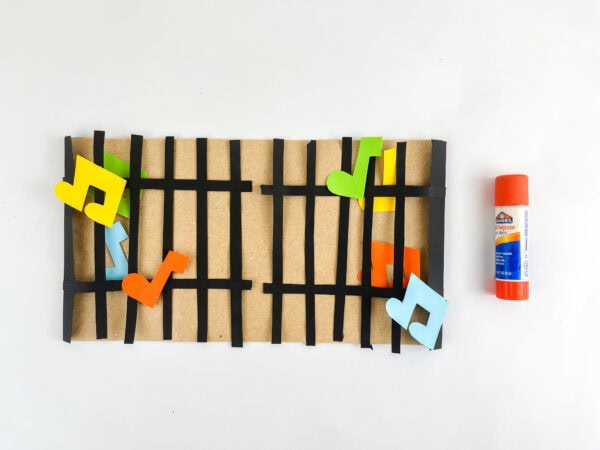
Arrange the narrow vertical strips side by side. Glue two horizontal strips across them, one near the top and one near the bottom.
Attach the outside edge of each door to a wider black support. Make two separate door panels. Do not glue them together in the middle.
The edges nearest the center of the scene need to remain free so the doors can open.
6. Create the Door Hinges
Fold a narrow flap along the wider outside support of each door. Glue only that attachment flap to the corresponding outer edge of the paper bag.
Keep the rest of the door free.
Gently test the movement:
- The left door should swing outward to the left.
- The right door should swing outward to the right.
- Both should close over the center of the scene.
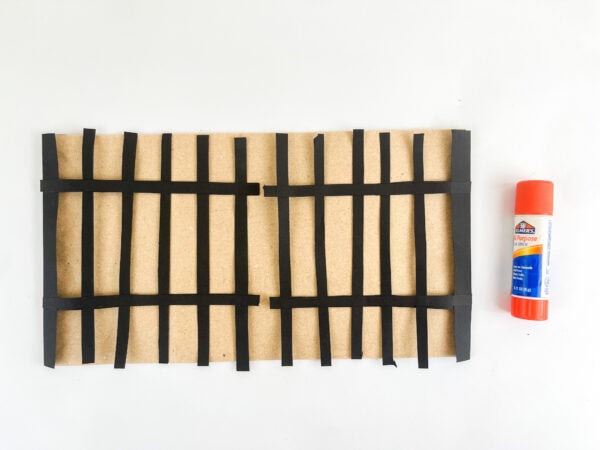
If needed, reinforce the attachment flap with a small piece of tape on the back.
7. Add the Music Notes
Color and cut out the printable music notes. For the bright construction-paper version shown in the photos, use the notes as tracing patterns.
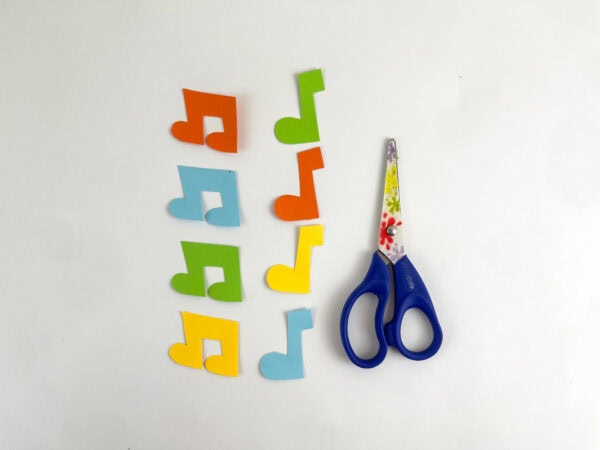
Glue the notes onto the bars and around the scene. Avoid placing a note across both doors or over a hinge. That can stop the doors from opening.
8. Attach Paul and Silas
Open both doors. Glue the colored Paul and Silas piece to the center of the brown paper bag.
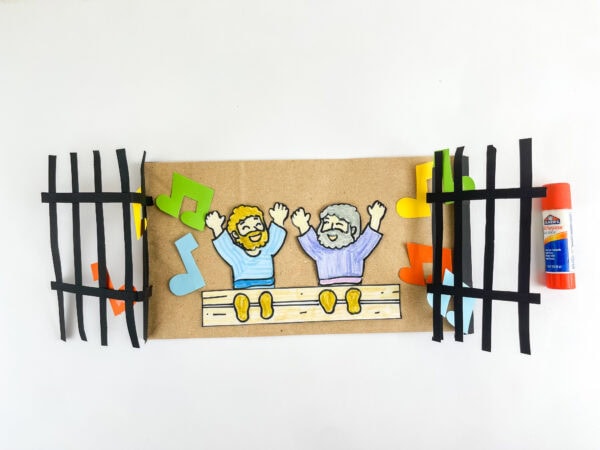
Keep glue away from the moving doors. Check that the figures are visible when the doors open and that the bars can close over them.
9. Let the Craft Dry
Leave the doors open while the glue dries.
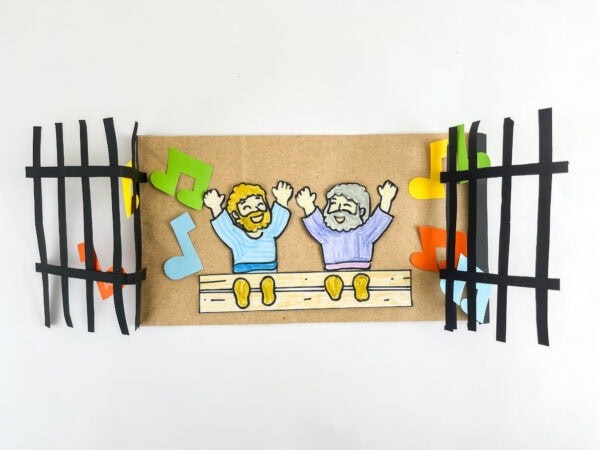
Once the attachments are secure, gently open and close the doors to practice retelling the story.
How to Use the Craft During a Bible Lesson
Read or summarize Acts 16:25–34 before introducing the craft. Then use the finished scene to review the events.
Close the Doors
Explain that Paul and Silas were in prison.
Ask:
“What did Paul and Silas do while they were there?”
Show the musical symbols while children recall how Paul and Silas worshiped through prayer and singing.
Open the Doors
Explain that an earthquake shook the prison and the doors opened. Open the paper doors gently.
Ask:
“Did Paul and Silas run away?”
Remind children that they stayed and Paul reassured the jailer.
Finish the Story
Explain that Paul and Silas told the jailer and his household about Jesus.
The open doors help children remember one event, but the lesson also includes their concern for the jailer and the good news they shared.
A Simple Memory Verse
Use this short excerpt from Acts 16:25:
“Paul and Silas prayed, and sang praises unto God.”
Acts 16:25, KJV
Read it together while pointing to the figures and music notes.
Children can repeat the verse in short phrases:
- Paul and Silas prayed.
- And sang praises.
- Unto God.
An adult can write Acts 16:25 on the back of the craft.
Adapting the Craft for Different Ages
Preschoolers
Prepare the figures, music notes, and prison doors in advance.
Let children:
- Color Paul and Silas
- Choose music-note colors
- Help apply glue
- Place the figures
- Practice opening the doors
Keep the lesson short and repeat the main idea.
Kindergarten and First Grade
Children can cut the larger shapes and help assemble the bars. Draw cutting lines on the black paper to make the narrow strips easier to prepare.
An adult can help fold and attach the hinges.
Older Elementary Children
Let older children measure and cut their own strips.
They can also:
- Write a short story summary on the back
- Add the Bible reference
- Explain the sequence of events
- Read the passage before sharing the craft
For another paper bag Bible project, try our Moses paper bag craft.
Sunday School and Classroom Preparation
For a group, prepare one completed example before class. Keep the doors open while demonstrating how the hinges work.
To organize supplies:
- Print one character template per child.
- Precut black strips for younger groups.
- Place each child’s pieces in a separate tray or envelope.
- Set out a limited selection of coloring supplies.
- Write names on the backs of the bags.
- Reserve a flat space for drying.
If time is limited, assemble the door panels beforehand. Children can color the figures, add music notes, and help attach the finished pieces.
Avoid stacking wet crafts. The bars may stick to the figures or neighboring projects.
Troubleshooting
The Doors Will Not Open
Check whether glue has spread under the bars or across the center. Secure only the outside attachment flaps to the bag. The door panels need to remain free.
The Black Strips Keep Tearing
Use slightly wider strips or sturdier black paper. Fewer, stronger bars are easier for young children to handle than many thin ones.
The Doors Sag
Use shorter strips or add a little more overlap where the bars connect. Allow the crossbar joints to dry before attaching the doors to the bag.
The Hinges Pull Away
Check that the flap has enough surface area for the glue to hold. Press it firmly and let it dry. A small piece of tape on the back can reinforce the attachment.
The Figures Are Hidden Behind the Bars
Space the bars farther apart or adjust the figure placement before the glue sets. The open doors should reveal the full scene.
Discussion Questions for Kids
Use a few questions while the glue dries:
- What were Paul and Silas doing at midnight?
- Who could hear them?
- What happened to the prison doors?
- Did Paul and Silas run away?
- How did they help the jailer?
- What is something you can pray about today?
Children do not need to share a personal worry aloud. They can think quietly or offer a general example.
Optional Activities to Extend the Lesson
Sing a Familiar Praise Song
Choose a short song your children already know. Point to the music notes and connect them with Paul and Silas singing in prison.
The Bible does not name the particular hymns they sang.
Retell the Story in Order
Use four simple prompts:
- Paul and Silas were in prison.
- They worshiped God with prayers and songs.
- An earthquake opened the doors.
- They stayed and later shared God’s word with the jailer.
Let children open and close the paper doors as they retell the events.
Add a Take-Home Message
Write this on the back: “Ask me about Paul and Silas! Read Acts 16:25–34 together.”
This gives families a clear starting point for reviewing the lesson.
Get the Paul and Silas Craft Template
Print the template, gather a paper bag and construction paper, and make an opening-door scene for your Acts 16 lesson.
Color the figures, add bright music notes, and use the finished craft to help children retell what happened.
Use the download section below to get the printable template.
More Bible Crafts for Kids
Continue your Bible craft activities with these projects:
- Moses and the burning bush craft for an Exodus 3 lesson
- Moses parts the Red Sea craft for another interactive Bible scene
- Sarah Bible craft for learning about Sarah and God’s faithfulness
- Abraham Bible paper craft for another character-based activity
Where is the Paul and Silas story in the Bible?
The prison story is in Acts 16. Acts 16:25–34 covers their praying and singing, the earthquake, and their encounter with the jailer.
Is this a paper bag puppet?
This project uses a flattened paper bag as the background for an opening-door Bible scene. It does not use the bag flap as a moving mouth.
Does the printable include colored figures?
The supplied template is black-and-white for children to color. The colored examples in the photos show the assembled craft.
Do I need to cut out every detail?
No. Cut around the outside of the combined Paul and Silas illustration. Young children do not need to cut between the fingers or separate the figures.
Can preschoolers make this craft?
Yes, with adult preparation. Precut the pieces and assemble the door panels so children can focus on coloring, placing pieces, and retelling the story.
Can I use cardstock instead of a paper bag?
Yes. A rectangle of brown cardstock can serve as the background. Check the figures and door sizes before gluing.
How should I store the finished craft?
Let everything dry completely. Close the doors gently and store the craft flat in a folder without placing heavy items on top.
Paul and Silas Craft
Make an interactive Paul and Silas prison scene with a paper bag, printable figures, colorful music notes, and opening paper doors.
Materials
- Paul and Silas printable template
- 1 brown paper lunch bag
- Black construction paper
- Colored construction paper
- White printer paper or lightweight cardstock
- Glue stick
- Crayons, markers, or colored pencils
- Optional clear tape for reinforcing hinges
Tools
- Printer
- Child-appropriate scissors
- Optional ruler and pencil
Instructions
- Print the template and color Paul and Silas.
- Cut around the combined figures and stocks.
- Flatten the paper bag and place it horizontally.
- Cut two wider black door supports and several narrow black strips.
- Assemble two separate barred doors, using vertical strips and horizontal crossbars.
- Fold an attachment flap along each outside support.
- Glue the flaps to the left and right edges of the bag, leaving the doors free to open.
- Cut or trace the music notes onto colored paper.
- Glue notes onto the bars without covering the hinges or joining the doors.
- Open the doors and glue Paul and Silas to the center of the bag.
- Let the craft dry with the doors open.
- Use the finished scene to retell Acts 16:25–34.
Notes
- Adults should prepare detailed cuts for younger children.
- Do not glue the door panels flat to the bag.
- Keep the center edges of the doors separate.
- Paper sizes and strip quantities depend on the bag used.
- Store flat after the glue dries completely.
